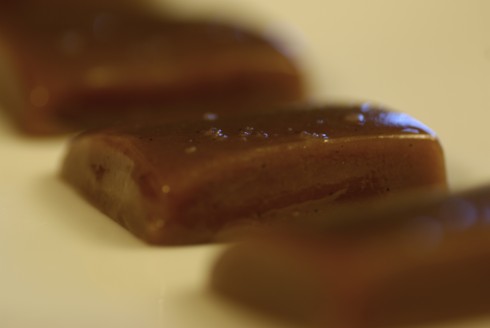
So after watching too many people suffer horrible sugar burns on Food Network Challenge, I came to the conclusion that candy making was too scary and too expensive should I end up in the emergency room. And then, as always, I found a recipe that just looked too good to pass on-I lusted after it for months. And then, the time came where they would work as a perfect gift. The stars all aligned and I, Emily, became a candy maker.
As typical, I breezed through the recipe and wondered, really, what was I so afraid of? This is nothing to say of my cooking skills-I have to read a recipe step 6 times in a row because I’ll miss a teeny part of a step that will ruin a whole dish-it’s more so a commentary on how we all just psyche ourselves out over things that seem difficult and scary but only because we’ve never tried it. And look at what happens when you give things a whirl: homemade caramels! Super impressive and much more delicious than the cheap cubes that have been sitting in the grocery store since last Halloween (even Rolo caramel filling isn’t as good as it used to be). So without further ado….
Vanilla Bean Salted Caramels
slightly modified from Annie’s Eats
makes an 8×8 inch pan; actual count is based on how big you cut the pieces
Emily’s Notes: You will need a candy thermometer; they’re about $5 at the grocery store. I adore Nielsen-Massey Vanilla Bean Paste. It’s not so much a paste-it has the consistency of maple syrup and TOTALLY worth the $8 at Williams-Sonoma. When it’s $10 for one single vanilla bean, why wouldn’t you buy this instead with similar results? The bottle lasted me about a year. I use it in place of regular vanilla when I want fancy little specks in whatever I’m making and when I want a stronger vanilla flavor than just extract (you’ll want a tiny spatula to make sure you get every drop of the paste out of the measuring spoon). Furthermore, this blog was almost titled something with “Vanilla” in it because I. LOVE. VANILLA. It is the finest of the flavors. Whenever I make a recipe, I always fill the measuring spoon over the mixing bowl and let it spill over in a faux “whoops!” moment, hence the “and then some” in the ingredient list. I’ll bet I get as much as twice the vanilla I’m supposed to sometimes…but it’s delicious.
- 1 cup heavy cream
- 5 tbsp. unsalted butter
- ½ tsp. vanilla extract (and then some)
- 1 tablespoon vanilla bean paste (and then some)
- 1¼ tsp. fleur de sel, or other fancy salt, plus more for garnish
- 1½ cups sugar
- ¼ cup light corn syrup
- ¼ cup water
- Line the bottom and sides of an 8-inch square baking dish with parchment paper. Lightly butter the parchment. (I recently discovered “Martha Wrap” at the grocery store: parchment paper on one side, foil on the other so you get the non-stick parchment benefits, but it’s stiff like foil so you can line a pan with it and it will actually STAY PUT! Genius!)
- In a small saucepan, combine the cream, butter, vanilla extract, vanilla bean paste, and fleur de sel. Heat over medium-high heat and bring to a boil. Stir often, to keep the paste moving around in the mixture. Remove from the heat and set aside.
- In a medium saucepan, combine the sugar, corn syrup, and water. Heat over medium-high heat, stirring occasionally until the sugar is dissolved. Boil, without stirring but gently swirling the pan occasionally, until the mixture is a light golden caramel color. Keep an eye on it-I stayed in the kitchen and washed the dishes I’d dirtied while it boiled. It was clearish for forever and then I turned away just as it was starting to brown slightly-when I turned back after cleaning a dish, it was already approaching too dark! At this point, I took a picture of the pot and sent it to my boyfriend saying “Look what I’m playing with! The boiling contents of this pot will give you third degree burns!”. Seriously, once you’re in the middle of the process you’ve already forgotten that this is supposedly scary and hard to do and you are instead confident enough to joke about it.
- Vigorously stir the cream mixture for a moment or two, to re-distribute the vanilla beans, and carefully stir the cream mixture into the caramel – pour slowly and stir constantly. Continue simmering the mixture until it registers 248˚ F on a candy thermometer (I fashioned a little tin foil rope sling so that it stayed upright in the pot-don’t let the tip touch the bottom of the pot, make sure it’s floating somewhere in the middle of the sugar syrup).
- Immediately remove from the heat and pour into the prepared pan. Tap the pan gently on the counter to get all the air bubbles rising towards the top. Let cool for 30 minutes, then sprinkle lightly with additional fleur de sel-I have Balinese Sea Salt from Williams-Sonoma that I love (even got my roommate seeing the light on fancy salt!), but it’s huge pyramids. I ground it up with a mortar and pestle so the grains were finer for sprinkling.
- Pop in the fridge and continue to let sit until completely set and cooled. I used a buttered pizza cutter to slice them. Wax paper is ideal for wrapping them-you can cut them into squares and wrap them like Christmas presents, or you can cut them into small rectangles and wrap them like Tootsie Rolls! Personally, I like the smaller Tootsie Roll method: perfect bite size and easier to wrap.
These will make pretty soft caramels that will stretch when you try to pull pieces off (which is why I prefer the smaller Tootsie Roll size). They will hold their shape for the most part, but are easy to roll up into the wrappers and then conform to the round shape. I made them as a gift, and they were well received, thankfully, so I highly suggest it. I actually made three recipes that night after I got home from work (and went to bed at a decent hour), which is a testament to how easy these are that I could squeeze them in.
I left the caramels out on the kitchen counter for a few days and during those few days the weather in Beach-town, USA turned cloudy and humid (humid, at least, for SoCal). They got a little greasy and melty, which I hear is common caramel behavior for humidity, so all my friends in the South-hurry and make this before you start getting 100% humidity days. Which also means…save this recipe and don’t forget these for Christmas time!
