Entries from October 31st, 2011

Southern Comfort Apple Pie

Monday, October 31, 2011

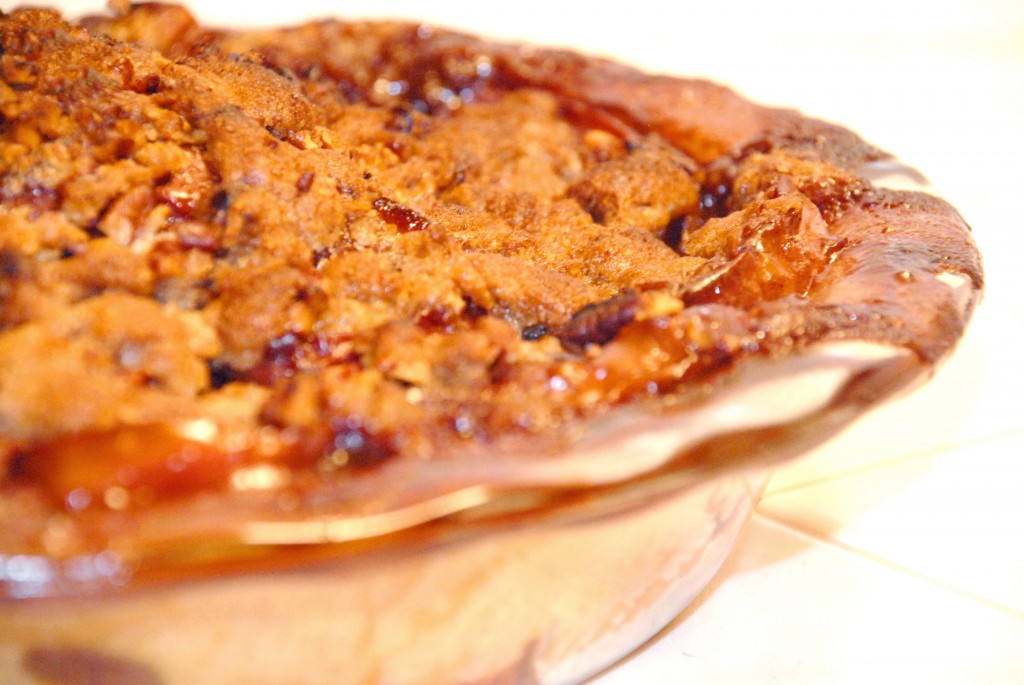
You probably have a favorite apple pie recipe.  You should probably throw it out the window and replace it with this one.  The process, I admit, is slightly more involved than your average apple pie recipe, but it is absolutely worth it.  There’s apples, Southern Comfort, caramel, an overabundance of cinnamon…really, I hope that old recipe of yours is on the ground outside your window by now.

As I mentioned previously, I made this for a group of friends along with the Pumpkin Pie, but this pie was without a doubt the winner of the night.  There are only two tiny issues I had with this pie: 1) the caramel filling overflowed a great deal, but I’m sure that if the pie had a well-sealed full top crust instead of just a crumble topping, this wouldn’t have been as big a problem-good thing we had a pan on the rack below, or else I’m guessing we would have had to pay to have the oven cleaned in the place we had rented!… and 2) good Saigon Cinnamon is $8 at my grocery store and I had just purchased a new bottle.  This recipe cleaned out at least half the bottle and then some!  That said, I think the strong spicy cinnamon really made this pie the wonder that it was, so chintzing on mediocre cinnamon is a crime against this pie.

In the end, though, this is another recipe to save for Thanksgiving and I promise you’ll barely be able to sit through dinner before diving into this pie!  Like the Pumpkin Pie, I did cheat and use a store-bought crust that was too small for my deep dish pie plate, but if you’re looking for a homemade pie crust recipe, see my Bourbon Honey Peach Pie

To see how other members of Project Pastry Queen fell in love with this pie (I think it was unanimously love-at-first-bite), check them out here!

Southern Comfort Apple Pie
The Pastry Queen by Rebecca Rather

Topping

  • 1/2 cup chopped pecans
  • 1/3 cup sugar
  • 3 tablespoons dark brown sugar
  • 1/2 teaspoon ground cinnamon
  • 1/4 teaspoon salt
  • 1/3 cup all purpose flour
  • 1/3 cup chilled unsalted butter

1 unbaked pie crust

Filling

  • 5-6 medium size tart apples
  • 1/2 cup unsalted butter
  • 3 tablespoons ground cinnamon
  • 1 cup sugar
  • 3/4 cup Southern Comfort liqueur
  • 1/2 cup heavy cream

To Make the Topping:

  1. Preheat the oven to 375 degrees.
  2. In a food processor, process both sugars, the cinnamon, salt and flour for about 1 minute.
  3. Cut the butter into small pieces and add to the sugar-flour mixture.  Pulse about 10 - 15 times, until the mixture is crumbly.  DON’T over-process!  Mine turned into a big hunk of dough because I pulsed a few extra times and then thought “oh, if I keep pulsing, the blade will cut up the mixture into tiny pieces again.”  I don’t know where that logic came from because the opposite is true and I knew it.  I just stuck the mixture back in the fridge and crumbled it up with my fingers later.
  4. Stir in the pecans (and don’t try tasting it, because I made this mistake and may have ended up eating a quarter of the bowl of topping).  Refrigerate until ready to use.
  5. Line a 9″ deep-dish pie plate with pie dough.  Press it into place and crimp the edges.

To Make the Filling:

  1. Peel, core, and cut the apples into 1/4″ thick slices (I used one of those handy apple slicers and just cut each resulting slice in half).
  2. Melt the butter in a large skillet over medium-high heat.  When the butter starts to foam, add the apples and saute for 5-8 minutes (I had to somehow do mine in two batches because my 10″ skillet wasn’t large enough.  Either do two skillets at once, splitting the ingredients evenly between the two or be ready to clean up the mess you make on the stove spilling apples out of the pan).
  3. In a small bowl, stir together the cinnamon and sugar; sprinkle it on the apples and stir to combine.  Simmer the apples for another minute.
  4. Remove the apples from the skillet with a slotted spoon and onto a baking sheet, leaving as much of the butter-sugar-apple juices mixture in the pan as possible.  Make sure the apples are spread out in a single layer or else they’ll steam and get all mushy.
  5. Pour the Southern Comfort into the butter-sugar mixure in the pan.  Simmer the mixture over medium heat for at least 5 minutes, until the alcohol burns off (it shouldn’t sting your nose if you sniff the steam rising from it).
  6. Add the cream and continue cooking for 5-10 minutes until the mixture is thick as pourable caramel.
  7. Add the apples back to the skillet and toss the apples with the caramel sauce until evenly coated, then pour contents of pan into the unbaked pie crust.
  8. Sprinkle the crumble topping evenly over the apples and transfer dish to oven, making sure there is a tin-foil lined baking sheet on the rack below the pie to catch any juices that bubble over (if there’s a lot, the oven may smoke, which is okay as long as your pie doesn’t burn and the fire alarm in your house doesn’t go off).
  9. Bake for 50-60 minutes until the filling is bubbling and the topping is brown.
  10. Serving warm with ice cream or cooled off after dinner or however you may decide to enjoy it!

Spiced Pumpkin Mousse

Friday, October 28, 2011

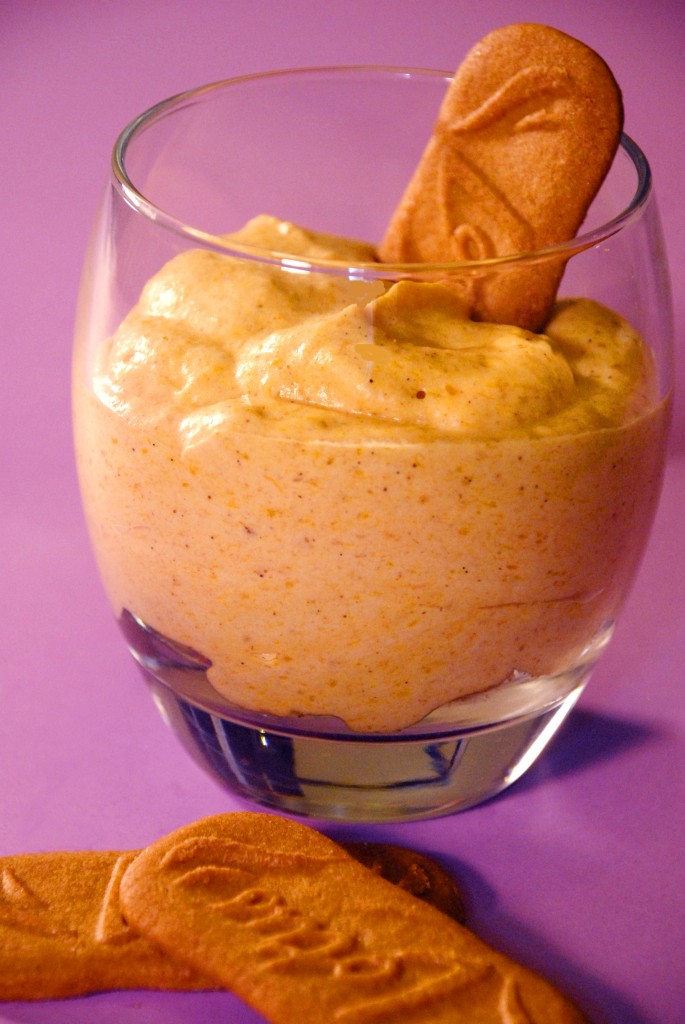
My first time making mousse and I’m hooked!  I don’t know about you, but I’m the kind of girl who just smothers her slices of pumpkin pie with whipped cream.  This mousse takes all the work out of baking a pie because it is essentially the pie filling combined with a lot of whipped cream - pure heaven in my book!  Supremely simple and very impressive, you just have to have a little foresight to make this ahead of time (it needs an hour to chill, then a little more work) before guests arrive.

You can use ginger snaps to accompany the mousse, but my favorite spice cookies are Biscoff cookies, which are cinnamon cookies rather than ginger.  You may recognize them as “airplane” cookies, because lots of airlines hand them out a snack, and I love them so much that many a flight attendant has snuck me handfuls of extra cookies over the years; when they started selling Biscoffs at most grocery stories, I practically didn’t know what to do with myself.  The flavor is hard to describe but their flavor is a deep, cinnamon and caramelized sugar and, although I could come up with any excuse to use them in a recipe, I think they go perfectly with the mousse!


Spiced Pumpkin Mousse
Adapted from Taste of Home
Serves 6

  • 1 1/2 teaspoons unflavored gelatin (Knox brand, next to the Jell-O)
  • 4 1/2 teaspoons cold water
  • 3 egg yolks
  • 3/4 cups sugar
  • 1 can, 15 oz, pumpkin puree
  • 3/4 teaspoon ground cinnamon
  • 1/4 teaspoon ground ginger
  • 1/8 teaspoon ground cloves
  • 1/8 teaspoon ground nutmeg
  • 1 1/2 cups heavy whipping cream
  • 2 teaspoons vanilla extract (or 1 tsp extract + 1 tsp vanilla bean paste)
  • 18 Biscoff cookies or ginger snap cookies
  1. In a small-medium saucepan, sprinkle gelatin over water; let stand for 1 minute.
  2. Whisk in egg yolks and sugar.  The next instructions will be confusing because the sugar-egg-gelatin mixture will be a paste, but then it all relaxes somehow into a more fluid liquid form in just a minute or two.
  3. Turn the heat on medium-low and cook, stirring constantly, until an instant thermometer reads 160 degrees and mixture has thickened, about 5 minutes-don’t turn your back on this!  All I did was pick up my phone to return a text and by the time I was done with my text message, the temperature was 190 degrees and the mixture had burned on the bottom of the pan!  It goes super fast.
  4. Transfer mixture to a small bowl and beat it until cool and thickened, about 3 minutes; mix in pumpkin and spices.
  5. Refrigerate for about 1 hour or until set.
  6. Once set, in a separate bowl, beat cream and vanilla until stiff peaks form.  Fold into pumpkin mixture.
  7. Crumble 2 cookies per serving container into the bottom of the container and spoon or pipe mousse on top.  Refrigerate for another hour until set.
  8. Garnish with remaining cookies and enjoy!

Penne with Butternut Squash Cream Sauce

Wednesday, October 26, 2011

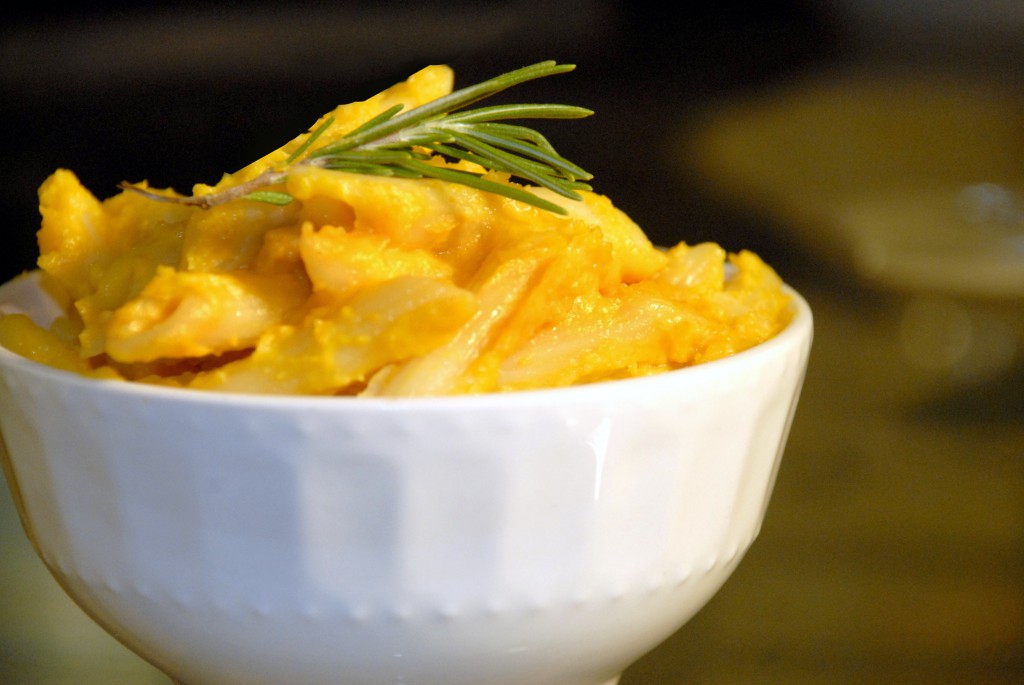
A great Fall meal, this is easy and remarkably healthy-but it doesn’t feel like it!  You have pasta (which can be as healthy or unhealthy as you make it) covered in a thick, rich sauce that is actually mostly just butternut squash puree.  And you know my other qualifications for a good weeknight dinner meal: inexpensive and fast to throw together after a long day at work!

I’m willing to bet that any parents out there might be able to make this for their kids, tell them it’s macaroni and cheese, and watch the whole pot disappear!  Really, sometimes I forget that it’s squash that I’m eating.

The one tiny downfall of this recipe is that you are at the mercy of the squash.  The first time I made this dish, the butternut squash flavor was exactly right.  When I made the dish tonight, the butternut squash was unusually sweet.  Salt and pepper did help balance it all out, but I just now found a recipe from the New York Times that suggests adding nutmeg-it sounds like a perfect compliment to the sweetness.  I’ll have to add some to my leftovers tomorrow!

Penne with Butternut Squash Cream Sauce
Adapted from Tart Reform

  • 1 lb penne pasta
  • 2 lb butternut squash
  • 1 cup half and half (I’m willing to bet yogurt would make a great substitute as well)
  • 1/2 cup parmesan plus more to top
  • 1/8 teaspoon nutmeg
  1. Dice squash and put in microwave safe bowl with a splash of water, cover with cling wrap and microwave until squash is soft, about 15-20 minutes.  Alternatively, roast in a 400 degree oven for 45 minutes.
  2. When squash is done, transfer to a pot on the stove, add half and half, and puree with an immersion blender until smooth.  Stir in nutmeg.
  3. While the puree heats to a boil, cook the pasta in a large pot of boiling, salted water, until al dente. Drain, reserving 1/4 cup pasta cooking water.  (I bolded it because I always always always forget this step)
  4. Stir the pasta and the reserved pasta cooking water into the squash puree (or vice versa, whichever has the bigger pot). Stir in the parmesan; season with salt and pepper to taste.  Enjoy!


Taco Salad

Monday, October 24, 2011

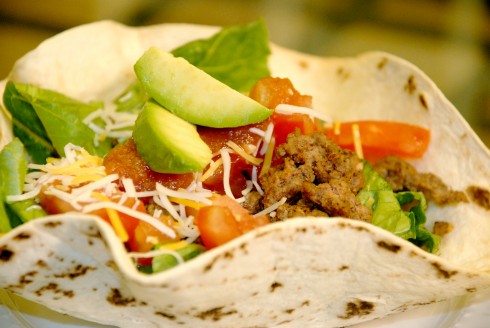
And thus another week begins which means another recipe for Project Pastry Queen!  This week Amanda chose Ground Beef Gorditas and, as you can probably tell from the picture above, I didn’t have the time to a) find masa dough and b) pan fry and then also deep fry the gorditas.  It did give me the chance, however, to try a new little technique for taco shell bowls that I’d been wanting to try that involved healthier baking instead of deep-frying.
I remember once standing in the middle of the grocery store having a minor disagreement with The Boyfriend: I had grown up with packaged taco seasoning and wanted to buy some for the tacos we were having that night; he insisted that I could probably make seasoning myself that was better tasting and, likely healthier, since it wouldn’t have all the sodium and other random chemicals found in that stuff.  I appreciate his confidence in me, but at that point in time I was sure nothing I attempted to create was going to taste as good as what I was familiar with.  I’ve since become more confident in myself as a cook, and this recipe was just the one I needed to figure out exactly what was needed in good taco meat seasoning (and I even added a little to it myself!).  Since I was making more of a taco salad, I left the tomato sauce out of the meat recipe-there’s nothing worse than soupy salad, but other than that, I think this is a winner for taco seasoning and I’m pleased to say that I won’t be buying the packaged kind ever again!

Taco Salad
Adapted from The Pastry Queen
Serves 2-3

  • 1 lb lean ground beef
  • 1 tablespoon finely chopped yellow onion
  • 3 cloves of garlic, minced
  • 1/2 teaspoon salt
  • 1/2 teaspoon ground cumin
  • 1/2 teaspoon chili powder
  • 1/2 teaspoon fresh ground pepper
  • 1 tablespoon hot sauce
  • 1 medium sized flour tortilla per person (I used Mission brand “Homestyle” tortillas)
  • 1 head romaine lettuce
  • 1 chopped tomato
  • shredded cheese
  • salsa
  • 1 sliced avocado
  • any other toppings you usually enjoy (sour cream, olives, queso fresco, etc etc)
  1. Preheat oven to 350 degrees
  2. In a large skillet, saute the beef and onion until browned, approx 10 minutes
  3. In the meantime, brush tortillas with water and microwave in a stack for 1 minute.  Drape each tortilla over an upside-down oven-safe cereal bowl and press it so that it molds to the shape of the bowl.  Place bowls on a baking sheet and bake in oven for 10 minutes, until stiff.  Pull sheet out of oven, let cool for a few minutes, then take the molded tortillas off the bowls and let the inside dry out for a few minutes.
  4. Drain off the fat from the ground beef, then add the garlic, salt, cumin, chili powder, pepper, and hot sauce to the beef, cook for another 5 minutes.
  5. Assemble the taco salad by first putting lettuce into the tortilla bowl, then topping with meat and other toppings of your choice.  Enjoy!

Rosemary Potato Pizza

Friday, October 21, 2011

This pizza has been haunting me for months and months-it combines so many of my favorite things, how am I supposed to resist it??  This is definitely a meal idea you want to keep on hand because it’s fast, delicious, and uses ingredients that you’ll likely already have (and if not, it’s just a quick run to Trader Joe’s).  I’m not sure which part I like best-the rosemary (my favorite herb), the mozzarella (which is light and not too much), the creamy potatoes or the crispy chewy crust.

This was also the first time I tried a secret trick to get a crispy pizza crust without a pizza stone…and wouldn’t ya know, it worked!  By putting the baking sheet into the oven ahead of time, while the oven is heating up, it helps the bottom of the crust crisp up while the top bakes normally-it was perfect!  I admit I didn’t make the crust dough myself, but I think sometimes it’s more important to get healthy, stress-free food into you than making EVERYthing handmade and, besides, Trader Joe’s refrigerated pizza dough is delicious!

Rosemary Potato Pizza
Adapted from Stone Soup via Elephantine

  • refrigerated pre-made pizza crust (Trader Joe’s suggested - you’ll find it near the pre-made salads, it should make about 3 decent sized pizzas or 4 slightly smaller pizzas)
  • 1 small-medium red potato per pizza
  • 1 sprig rosemary per pizza
  • 1-2 small balls of fresh mozzarella (the kind floating in water)
  • olive oil for drizzling
  • salt for sprinkling
  1. Preheat the oven to 450 and place a lightly oiled baking sheet in oven as it warms
  2. Divide the dough into the number of pizzas you want and gently stretch dough into thin rounds, leave on counter workspace while you prepare the other ingredients
  3. Slice the potatoes extremely thinly (this is another job the mandolin slicer came in very handy for) and slice the mozzarella balls as thinly as they can go, likely 1/8″ - 1/4″ thick.
  4. Once the oven is preheated, using oven mitts, take the hot baking sheet out of the oven and place on a safe surface.  Transfer the dough rounds to the hot baking sheet (you may have to bake in batches) and brush olive oil over the raw dough.  Arrange the potato slices in a single layer, slightly overlapping, sprinkle rosemary leaves over the pizza, arrange the mozzarella bits and drizzle with a second round of olive oil.
  5. Put sheet with pizzas back into oven and bake for 10 minutes or until the cheese and crust are just starting to brown.
  6. Sprinkle with salt to taste.  Enjoy hot out of the oven!

Homemade Fruit Leather

Wednesday, October 19, 2011

Fall in Southern California is a little hard to find sometimes, but I certainly found it while camping in Sequoia National Park this weekend!  It was just coolenough that I needed to wear a jacket while hiking and there were hints of snow on the mountain tops.  The trees there are mostly conifers, which meant we didn’t get beautiful orange and red Fall foliage, but it did smell just like Christmas was around the corner and that was good enough for me!

While preparing for the camping trip, I was considering different snacks to bring for the hike: homemade granola?  just hope that fruit stayed intact in our backpacks?  and then I came across homemade fruit leather on Pinterest and I was sold (especially because the Boyfriend was out of town and he LOVES fruit leather and I knew he’d love the surprise).

This recipe can be made to accommodate almost any fruit you can think of.  I was headed for strawberries but went with raspberries because they were on sale at the grocery store and my brain has already started thinking up crazy cool combinations (cinnamon-peach-blueberry would be fantastic!)  I must admit, I thought these were the sweetest raspberries I’d ever tasted and thus decided to forego the sugar…which turned out to be a poor decision because it meant that these leathers were EXTREMELY tart (I think I may have used extra lemon juice on accident as well…).  That said, plenty of people loved them, so it really will have to be up to your own judgement how sweet you want to make these-just taste the puree before drying and know that sweetness is concentrated once the leather is dry.  These are super simple to make and, while it SEEMS like they would be time consuming, it’s really hands-off for the most part, so I’m sticking by my “these are super easy” statement.

I can say for sure that these certainly didn’t take as long to dry as other people suggested, which surprised me a little, but I think if you just keep a close eye on it, you’ll be fine.  I just stacked the strips in a plastic baggie and threw them in my backpack and they didn’t stick together at all-no powder coating needed AND no sticky fingers after eating, so I was pretty delighted with how they turned out. 

Happy Hiking!  (or Happy School Lunches…or Happy Quick Snack Break at the Office…)

Homemade Cinnamon-Vanilla Raspberry Fruit Leather
Adapted from Tasty Kitchen
yields one 12″ x 16″ pan

  • 2 cups raspberries (or other chopped fruit)
  • 1/4 cup water
  • 1 tablespoon lemon juice
  • 0 - 1/4 cup sugar (depending on your sweet tooth)
  • 1 tablespoon vanilla extract (adjust according to taste)
  • 1 teaspoon cinnamon (adjust according to taste)
  • vegetable oil
  1. Heat oven to lowest temperature setting possible.  My lowest setting is 180 degrees, so I just set the dial to about a 1/4″ short of the lowest temperature and hoped it would work (it did).
  2. Add fruit, water, and lemon juice to saucepan and stew for 10-15 minutes until softened.
  3. Add cinnamon and vanilla extract and let simmer for 5 more minutes.
  4. Using a stick blender or a food processor, blend fruit until smooth and let cool for a few minutes while you prepare the pan.
  5. Using a 12″x16″ rimmed baking sheet, line it with parchment paper (I used Martha Wrap, which I thought was perfect for the job) and brush prepared pan with a layer of vegetable oil.
  6. Pour the fruit puree through a sieve (it is definitely necessary for raspberries-those little seeds are tough!) over the prepared pan and spread it evenly over the pan with an offset spatula.  It’s like frosting a cake, only easier-the only goal is to make sure that you have a very thin, very even layer of fruit puree.  A bit of liquid separated out of the puree when I sieved it into the pan, but I was able to gently incorporated it back in with my offset spatula before spreading the layer even again.
  7. Carefully put the pan in the oven and walk away-it’s going to be in there for a number of hours.  Know that if you’re impatient and you poke it to see how it’s coming along, you’re likely to poke a hole in the leather, so I tested it by tilting up a corner of the parchment paper and seeing if the puree ran off the paper towards the center.
  8. I think my leather was in the oven for about 4-5 hours, but don’t quote me on that-all ovens are different and you really just need to keep an eye on things.  Many people who made fruit leather said they actually left the leather in their ovens on low all night, so I’m not sure why my oven was so fast.  About half way through the process I pulled out the leather and found it was getting a bit crispy and brittle on the edges.  Generously brush the leather with water and stick it back in the oven-this trick honestly works like a charm.  There was not a brittle edge to be found when I took the leather out for a second time, just chewy goodness!
  9. As I was about to go to bed, I decided the leather was done on top and that the underside was just a little sticky, but that all it needed was air-drying.  I carefully flipped the whole sheet of fruit leather over upside down and put it back in the pan, turned off the oven and put the leather back in to rest and dry in the oven so that it wasn’t taking up counter space.
  10. When you wake up in the morning, voila!  Homemade fruit roll-ups that you won’t cringe at when you put it in a lunchbox.  I used a pizza cutter to cut mine into strips with no problems.  Enjoy!

Bourbon Pumpkin Pie

Monday, October 17, 2011


Clearly I’ve been on a big bourbon-in-cooking kick lately, but this time it’s not my fault!  Tara chose the Bourbon Pumpkin Tart for Project Pastry Queen this week!

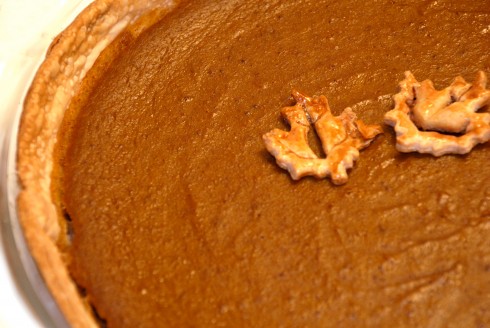
I do love pumpkin pie—it’s one of my all-time favorites, so I was excited to try a new version of it.  I have to admit, I found this one to be a little too spiced (I think it was the cloves), but the addition of bourbon was a lot of fun.  The changes I made to the recipe were out of necessity and not experimentation with my own version, unfortunately, because I made this pie in a kitchen that was not my own, hence the pie instead of the great tart idea and, because I skipped ahead a few weeks to also make the Southern Comfort Apple Pie which also had a crumb topping, I left the crumb topping off of this pumpkin pie so as not to be too redundant (I was cooking for a crowd, after all, and who needs crumble topping on both pies for dessert?).  I also regret to say that I used store-bought crust because, again, I was cooking for a crowd in a foreign kitchen (you can tell-look how it bubbles in the picture).  That said, making this recipe made me realize that the new pie plates I bought are actually deep-dish pie plates, because the rolled up pie crust I usually use in a pinch didn’t have any left over for crimping the edges!

I highly highly suggest you keep this recipe in the back of your mind for Thanksgiving, especially if you like a pumpkin pie chock-full of spices—and if not, just leave out the cloves and ginger and be sure to serve the pie with whipped cream to mellow the flavors out.  I’m posting the recipe as I made it, but if you would prefer to try the original tart version with crumble topping, as written in The Pastry Queen, head over to Tara’s blog (who, by the way made an absolutely gorgeous tart-it makes me wish I had saved this pie to make at home and hadn’t had to “dumb” mine down!).

Bourbon Pumpkin Pie
Adapted from The Pastry Queen by Rebecca Rathers

  • 1 can (15 oz) pure pumpkin
  • 3 large eggs
  • ½ cup sugar
  • ¼ cup firmly packed brown sugar
  • ¼ teaspoon salt
  • 1 teaspoon ground cinnamon
  • 1 teaspoon ground ginger
  • ½ teaspoon ground cloves
  • ½ teaspoon ground nutmeg
  • 1 tablespoon flour
  • ½ cup heavy whipping cream
  • ¼ cup bourbon
  • 1 refrigerated pie crust (for a homemade pie crust recipe, see my previous post on Peach Pie)
  1. Preheat oven to 350 degrees
  2. Roll out crust and gently ease it into a 9 inch pie plate.
  3. Add pumpkin to a large bowl and whisk in the eggs, one at a time until thoroughly incorporated.
  4. Add both sugars, salt, cinnamon, ginger, cloves, nutmeg and flour; whisk vigorously until combined.  Whisk in cream and bourbon.
  5. Pour the pumpkin mixture into the prepared pie crust and bake for 40-45 minutes or until the filling is set and doesn’t jiggle when you move the pie plate back and forth.
  6. Let cool 1 hour before serving and, as I mentioned before, serve with whipped cream!

Cupcake-Style Cinnamon Rolls

Friday, October 14, 2011

I’m not sure if there is a cuter idea out there than cinnamon rolls baked as if they were cupcakes and I’ve been dying to try this from the moment I saw them on Pinterest!  While I love a big gooey messy cinnamon roll that you have to eat with a fork and knife just as much as the next person, there was something so quaint and wonderful by being able to peel the wrapper off just like a cupcake and eat it out of my hand.  I would imagine these being great for brunches or breakfasts with kids around so you can just hand them a roll and send them on their way.

They’re certainly not for the completely novice baker, as they have a lot of steps involved, but if they weren’t doable, I wouldn’t be posting it for you try, so get in that kitchen!

The best part about these rolls is that you don’t have to wake up at 4:00 in the morning in order to have fresh-baked cinnamon buns in the morning-I’ve included instructions for par-baking, which means baking the rolls just until they’re set, but not golden brown and perfect yet.  Then you can just throw them into the freezer until you’re ready for them, move them to the fridge the night before, and then just pop in the oven the next morning for ten minutes.  Only 10 minutes to an amazing, cinnamon-y, sweet, delicious breakfast!

Buns:

  • 1 cup warm milk
  • 2 eggs, room temperature
  • 1/3 cup butter, melted
  • 4 1/2 cups bread flour or regular flour (bread flour makes for a lighter cinnamon roll)
  • 1 teaspoon salt
  • 1/2 cup white sugar
  • 1 pkg yeast (1/4 ounce)

Filling:

  • 1 cup brown sugar, packed
  • 2 1/2 tablespoons ground cinnamon
  • 1/3 cup butter, softened

Icing:

  • 8 oz cream cheese, softened
  • 1/4 cup (4 tablespoons) butter, softened
  • 1 1/2 cups confectioners’ sugar
  • 1/2 teaspoon vanilla extract
  • 1/8 teaspoon salt
  1. Microwave milk for 30-40 seconds in the microwave (you want milk to be about 110 degrees). Dissolve yeast in warm milk in a large bowl.
  2. Add sugar, butter, salt, eggs, and flour; mix well.
  3. Knead dough into a large ball, using your hands dusted lightly with flour. Put in a bowl sprayed with cooking spray and cover tightly with plastic wrap. Let rise in a warm place about 1 hour or until dough has doubled in size; line 2 cupcake tins with cupcake liners and lightly spray the cupcake liners with baking spray.
  4. In a small bowl, thoroughly combine brown sugar and cinnamon.
  5. Sprinkle flour on the surface you’re going to roll the dough on.  Roll dough into a 16×21 inch rectangle about 1/4 inch thick. Spread dough with 1/3 cup softened butter (if your butter isn’t soft enough at this point, put it in a bowl and smear it around in the bowl with a wooden spoon until you can whip the spoon around through the butter) (other note: I used an offset spatula for spreading the butter and it was the PERFECT tool for the job).
  6. Sprinkle buttered dough evenly with sugar/cinnamon mixture. Roll up dough starting with the longer side and cut into 24 evenly sized rolls-to ensure even slices I just keep dividing each portion in halves or thirds (if you’re just doing normal rolls and not cupcake-style, cutting into 12 pieces is preferable)
  7. You’ll likely need to un-roll and re-roll the buns to fit in each of the cupcake lined spots.  Or, if you’re not in the mood for the cupcake-style, arrange the rolls in a lightly greased 9×13 inch glass baking dish.
  8. Cover and let rise until nearly doubled, about 30 minutes; in the meantime preheat oven to 350 degrees.
  9. If serving immediately, bake the cinnamon rolls for 15-20 minutes until golden brown.  If par-baking the cinnamon rolls to freeze for a later date, bake for 10 minutes until mostly baked but not browned.  Pull the buns out and let them cool completely before wrapping them tightly in saran wrap and tin foil and putting in the freezer.  The night before serving the rolls, unwrap them and put them in the fridge overnight to defrost.  The next morning, preheat oven to 350 degrees and bake for approximately 10 minutes until soft and golden brown.
  10. While in the oven, beat together cream cheese, butter, confectioners’ sugar, vanilla extract and salt. Spread frosting on while they are still warm so that the frosting melts into the roll.

Maple Vanilla Nut Clusters

Wednesday, October 12, 2011

I absolutely love recipes like this: easy to make, easy to clean up, perfect to whip up for a group of friends and DELICIOUS.  I already have a spiced nut recipe that I swear by, but this recipe is a game changer.  I will definitely be turning to this one when I want something a little sweeter.  I added extra pecans to the recipe since I find it hard to believe you can have too many pecans but left the amount of glaze the same and I think it turned out fantastic.

These will be great to throw together before any Fall parties you may have coming up!  And, if you’re like me and planning your Thanksgiving menu already, these would be wonderful to make a few days ahead and have sitting on the coffee table for your guests to munch on while waiting for the big event.

Maple Vanilla Nut Clusters
Slightly adapted from Pinch of Yum

  • 1 cup whole raw almonds
  • 3/4 cup chopped raw pecans
  • 1 tablespoon salted butter
  • 1 tsp vanilla bean paste or vanilla extract
  • 1 tsp maple syrup
  • 1 tbs water
  • 1/4 sugar
  1. Toast nuts in a nonstick skillet over medium heat, stirring occasionally, about 5 minutes
  2. Combine water, vanilla, maple syrup and sugar
  3. Add butter and sugar mixture to toasted nuts. Continue to heat over medium, stirring constantly, until the mixture is sticky and no longer runny (about 3 minutes)
  4. Remove from heat and spread the nuts around in the skillet.  Let sit for at least 1 hour in the pan or until cool and hardened

Lindsay, of Pinch of Yum, points out that the flavors really develop overnight, so it’s best not to chow down on it all immediately…but chow down the next day, for sure!

Curried Butternut Squash Soup

Sunday, October 9, 2011

I can’t lie, I considered skipping this week’s Project Pastry Queen assignment.  I have a go-to recipe for Butternut Squash soup that I created myself and I just can’t bear to leave it behind.  That said, I’m glad I gave this one a try because it certainly gave my normal recipe a run for its money!

I had just come back from a weekend trip away so I wasn’t particularly looking forward to standing over a hot stove, but  it’s soup so it’s a cinch to throw together and let simmer while you take a disco nap in the hopes that you can sort of maybe catch up on the rest you didn’t catch up on over the weekend because you were having too much fun.  I don’t know why I always think soup is a long complicated process so I shouldn’t hesitate in the future.

This soup is a great recipe to keep for a cool Fall evening-the spices will warm you right up!

Note: 1 1/2 lbs of butternut squash is a relatively small squash compared to what I normally see at the grocery store.  Either make sure to get one that’s close (I had to do a 2 pounder), make a double batch of soup, or save the extra squash for something else, like Butternut Squash Risotto (my first recipe on the blog ever!)

Curried Butternut Squash Soup
adapted from The Pastry Queen, by Rebecca Rather
serves 4 to 6

  • 2 Tbs unsalted butter or olive oil
  • 1/2 medium yellow onion, chopped
  • 1 large carrot, peeled and sliced
  • 1 1/2 lbs butternut squash, peeled, seeded, and cubed
  • 1 medium russet potato, peeled and cubed
  • 1 tsp ground ginger
  • 1 tsp ground cinnamon
  • 1 1/2 Tbs curry powder
  • 1/2 tsp salt
  • 2 cups chicken stock
  • 1/2 cup milk
  • 1/2 cup heavy cream
  • 1 tsp honey
  • 1/2 tsp paprika
  • Freshly ground black pepper
  • Greek yogurt, for garnish
  1. Melt the butter in a large saucepan or Dutch oven over medium-high heat.  Add the onion and carrot and saute over medium heat for about 3 minutes, or until the onions begin to soften.
  2. Add the squash potato, ginger, cinnamon, curry powder, and salt;  Saute for 2 minutes.
  3. Add the stock, milk, cream, honey, and paprika and bring the soup to a boil.
  4. Decrease the heat, cover the pot, and simmer the soup over low heat for about 45 minutes, or until the vegetables are soft.
  5. Puree the soup with a stick blender (what? you don’t have one yet?!) until smooth.
  6. Add black pepper and additional salt to taste.  If the soup seems too thick, add more milk or chicken stock.
  7. Serve hot with a dollop of Greek yogurt on top-it adds a wonderful tangy flavor!