Entries from November 30th, 2011

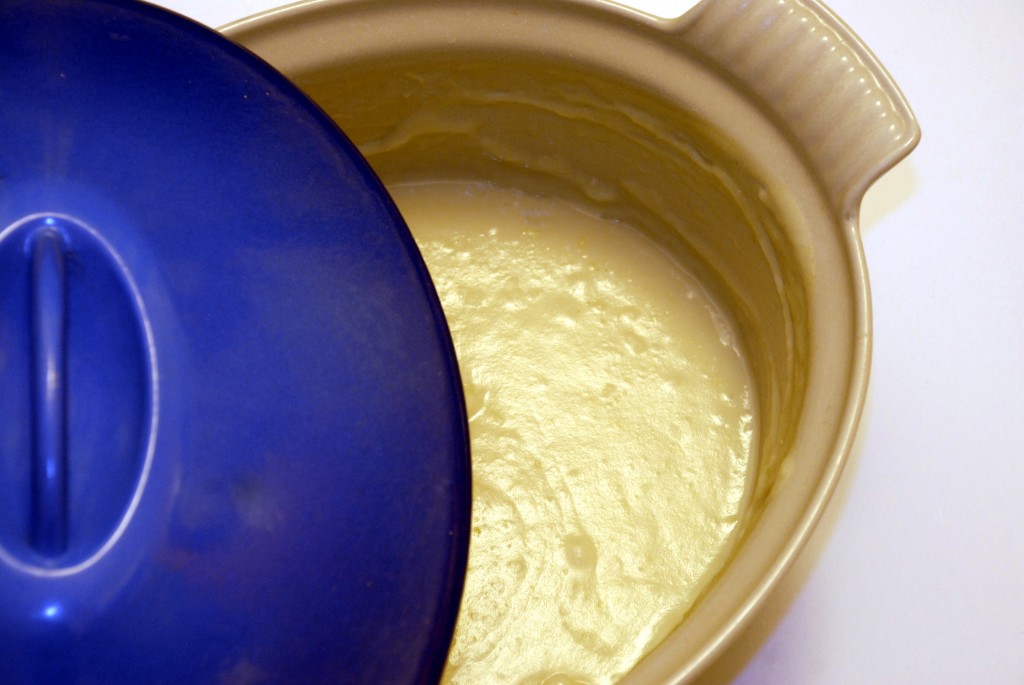
Coral Tree Cafe Vegetable Soup

Wednesday, November 30, 2011

A few weeks ago I got an email from my second cousin saying that my great aunt had found my name in the LA Times newspaper.  Now while I let you wrap your head around those extended family connections, I’ll add that I had absolutely no idea what she was talking about or why my name would be in the paper.  I followed the link she sent to find that a recipe request I had submitted months before hand (and subsequently put on the back burner in my mind) had been answered!  This column in the LA Times food section, called “Culinary SOS”, will track down recipes for you from any restaurant in the country that is willing to share them…but vegetable soup?

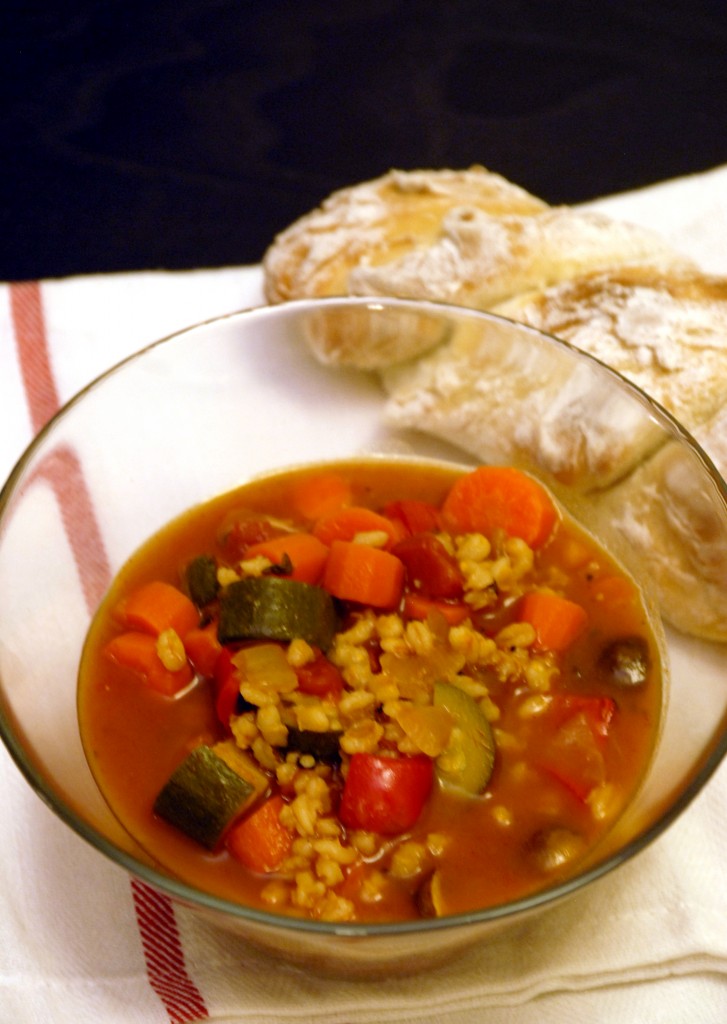
Once you try it, this is the only vegetable soup you will ever want to eat (at least that’s how it worked for me).  The Coral Tree Cafe here in the Brentwood area of LA has lots of fancy sandwiches for a pretty penny and some equally expensive lovely baked goods, but whenever I’m there, I only have eyes for this huge $5 bowl of vegetable soup-which, I might add, was always a soup that was way at the bottom of my soup list.  It has some veggies thrown in there that aren’t typical of vegetable soup like zucchini and red bell pepper and I just love the soft yet chewy texture the pearl barley adds.  I’d even gone so far as to write down the veggies I could decipher on the back of a receipt, but was too worried that my attempted copy-cat soup would turn out vastly inferior.  Thus, writing to Culinary SOS.  It’s just vegetable soup, how hard can it be?  But as I said in my note to CSOS, there was some special ingredient that I knew I was missing.  It was marinara sauce.  Seriously.

Coral Tree Cafe Vegetable Soup
Adapted from the Coral Tree Cafe, courtesy of The LA Times’ Culinary SOS
Serves 8-10

  • 2 tablespoons oil
  • 2 cups diced carrots
  • 2 cups diced onions
  • 1/2 cup diced red bell pepper
  • 1 1/2 teaspoons chopped fresh thyme
  • 3/4 cup pearl barley
  • 1 quart (4 cups) vegetable broth
  • 1 1/2 cups marinara sauce
  • 2 cups quartered mushrooms
  • 2 cups diced zucchini
  • Salt and pepper
  1. In a heavy-bottomed stock pot or dutch oven, heat the oil over medium heat until tossing in a piece of onion means you hear a lot of sizzling.
  2. Add the carrots, onions, bell pepper, thyme and barley to the pot, stirring frequently so the barley doesn’t burn, for about 20 minutes.  The onions should be clear at this point.
  3. Add the vegetable broth and marinara sauce, cover the pot and bring to a boil, then reduce to a simmer for 10 minutes.
  4. Add the mushrooms and zucchini and let simmer for at least another 10 minutes.
  5. The instructions from Coral Tree say you can eat it now and if you like your veggies slightly crunchy still, go for it.  I prefer mine softer and simmering it for a while longer also means your barley puffs up a lot more.  I would let it go for at least another 30 minutes, with the pot covered.
  6. Serve hot with bread and butter on the side-it’s necessary for mopping up the last drips of broth.  Enjoy!

Southern Sausage Gravy & Buttermilk Biscuits

Monday, November 28, 2011

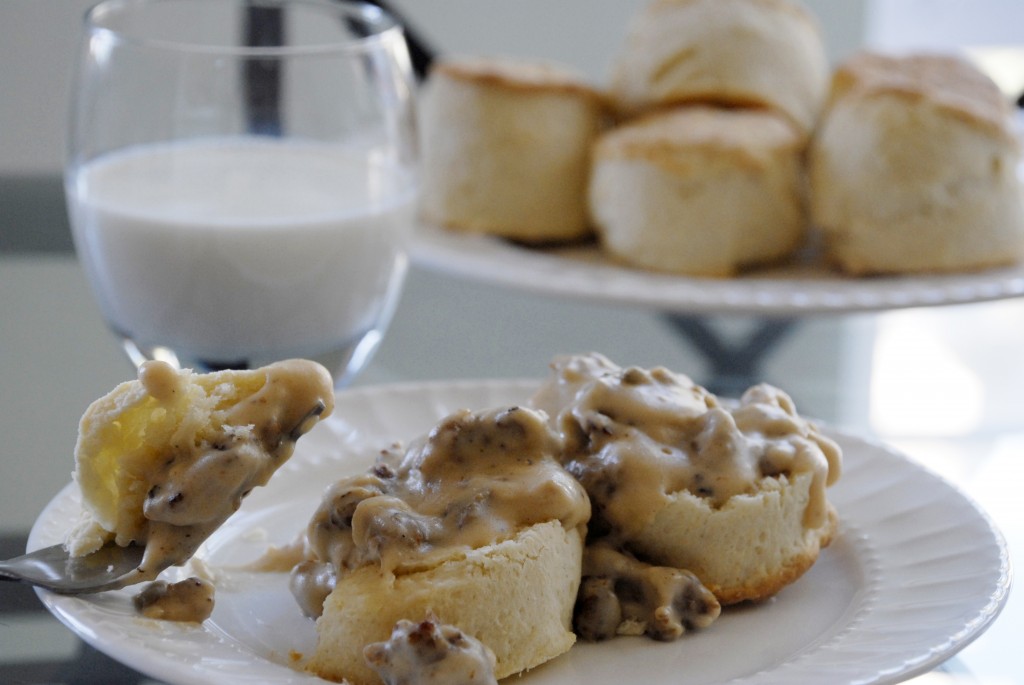
Southern Sausage Gravy and Buttermilk Biscuits

Snowy weather in the forecast would always mean what my family called “French Toast” weather. This is because everyone would rush to the store to buy milk, eggs and bread, and what else can you make with milk, eggs and bread, but French toast? Well today was a “Sausage and Biscuits” kind of day. Now that Thanksgiving is over, I was taking stock of what was in my fridge besides leftovers and found half a package of sausage (the other half was used for stuffing), a half used gallon of milk (used for the turkey gravy and other assorted baked goods), and a carton of buttermilk (bought one too many cartons for brining the turkey). There’s only one thing I can think of to be made with sausage, milk, and buttermilk and, despite the last time I tried making them being a complete failure, I can finally call myself a proper Southern cook: after all these years, I have finally mastered biscuits and sausage gravy that taste just like home.

I’ve always been too impatient in the kitchen and would often end up with basically inedible lumpy gravy. Worse, instead of big lumps of flour, I would whisk so vigorously that my gravy would have millions of tiny lumps that were absolutely impossible to get rid of and extremely unpleasant to look at. Wondra Flour helped me avoid those lumps but then Wondra failed me (I think the canister was finally too old) and I realized I was going to have to learn without any cheats. The secret isn’t necessarily patience; it’s just all in the technique…

First, you should have some sort of liquefied fat in the pan, be it drippings from the meat or melted butter if your meat didn’t give off enough drippings. Second, add flour, a tablespoon at a time, until you have a paste (called a roux) in the pan. The paste will turn golden brown the longer you cook it (a dark roux is always the start to a good gumbo). Third, instead of just dumping milk in and hoping to stir it to smoothness, add the milk, a splash at a time, whisking until the paste fully absorbs the milk each time. As you continue to do this splash by splash, the paste will start to look more like a dough, and later still, more like a thick batter. Finally after all the milk is incorporated, you’ll end up with gravy that looks and tastes like perfection and without a gross clump of flour in sight. It’s a little confusing going from a liquid in the pan, to a paste, and slowly bringing it back to liquid again, but it’s exactly the trick to perfect gravy every time.

The biscuits are buttermilk biscuits from the author of my new favorite cookbook, Sarabeth’s Bakery by Sarabeth Levine. It had been on my wish list for ages and I found it at Borders during their closing sale (there may have been tears shed on my part) for 50% off. Borders’ untimely demise, while terribly sad, brought me what is likely going to be one of the most treasured cookbooks to ever grace my shelf.


Southern Sausage Gravy & Buttermilk Biscuits
Buttermilk Biscuits adapted from Sarabeth’s Bakery
Sausage Gravy is my own recipe
Yields 4 single servings or 2 servings for 2 hungry breakfasters, plus extra biscuits

Gravy

  • ½ tube of country sausage (like Jimmy Dean)
  • 2 tablespoons butter
  • 3 tablespoons flour
  • 1 ½ cups milk
  • Up to ½ teaspoon salt
  • Fresh ground pepper

Biscuits

  • 1 5/8 cups flour (I measured out 1 ½ cups and then filled my ¼ cup measuring cup just about half way)
  • 1 tablespoon sugar
  • 3 1/2 teaspoons baking powder
  • Pinch of salt
  • 6 tablespoons chilled unsalted butter, cut into cubes
  • ¾ cups buttermilk
  1. Preheat oven to 400 degrees and cover a baking sheet with parchment paper.
  2. Set sausage cooking in a pan over low-medium heat. I like to keep it low so that by the time I get the biscuits in the oven, the sausage is almost ready and I didn’t have to worry about it burning. Also, one of those round mesh screens that you lay across your pan is very nice to have in this case, so you don’t have grease splattering all over your stove while your back is turned.
  3. Sift the flour, sugar, baking powder and salt into the bowl of a food processor. Scatter the cubed butter around the bowl and pulse the processor until the mixture looks like coarse meal.
  4. Instead of pulsing, turn the processor on and drizzle the buttermilk through the open feed tube. Continue processing just until the dough forms into one or two large balls, which won’t take too long.
  5. Lightly flour a surface and turn the dough out onto it. Knead the dough just a few times to bring it together, sprinkle flour on top of the dough, and roll it with a rolling pin just until ¾” thick (this is SUPER thick—I admit I rolled mine just a little and measured it and realized it was already 1/2” thick so I had to fold it over and roll it out again, which breaks Sarabeth’s “handle this dough as little as possible” rule).
  6. Cut the biscuits with a round biscuit cutter, about 2” wide. Sara warns you can gather up the scraps and re-roll them out once, but not a second time or else you’ll be over-handling the dough which results in tough biscuits. Cutting the initial batch and then re-rolling the scraps just the one time gave me 7 biscuits.
  7. Bake the biscuits for 15-18 minutes, until golden brown on top. And while the biscuits are baking…
  8. Once the sausage is fully cooked, transfer the sausage to a separate bowl, leaving as much of the sausage grease behind in the pan as you can (gross sounding, but oh so delicious). My sausage didn’t leave behind much grease, so I added 2 tablespoons of butter to melt in the pan. If your sausage gave off a lot of grease, you can use less butter.
  9. Turn the heat to low and add the flour to the fat in the pan, one tablespoon at a time, whisking thoroughly after each tablespoon until a thick paste is formed. It will darken quickly if your heat is too high.
  10. Add the milk to the pan, one splash at a time, whisking thoroughly after each addition until the paste has fully absorbed the liquid. After all the milk has been added, you may notice that your gravy is a little thin, but this is fine since the gravy will thicken up as it simmers.
  11. Add the sausage back to the gravy and add the salt (to taste) and plenty of fresh ground pepper. Let the gravy simmer on the stove for at least 5 minutes until it thickens up a bit and reaches a consistency to your liking. (The biscuits are probably out of the oven by now)
  12. Split a hot biscuit in half and place the top and bottom halves on a plate with the insides facing up. Top with hot sausage gravy and serve immediately to your hungry Southern breakfasters!
Spiced Pomegranate Apple Cider

Friday, November 25, 2011

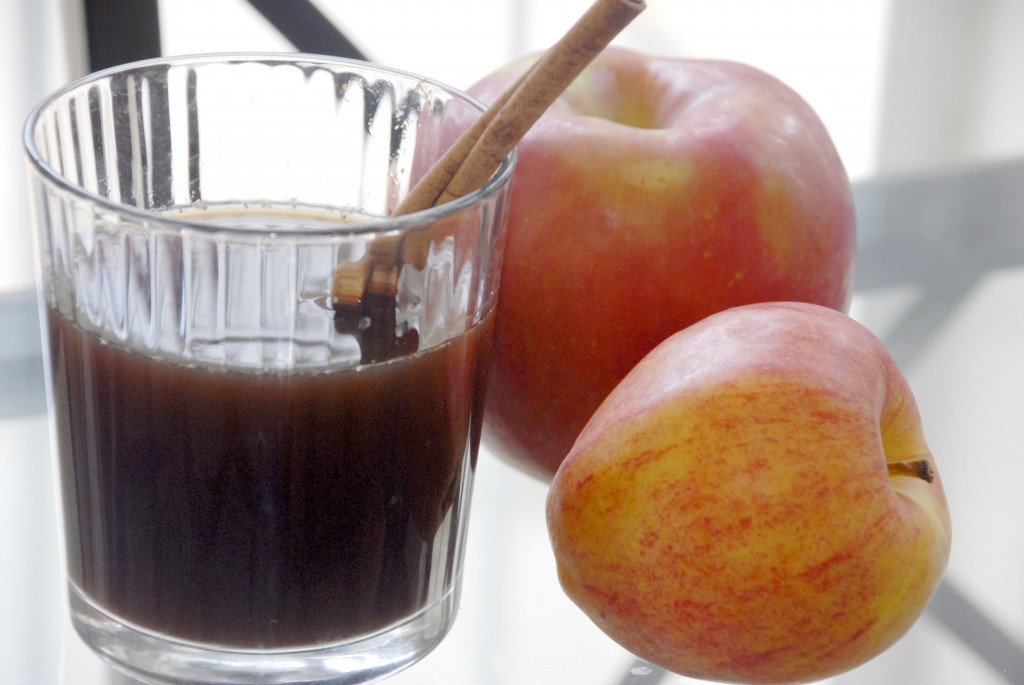
I write this to you with a still uncomfortably full belly, so I’m going to keep it short.  I hope everybody had a safe, delicious, wonderful Thanksgiving and that your fridge is now stocked with a bounty of leftovers-my favorite part of the holiday!  Since no one wants to even think about the kitchen, much less cook in it, so soon after the marathon cooking that comes with Thanksgiving, I offer up a recipe for a spicy drink that will go great with all of those turkey sandwiches you’ll be eating over the next few days.

Spiced Pomegranate Apple Cider just needs to be thrown together in a pot and to simmer on the stove for a little while and a wonderful hot drink emerges with barely any effort on your part at all except to sit down and enjoy a steaming mug of it.  When looking up recipes for research, every site that mentioned pomegranate apple cider had pages and pages extolling the virtues of pomegranate as a super-food and an antioxidant, so if you care about that sort of thing, this cider is fantastic for you.  If you don’t care about that sort of thing, it’s just a delicious seasonal drink.

Spiced Pomegranate Apple Cider

  • 1 part 100% pomegranate juice to 2 parts apple cider (I made mine 1 1/2 cups pomegranate to 3 cups cider)
  • 2 cinnamon sticks
  • 5 whole cloves or 1/8 - 1/4 teaspoon ground cloves depending on how spicy you like it
  1. Combine all ingredients in a large pot.
  2. Heat on medium heat until brought to a simmer.
  3. Simmer for 10 minutes at least; you can simmer as long as you like, but just know that you’ll be reducing the liquid the longer you simmer.
  4. Serve and enjoy hot!


Sage & Honey Cornbread

Wednesday, November 23, 2011

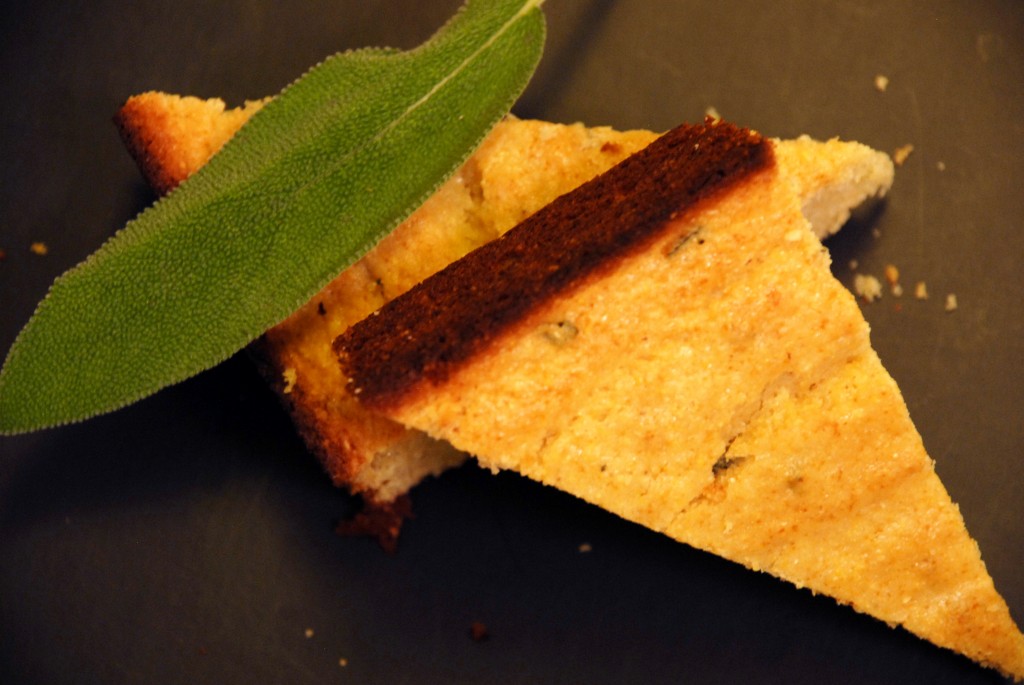
The big day is almost here: Thanksgiving is tomorrow!!  I’ve been busy planning and shopping and planning and cooking and planning some more-I can hardly wait for this day to come around each year!  Our whole family would always wake up early and pitch in with the cooking.  Dad and I would argue over what should be on the tv (seriously, who doesn’t want to watch the Macy’s Thanksgiving Day Parade!?…apparently Dad, that’s who).  Now that I live all the way across the country, I get to share the cooking load with other members of my extended family (I wonder what will be on the tv in Anaheim?), sure to create new memories to add to one of my favorite holidays.

While I have fond memories of rolling up Pillsbury Crescent Rolls with my sister on Thanksgiving, I think cornbread on the Thanksgiving table is a charming addition and this cornbread takes it a step further by lining it up perfectly with the flavors of the season.  Just a touch of sweetness from the honey (and a little bit of a lingering honey taste on your tongue after you swallow) and the warm herbaceous flavor of the sage make this cornbread so much more than the sticky sickly sweet cornbread muffins you find at the grocery store.  I think you’d be hard-pressed to find a better quick and easy bread for your Thanksgiving table.

I hope everyone has a wonderful, safe and, of course, a delicious Thanksgiving holiday!  I’ll be back on Friday, laden-down with leftovers, and I’m pretty sure no one really wants to cook the day after Thanksgiving so I’ll have a fantastic drink recipe waiting for you to go with those turkey sandwiches.

Note: The recipe as done by Bon Appetit and Katie, The Parsley Thief, is baked in a cast iron skillet, which I don’t have.  If you have a skillet, please use it because I’m sure it gives the cornbread that little something extra special, but I used a dark baking pan and it turned out great!

Sage & Honey Cornbread

Adapted from Bon Appétit, via The Parsley Thief

  • 1 cup cornmeal
  • 1 cup flour
  • 1 tablespoon baking powder
  • 1 teaspoon salt
  • 2 teaspoons chopped fresh sage
  • 1 cup whole milk
  • 1/2 cup honey
  • 1 large egg
  • 6 tablespoons butter, melted
  • 2 tablespoons butter
  1. Set oven to 400 degrees, place an 8×8 dark square baking pan into the oven to preheat (if you have a 10″ cast iron skillet, by all means use that!)
  2. In a large bowl, mix together the cornmeal, flour, baking powder and salt.  Add sage and thoroughly mix.
  3. In a medium bowl, whisk together the milk, honey, egg and melted butter.
  4. Remove pan from oven and toss in the leftover 2 tablespoons of butter to melt, swirling it around the pan so the pan is evenly coated.
  5. Whisk the wet ingredients into the bowl of dry ingredients, mixing just until there are no white streaks, but the batter is still very lumpy.
  6. Pour batter into pan, smooth surface of batter with spatula, return pan to oven.
  7. Bake for about 20 minutes, until outside edges are golden brown and a cake tester (or toothpick) inserted into center comes out clean.
  8. Let cool in the pan for 5 minutes or so before turning out of the pan and moving cornbread to a wire cooling rack so that the crust doesn’t stay soft.  Serve warm with butter.  Enjoy!

Mixed Greens with Goat Cheese and Pomegranate Vinaigrette

Monday, November 21, 2011

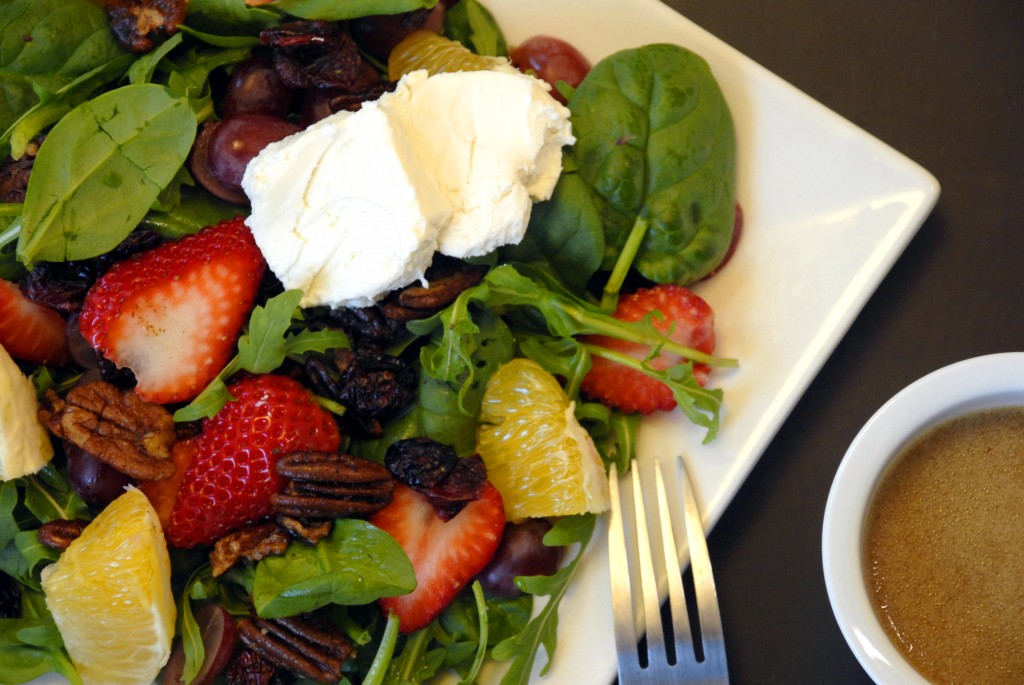
When faced with the decision of what to choose for Project Pastry Queen the week of Thanksgiving, I knew I had to keep it light.  I don’t think any of us wanted a) to spend more time in the kitchen this week than we had to before Thursday and b) to have a giant cake lying around the house to have to finish before the biggest food day of the year.  I have to admit: this recipe is very very loosely based on the recipe I was supposed to present to you for Project Pastry Queen this week.  In fact, for the actual recipe, I’m going to direct you over to the other Emily on Project Pastry Queen for the recipe found in the book.

Because this PPQ recipe used goat cheese, it reminded me of the first salad that got me liking goat cheese and then I got an intense craving for that salad so this recipe is actually inspired by my favorite salad at the Corner Bakery.  Since I’ve never purchased goat cheese for myself, I found myself standing in front of the goat cheese at Trader Joe’s for quite a long time before settling on a package of goat cheese with honey.  I’m pleased to say I really liked it!  There are a lot of other delicious add-ins to the salad as well, including Pastry Queen’s spiced pecans, and hands-down the easiest vinaigrette recipe I’ve ever found; a pomegranate vinaigrette.  A great refreshing salad, perfect to counteract those calories that you’re going to be consuming later this week!

Mixed Greens with Goat Cheese and Pomegranate Vinaigrette
Spiced Nuts from Project Pastry Queen
Pomegranate Vinaigrette adapted from Robin Miller

  • arugula
  • spinach
  • orange slices
  • strawberries, sliced
  • dried cranberries
  • grapes, halved
  • goat cheese

Spiced Pecans

  • 1 1/2 cups pecan halves
  • 3 tablespoons butter
  • 1/2 teaspoon cumin
  • 1/4 teaspoon cayenne
  • 1/4 teaspoon salt

Pomegranate Vinaigrette

  • 1/2 cup 100% pomegranate juice
  • 2 tablespoons champagne vinegar
  • 2 tablespoons olive oil
  • 2 teaspoons Dijon mustard
  1. Heat oven to 350 degrees.
  2. Melt butter in a small saucepan, stir in cumin, cayenne, and salt.
  3. Pour butter mixture over the pecans in a bowl and mix until pecans are evenly coated.
  4. Spread pecans in an even layer on a baking sheet and bake for 5-7 minutes.
  5. Take out and set aside; let cool for 15 minutes before putting on salad.
  6. Put all vinaigrette ingredients into an well-sealed container and shake vigorously until well combined.
  7. Toss equal parts spinach and arugula in the vinaigrette, top with orange slices, grapes, strawberries, cranberries, spiced nuts and rounds of goat cheese.  Enjoy!

Roasted Garlic Lemon Brussels Sprouts

Friday, November 18, 2011

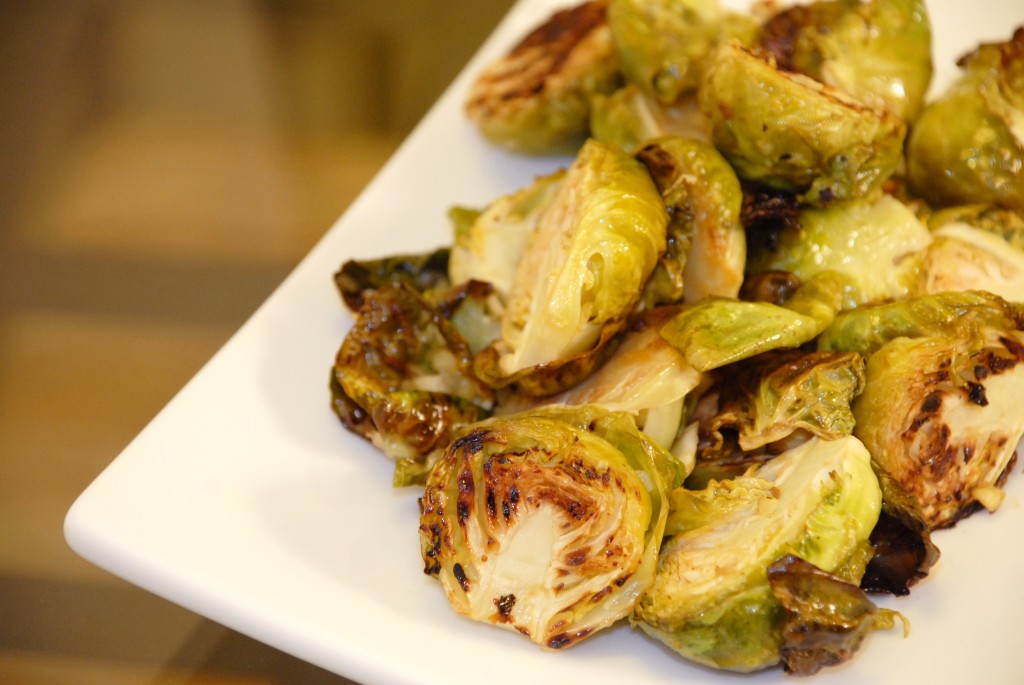
Strangely enough, I was a kid who loved Brussels sprouts.  That said, I loved the Brussels sprouts that came drenched in delicious salty butter sauce, so it probably could have been a piece of plastic under that sauce and I still would have eaten it.  Now that I’m a grown-up, I’m pleased to say that I can appreciate Brussels sprouts in their more natural state, although I know many many adults who still won’t touch a sprout with a ten foot pole….until they try these.

These Brussels sprouts are game-changers.  A person can insist all they want that they don’t like Brussels sprouts and then they take a bite of these sprouts and they start to waver a little bit…eat a few more….then try to cover up what they said earlier by saying “maybe it wasn’t Brussels sprouts that I hated, maybe I’m confusing them with something else…”

Every Thanksgiving table needs more greens and these sprouts are exactly what you want-a flash of green vegetable amongst a sea of starchy potatoes and stuffings and yams and cornbreads; a nice gentle burst of acidity to cut through the heavy gravy and marshmallow toppings.

You barely have to do anything to prepare them either, so these make a great addition to any weeknight dinner, though I admit I do like to save this recipe for holidays-while there’s no doubt the traditional dishes like cranberry jelly and Grandma’s special pumpkin pie are going to make it to the table, it’s so much harder to find a vegetable that feels special enough to sit next to the turkey on the big day and I like to keep this one hidden away until the holidays to give it the spotlight it deserves!


Roasted Garlic Lemon Brussels Sprouts
Serves 2-4 as a side
Recipe from (the clearly genius) BrokeAss Gourmet

  • 1 lb Brussels sprouts
  • 4 cloves of garlic, minced
  • 2 tablespoons extra virgin olive oil
  • zest and juice of 1 lemon
  • salt & pepper
  1. Preheat oven to 375 degrees.
  2. Slice 1/2″ off the yucky ends of each sprout.  Peel off and discard any leaves that have black specks on them (there’s always a few in the bunch).  Slice the sprouts in half and toss them in a mixing bowl as you go, saving any of the leaves that may fall off in the process and throwing them in as well.
  3. Add the garlic, olive oil, zest, juice, salt and pepper to bowl and mix thoroughly (some more leaves will detach themselves, this is still okay-they’ll turn crispy in the oven!)
  4. Cover a rimmed baking sheet with tin foil and pour contents of bowl onto sheet; spread around into an even layer.
  5. Bake for about 15 minutes - pulling the sheet out once or twice to shake and redistribute the sprouts so they brown evenly.  I remember making them once and pulling them out when they were done and someone nearby remarked “Oh no!  They’re burned!”-but they were actually perfect because that’s exactly how you want them to look; a little charred is what makes these so good!  The leaves that fell off will be the darkest while the sprouts should have dark spots of color on them.
  6. Serve warm, garnish with some left over lemon zest if you have it, and enjoy!

Potato Leek Soup

Wednesday, November 16, 2011

Last week my CSA box was delivered with some beautiful leeks in it.  If you know me at all, you’ll know that it’s been an uphill battle for me and onions and all onion related produce, but I dare you to try to deny the leeks that showed up on my doorstep.  Since I’d truthfully never actually cooked with leeks before, I wanted something simple and fool proof that I could use the leeks in; something that would be warm and satisfying after a long day at work yet simple enough that it didn’t feel like a chore to come home and make.

In Julie & Julia, the book starts out with Julie going to the market and absentmindedly buying food for dinner, realizing only on the way home that she’s purchased the exact ingredients for potato leek soup.  I’ve always found this story a little suspect since I can’t go to the market without forgetting something even when I have a list in front of my face, much less absentmindedly shopping, but the simplicity of this recipe has always appealed to me and when I pulled open the CSA box and found the leeks, I knew immediately that they were going into soup.

Julia’s recipe seemed to need a little jazzing up (it was just leeks, potato, and water), so I started from scratch and made my own recipe while trying to maintain the simplicity and up the flavor profile at the same time-The Boyfriend, who had already eaten dinner, tried a spoonful from my bowl of soup and proceeded to ask if he could have a whole bowl himself because it was “mad good”.  Music to a cook/girlfriend’s ears…

Potato Leek Soup
Serves 6

  • 4 medium-large russet potatoes, diced
  • 2 large leeks, trimmed down to light green portion, dark green leaves and root tips discarded, halved lengthwise then sliced
  • 5 cups chicken broth
  • 1 teaspoon salt
  • 1/2 teaspoon white pepper
  • 1/2 cup sour cream
  1. In a large pot, add the potatoes, leeks, and chicken broth.  Bring contents to a boil, then lower to a simmer for 30-40 minutes until vegetables are soft.
  2. Turn off heat and puree potatoes and leeks with a stick blender (or in a traditional upright blender).
  3. Stir in salt and white pepper, then stir in 1/4 cup of sour cream at a time, making sure the sour cream melts completely into the soup and there are no white streaks after each 1/4 cup.
  4. Serve warm and enjoy!

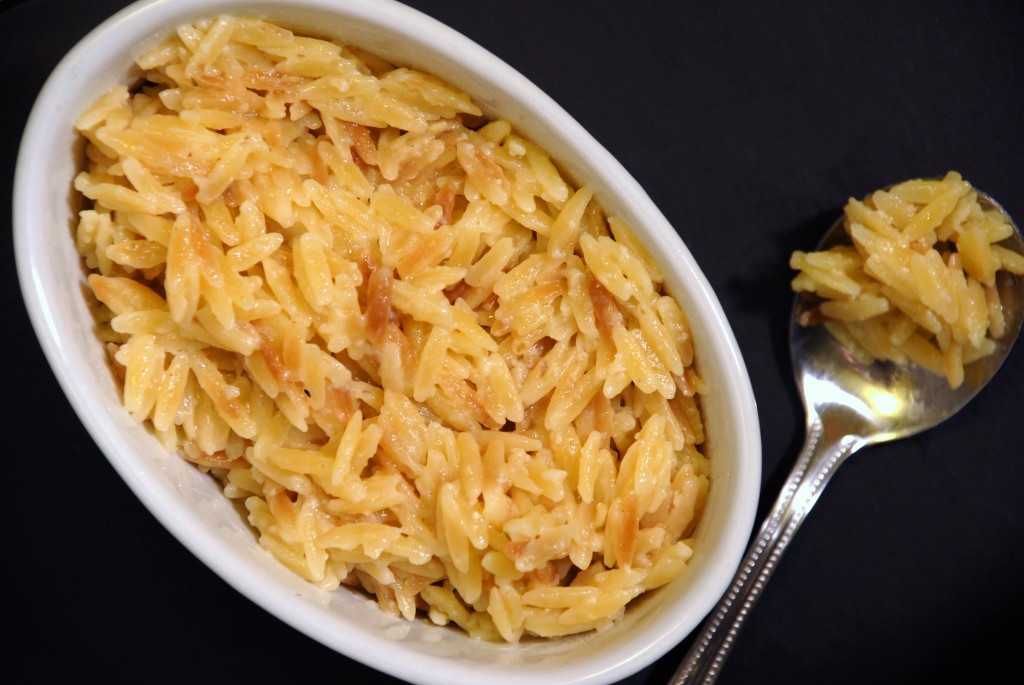
Parmesan Orzo

Monday, November 14, 2011

What a weekend!  The International Food Bloggers Conference was everything I had hoped for and more!  Hopefully you’ll be seeing many improvements coming to the blog very soon (and French macarons now that I’ve had some hands on practice with them).  That said, the one side effect I never expected as a result of IFBC was the food hangover that resulted on Sunday.  I’ve heard people complaining about being sick after too much rich food, but always thought that was ridiculous…until today.  Chef Michael Moore’s dinner was great, but I could barely bike home afterwards and couldn’t even make it to bed-I immediately passed out on the couch instead.

After all that food and, frankly, just being exhausted from a long weekend, I needed something super easy and not too heavy to throw together for dinner tonight.  I had been thinking about making this parmesan orzo for quite a while now, and now that I’ve had a chance to make it I can say that that is just as easy as it looks-it will be ready in less than 20 minutes, most of which are hands-off.  It’s great as a side dish, but tonight the BF and I got some roasted red pepper and garlic chicken sausage, sauteed them, sliced them, and threw them into the pasta.  It made a good filling dish for him, but was still light enough that I didn’t need to be rolled to bed.

Parmesan Orzo
Serves 2-4, depending on serving method
Adapted from Cooking Light via CheapHealthyGood

  • 1 tablespoon butter
  • 1 cup orzo
  • 1 1/4 cups water
  • ¾ cup chicken broth
  • ½ cup white wine
  • ¼ cup grated parmesan
  • 1 tablespoon olive oil
  • salt
  1. In a saucepan, melt butter over medium heat.  Pour the orzo in to the saucepan and cook orzo in the melted butter for 3 minutes until some of the pieces turn toasted brown, stirring periodically.
  2. Add white wine, water, and broth, and bring to a boil (careful, it’ll make a loud noise and lots of steam when you do this, since you’re adding liquid to a dry pot).  Lower heat to a simmer and cook for 15 minutes, until most of the liquid is gone.
  3. Remove pan from heat and stir in parmesan and olive oil; salt to taste and serve piping hot.

Pretty-in-Purple Shortbread Hippos

Friday, November 11, 2011

…aaaand I’m back!  This recipe for Project Pastry Queen is admittedly almost a week late, but this was a very good one for me to get back into the kitchen with-minimal ingredients, quick to throw together, nothing fancy and no surprises.  And delicious!  I love the frosting on these cookies; it’s definitely one of those flavors from childhood that you just don’t forget.

Rebecca’s cookies in The Pastry Queen are “Pretty-in-Pink Shortbread Pigs”, but I knew I wanted a chance to sort through the big bins of cookie cutters at Sur la Table before settling on a pig and, let me tell you, that was a fantastic idea because you should have heard the squeals I made in the middle of the store when I found a hippo cookie cutter!  Hippos are my favorite animal and my parents even “adopted” a hippo in my name through the World Wildlife Fund last year for my birthday, so I grabbed the hippo and excitedly took my prize to the register and then home to make some cookies.

Sturdy cookies (despite being shortbread) and easy icing (all you do is dip them) make this a wonderful cookie to bake with kids-or if you want a quick treat for yourself one evening!  Click on over to Project Pastry Queen to see everyone’s takes on Danmy‘s choice for the week.  There may or may not be a recipe for bacon-chocolate frosted pig cookies over there and I just thought you should know.

Pretty-in-Purple Shortbread Hippos
Makes 20 cookies
The Pastry Queen

Cookies

  • 2 cups (4 sticks) unsalted butter, at room temperature
  • 1 1/2 cups powdered sugar
  • 2 tablespoons vanilla extract
  • 4 cups all purpose flour
  • 2 teaspoons baking powder

Icing

  • 2 cups powdered sugar, sifted
  • 1/4 cup milk
  • 1 teaspoon vanilla extract
  • food coloring of your choice

To make the cookies

  1. Preheat the oven to 350 degrees.  Line baking sheets with parchment paper (or grease generously with butter).
  2. Beat the butter and sugar until fluffy clumps form, add the vanilla and beat until it’s a smooth batter.
  3. Sprinkle the baking powder over the batter and, on low speed, blend it into the batter, then slowly add the flour, keeping the mixer on low speed until fully combined.  Rebecca warns against over-beating, so be careful of that.
  4. Form the dough into a ball, wrap in plastic wrap, and refrigerate for 30 minutes.
  5. After the 30 minutes are up, flour a smooth flat surface and gently roll the dough out to 1/4″ thick with a rolling pin.  Cut the cookies out with your desired cutters and place on the baking sheet 1/2″ apart.  Squish the remaining dough scraps back together, roll out the dough again, and cut more cookies out until scraps are all used up.
  6. Bake the cookies for 10-12 minutes, until the edges start to turn light brown.
  7. Cool the cookies on the baking sheet for 10 minutes before moving to a wire cooling rack for another 5 minutes at least.

To make the icing

  1. Whisk together the powdered sugar, milk, and vanilla extract until fully combined with no lumps.  Whisk in your color of choice (Only 1 drop each of red and blue was needed for that great pastel purple color in the photo).
  2. When the cookies are cool, dip them face down in the icing, let it drain off the cookie a bit and flip the cookie back up-right, tilting the cookie back and forth to get the icing to reach the edges.
  3. Let the frosting dry overnight before packing them up in an airtight container, but be aware that my cookies still stuck together a bit-a sheet of parchment paper between layers would have been helpful.  Enjoy!


Back to Your Regularly Scheduled Programming Soon…

Wednesday, November 9, 2011

For most cooks, these first few weeks in November are the calm before the storm, the last relaxed period before the holidays really kick in and you’re required to put large amounts of food on the table for large numbers of guests.

For me, however, it’s the last storm before the skies clear-right now I’m strangely busy, amongst other obstacles (flat tire!  sliced finger!-can’t cook with that, anyway) and I’m so looking forward to getting through this week because after that, the clouds part, the sun shines through and…it’s Thanksgiving.  The week before Thanksgiving I go into zen mode and am in pure bliss making grocery lists and time tables and scheduling how far ahead to start one dish before another (confession: I may have started some of that already).

This year I’ll be joining my great aunt and uncle at my cousin’s lovely house in Anaheim and I couldn’t be more excited to be sharing Thanksgiving with them.  I always hope to take as much pressure off the hostess as possible on the Big Day and am always happy to contribute as much as I can bring to the table.

Since this is my first Thanksgiving in Anaheim, I’m bringing all of my Turkey Day Specialties:

  • Caramelized Onion Cornbread Stuffing
  • Candied Sweet Potatoes
  • Buttered Green Beans with Dill
  • Pumpkin Pie
  • Southern Comfort Apple Pie
  • Emily’s Famous Pecan Pie

I’ll also be making some homemade turkey stock the week before so that I have plenty for gravy making, since there is nothing more upsetting to me than a shortage of gravy for leftovers!

In the meantime, I’m going to be spending this weekend in a “stay-cation” of sorts-the International Food Bloggers Conference will be in Santa Monica!  With great thanks to the generous event sponsors who awarded me a scholarship, I’ll be in lectures and tutorials, wine-tastings, and mingling with other food bloggers, learning all I possibly can for three straight days.  I hope that it will bring me and my blog to the next level for you to enjoy!

Countdown to Thanksgiving: 15 Days!