Entries Tagged as 'Candy'

Caramel-Filled Brownies

Monday, January 9, 2012

If you are on a New Year’s Resolution Diet, STOP READING.  I’m about to share with you what I’m pretty sure is the richest, most decadent dessert to ever come out of my kitchen.  What’s more, my favorite blogger, Annie of Annie’s Eats, says it’s her favorite dessert of 2011 and that’s really saying something because the things that come out of her kitchen are just mind-blowing.

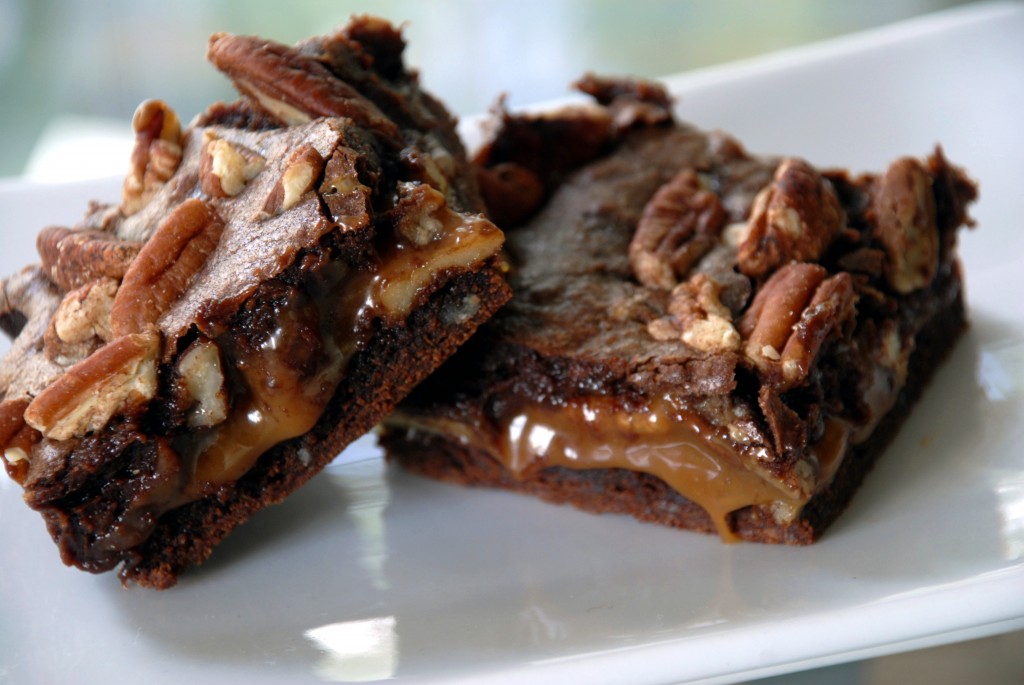
Rich chocolate, toasty pecans, and a layer of caramel that is soft and oozy in just the right way-it’s like a more substantial turtle candy than a baked good.  Beth of The Powdered Plum chose them back in March of 2011 for Project Pastry Queen and I’m so glad I had a wildcard week to go back and try them, because I can’t imagine not having this recipe around.  These brownies are here at the office today to celebrate January birthdays (albeit a bit late-I can’t believe the flu put me in bed for a whole week!) along with a Boston Cream Pie that I’m pretty sure is going to be MY favorite dessert and I can’t wait to hear what everyone thinks! (Clearly I have no respect for my co-workers and their diets…or I can just say that I’m “testing them”-whatever doesn’t get eaten, after all, comes home with me!)

(Note: In writing out the recipe now, I realize I only used 1 stick of butter instead of 2 in the first step.  Doh!  The brownies taste fantastic, though, so if you want to leave out a stick of butter in the name of health, go for it.  Also, perhaps because I added that splash of water I write about in the instructions below, the top layer is very fudgy, almost lava cake style, while the bottom layer is a bit stiffer, almost chewy-which makes sense because it was also baked twice.  I also took the brownies out at the 20 minute mark on the dot so perhaps the top layer should have baked a tad longer but I do love how fudgy they turned out!)

Caramel-Filled Brownies

Adapted from The Pastry Queen by Rebecca Rather

  • 2 cups pecans, chopped (Rebecca always toasts her pecans at 350 degrees for about 7-9 minutes but I always skip this step.)
  • 1 cup (2 sticks) unsalted butter
  • 12 oz bittersweet chocolate, coarsely chopped
  • 1 1/2 cups sugar
  • 4 eggs
  • 1 tablespoon vanilla extract
  • 1 1/4 cups flour
  • 1/2 tsp salt
  • 14 oz caramel candies, unwrapped (I used Werther’s caramels)
  • 1/3 cup heavy whipping cream
  1. Heat oven to 350 degrees.  Line a 13 x 9″ baking dish with tin foil and GREASE THE HECK out of the tin foil.  If you don’t get every inch of the foil, the brownie and caramel will stick to it like there’s no tomorrow.
  2. Melt butter in a small saucepan and add the chopped chocolate, stirring until everything is melted and smooth, then pour the chocolate into a large bowl.
  3. Mix the sugar, eggs, and vanilla, mixing by hand for about 2 minutes.  Mix in the flour and salt until thoroughly combined.
  4. Pour approximately half the batter into the baking dish and bake for 20 minutes.
  5. Once the first half of the brownies are done and cooling (let cool for at least 20 minutes), in a small saucepan melt the caramel candies in the whipping cream, whisking until smooth.  Stir in half the pecans and pour immediately over the baked brownies.
  6. At this point, the leftover brownie batter was super stiff and Rebecca warns you won’t be able to easily spread it, so I added a splash of water to the batter to give it a little more “flow”.  It could be because I forgot that extra stick of butter in the first step, but I’m not sure-just use your best judgement when you get to this step in your own kitchen.  Evenly pour the rest of the brownie batter over the top of the caramel.  It will be almost impossible to smooth the brownie mixture over the caramel (they’ll just mix together instead of staying separate layers), so be sure to pour the batter as evenly as possible.  Smooth as best you can (I had a rim of caramel around the outside edge where I couldn’t get the batter to reach).
  7. Sprinkle the rest of the pecans over the top of the batter and bake for another 20 minutes.
  8. Let the brownies cool completely in the pan before cutting.  The caramel will still be oozy even after they cool, so no need to worry about that.  Rebecca suggests popping them in the freezer for 30 minutes to speed cooling if you just can’t wait.  Enjoy!  (and get right back on that New Year’s Diet as soon as you finish the pan)


Nonpareils

Friday, December 23, 2011

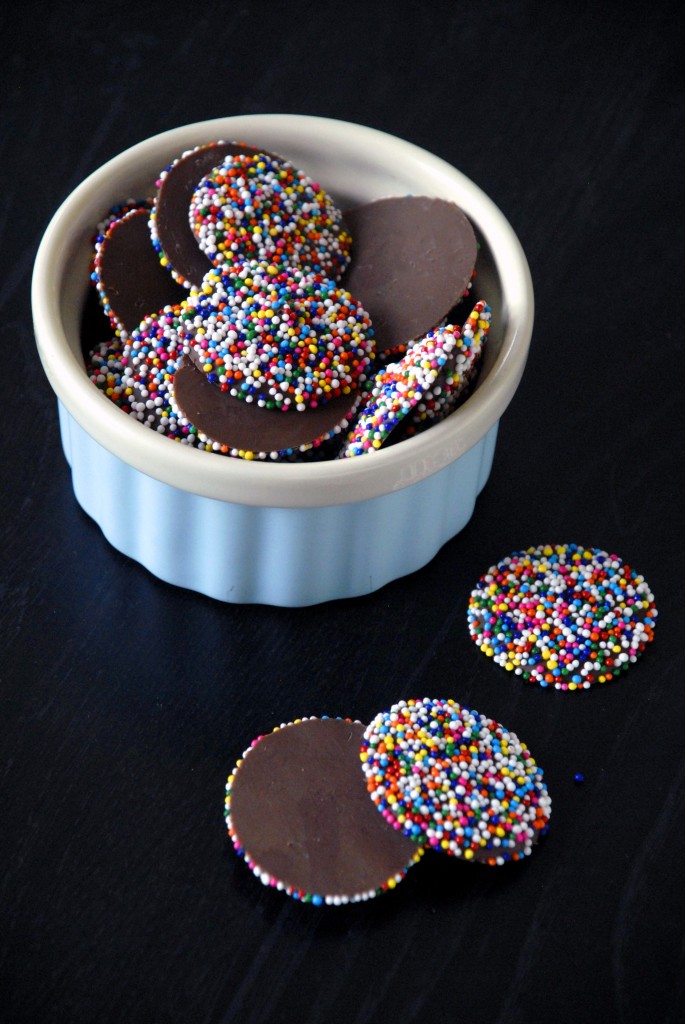
Since we tackled one of the hardest candies yesterday, today we’re going the opposite route-something supremely easy and something that will be fun for the whole family to help with.  Best of all, you can tailor them to your own taste, be it milk chocolate, dark chocolate, or even adjust the sprinkle colors to match the holiday or season.  I made these specifically this year for my Uncle Steffen, who loves these, so I hope that the box has made its way through the post office system before he reads this!

An adult should take over the melting of the chocolate part, but after that, feel free to let kids pull up a stool, spoon the chocolate, and sprinkle the beads.

Also be sure to add your email address in the upper right hand corner of the website-you’ll get all of these recipes emailed directly to you!

Nonpareils

Adapted from Martha Stewart

  • 2 bars of your favorite chocolate (about 4 oz each)
  • 1/2 teaspoon of pure vegetable shortening
  • 1/4 cup of sugar beads (I bought two bottles and used almost all of both…but then again I wasn’t very careful about reserving the ones that didn’t stick to the chocolate right away)
  1.  Line a baking sheet with parchment paper.
  2. In a double boiler, melt the chocolate and shortening together.  (or use a makeshift double boiler like I do-simmer a pot of water and then just put a metal mixing bowl over the top of it to melt the chocolate in)
  3. Spoon the chocolate into little pools about the size of a quarter.
  4. Let the chocolate cool on the sheet for 20 minutes then come back and sprinkle the sugar beads very generously over the chocolate.  I actually sprinkled once, let them set for a few minutes, then sprinkled again over any areas short of sprinkles.  Also, make sure to wait the full 20 minutes or else the sprinkles will just settle down into the chocolate and your candy won’t be very pretty.
  5. Let chocolates cool over night and then gently remove them in the morning.  Enjoy!

Homemade Candy Canes

Friday, December 23, 2011

Whew, what a day-no sleep, no food, lots of running through the airport…it must mean Christmas travel!  This is my first shot at the internet today, which is why this is such a late post, but I think it’s one worth waiting for.  I mentioned I had a number of candy recipes for you and I’m going to go with the hardest first, candy canes, because these aren’t exactly something you want to try doing once the kids are in town (tomorrow’s recipe is definitely a more family-oriented one).

There are still sugar shards to be found around my kitchen and my hands ached the whole night after this project, but it was worth it just to be able to crunch into a pepperminty candy cane I made myself.  I’m sure you’ll feel the same way!

Homemade Candy Canes

Adapted from Whirly Bird

  • 3 cups sugar
  • 1 teaspoon Peppermint flavoring (add 1/2 teaspoon more for stronger flavoring)
  • 1/2 cup water
  • 3/4 cup light corn syrup
  • 1/2 teaspoon of food coloring for each color you want to twist in to the cane
  • 1/4 teaspoon cream of tartar
  • powdered sugar, for dusting
  • vegetable oil, for greasing pans and utensils
  • rimmed baking sheets, kitchen scissors, a candy thermometer, and at least one spatula (one spatula per color is better and I definitely found my wooden spatula to be the best to use by far)

Do set out all of your ingredients ahead of time so that everything will be ready to go.  I can tell you now that it will take you a little while to get the technique down -I spent a lot of time putting the sugar in the oven to soften it and taking it back out to cool before I finally got a hang for how the sugar should feel in consistency and could actually start rolling it out into canes.  The boyfriend would be very unhappy if I got sugar syrup all over his camera, so please do refer to Whirly Bird‘s post for pictures on what the process should look like at different stages.  Good luck!

  1. Preheat oven to 350 degrees in case you need to soften the sugar back up during the process.  Oil the baking sheets so they’re ready when your sugar reaches the right temperature and, if you have the extra counter space, sprinkle powdered sugar on a surface for later.
  2. Combine sugar, water, syrup, and cream of tartar in a saucepan-don’t stir-and bring to a boil.  Keep letting the pot boil until your candy thermometer reaches 280 degrees.
  3. Pour the sugar into pools on the greased pans-I poured a bigger amount into one pan for the white and then in opposite corners of a second pan, poured two smaller amounts (one for green and one for red) making sure they didn’t run together.
  4. Pour the peppermint oil evenly over the different sugar pools, then pour the food coloring on to their respective small sugar pools.  If you want white, leave that pool clear of dye.
  5. Let the sugar cool for a few minutes, then take a spatula and start to fold it over itself, as if you were kneading bread.  The sugar should be cool enough that it should have a consistency almost like clay.  If it’s just a sticky mess, let it cool for a little longer before kneading it.  Once you knead it with a spatula enough that you can pick it up and mold it, pick up the sugar intended to be white and stretch, pull, and knead it with your hands.  The longer you do this, you’ll see the white color come out.  Roll the white sugar into a long log.  Repeat with the colored sugars, but don’t knead these in your hand for too long or else white will get worked into your color and make pastels.  Roll these into separate sugar logs as well.
  6. Press the smaller logs into the sides of the larger log (I put the red and green logs exactly opposite of each other on either side of the white log).
  7. Working quickly while the candy is still warm, take hold of one end of the log and start twisting the ropes together (oiling your hands lightly may make this process easier).  The technique takes a second or two to get used to, but as you’re twisting the candy, pull it away from the rest of the candy log at the same time as you’re twisting so that it forms slender twisted rods.  When you’ve reached your desired length, use scissors to snip the thin candy strip off the log, gently (GENTLY!) bend it into a hook shape, and place it on that surface you covered with powdered sugar.
  8. Repeat until you’ve used up the whole sugar log and your hands are bright red and angry at you.  If the sugar cools too much during the process, I just kept the oven door open and held the log inside for a few seconds until it softened-you could see the skinner side start to droop.  (I felt very much like a glass blower through this part)
  9. Let the candy canes “cure” overnight or else they’ll stick to your teeth-I hate when candy canes do this!  Mine were still sticky to the touch the next day so I dusted them with powdered sugar all over and used a pastry brush to brush the excess off.
  10. Share with family and revel in your first step towards major hard candy making!


Strawberry Marshmallows

Thursday, June 23, 2011

Summer is officially here-the calendar says so, even though June means the opposite of beach weather here where I live.  Summer to me means fresh fruit and it means campfires and this recipe combines both with spectacular results!  As you know from my caramel recipe from last week, I am certainly new on the candy making scene, but it really isn’t as scary as I initially thought.  That said, this recipe for marshmallows is just as easy, but certainly a step up if only for the number of steps involved and TOTALLY, without a doubt, worth the effort.  (I might point out that, while kids love candy, candy making isn’t the best idea to do WITH kids-serious boiling liquid and lots of down time doing nothing but staring at sugar waiting to change colors probably aren’t a good match.  Get the kids involved when it’s time to a) cut the marshmallows out with cookie cutters if you choose or b) when it’s time to eat!)

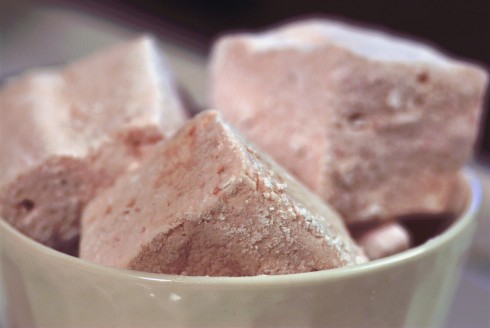
These marshmallows were part 2 of the 3 part thank you gift I gave to my aunt and uncle and I think these were the star of the show!  The boyfriend was heard to say, “these aren’t marshmallows…these are…fluffier…creamier…better…” and then he sort of trailed off while he continued to stare at the one he was eating.  I was impressed that such a little amount of strawberry puree would make such strongly flavored and scented marshmallows-you can smell these from across the room and they are a beautiful vibrant pink until you dust them with the powdered sugar!

I, for one, cannot WAIT to try toasting these over a campfire for s’mores.  Strawberry seems like a great flavor to add to the chocolate and graham cracker flavor profile and these strawberry marshmallows really turn the dial up from “kids treat” to “adult treat”.

Strawberry Marshmallows
adapted from Smitten Kitchen
makes a 9 x 13 pan, number of marshmallows depends on how small you cut them

  • 2 tablespoons plus 2 1/2 teaspoons Knox unflavored gelatin (in grocery store next to the Jell-O)
  • 1/2 cup cold water, divided
  • 1/2 cup cold strawberry puree
  • 2 cups granulated sugar
  • 1/2 cup light corn syrup
  • 1/4 teaspoon salt
  • 2 large egg whites
  • 1 tablespoon vanilla
  • 1 cup confectioner’s sugar
  1. Oil bottom and sides of a 13- by 9- by 2-inch baking pan or dish and dust bottom and sides with confectioners’ sugar.
  2. In a large bowl (I would go with a metal bowl, since the boiling sugar mixture will go into this later and pouring something that hot into plastic always makes me nervous), mix the 1/2 cup strawberry puree with just a little splash of the 1/2 cup of cold water, sprinkle gelatin over mixture and let stand to soften.
  3. In a 3-quart heavy saucepan heat granulated sugar, corn syrup, what’s left of the 1/2 cup of cold water and salt over low heat, stirring with a wooden spoon, until sugar is dissolved. Increase heat to medium to bring mixture to a boil.  As with the caramel, don’t stir the mixture, just gently swirl the pan occasionally until a candy or digital thermometer registers 240°F, about 12 minutes (again, as with the caramel, I fashioned a tin foil sling to hold the candy thermometer at the right floating height in the mixture).  Remove pan from heat and pour sugar mixture over gelatin mixture, stirring until gelatin is dissolved and all lumps are gone, just a few minutes.
  4. With an electric mixer, beat the sugar-gelatin mixture on high speed until about tripled in volume.  It will take about 10 minutes and you’re aiming for puffy and thick.  It was quite the experience for me with my little hand mixer-by the time it was almost ready, I couldn’t touch the beaters to the bottom of the bowl anymore because mixture was so much higher in volume now and the sticky marshmallow would crawl up beater arms almost to the motor-which I have to admit is a little scary, because you start to wonder if you’re going to ruin your mixer by getting marshmallow goo in the motor and how are you going to finish your recipe without an electric mixer, much less afford a new one!?
  5. Once your fluff is puffy enough, set the bowl aside and rinse off your beaters with very hot water to make the sugar melt instead of gunking up your sponge.  In a separate medium bowl, beat egg whites until they just hold stiff peaks.  Add the egg whites into the bowl of marshmallow fluff and on low-medium speed, beat the whites and vanilla into sugar mixture until just combined.
  6. Pour mixture into baking pan and, based on every single other food blogger’s suggestion, do not try to get every drop of fluff out of the bowl.  Take a spatula and gently work the mass of fluff out of the bowl and down into the pan; leave the scraps or else you will end up a very sticky mess.  Gently shake the pan to make sure it’s evenly distributed, but resist the urge to smooth out the top of the marshmallow with your spatula.  That will also cause a mess and the swirls, in the end, are quite charming.
  7. Sift 1/4 cup confectioners sugar evenly over top. Chill marshmallow in the fridge, uncovered, until firm, at least three hours, and up to one day.
  8. Run a thin knife around edges of pan and invert pan onto a large cutting board.  Lift up a corner of the pan and, using your fingers, pry a corner of the marshmallow out and slowly work the rest of the soft slab out onto the cutting board.  With a lightly oiled pizza cutter (or large knife), cut the marshmallow into cubes.  You can also use cookie cutters for fun shapes-the sky’s the limit!  Sift remaining confectioners’ sugar back into your now-empty baking pan, and roll the marshmallows through it in a couple of batches, making sure that all sides of the marshmallow are coated.  If the sugar gets packed down, use a spoon to fluff it again.  I let my marshmallows sit out overnight and they were slightly sticky again in the morning so I re-coated them with the sugar before packing them away.

Vanilla Bean Salted Caramels

Thursday, June 16, 2011

So after watching too many people suffer horrible sugar burns on Food Network Challenge, I came to the conclusion that candy making was too scary and too expensive should I end up in the emergency room.  And then, as always, I found a recipe that just looked too good to pass on-I lusted after it for months.  And then, the time came where they would work as a perfect gift.  The stars all aligned and I, Emily, became a candy maker.

As typical, I breezed through the recipe and wondered, really, what was I so afraid of?  This is nothing to say of my cooking skills-I have to read a recipe step 6 times in a row because I’ll miss a teeny part of a step that will ruin a whole dish-it’s more so a commentary on how we all just psyche ourselves out over things that seem difficult and scary but only because we’ve never tried it.  And look at what happens when you give things a whirl: homemade caramels!  Super impressive and much more delicious than the cheap cubes that have been sitting in the grocery store since last Halloween (even Rolo caramel filling isn’t as good as it used to be).  So without further ado….

Vanilla Bean Salted Caramels
slightly modified from Annie’s Eats
makes an 8×8 inch pan; actual count is based on how big you cut the pieces

Emily’s Notes:  You will need a candy thermometer; they’re about $5 at the grocery store.    I adore Nielsen-Massey Vanilla Bean Paste.  It’s not so much a paste-it has the consistency of maple syrup and TOTALLY worth the $8 at Williams-Sonoma.  When it’s $10 for one single vanilla bean, why wouldn’t you buy this instead with similar results?  The bottle lasted me about a year.  I use it in place of regular vanilla when I want fancy little specks in whatever I’m making and when I want a stronger vanilla flavor than just extract (you’ll want a tiny spatula to make sure you get every drop of the paste out of the measuring spoon).  Furthermore, this blog was almost titled something with “Vanilla” in it because I. LOVE. VANILLA.  It is the finest of the flavors.  Whenever I make a recipe, I always fill the measuring spoon over the mixing bowl and let it spill over in a faux “whoops!” moment, hence the “and then some” in the ingredient list.  I’ll bet I get as much as twice the vanilla I’m supposed to sometimes…but it’s delicious.

  • 1 cup heavy cream
  • 5 tbsp. unsalted butter
  • ½ tsp. vanilla extract (and then some)
  • 1 tablespoon vanilla bean paste (and then some)
  • 1¼ tsp. fleur de sel, or other fancy salt, plus more for garnish
  • 1½ cups sugar
  • ¼ cup light corn syrup
  • ¼ cup water
  1. Line the bottom and sides of an 8-inch square baking dish with parchment paper. Lightly butter the parchment.  (I recently discovered “Martha Wrap” at the grocery store: parchment paper on one side, foil on the other so you get the non-stick parchment benefits, but it’s stiff like foil so you can line a pan with it and it will actually STAY PUT! Genius!)
  2. In a small saucepan, combine the cream, butter, vanilla extract, vanilla bean paste, and fleur de sel.  Heat over medium-high heat and bring to a boil.  Stir often, to keep the paste moving around in the mixture.  Remove from the heat and set aside.
  3. In a medium saucepan, combine the sugar, corn syrup, and water.  Heat over medium-high heat, stirring occasionally until the sugar is dissolved.  Boil, without stirring but gently swirling the pan occasionally, until the mixture is a light golden caramel color.  Keep an eye on it-I stayed in the kitchen and washed the dishes I’d dirtied while it boiled.  It was clearish for forever and then I turned away just as it was starting to brown slightly-when I turned back after cleaning a dish,  it was already approaching too dark!  At this point, I took a picture of the pot and sent it to my boyfriend saying “Look what I’m playing with!  The boiling contents of this pot will give you third degree burns!”.  Seriously, once you’re in the middle of the process you’ve already forgotten that this is supposedly scary and hard to do and you are instead confident enough to joke about it.
  4. Vigorously stir the cream mixture for a moment or two, to re-distribute the vanilla beans,  and carefully stir the cream mixture into the caramel –  pour slowly and stir constantly.  Continue simmering the mixture until it registers 248˚ F on a candy thermometer (I fashioned a little tin foil rope sling so that it stayed upright in the pot-don’t let the tip touch the bottom of the pot, make sure it’s floating somewhere in the middle of the sugar syrup).
  5. Immediately remove from the heat and pour into the prepared pan.  Tap the pan gently on the counter to get all the air bubbles rising towards the top.  Let cool for 30 minutes, then sprinkle lightly with additional fleur de sel-I have Balinese Sea Salt from Williams-Sonoma that I love (even got my roommate seeing the light on fancy salt!), but it’s huge pyramids.  I ground it up with a mortar and pestle so the grains were finer for sprinkling.
  6. Pop in the fridge and continue to let sit until completely set and cooled.  I used a buttered pizza cutter to slice them.  Wax paper is ideal for wrapping them-you can cut them into squares and wrap them like Christmas presents, or you can cut them into small rectangles and wrap them like Tootsie Rolls!  Personally, I like the smaller Tootsie Roll method: perfect bite size and easier to wrap.

These will make pretty soft caramels that will stretch when you try to pull pieces off (which is why I prefer the smaller Tootsie Roll size).  They will hold their shape for the most part, but are easy to roll up into the wrappers and then conform to the round shape.  I made them as a gift, and they were well received, thankfully, so I highly suggest it.  I actually made three recipes that night after I got home from work (and went to bed at a decent hour), which is a testament to how easy these are that I could squeeze them in.

I left the caramels out on the kitchen counter for a few days and during those few days the weather in Beach-town, USA turned cloudy and humid (humid, at least, for SoCal).  They got a little greasy and melty, which I hear is common caramel behavior for humidity, so all my friends in the South-hurry and make this before you start getting 100% humidity days.  Which also means…save this recipe and don’t forget these for Christmas time!