Entries Tagged as 'Chicken'

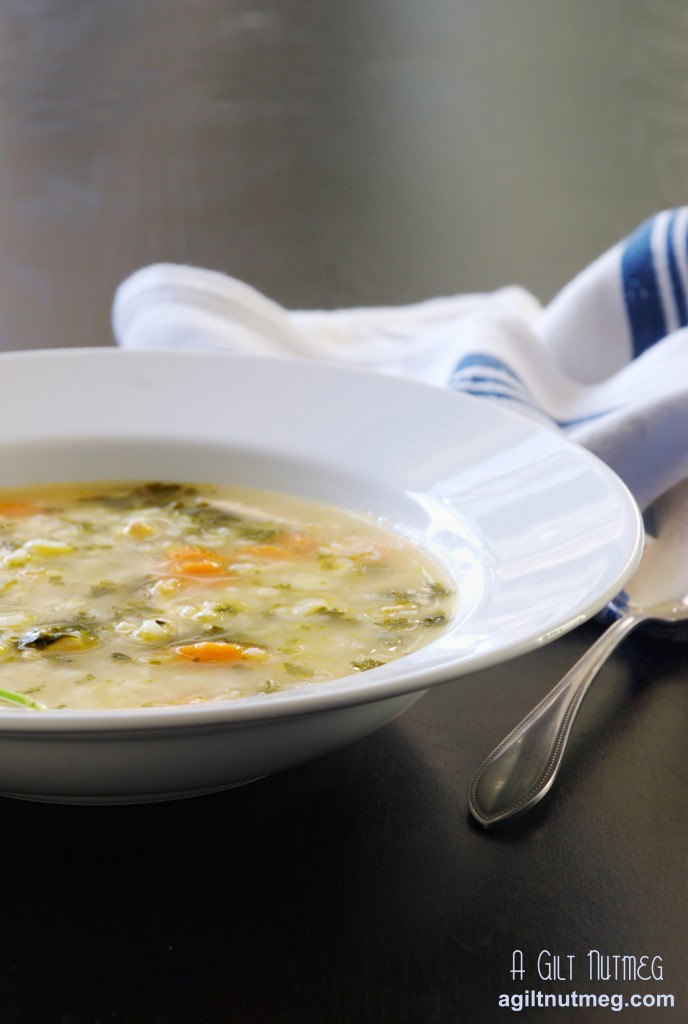
Chicken Soup with Rice

Friday, May 11, 2012

chicken soup with rice by maurice sendak

Last Tuesday, on May 8, the world lost a great presence.  Those of you who don’t know me personally won’t know that my other burning passion besides food is for children’s book illustrations (it doesn’t really come up on a food blog, after all).  I have Beatrix Potter prints in my apartment, my cell phone background is E. H. Shepard, and if I had an extra $3,500 would, without hesitation, buy my favorite Garth Williams illustration of a little sparrow eying a biscuit from “Stuart Little”.  And because of this love of illustration, Tuesday’s passing of Maurice Sendak was especially saddening.  Most people are familiar with Sendak’s “Where the Wild Things Are”, but I never really cared for that book as a child.  Instead I preferred-as anyone who loves cooking might- “Chicken Soup with Rice”.

Image Borrowed from Foodie Parent

The book is a tribute to eating chicken soup throughout the year, with a poem for each month.  I couldn’t think of a better way to celebrate Maurice Sendak’s life than to make a batch of Chicken Soup with Rice and read the book again.  The recipe is a great one that comes together very quickly, yet tastes like it’s been simmering for hours.  It will be perfect for every month of the year.  Maurice, you will be sorely missed.

In May
I think it truly best
to be a robin
lightly dressed
concocting soup
inside my nest.
Mix it once
mix it twice
mix that chicken soup
with rice.

Chicken Soup with Rice
Adapted from “Mad Hungry” by Lucinda Quinn via Martha Stewart
Makes 4 servings

  • 2 boneless, skinless chicken breasts
  • 2 Tbsp olive oil (divided into 1 Tbsp and 1 Tbsp)
  • 1 Tbsp butter
  • 6 spring onions (or scallions), white and light green parts only
  • 3 medium sized carrots
  • 2/3 cup chopped fresh parsley
  • 1/2 teaspoon dried thyme
  • 1 bay leaf
  • 48 oz box of low sodium chicken broth (6 cups)
  • 1 cup cooked rice
  1. Heat 1 Tbsp of olive oil in a stock pot; while it’s heating slice the chicken into approximately 1/2″ slices and then throw them into the pot to brown.
  2. While the chicken is browning, thinly slice the scallions and peel and slice the carrots into what my mom would always call “pennies”.
  3. When the chicken is cooked through and golden brown, move it to a bowl and set aside.
  4. Add the remaining Tbsp of olive oil and the butter to the pot and melt.  Add the onions, carrots, parsley, thyme and bay leaf.  Saute for about 3 minutes.
  5. Add the chicken broth and simmer for 5 minutes or so; in the meantime shred the chicken.  The easiest way to do this is to take two forks, stab one fork towards the end of a piece to hold it in place and drag the other fork across the chicken to pull it into long shreds and pieces of various sizes.
  6. Add the chicken and rice to the soup and simmer for another 5 minutes or so until the chicken and rice are heated up.
  7. Remove the bay leaf and enjoy while reading the appropriate month’s poem in “Chicken Soup with Rice”.

**Note: the soup is delicious, of course, as leftovers, but the rice does tend to get a little mushy the next day.  Best not to let it sit in the fridge for more than 24 hours before eating the rest of it.  Also, the broth is my favorite part of any soup, so when I reheated it, I added an extra little bit of water to the bowl-it gave me a little more broth without diluting the flavor.

Creamy Chicken Taquitos

Wednesday, February 15, 2012

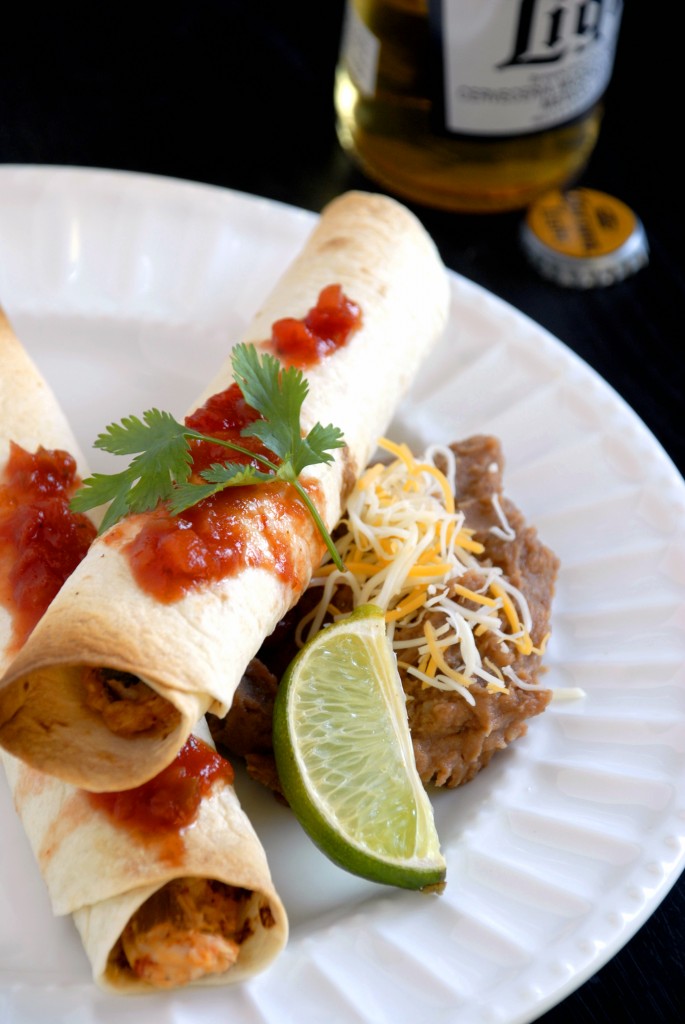
 baked creamy chicken taquitos

I don’t like to lie to you, my dear readers, so I will neither confirm, nor deny, that the only real experience I had with taquitos before making this recipe was from the 7-11 gas station in Georgia.

I will also put out there that I prefer baking to cooking (I’m sure that’s clear to most of you, by now, though) because too often you put the time, money and effort into making a nice dinner and then it’s…you know…good but would have been better if you’d just ordered it at a restaurant where they use 4 times as much butter and you wouldn’t have to clean up the grease splattered kitchen afterwards.

I can safely say that this dinner does not play out like the scene I just described.  No, these taquitos hit the spot in every way possible:  easy to make, easy to clean, filling, delicious, and absolutely satisfying in all manners of the word.  It’s even baked instead of fried like restaurant taquitos so you’ve kicked up the health factor a notch and it’s a great new fun alternative to the typical taco night (not that I would EVER turn down a taco).

Now the only question we were trying to figure out was…do you eat these with a knife and fork or pick them up with your fingers?

Creamy Chicken Taquitos
Makes 12-14, depending on how generous you are with the filling
Adapted from Annie’s Eats, originally from Our Best Bites

  • 3 oz. cream cheese, softened
  • ¼ cup salsa
  • 4 oz can of diced green chiles
  • freshly squeezed lime juice from 1/2 lime
  • 1 tsp. chili powder
  • ½ tsp. cumin
  • ½ tsp. onion powder
  • 3 cloves garlic, minced or garlic pressed
  • 3 tbsp. chopped cilantro
  • 2-3 green onions, chopped
  • 2 cups shredded cooked chicken (I just grabbed an already roasted chicken from the grocery deli and shredded it at home)
  • 1 cup shredded Mexican cheese
  • 10-14 flour tortillas - size 6″ (packages at my market came in either 10 or 16)
  • Cooking spray
  • Kosher salt
  1. Heat oven to 425 degrees and line a baking sheet with parchment paper
  2. Be sure to soften the cream cheese prior to starting the rest of the recipe-30 seconds or so in the microwave did the trick for me.
  3. In a large bowl, mix all of the ingredients, except for the tortillas, spray and salt, and stir until they’re all thoroughly combined.
  4. Heat the stack of tortillas you’re going to use for 30 seconds in the microwave so that they’re soft and pliable (if you find you’re one short and need to heat an extra tortilla, don’t do it by itself for a full 30 seconds!  I killed a tortilla that way, just do it for maybe 10 seconds).
  5. Lay the tortilla flat and spoon 2-3 tablespoons of filling in a straight line on the tortilla-most people say to do it down the center, but I did it a bit closer to the edge I was rolling up so that I could roll the tortilla very tightly.
  6. Once it’s rolled up, place the filled tortilla on the prepared baking sheet with the edge of the tortilla hidden on the bottom so that it doesn’t unroll.  Press gently to flatten it just enough so that it doesn’t roll around on the baking sheet.  You can arrange these pretty close together-I did mine about an inch apart so I could fit all of them on my oversized cookie sheet but still have enough room for air to circulate around them.
  7. Once all of the tortillas are rolled up and placed on the baking sheet, lightly spray them with cooking spray and sprinkle kosher salt over the tops of them.
  8. Bake for 15-20 minutes until golden brown on the edges.
  9. These are great for freezing for future meals!  Annie notes: “To freeze before baking, transfer the baking sheet to the freezer and chill the assembled taquitos 30-60 minutes.  Transfer to a freezer-safe container or plastic bag.  To bake from the freezer, simply add a few additional minutes to the original baking time, until the filling is warmed through.
  10. Serve hot from the oven with extra salsa, hot sauce, and sour cream.  Enjoy!

All-Sold-Out Chicken Pot Pies

Wednesday, December 14, 2011

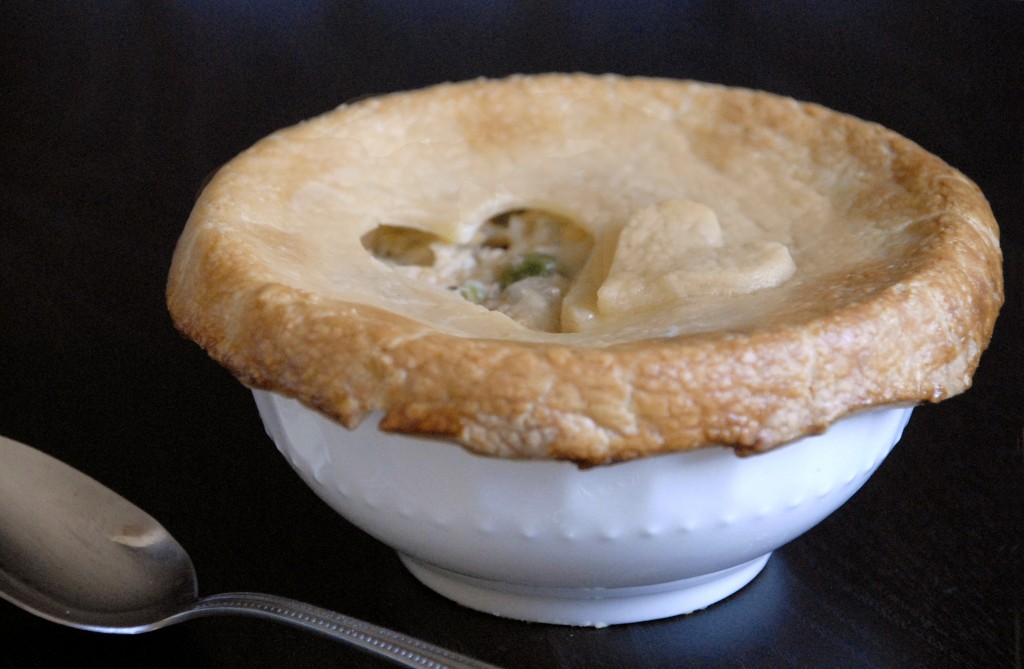
I love chicken pot pie.  It was (is) one of Mom’s signature dishes as I was growing up, and to this day I find I’m compelled to try it from every restaurant menu it appears on (which isn’t many, because it’s more a homey comfort food instead of high class fare).  So naturally, I’ve been looking forward to trying this recipe ever since I cracked open The Pastry Queen.

What can I say, but that it’s a great chicken pot pie!  I have certainly built up a criteria over the years, some of which this pie admittedly doesn’t qualify for, namely in two things:  I prefer puff pastry on top to crust (or the biscuits Mom tops hers with) and I prefer a higher sauce-to-filling ratio than this one provided, the opposite of which seems to be standard for chicken pot pie recipes I’ve tried at home.  But that all said, the filling is really a great combination of flavors-adding mushrooms and red bell pepper that I never would have used before, and I look forward to making this again and again!  I was surprised at Rebecca’s use of hot sauce and red pepper flakes but this was by no means a spicy dish: the hot sauce really gives an otherwise bland cream sauce dimension without overloading you on too many flavors.

I wish I loved the crust as much as the other girls did, but it felt a little heavy and dry to me (rolling it much thinner than Rebecca suggested helped a lot, though) so I think I’ll stick with puff pastry in the future-even just the frozen stuff does the trick.  As for the filling, it was so good that the only change I made was to add some dried thyme, since I’m of the opinion that most savory comfort food just isn’t comfort food without thyme in it.

Note: While I know many cooks prefer to prepare a mise en place (which means setting out all of your ingredients measured and chopped exactly how you need them before you start the recipe), this recipe lends itself well to those less-organized people (me) who prepare ingredients as they go.  While the potatoes and onions cooked, I chopped the bell pepper and mushrooms.  While the vegetables all cooked together, I shredded the chicken, and so on and so forth.

All-Sold-Out Chicken Pot Pies
Makes 6 Servings
Adapted from The Pastry Queen by Rebecca Rather

Filling

  • 3 tablespoons unsalted butter
  • 1 medium-size yellow onion, chopped
  • 3 cloves garlic, minced
  • 1 large russet potato, peeled and diced
  • 1 red bell pepper, diced
  • 8 oz. button mushrooms, sliced (I think 4 oz, half a package of mushrooms, is perfect but you can adjust to your tastes)
  • ½ teaspoon crushed red pepper flakes
  • 1 teaspoon dried thyme
  • salt and freshly ground black pepper
  • 1 purchased cooked rotisserie chicken, shredded
  • 1 (8 oz) package frozen peas

Cream Sauce

  • ½ cup (1 stick) unsalted butter
  • 1 cup all-purpose flour
  • 3 cups chicken stock
  • ½ cup heavy whipping cream
  • dash of hot pepper sauce, such as Tabasco
  • salt and white pepper

Crust

  • 1 cup (2 sticks) chilled unsalted butter, cut into 16 pieces
  • 3 cups all-purpose flour
  • 10 oz. chilled cream cheese
  • 1 tsp salt
  • ½ tsp white pepper
  • 1 large egg
  1. Melt the butter in a large pan over medium heat, add the potatoes and onions and saute for 5 minutes
  2. Add the bell pepper, garlic and mushrooms and saute for 15 minutes, until potatoes are soft; stir in the crushed red pepper and thyme; salt and pepper to taste.
  3. Add the shredded chicken and frozen peas, which will defrost in the heat of the filling, and set the pot aside while you make the cream sauce.
  4. Add butter for the cream sauce to a new sauce pan and let it melt.
  5. Gradually add the flour, whisking the whole time so that the butter and flour make a paste.
  6. Gradually add the chicken stock to the flour-butter paste, whisking thoroughly after each addition until you have a smooth sauce before adding more chicken stock; add the cream, hot pepper sauce; salt and white pepper to taste.  I will never forget my Mom’s advice to “cook the flour taste out.”  I stood over the stove and let it bubble for about ten minutes, tasting it every few minutes or so.  She’s absolutely right-it will taste just like flour until cooked long enough and then it starts to taste creamy and peppery instead.
  7. Pour the cream sauce over the chicken-vegetable mixture in the other pot and stir to combine.  Divide the filling up amongst the (oven proof) serving bowls you are using.  If you don’t want to do individual servings, you can do one big glass baking dish of it, which is how Mom always served it to the family.
  8. Heat the oven to 375 degrees.
  9. Pulse the flour and butter in a food processor until crumbly.
  10. Add the cream cheese, salt and pepper to the food processor and process until the dough forms a big ball.
  11. Dump the dough out onto a floured surface and roll it to 1/8″ thickness (Rebecca said 1/4″ but that was WAY too thick for me) with a floured rolling pin.
  12. Cut out rounds of dough that will drape over the sides of your bowls by about 1/2″, and drape over tops of bowls.
  13. Beat the egg with a splash of water and brush the crust with the egg mixture.
  14. Place pot pies on a baking sheet so you can put them all in and pull them out all at once.
  15. Bake for 20-25 minutes until golden brown on top and enjoy!


Skillet Glazed Drumsticks

Thursday, July 14, 2011

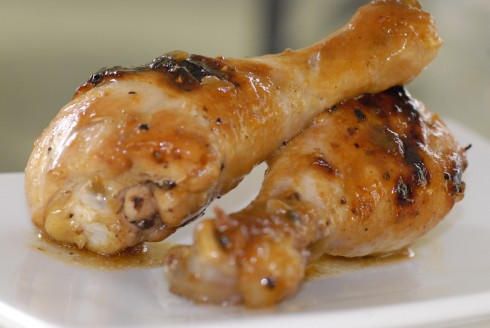
True Confession:  I love buying rotisserie chickens from the grocery store.  They’re fast and delicious and so easy after a long day at work.  But sometimes you want something a little more interesting and this recipe is just the trick!  If you’ve never pan-roasted before, you are in for a treat-you get the delicious browned outside of the chicken from cooking it in the skillet on the stove-top, yet popping it in the oven to finish cooking means you’re going to still end up with moist chicken.  Don’t let the presence of jalapeno jelly make you think this is a spicy dish-unless you add a lot of hot sauce.  In the end, I could barely taste any spicy heat at all!

Before we go any further, make sure you have a large skillet that is able to go in the oven.  That means no plastic handles and, just because it seems like a good idea, I try not to put non-stick pans in the oven.  Who knows what chemicals were used to make it non-stick and I’d rather not have that melting into my food.  I will warn you that while certain ingredients aren’t exactly fun to work with (cleaning out a raw chicken, for example), I never really am completely grossed out by them.  That said?  Jalapeno jelly was disgusting!  and I normally love jalapenos!  ….have I whet your appetite yet?  The end product here is delicious, though, so just dive right in and go for it because you’ll love what you’re eating for dinner-not your average chicken dish!

Skillet Glazed Drumsticks
recipe source: America’s Test Kitchen 30 Minute Suppers Summer 2010
Serves 4

  • 3 tablespoons jalapeno jelly
  • 1 teaspoon grated zest and 2/3 cup juice from 2 large oranges
  • 1 shallot, minced
  • hot sauce
  • 2 tablespoons molasses
  • 1 teaspoon cornstarch
  • 8 chicken drumsticks (about 3 pounds)
  • salt and pepper
  • 2 tablespoons vegetable oil
  1. Adjust oven rack to middle position and heat oven to 450 degrees.  Combine jelly, orange zest and juice, and shallot in small saucepan, add a few dashes of hot sauce to taste.  (I probably put in a teaspoon or so and could barely taste any spice at all.)  Whisk in molasses and cornstarch.  Simmer mixture over medium heat until thickened, about 5 minutes.
  2. Meanwhile, pat chicken dry with paper towels and season with salt and pepper.  Heat oil in large skillet over medium-high heat until just smoking.  Cook chicken, turning once or twice, until well browned.
  3. As best you can manage it without dumping the chicken out of the pan too, pour off remaining oil.  Pour the heated glaze over the chicken in the skillet, turning chicken until thoroughly coated.  Transfer skillet to oven and roast until chicken registers 175 degrees, 20 to 25 minutes, flipping chicken halfway through.
  4. Transfer chicken to platter, season glaze with salt and pepper to taste, and pour glaze over chicken.

Poulet en Cocotte

Sunday, June 19, 2011

Poulet en Cocotte is French for “Chicken in a Pot”, which is hardly a very appetizing name-but at least the chicken is delicious!  The first half of the recipe is pretty hands-off and the sauce in the second half is simple as well.  I actually made this chicken and the sauce last for a whole week of leftovers…and now that I’m writing about it, I’m craving it again.  Would it be bad to have chicken for 2 full weeks in a row?

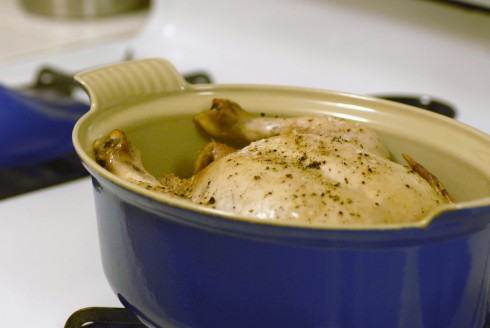
A word of warning: part of what makes this recipe so easy is that you don’t brown the chicken first and the chicken isn’t going to brown very much in the pot, so you’re going to end up with a relatively light colored bird.  Cooks Illustrated is always on this obsessive quest for browned crispy skin on chicken and turkey but, truthfully, I don’t particularly care one way or the other so this recipe suits me just fine.

Poulet en Cocotte
recipe slightly modified from The Best International Recipe cookbook
Serves 4, or a week of leftovers for 1

  • 1 roasting chicken (approx 5 lbs), giblets discarded
  • salt and ground black pepper
  • 1 tablespoon olive oil
  • 2 large shallots, sliced thin
  • 6 garlic cloves peeled and trimmed
  • 1/2 cup dry white wine
  • 1/2 cup low-sodium chicken broth
  • 2 bay leaves
  • 1 1/2 tablespoons dried thyme
  • 2 tablespoons chilled unsalted butter, cut into 2 pieces
  1. Adjust an oven rack to the lower middle position and heat the oven to 375 degrees.  Make sure the chicken doesn’t have giblets hiding inside, and if there are, pull them out and discard.  Pat the chicken dry with paper towels and season with salt and pepper. Add the oil, shallots and garlic cloves to a large Dutch oven and lay the chicken on top, breast side up.
  2. Cover and bake until an instant-read thermometer registers 160 degrees in the center of the breast, about 1 hour. If you don’t have a meat thermometer of any kind, use your best chicken-judgement skills: make sure the meat is not pink and the juices run clear.
  3. Tip the chicken to drain the juices from the cavity back into the pot you roasted it in. Transfer the chicken to a carving board, tent loosely with foil, and let rest while finishing the sauce-I promise it will stay piping hot for a loooooong time.
  4. Pour all the cooking juices into a fat separator and set aside to settle, about 3 minutes.  I don’t have a fat separator right now, so I just put it into a measuring cup, let it settle, and then spooned the fat off the top as best I could. Pour the defatted juices back into the pot and stir in the wine, broth, bay leaves, and thyme. Bring to a boil over medium-high heat and cook until the liquid has reduced to about 1 cup, 5-10 minutes.
  5. Off heat, remove the bay leaves, whisk in the butter and season with salt and pepper to taste. Full disclosure: I don’t actually love onions and shallots, so I spooned the shallots out of the sauce at this point. But I don’t suggest this unless you’re just picky like me.

If you’re serving this for dinner for more than just yourself, carve the chicken up and serve the sauce in a gravy boat. If it’s for a less formal occasion (i.e: me standing over the kitchen counter at 11pm on a Sunday night), let the chicken cool (so you don’t burn your fingers…learn from my example) and tear it down into pieces directly into the tupperware. Dip pieces of chicken into the pan of gravy as you are breaking down the chicken, pop directly into your mouth and voila: dinner!  Don’t forget to save the sauce, too-it’s what really makes the chicken worth eating all week.