Entries Tagged as 'Sandwiches'

Steak & Arugula Picnic Sandwiches

Wednesday, May 16, 2012

steak picnic sandwiches

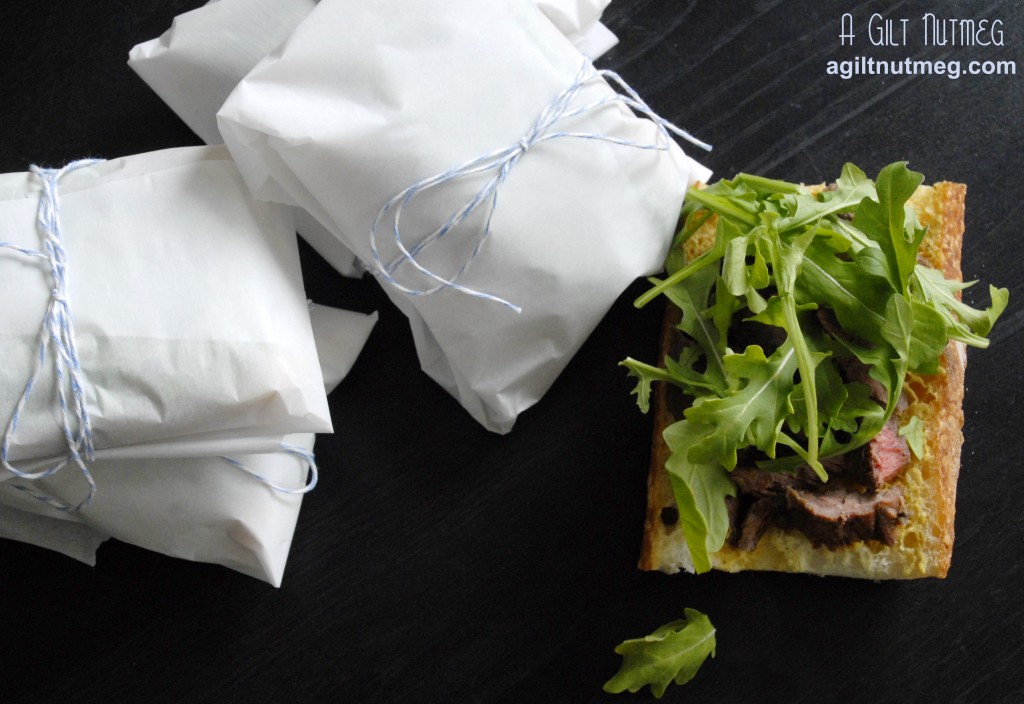
Serves me right for thinking I might have a relaxing weekend for once.  Thursday night rolled around and The Boyfriend’s Dad asked how I might feel about filling a basket for a picnic lunch for Mother’s Day.  Of course I can’t say no to that!  I spent the next few days trying to decide what I might make that would be okay at room temperature for a little while and that would pack nicely for travel.  I am proud to say that the lunch was a success and that I was able to make some of my favorite foods to share with them on Sunday and now with you.  First up on the list are these incredibly simple Steak & Arugula Picnic Sandwiches.

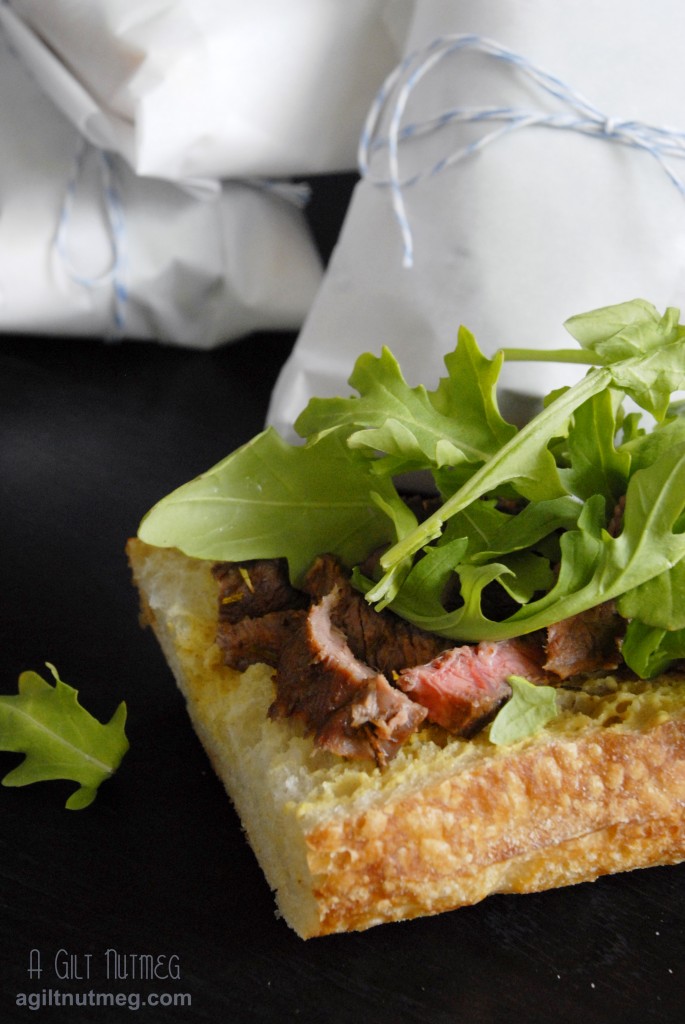
Your first step above all is to find a great bread.  I was standing in line at 9am waiting for the doors to open at the world famous Bay Cities Deli on Sunday morning.  I think that walking out of the store 5 minutes later with a loaf of crunchy chewy Italian bread still warm and fragrant from the oven was one of my favorite food moments in recent memory.  After that, the rest is a snap; this steak is one of the very first recipes I ever posted on this blog and beyond that it just involves slathering on some good mustard and piling on the arugula.  Because they’re open faced (no top piece of bread), they’re just the right amount of filling when you pair them with a few sides instead of overstuffing yourself…because who wants that on a picnic?  Wrap it all up in parchment paper, tie it with baker’s twine and these sandwiches are super portable without worry about crushing them.
steak picnic sandwiches 2

Steak & Arugula Picnic Sandwiches
Adapted from Martha Stewart Living, July 2009
Serves 4

  • One loaf of high quality sandwich bread or two 6″ rolls
  • Approximately 2 cups of arugula
  • Your preferred mustard (I like a spicy Dijon)
  • One recipe of Marinated Balsamic Skirt Steak (below)

Steak

  • 1/2 cup balsamic vinegar
  • 1/4 cup soy sauce
  • 2 tablespoons brown sugar
  • 4 garlic cloves, sliced
  • 1 tablespoon dried rosemary
  • Coarse salt and ground pepper
  • 1 pound skirt steak
  1. Poke the steak all over with a fork, then combine the steak ingredients in an airtight container at least 30 minutes prior to cooking, if you’re in a rush, or put them together the night before and stick them in the fridge so that the flavors can combine.
  2. When ready to cook the steak, set the oven to Broil (or 500 degrees), line a rimmed baking sheet with aluminum foil and lay the steak flat on the prepared pan.
  3. Broil the steak 3 minutes on each side for medium; cook an extra minute or so on each side for more well done.
  4. When the steak is done to your preference, pull it out of the oven, move it to a platter and let it cool for at least 15 minutes.
  5. When cool, slice the steak against the grain (you don’t want chewy meat on a sandwich), removing any excess fat along the way.
  6. Slice the bread roll in half lengthwise and then cut the halves into 6″ portions (cut the rounded ends off, too).
  7. Spread mustard over the bread, pile the meat on top and then the arugula.
  8. Wrap sandwiches in parchment paper, tape or tie them shut and put them in the picnic basket to enjoy!

Caprese Burgers

Friday, September 2, 2011

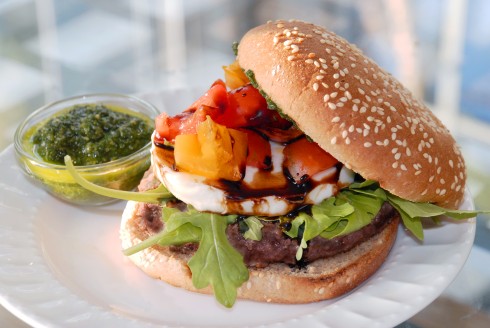
So the boyfriend and I desperately needed a night out.  The solution?  The Counter, a fantastic build-your-own-burger joint, has the best Tuesday night dinner around.  For the price of one of their normal burgers, you get 4 mini burgers designed specially by the chef and 4 mini beer pairings.  The fact that you don’t have to choose just one meal and get 4 very different burgers AND 4 different beers is just phenomenal.  This week the chef created a bacon cheeseburger with potato chips (as a burger topping) and stone ground mustard, a burger with blue cheese, celery slices and buffalo sauce, a southwest burger with corn & black bean salsa, chipotle aioli and fried jalapeno slices and….a caprese burger.

I carefully took only one bite of burger and one sip of the matching beer before moving on to the next, moving in a slow circle around the plate.  And even though I enjoyed all of the burgers immensely, this caprese burger was something special.  It was one of those things where you hit yourself over the head and say “why didn’t I think of this?!“  It was so good, in fact, that after only one bite, I borrowed the boyfriend’s fancy phone to email myself the list of ingredients.  It was so good that the very next day I found myself hungrily craving a full size caprese burger and, let me tell you, when I get a craving like this, it HAUNTS me.  So there was nothing else to do but recreate the burger at home and have caprese burgers two nights in a row.  These are so easy to throw together yet look so impressive that I can’t wait to make them for friends-great for this weekend’s last ditch effort at holding on to summer, Labor Day!  So with out further ado…

Caprese Burgers
Serves 4
Inspired by a Mix-It-Up special from The Counter

  • 4 burger patties
  • 4 hamburger buns
  • arugula
  • 2 tomatoes, chopped (I used heirloom tomatoes, since it’s just barely still summertime)
  • fresh mozzarella, sliced into 1/2 inch thick slices (will come in a single ball the size of a baseball)
  • 1 recipe balsamic reduction (see below)
  • 1 recipe pesto spread (see below)

Balsamic Reduction

  • 1/2 cup balsamic vinegar
  • 1 tablespoon brown sugar

Pesto Spread

  • 2-3 packed cups fresh basil leaves (1 large box of basil from Trader Joes is only $1.99 and is the perfect amount!)
  • 3-4 cloves of garlic
  • 7 tablespoons olive oil
  • pinch of salt
  1. Bring the balsamic vinegar to a boil in a small saucepan.  Once boiling, turn the heat down to medium and let it continue to simmer for about 10 minutes.  Add the brown sugar and stir until dissolved.  Turn heat off to let it cool until your burgers are ready.  The vinegar will turn very thick and should coat the back of a spoon.
  2. In a food processor, combine the basil, garlic, salt and olive oil and pulse until you have a fine paste.  Set aside until ready to use.
  3. Turn your oven on to 500 degrees and place the hamburger bun halves face-down in the oven to toast while preparing your burgers.
  4. Grill or fry the burgers in your preferred method.  I found I didn’t even have to season them due to the strong flavors in the balsamic reduction and the pesto.
  5. Stack your burger: Bottom half of bun, burger patty, arugula, mozzarella slice, chopped tomatoes.  Drizzle the balsamic reduction over the tomatoes.  Spread a thick layer of the pesto on the top bun and drop it on top of the burger.  Voila!

It seems that everyone’s tastes are different when it comes to this burger-the boyfriend literally brought the pot of balsamic reduction to the table so he could keep slathering it on his burger while I couldn’t get enough pesto and would spread a little extra on each bite of burger.  The roommate happily ate hers without any extra additions at all.  So that means the solution is just to bring all the sauces to the table to let everyone choose for themselves!

Lobster BLT

Tuesday, July 5, 2011

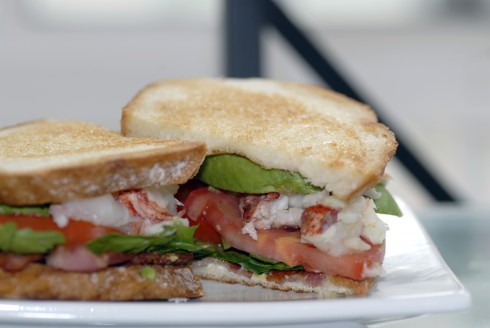
This sandwich will change how you feel about BLTs forever.  It will change how you feel about lobster forever.  Basically, you need to try this sandwich as soon as you can.  And if you don’t like lobster (!?) or can’t eat shellfish, then this will give you a really great basic BLT sandwich that I promise you’ll love more than any BLT you’ve ever had, just by switching up a few of the basic steps that make for a mediocre BLT.  Since BLTs are my favorite sandwiches, trust me, I’ve had my fair share of poorly made BLTs-the toast is too toasted and the bacon is super crisp and all of this leaves the roof of your mouth completely torn up and worst of all, there isn’t any flavor other than mayo-how is that possible!?

Trick one: fresh ingredients.  Best to make this sandwich when things like tomatoes are actually in season so you don’t have a bland sandwich.  Lobster was on sale when I bought mine so I got a little tail for $6-8 and just froze it until I was ready to make this.  You’ll note that I have garlic infused olive oil listed in the ingredients.  I suggest you find a bottle of this stuff right this moment-drop what you’re doing and just go.  You will thank me later.  You can use it in a TON of dishes and, really, it’s really one of the secrets to making this a great sandwich.  If you don’t like garlic you can use butter instead.

Lobster BLT with Citrus Mayonnaise
makes 1 delicious sandwich

  • 1 lobster tail
  • 3 slices bacon
  • arugula
  • ripe tomato
  • ripe avocado
  • 1 tablespoon mayonnaise
  • 1 teaspoon lemon zest
  • 2 tablespoons lemon juice
  • 2 pieces high quality rustic round loaf sandwich bread such as sourdough
  • garlic infused olive oil (or butter)
  • salt and pepper
  1. Get a pot of water boiling with a steamer basket inside.  Once the pot is at a rolling boil, place the lobster tail inside and cover the pot with the lid.  Let the tail steam 5-10 minutes.  The shell will turn red and the meat will be a pearly white.  Truthfully, I’d rather have my shellfish underdone rather than overdone (it gets chewy) but if you’d rather have it well done, leave it in for a few minutes longer just to be safe.  When it’s done, take the steamer out and run the tail under cold water to stop it from cooking any more; set aside.
  2. Set three strips of bacon frying.  One of the secrets to this sandwich: do not cook the bacon till crispy! Fry it until done, but still floppy.  Again, if this makes you nervous, go ahead and fry the living daylights out of it, but your sandwich won’t be as delicious because you’ll be eating carbon bacon.
  3. While the bacon is frying (don’t forget to flip it half way through!), slice your avocado and tomato and chop up your lobster tail.  Don’t worry about being gentle with the shell-you’re chopping up the meat anyway.  I took a large chef’s knife, placed it along the underside of the tail and pressed down until the softer under part cracked.  Then I was able to pry the shell apart and pull out the tail.  Chop coarsely.
  4. At this point, your bacon is likely finished; Place the finished bacon on a paper towel to soak up that extra grease you don’t need, turn off the burner, and take a wadded up paper towel and wipe the frying pan clean of the bacon grease while it’s still hot.
  5. Stir together the mayonnaise, lemon zest, and lemon juice-I preferred more lemon juice than not, as I actually don’t like the taste of mayo.
  6. Turn the burner on again under your frying pan.  Lightly brush both sides of your bread with the garlic olive oil (or just lightly butter each side) and toss the bread, one piece at a time into the frying pan, frying each side until golden-this is one of the secret tricks to the sandwich.  Instead of toast so stiff that everything falls out from between the slices, this warm, garlic-buttery delicious bread is still soft enough to not scratch the roof of your mouth, but sturdy enough to hold all of the ingredients.
  7. Finally, assemble!  Spread the citrus mayo on one of the bread slices, layer with bacon, arugula, tomato (salt and pepper here), lobster chunks, and avocado.

Like I said, game changer in the sandwich world-I’m never going back to bad diner BLTs.