Entries from April 30th, 2012

Honey Muffins

Monday, April 30, 2012

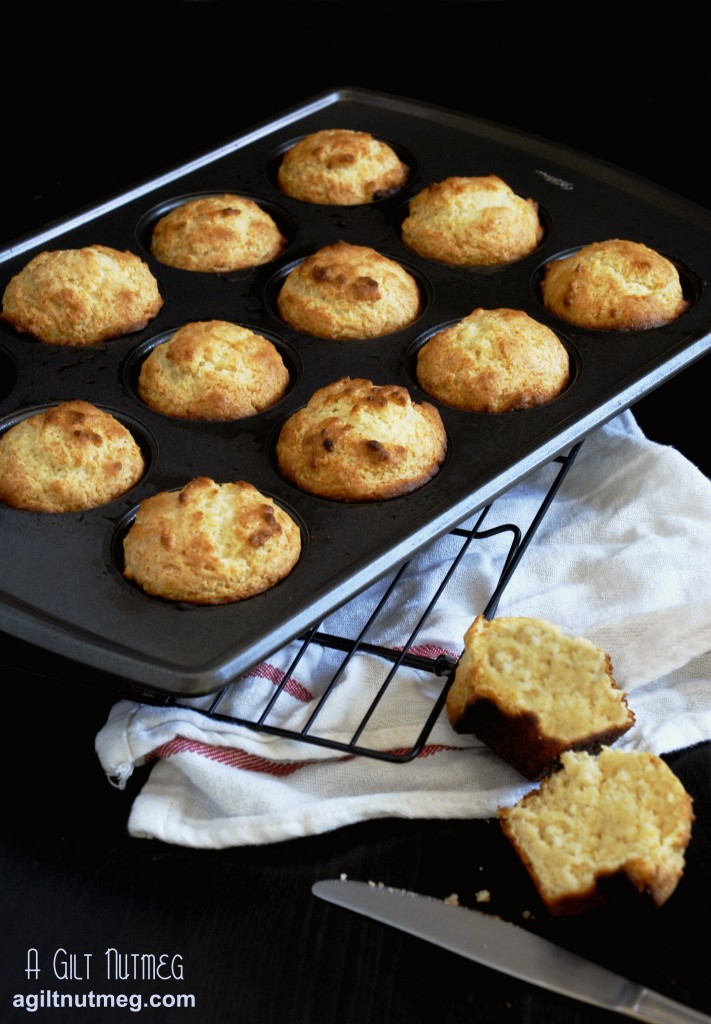
honey muffins

There’s nothing better than waking up to the smell of fresh baked muffins.  While most muffins have that wonderful warm, bready-cakey scent, these particular muffins are even more wonderful because the scent of sweet honey will linger throughout your house as well.

They’re a snap to whip up for a quick breakfast and make for a great muffin to grab on the way out the door.  I left them in a bowl on the kitchen table and every day would come home to find one or two missing, as The Boyfriend and The Roommate kept snatching them to eat on the way to work!

Honey Muffins
Yields 12 muffins
From Taste of Home

  • 2 cups all-purpose flour
  • 1/2 cup sugar
  • 3 teaspoons baking powder
  • 1/2 teaspoon salt
  • 1 egg
  • 1 cup milk
  • 1/4 cup butter, melted
  • 1/4 cup honey
  1. Heat oven to 400 degrees.  Grease a muffin pan or line it with cupcake papers.
  2. In a large bowl, stir together the flour, sugar, baking powder and salt until thoroughly combined.
  3. In a separate bowl, stir together the egg, milk, butter and honey until thoroughly combined.
  4. Add the wet ingredients into the dry ingredients and stir just until you don’t see any streaks of dry ingredients anymore.
  5. Divide the batter evenly amongst the 12 muffin cups in the prepared pan and bake for about 15 minutes, until an inserted toothpick comes out clean.
  6. Serve warm with butter and enjoy!

Spinach & Prosciutto Stuffed Twice-Baked Sweet Potatoes

Friday, April 27, 2012

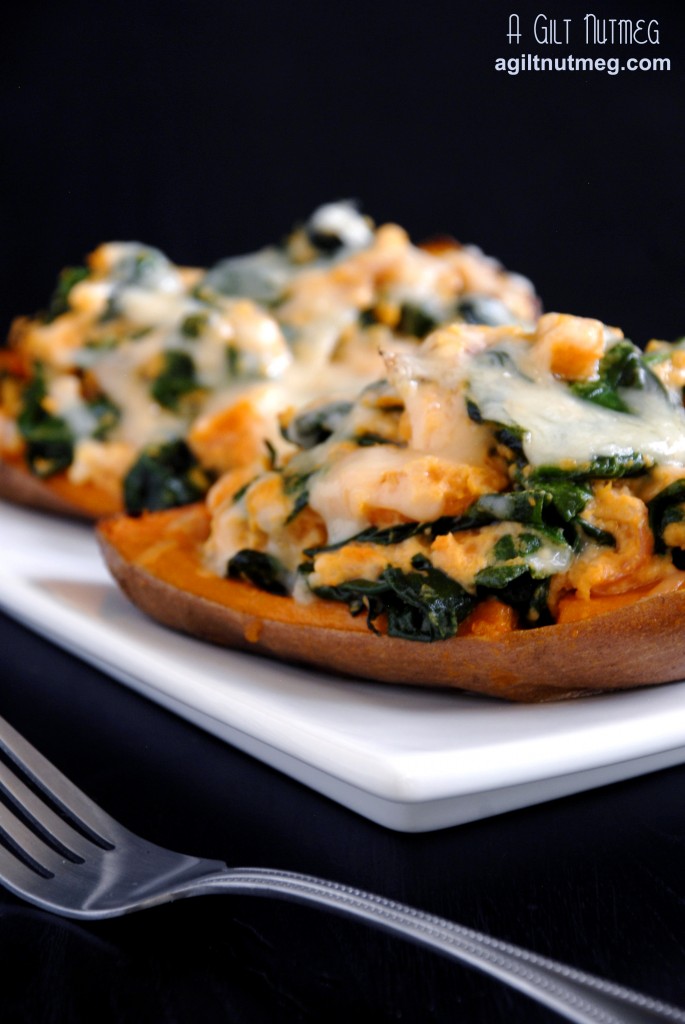
spinach twice baked sweet potatoes

In the latest issue of Bon Appetit, they have a little blurb about getting the most out of your food; it turns out our bodies need help in absorbing certain nutrients.  The easiest example is Vitamin D and Calcium: our bodies need vitamin D to be present in order to better absorb calcium, which is why milk is now usually fortified with vitamin D.  Simple! Right?  Clearly, I was fascinated with this article and started wondering how I could incorporate this new found knowledge into my everyday diet so I got started right away with the energy-boosting Vitamin C and Iron combo.  Vitamin C is the helper here and an increased amount of iron will help raise energy levels, so I started hunting for recipes that might fit the bill.

I’ve had this recipe from Pinch of Yum saved for quite a while and I used it as a base to create my own stuffed twice-baked sweet potatoes.  All I can say is…these potatoes are delicious!  You hardly remember that you’re eating healthily and you feel great afterwards.  I tried to make a few healthy switches (greek yogurt instead of sour cream, a little bit of homemade ricotta instead of cream cheese) and some additions (prosciutto is also high in iron and adds some salty crunch), but the base still stands: sweet potatoes, which are high in vitamin C and spinach, which is high in iron.  After just one of these potatoes each, my dinner guest and I were stuffed and couldn’t eat any more.  Even better, they heat up beautifully, so these are some leftovers you’ll be happy to eat.

Spinach & Prosciutto Stuffed Twice-Baked Sweet Potatoes
Adapted/Inspired by Pinch of Yum
Serves 4

**See notes below

  • 2 large sweet potatoes (I tried to find some that when cut in half would make good boats that would stand up on their own)
  • 2 tablespoons butter
  • 1 shallot, minced
  • 3 slices of prosciutto
  • 1 bag of fresh baby spinach
  • 1/4 cup plain Greek yogurt
  • 2 tablespoons creamy homemade ricotta (or substitute cream cheese)
  • approx 1/4 cup shredded Gruyere (I used Trader Joes’ Cheddar & Gruyere Mélange)
  1. Bake the sweet potatoes in a 350 oven for 1 hour or until soft when poked with a fork.  When the potatoes are done, set them aside to cool for 10 minutes or so before slicing in half, lengthwise.
  2. Leave the oven on 350 degrees after you take out the potatoes and lay the three slices of prosciutto on a baking sheet covered in aluminum foil.  Bake for 5 minutes, flip the prosciutto slices and bake for 5 minutes longer.  Leave the oven on again and set the prosciutto aside.
  3. In the meantime, melt the butter in a large pan and saute the shallot until soft.  (The shallots were still a little too pronounced in “oniony” flavor for me, so next time I’ll let them go much longer and caramelize them a bit instead.)
  4. When the shallots are soft, turn the heat off under then pan and dump the bag of spinach into the pan, stirring slowly as the spinach leaves wilt.  You don’t want them turned to mush, just darkened and a little softened-the residual heat from the pan should be enough to accomplish this.
  5. Once the potatoes have cooled a bit, slice them in half length wise and gently scoop out the insides of the potato, leaving a 1/2″ or more of potato in the skin, to keep the skin sturdy.  Brush the skins with some olive oil and put them in the oven for 10 minutes.
  6. While those are baking, in a large bowl, mix together the insides of the sweet potatoes, the yogurt, ricotta, spinach-shallot mixture and then rip the prosciutto into small pieces into the bowl and mix until well combined.
  7. Take the potato skins out of the oven, divide the filling from the bowl evenly into the skins, then sprinkle the cheese over the tops of the filling and bake for another 10 minutes until the filling is heated and the cheese melted.  Enjoy!

**Cooking Notes: I went to my local Italian deli for some suggestions about what sort of meat to add instead of bacon, which I felt was too strongly flavored.  Sadly, they weren’t much help, but when I decided on prosciutto, the guy tried to give me thick slices “for baking”-he clearly didn’t understand what I was aiming for!  I whispered to the person cutting it to go ahead and slice it thin like they would for sandwiches so that it would turn out nice and crispy.

Also, this recipe is for 2 potatoes, which make 4 servings (one half potato each).  The thing about sweet potatoes, however, is that, unlike white potatoes, the skin often cleanly separates from the potato, which makes carving out a sturdy little boat very difficult.  Anticipating this, I roasted three potatoes and picked out the 4 halves that didn’t separate and saved the other 2 to eat later.

Homemade Ricotta

Wednesday, April 25, 2012

There are a couple of things that make this post unbelievable.  The first is that I made cheese, a task I always thought best left to the professionals.  The second is that I made ricotta cheese and the third is that I actually liked it.  I’ve always shunned things like stuffed pasta shells and traditional lasagna because ricotta cheese is grainy and dry, but this ricotta….this is rich and dense yet somehow light at the same time, and I’m pretty sure there will be tears when this batch is gone.

All of the credit must go to SmittenKitchen, who did all the cheese-making research and figured out how to make this incredible ricotta.  And, really, it can’t get more simple to make in your own kitchen than this: heat milk in a pot, add lemon juice, leave it in a strainer, done.  Seriously, that’s it!  The only thing stopping me (aside from not realizing how simple it was) was that I never remembered to see if my grocery store had cheesecloth.  Once I stumbled across it, cheese making was on.  This is definitely one recipe NOT to be scared to make.

The last part of this post is a very very long overdue mention regarding one of the greatest food gifts I have ever received.  Last year at the International Food Bloggers Conference in Santa Monica, I was seated at dinner next to Ms. Lamamié from the Trade Commission of Spain.  She brought with her olive oil and there was a different bottle on every dinner table in the room.  I’m normally a bread-and-butter kind of gal, but she encouraged our table to try the olive oil and I don’t think I once glanced at the butter dish again for the rest of the evening.  When dinner was done, and admittedly after a glass of wine or two, I asked Ms. Lamamié if I might be able to take that bottle of olive oil home, which she graciously allowed me to do.  The olive oil was Marques De Grinon Extra Virgin Olive Oil and I have never looked back.  I have a bottle of cheaper olive oil when I just want to fry something up, when the flavor is going to be hidden, but whenever the flavor of olive oil needs to shine, like drizzling it over this ricotta, I always pull the Marques De Grinon down from off the shelf.  I thought olive oil all tasted the same, but in fact olive oils differ just like wines differ.  This olive oil is fruity and spicy in a way I never knew olive oil could be and now I truly believe it’s well worth the money to splurge on a bottle!  Ms. Lamamié warned me that you should not let olive oil sit for too long, that it does not behave like wine and deteriorates over time; you should finish a bottle in 3-6 months for the best flavor, if I remember correctly, but I just can’t bring myself to speed through this bottle and I plan to continue savoring it until the last drop (and it still tastes great).  Thank you, again, Spain, for giving me such a wonderful, eye-opening addition to my kitchen!

Homemade Ricotta Cheese
Recipe from SmittenKitchen
Makes about 1 cup

  • 3 cups whole milk
  • 1 cup heavy cream
  • 1/2 teaspoon coarse sea salt
  • 3 tablespoons freshly squeezed lemon juice
  1. In a medium stainless steel (or other nonreactive) saucepan, heat the milk, cream and salt to 190 degrees Fahrenheit, stirring it every once in a while.  My pots have a small lip on them which makes it difficult to clip a thermometer to the side, so I have to attach it with a twist of aluminum foil hooked onto the handle of the pot.
  2. Once the milk hits 190 degrees, turn off the burner and add the lemon juice, stirring only once to distribute the juice, then leave the pot sitting undisturbed for 5 minutes.
  3. While the pot is sitting, line a sieve with 3 pieces of cheesecloth and set it over a large bowl.
  4. Pour the milk mixture slowly into the prepared sieve and set the bowl aside for two hours.  This is separating the curds (the cheese) and the whey (the water dripping into the bowl).
  5. After the wait time is up, gather the edges of the cheesecloth and very gently squeeze a little bit more of the liquid out (but don’t squeeze too hard-we want some of the liquid in there to keep it creamy) and transfer to the fridge in an airtight container.  You could eat it immediately, but it will firm up almost to the consistency of cream cheese after sitting in the fridge for a little while, which I loved.
  6. SmittenKitchen’s lasts only 2-3 days in the fridge, but mine is going on over a week and still smells and tastes great, so it seems to come down to the types of milk you use-use your best “is this still good” judgement before eating.  Serve on toasted baguettes with olive oil and sea salt, or use in recipes calling for ricotta, and enjoy!


Disclaimer:  The bottle of Marques De Grinon Extra Virgin Olive Oil was given to me, free of charge, by a representative of The Trade Commission of Spain and Olive Oil from Spain, however, the opinions expressed here are my own.
 

Oatmeal Crisps

Monday, April 23, 2012

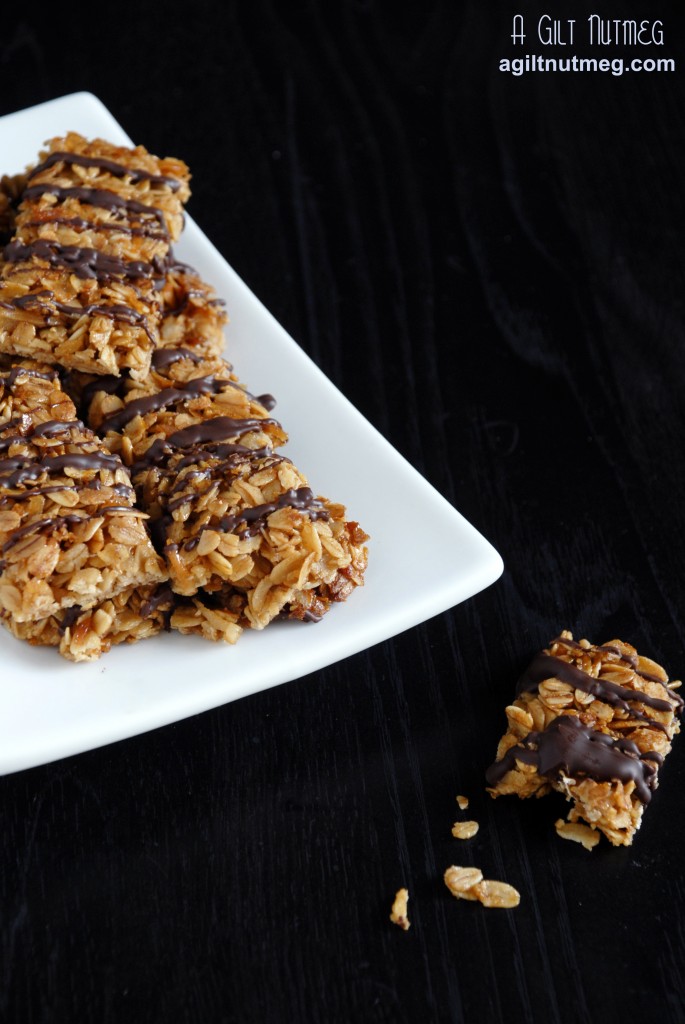
oatmeal crisps

Considering Oatmeal Raisin Cookies are one of my favorite cookies of all time, I had a suspicion that these crisps from The Pastry Queen might be particularly up my alley-and I was right!  These are deliciously oaty and brown sugary and (thanks to the incorrect assumption that I had corn syrup at home) full of honey flavor.  These remind me of my favorite crunchy granola bars and, truthfully, I don’t think these even need chocolate on top, which is why I just drizzled it on instead of making one thick layer of it-and when I make them again I won’t even add the chocolate.  I can’t wait to make another batch just to crumble over yogurt or ice cream!

Thanks to Missy for choosing this week’s recipe and check out the other PPQ members versions here!

Oatmeal Crisps
Yields one 9×13″ pan
Adapted from The Pastry Queen

  •  1/2 cup unsalted butter
  • 1/2 cup firmly packed dark brown sugar
  • 1 Tablespoon honey
  • 2 cups old-fashioned rolled oats
  • 1 teaspoon baking powder
  • 1/4 teaspoon salt
  • 1/3 cup sweetened shredded coconut
  • 1/2 cup bittersweet chocolate chips (optional)
  1. Heat the oven to 350 degrees and grease a 9×13″ glass baking dish.
  2. In a small saucepan, melt the butter and stir in the brown sugar and honey until the mixture is smooth, about 2 minutes and turn off the heat.
  3. With a wooden spoon in a large bowl, stir together the oats, baking powder, salt and coconut; stir in the butter mixture until the dry ingredients are fully coated in the liquid ingredients.
  4. Pour the mixture into the prepared dish and, with the back of the wooden spoon, pat the mixture into a flat, even layer in the dish.
  5. Bake for 20-25 minutes and take the dish out to cool on a wire rack for 20 minutes.  When you pull the dish out, the mixture will still be liquid, but it will harden and crisp as it cools.
  6. After cooling for 2o minutes, line a cutting board with wax paper or parchment paper.  Lay the cutting board over the top of your glass dish (papered side facing the cooled oatmeal mixture), then flip the pan over so that the oatmeal mixture lays flat on the papered cutting board.  With a sharp knife or pizza cutter, gently cut the oatmeal slab into bars.  The bars will be fragile and will stretch a little bit; just push them back into shape with your fingers.  If you are planning on drizzling chocolate over the bars, leave them on the parchment paper while you melt the chocolate.
  7. If you choose to drizzle chocolate over the bars, set a large pot of water simmering and in a metal bowl placed over the pot of simmering water, melt the chocolate chips.  Once the chocolate is melted, drizzle it in a thin stream back and forth over the bars.  Let the chocolate cool and harden completely.
  8. My only warning is that humidity will turn these bars soft, but they will still be delicious.  Store them in an air-tight container until you’re ready to eat.  Enjoy!


Lemon Sugar Dutch Baby

Friday, April 20, 2012

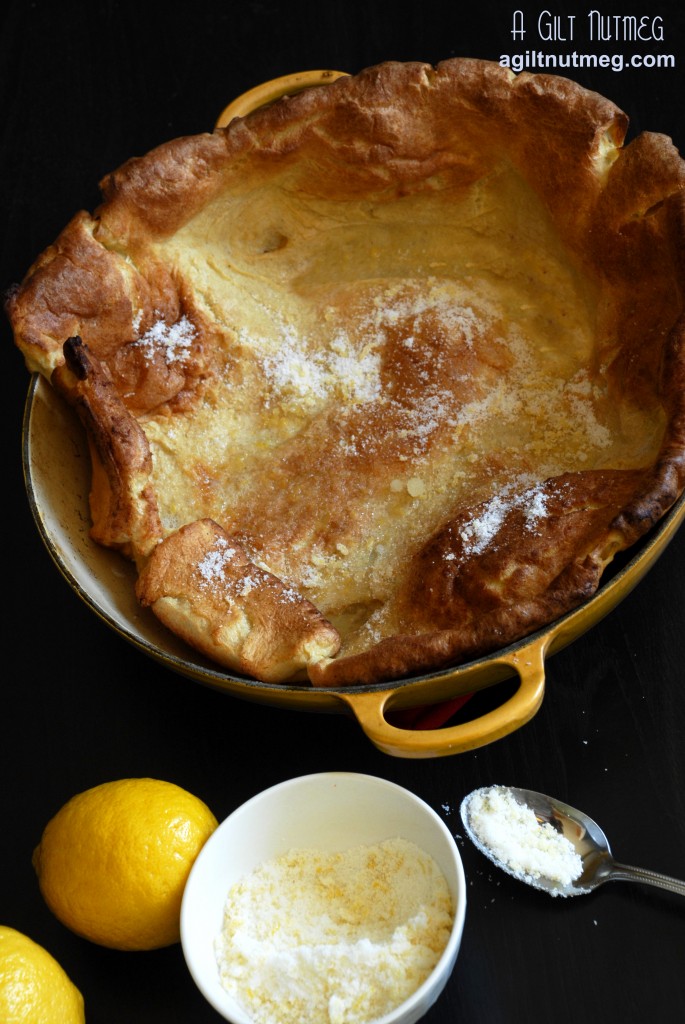
lemon sugar dutchbaby

 A few weeks ago, my roommate told me her favorite brunch food was a Dutch Baby.  Knockawhat??  I did a double take and asked her to repeat what she just said.  I then took to the internet to make sure she wasn’t importing small children from the Netherlands to eat and instead discovered what is now one of my all time favorite breakfast/brunch items to make because a) it’s incredibly easy and b) it’s also pretty much one of the most impressive things you could possibly put on a table in front of guests, not to mention one of the most tasty.

To put it in simplest terms, a Dutch Baby is a cross between a pancake and a popover.  It’s the size of a very large pancake but it’s eggy and puffy from steam in the batter just like a popover.  The difference is that in this case the batter is sweetened or spiced and instead of serving it with Sunday Pot Roast, it’s sprinkled with sugar and spritzed with fresh lemon juice.

The reason we were even discussing Dutch Babies in the first place was because my roommate was complaining that they were hard to come by in restaurants.  I promised her I would make one for her soon and last weekend we all gathered on the floor around the coffee table and had our first Apartment 5 Dutch Baby.  Like I said, it was so easy and so deliciously sweet and tart that I’m sure it won’t be long before another one graces our brunch table-and I’ll be counting down the days until it does.

Lemon Sugar Dutch Baby
Adapted from Gourmet
Serves 4

  • 3 large eggs that have been sitting at room temperature for 30 minutes
  • 2/3 cup whole milk at room temperature
  • 2/3 cup flour
  • 1/4 teaspoon vanilla extract
  • 1/8 teaspoon cinnamon
  • 1/8 teaspoon nutmeg
  • 1/8 teaspoon coarse salt
  • 1/2 stick unsalted butter, cut into 4 pieces
  • 1/3 cup sugar
  • 2 teaspoons grated lemon zest
  1. Find a 10″ cast iron or oven proof skillet, place it on the middle rack in your oven, and heat oven to 450 degrees (start this step early because you want the skillet to be very hot and the batter takes no time to throw together).
  2. Beat the eggs on high speed for a few minutes until pale and frothy.
  3. Add the milk, flour, vanilla, cinnamon, nutmeg and salt and keep beating for another minute, until the ingredients are smooth and fully incorporated.
  4. Using heavy duty oven mitts, pull the skillet out of the oven (close the oven door), and put it down on the stove or somewhere else heatproof.  Toss the pieces of butter into the skillet and swirl the skillet around so that it is fully coated as the butter melts.
  5. Once the butter is fully melted, pour the batter in and immediately pop the skillet back into the oven.
  6. Bake for about 20 minutes; it should look puffy and evenly golden brown around the edges when it’s done.
  7. While it’s in the oven baking, stir together the sugar and lemon zest in a small bowl and set aside.
  8. Once the Dutch Baby is done, pull it out of the oven, sprinkle a few spoonfuls of lemon sugar over it and serve immediately while still warm.  Serve with lemon wedges to squeeze over the slices of Dutch Baby and the extra lemon sugar for those who need a little more sweetness.  Enjoy!

Vanilla Coconut Rice Pudding

Wednesday, April 18, 2012

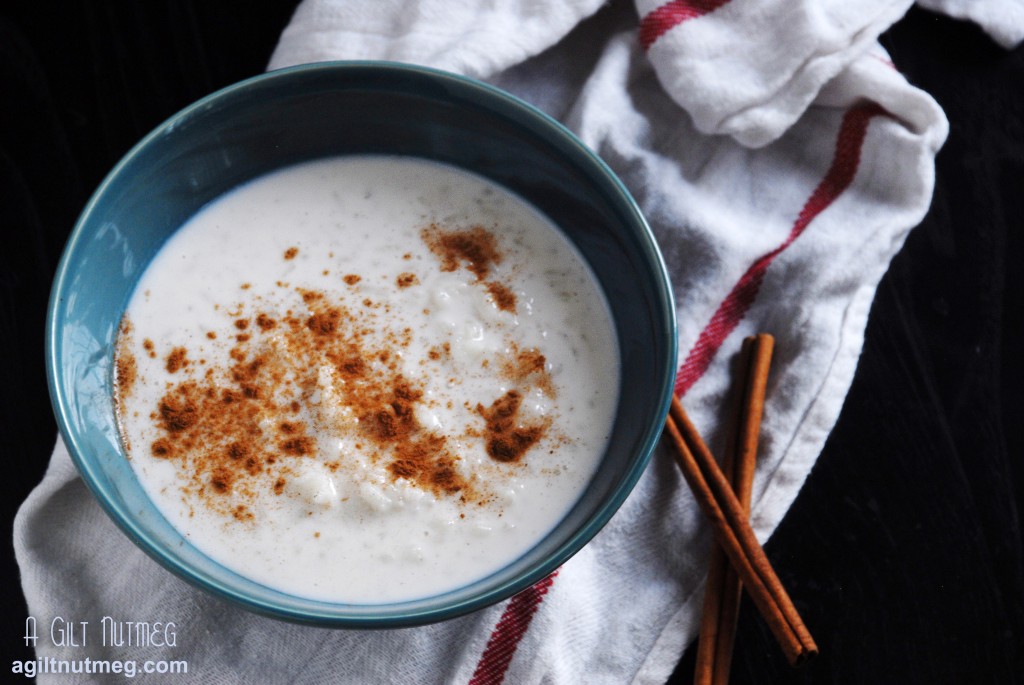
coconut rice pudding

When my sister started eating rice pudding, I was thoroughly grossed out; I couldn’t think of anything that looked more unappetizing, except maybe tapioca.  Then, a few years ago, my favorite Indian restaurant in all of Los Angeles (Anarkali, on Melrose, for those locals reading) set a little dish of rice pudding in front of me as a little complimentary sweet to end the meal with and my whole view on rice pudding changed.

Looking back, I can’t imagine why I would be turned off by a recipe that centers on my favorite spices and now rice pudding is by far one of my favorite desserts.  Dare I say, ice cream doesn’t even hold a candle to rice pudding for the cold, sweet, creamy comfort it provides.

This recipe is a little different from the normal rice pudding in that instead of using only milk, it also uses coconut milk for flavor.  It adds a gentle coconut flavor that pairs well with the vanilla bean but isn’t overwhelmingly “coconutty”, if you catch my drift.  Sprinkle with cinnamon for an additional twist of flavor and you may find yourself eating this for breakfast like I did because I just couldn’t wait until dessert later in the day!

Vanilla Coconut Rice Pudding
Adapted from Vanilla Garlic
Makes about 4 cups

  • 1 1/2 cups cooked cold Arborio rice (or 3/4 cup uncooked Arborio rice + 1 cup water)
  • 1 can (15 oz) light coconut milk
  • 2 cups whole milk
  • 1/3 cup sugar
  • pinch of salt
  • 1 vanilla bean, seeds scraped out for use, or 1 Tablespoon vanilla bean paste
  1. If you don’t have cooked rice lying around, which I didn’t, in a saucepan bring the water and rice to a boil, turn the heat to low and let it simmer for a few minutes, stirring until the water is completely absorbed.  The rice should be al dente-slightly crunchy in the middle, which will give your rice pudding more texture later.  Move the rice to a bowl and put in the fridge (or if you’re in a hurry like me, in the freezer) until it cools down.
  2. Combine the rice, coconut milk, whole milk, sugar, salt and vanilla in a large saucepan and cook, uncovered, on low-medium heat for 40 minutes.  If you want it a little thicker, cook the mixture for a bit longer.
  3. Let the mixture cool to almost room temperature (so you don’t heat up your fridge too much), then move to the refrigerator to finish chilling.  Serve cold with a sprinkle of cinnamon and enjoy!


Peanut Buttercups with Peanut-Penuche Icing

Monday, April 16, 2012

peanut butter chocolate cupcakes

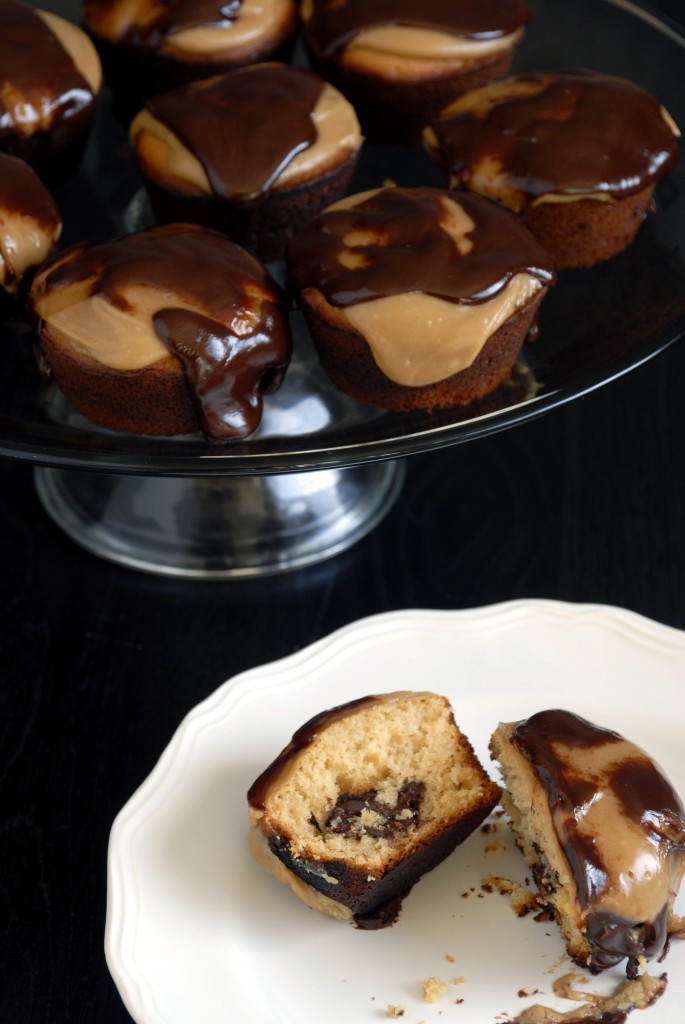
While peanut butter cupcakes aren’t my favorite, I knew these would be a hit for our April birthdays celebration, so I made Jen‘s PPQ choice as well as next week’s PPQ Oatmeal Crisps to bring into the office.  Good for any sort of celebration, these cupcakes are sort of like an inside-out Reese’s Peanut Butter Cup with the peanut butter on the outside and a pocket of chocolate on the inside.  They’re topped with a peanut butter penuche icing-a term I had not known before Pastry Queen and, subsequently, Wikipedia, which says it is a “fudge-like candy made from butter, brown sugar and milk”.  Rebecca added peanut butter for flavor and I thought the rich, gooey topping was a nice change from the normal whipped buttercream frosting.  To balance out the peanut-butter-on-top-of-peanut-butter overdose, I added some bittersweet chocolate ganache on top.  You can see that the chocolate sort of separated as it ran down the sides of the cupcakes, but it still adds that little break from the peanut butter I think is necessary.  Be sure to check out Project Pastry Queen for the other members’ takes on the recipes.

Aside from adding the ganache on top, I also made these in normal cupcake tins as opposed to the “Texas-sized muffin tins” Rebecca suggests.  Other PPQ members warned against over filling the muffin tins and I concur with this advice-I filled the cups just halfway, inserted the chocolate pieces, then dabbed just enough batter over the chocolate to cover it.  The cupcakes baked up beautifully.  In addition, the batter made enough for 20 normal-sized cupcakes, not the suggested 12.

Peanut Buttercups with Peanut-Penuche Icing
Adapted from The Pastry Queen
Yields about 20 standard size cupcakes

Cupcakes

  • 1 3/4 cups flour
  • 1 Tablespoon baking powder
  • 1/4 teaspoon salt
  • 1 1/4 cups firmly packed dark brown sugar
  • 6 tablespoons unsalted butter at room temperature
  • 1/3 cup peanut butter (smooth or chunky will do)
  • 1 cup milk
  • 1 teaspoon vanilla extract
  • 2 eggs
  • 1 bar bittersweet chocolate (4 oz), broken into 20 equal-ish pieces

Penuche Icing

  • 1/4 cup unsalted butter
  • 1/4 cup smooth peanut butter
  • 1/4 cup milk
  • 1 cup firmly packed dark brown sugar
  • 1/8 teaspoon salt
  • 1 teaspoon vanilla extract
  • 1/2 cup powdered sugar

Chocolate Ganache

  • 1 bar bittersweet chocolate (4 oz), chopped
  • 1/2 cup heavy cream
  • 2 tablespoons corn syrup
  1. Heat the oven to 350 degrees and lightly coat two cupcake tins with non-stick baking spray or cupcake paper cups.
  2. In a large bowl, mix the flour, baking powder, salt and sugar until well combined.
  3. Add the butter, peanut butter, milk and vanilla, beating until thoroughly combined, about 1 minute.
  4. Add the eggs and beat for another few minutes on medium speed until the eggs are fully incorporated.
  5. Fill 20 of the cupcake cups halfway to the top and insert a piece of chocolate into each cup.  Dab a spoonful of batter on top of each chocolate piece to cover it-you should have just barely enough batter to complete this.
  6. Bake for 30-35 minutes until the tops are light brown and an inserted toothpick comes out clean, except for melted chocolate from the center.  While the cupcakes are baking, start making the frosting, since you’ll need to let it rest for a while.
  7. In a medium saucepan, melt together the butter, milk, brown sugar and salt.  Bring the mixture to a low boil and, without stirring once, let it boil slowly for 1 1/2 minutes.  Turn the heat off and let the mixture cool for 30 minutes at the most.
  8. Cool the muffins for 10 minutes before taking them out of the pan, then let them cool on a wire rack before frosting.
  9. Add the vanilla and powdered sugar to the cooled frosting and beat it for about 1 minute on medium speed until the icing is creamy.
  10. Frost the cupcakes right away or else the peanut butter icing gets clumpy.
  11. Once you’ve got those iced and the icing is setting, heat the heavy cream until almost boiling, then pour it over the chopped chocolate, whisking until you’ve got a smooth ganache.  Pour a spoonful of ganache over each cupcake and enjoy!

Caramelized Shallot and Crispy Sage Macaroni and Cheese

Friday, April 13, 2012

caramelized shallot and crispy sage macaroni and cheese

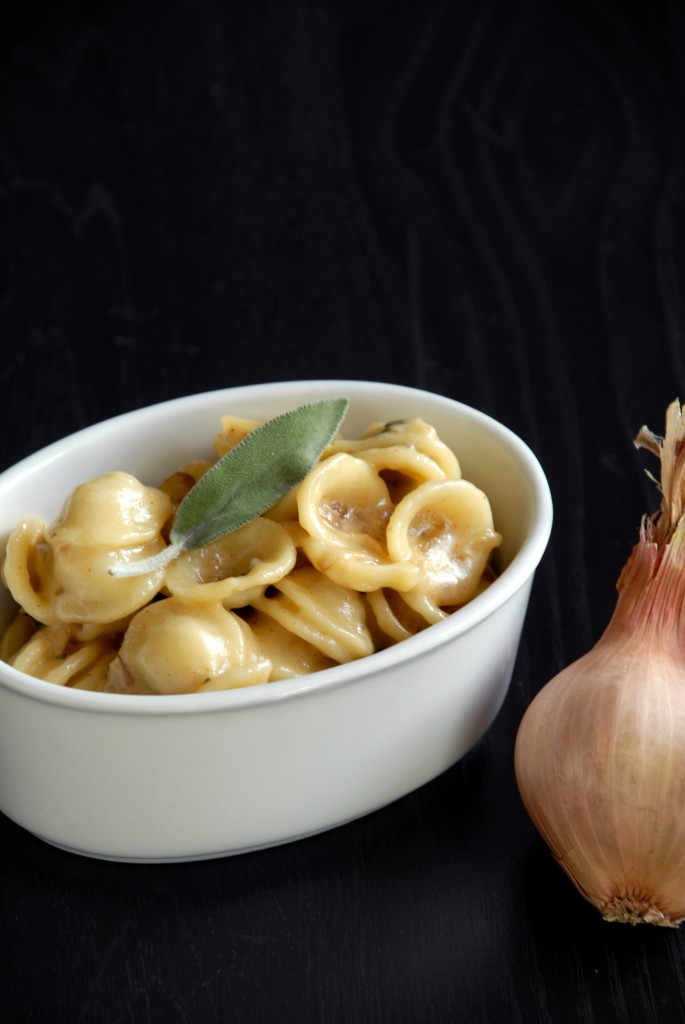
Attention Readers- The following words just came out of The Boyfriend’s mouth: “This is the best mac and cheese you’ve ever made“.  Yes, I’m telling the truth and, what’s more, I agree with him.  For years now I have been on a never ending quest for a homemade macaroni and cheese that I actually like and had yet to be satisfied until this recipe.  I’m sure my poor father’s heart has been broken many a time over the years because he loves homemade macaroni and cheese whereas I just never could get over the boxed kind.  Luckily, I can tell you exactly why I don’t like homemade mac and cheese: cheddar cheese melts grainy.  That’s it!  I want my mac and cheese to be smooth and creamy, not grainy and stringy.  My solution was discovered by wandering the Trader Joe’s cheese section for some gruyere for this recipe when I stumbled across Trader Joe’s Cheddar & Gruyere Melange.  It melts like gruyere but tastes like cheddar and with this one cheese all of my mac and cheese problems were solved!  Now add to this some sweet caramelized shallots and crisped up sage (The Boyfriend’s absolute favorite) and you’ve got yourself a near perfect mac and cheese dinner.  The only negative?  It does dirty up a whoooole lot of pots and pans, so only make this if you’re prepared for the clean up later.

Caramelized Shallot and Crispy Sage Macaroni and Cheese
Adapted from Cake, Batter & Bowl
Makes 2 entree servings, double if making for a family or if you want leftovers

  • 1/2 pound orecchiette pasta
  • 1 Tablespoon olive oil
  • 1 cup finely chopped shallots
  • 1/2 Tablespoon sugar
  • 1 clove garlic, minced
  • 2 Tablespoons butter + 1 Tablespoon butter, seperated
  • 2 Tablespoons all-purpose flour
  • 3/4 cup buttermilk
  • 1/2 cup heavy cream
  • 2 cups shredded Trader Joe’s Cheddar & Gruyere Melange (or 1 cup shredded Sharp Cheddar + 1 cup shredded Gruyere)
  • 1/2 teaspoon salt
  • 1/8 teaspoon nutmeg
  • 1/8 teaspoon cayenne
  • 1/4 cup chopped fresh sage
  1. In a saute pan, heat the olive oil on medium heat; add the shallots and sugar, stirring frequently for 18 minutes until shallots are very soft and completely golden brown throughout.  Add the garlic, stir for another minute, then set the pan aside for later use.
  2. In the meantime, bring a pot of water to boil and toss a little salt and olive oil into the water; cook the pasta until al dente, then drain and set aside.
  3. In a third pot (medium sized), melt the 2 tablespoons of butter and whisk the flour in.  Keep whisking until the flour-butter mixture turns golden brown, about one minute. (This is called a roux and the darker your roux the more nutty the flavor of your final dish will be.)
  4. Whisk the buttermilk and cream into the flour-butter mixture and bring the pot to a boil. (Adding milk to a roux makes it a bechamel sauce; look at all the French this recipe teaches you!)  Once it reaches boiling, lower the heat and stir in the shredded cheese(s).  Once melted and smooth, stir the salt, nutmeg and cayenne into the cheese sauce.
  5. In a small pan, melt the last tablespoon of butter.  Once melted and hot, drop the chopped sage in, let it sizzle for 30 seconds or so, then turn off the heat.
  6. Combine pasta, cheese sauce, shallots and sage in a large bowl and mix until pasta is thoroughly coated and shallots and sage are evenly distributed.  Enjoy!

Salmon Croquettes

Wednesday, April 11, 2012

salmon croquettes

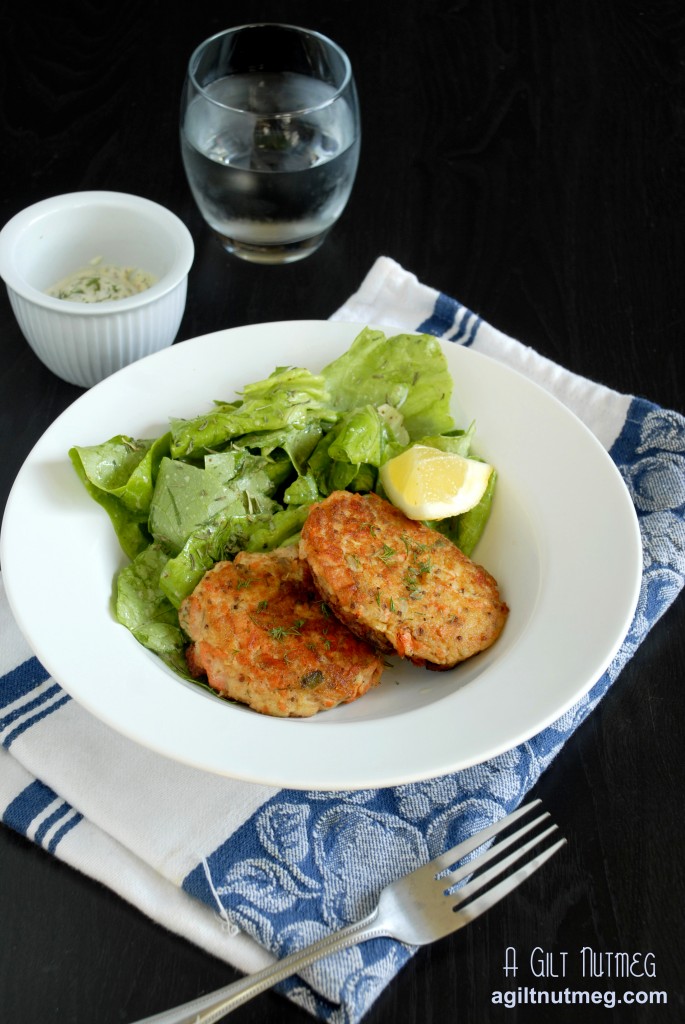
When I am making salmon for dinner, my favorite side dish to serve with it is whipped potatoes.  To me, nothing beats the soft, buttery potatoes in contrast to the flavorful, flaky fish-pair it with a simple salad and I’m in fish heaven.  While I love salmon, I’ve never been a huge fan of salmon croquettes because the binders (crackers, bread crumbs) were overbearing in flavor or unappealing in texture; the fish just always seemed to get lost.  Imagine my delight when I found this recipe for salmon croquettes that used mashed potatoes as a binder!

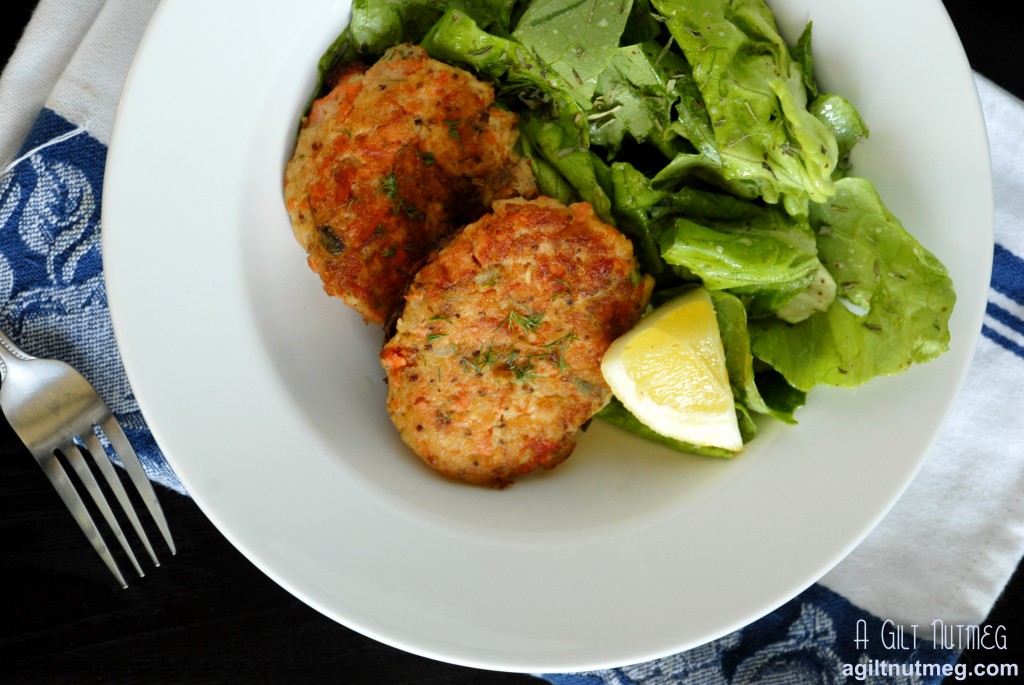
The texture is certainly a bit more delicate than your average croquette, but these croquettes put me right up there in fish heaven again and I’m so glad I’ve found this recipe.  Instead of an overwhelming breadcrumb flavor and texture, you get those wonderful mashed potatoes and flaky salmon mixed in with fresh dill, lemon zest, and scallions.  Even better, there’s a dill Dijon mayonnaise that pairs with it and, long story short, I will be happily eating these for days to come.  For those big eaters out there, I know the above picture looks like a pretty light meal, but these are surprisingly filling!


salmon croquettes


Pan Fried Salmon Croquettes
Adapted from Bon Appetit
Makes 12 medium sized cakes

  • 1/2 cup mayonnaise
  • 2 Tablespoons Dijon mustard
  • 3/4 pound salmon fillet, preferably sockeye
  • olive oil for brushing
  • 1 1/2 lbs russet potatoes, diced
  • 1 teaspoon kosher salt
  • 1 egg + 1 egg yolk, lightly beaten
  • 2 tablespoons chopped fresh dill (my secret: instead of chopping with a knife, I just use scissors and cut it over the bowl)
  • 2 scallions, thinly sliced
  • lemon zest from 1 large lemon
  • 1/2 teaspoon cayenne pepper
  • 1/2 teaspoon paprika
  • black pepper to taste
  • vegetable oil for frying
  1. Combine the mustard and mayonnaise in a small bowl.  Measure out 1/3 cup of the mixture for the croquettes and refrigerate the rest for later.
  2. Brush the fish with olive oil and bake in a 400 degree oven for about 12 minutes.  Set it aside to cool and in the meantime…
  3. Cover the diced potatoes with water, sprinkle some salt in, and boil until tender.  Drain the potatoes and let cool; mash them or use a stick blender until smooth.  (When I used the stick blender they got a little sticky and gummy, but I figured this was fine considering they were being used as fish glue).
  4. Remove the skin and any bones from the fish, move it to a medium bowl and using two forks, flake it into large pieces.
  5. In a large bowl, combine the mashed potatoes, salt, egg, dill, scallions, lemon zest, cayenne pepper, paprika and black pepper.
  6. Fold the Dijon mayonnaise mixture and salmon into the mashed potatoes mixture until thoroughly combined.
  7. Line a baking sheet with parchment paper or waxed paper.  Spoon (I used an ice cream scoop and it worked perfectly) the mixture into 12 even portions onto the prepared baking sheet, cover loosely with plastic wrap and put the sheet into the fridge.  You want to leave them in the fridge for at least an hour; I fried up a few for dinner that night and left the rest in the fridge overnight and they were great for dinner the next night, so prepping all of this the night before will mean a super fast dinner the next night.
  8. Heat a few tablespoons of vegetable oil in a large pan and add 3-4 cakes, flattening or shaping them into rounds as necessary (err on the side of more oil rather than less, as I found that the cakes stuck to the pan a bit when I used less oil).  Fry until golden brown on each side, about 3 minutes on each side.  I put the lid on the pan while I waited, to cut down on grease splatter and ensure that the cakes were hot enough to fully cook through.
  9. When ready to serve, add about a Tablespoon of lemon juice (I just squeeze a quarter of a lemon in that I had lying around) and any left over fresh dill to taste to the Dijon mayo sauce and serve the cakes with a lightly dressed salad.  Enjoy!

Up next to try: freezing the patties for a super quick dinner down the line and seeing how these turn out if I were to bake them instead of fry them.  Trust me, it won’t take long for me to get around to these again!

Coconut Chocolate Pie

Monday, April 9, 2012

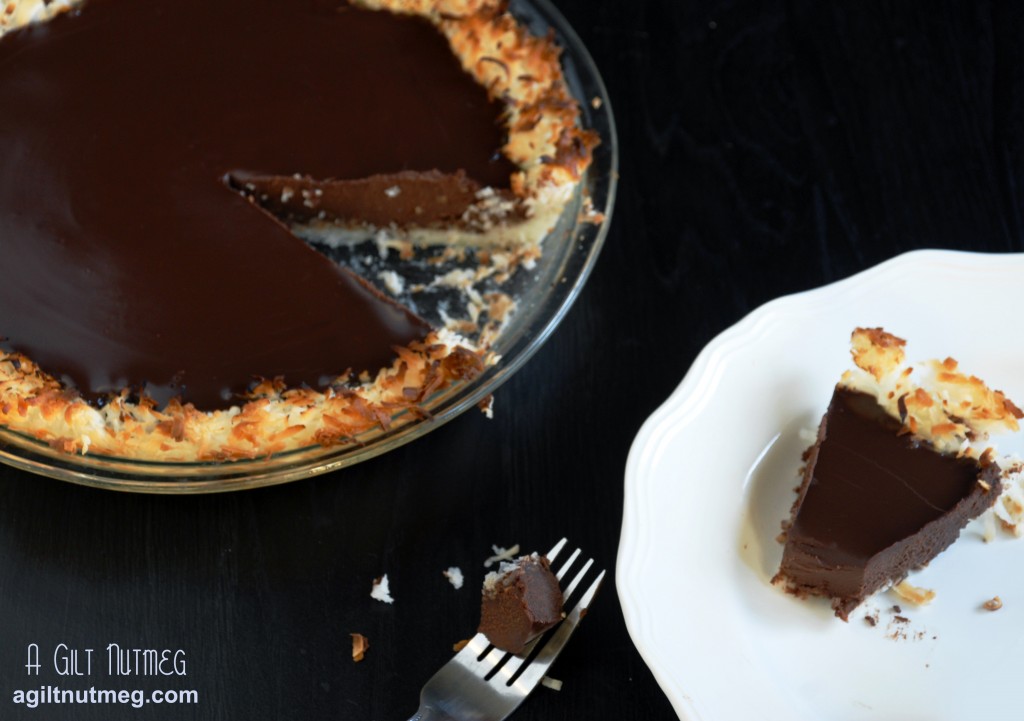
 coconut chocolate pie

It’s still Passover so I’m not too too late with this holiday approved dessert, I think.  Between all of the coconut macaroons and flourless chocolate cakes that come out this time of the year, this combo seemed like an obvious (and delicious) choice-and contrary to many holiday desserts, this one is so incredibly easy I could hardly believe it!  It only has 4 ingredients and takes practically no time to complete the steps, which was a major relief because those Hot Cross Buns put a temporary curse on my kitchen.  Nothing was working and after I ruined the lime creme I was making to fill coconut macaroon tart shells, I was sure I was going to have to go back to the grocery store at 10pm (typical me scenario) to get ingredients so that I could produce something (anything) for today’s post.  Then the kitchen fairies came out and, knowing I needed 8 oz of bittersweet chocolate for this recipe (which I already had the coconut for), I found a 4 oz bar of bittersweet chocolate and exactly 4 oz of bittersweet chocolate chips leftover from a previous recipe.

This recipe produces a crisp coconut macaroon “crust” and a creamy dense chocolate filling that will be perfect with a little bit of whipped cream to lighten it up.  While it is appropriate for Passover, since it is has no flour in it and is unleavened, I think this pie will be welcome at anyone’s spring table.  Chag Sameach!

Coconut Chocolate Pie
Adapted from Martha Stewart’s New Pies and Tarts

For the crust

  • 4 tablespoons unsalted butter, softened
  • 1 bag (about 14 oz) of shredded coconut

For the filling

  • 1 cup heavy cream
  • 8 ounces bittersweet chocolate, finely chopped
  1. Heat oven to 350 degrees.
  2. In a food processor, pulse about 1/3 of the coconut and butter together until well combined, 1-2 minutes.
  3. In a medium bowl, combine the coconut-butter mixture with the rest of the coconut and stir well until mixture is cohesive.
  4. Press the coconut into a 9″ pie plate so that it forms a crust and bake for 10-15 minutes.  If the edges start to brown too much, cover them with some tin foil.
  5. Once golden brown, move the crust to a wire cooling rack and let it cool completely before filling with the chocolate (this will allow the crust to crisp up first).
  6. While the crust is cooling, bring the heavy cream to boil in a small saucepan.
  7. Put the chopped chocolate into a medium bowl and pour the boiling cream over it.  Let it sit for a few minutes then whisk until it is smooth and no streaks of cream remain.
  8. Pour the chocolate into the tart shell and let it cool before moving it to the refrigerator to set completely for another hour or so.  Enjoy!