Entries from August 22nd, 2012

Maple-Cider Glazed Bacon

Wednesday, August 22, 2012

maple cider glazed bacon

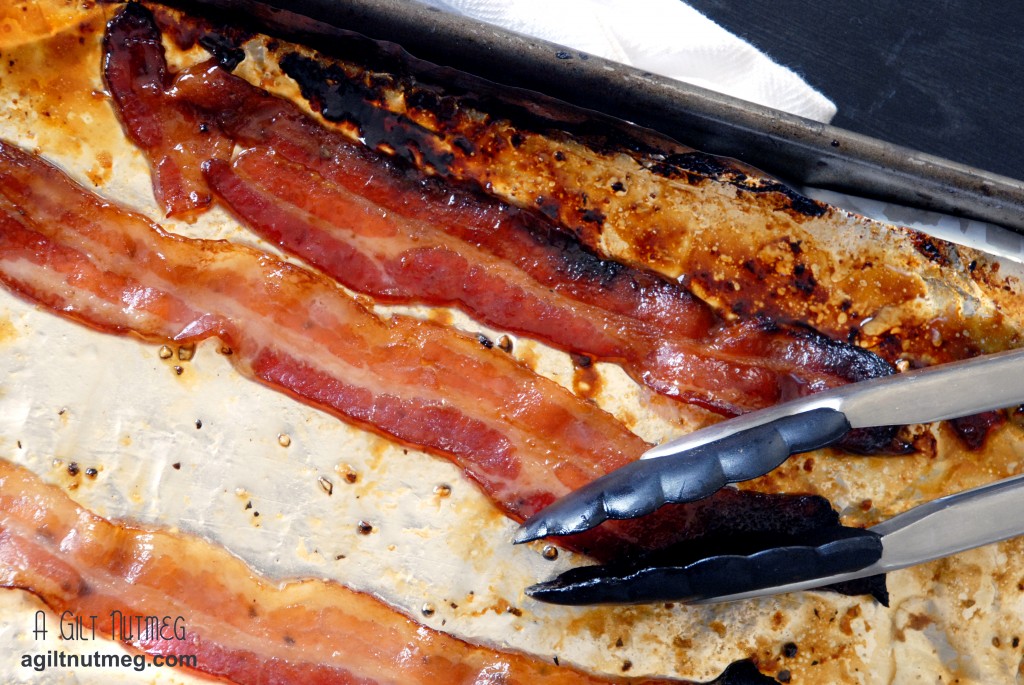
So when I said “I have bacon for you this Friday” I bet you didn’t think I meant “1 1/2 weeks later on a Wednesday”, did you?  Stuff got in the way, but here’s the bacon!  It’s outrageously good, so you should probably just quit whatever you’re doing and head to your oven right now.  Seriously, look at the picture below:
Could there be bacon any more glossy and translucent?  Look at that glaze!  It’s practically shellacked on.  Best of all, this bacon is baked in the oven so you don’t have to think twice about it while you’re still cooking eggs or something.  While not as covered in spices and herbs as other glazed bacon I’ve come across here in LA’s trendy restaurants, this bacon has a sweet/savory finish that is still going to leave you fighting over that last piece.  And, of course, if you want to experiment with all those herbs and spices, go for it!  I bet thyme or some Cajun seasoning would be great!

Maple-Cider Glazed Bacon
Makes 1 package of bacon
Was initially my own creation, but then I found The Spontaneous Hausfrau
already thought of it, so I have to give her credit for helping with ratios

  • 1 cup apple cider
  • 2 Tablespoons maple syrup (try to find the real thing here, not the corn syrup version)
  • 1 package of your favorite bacon
  • salt & pepper
  1. Heat the oven to 450 degrees.
  2. In a small saucepan, boil the apple cider and maple syrup until reduced to about half.  Let it cool slightly as you’re laying out the bacon.
  3. Cover a rimmed baking sheet in tin foil and arrange your bacon in rows on the sheet.  You don’t want them overlapping, but if you want to fit a whole package, you’ll likely have to pack those babies in pretty tightly next to each other.  Personally, I know the bacon is going to be sizzling in its own grease in the oven and I love that thought, but if that’s not your thing, you can arrange the bacon on wire cooling racks on your baking sheet so that the grease drips off as it bakes.  Just know that some of your glaze will drip off too!
  4. Using a basting brush, generously brush about half the glaze over the top of the bacon, then grind salt and pepper over the top of the bacon.
  5. Bake for about 10 minutes until the bacon is sizzling and darkening in color.  Flip the bacon slices and baste with the remaining cider.
  6. Continue baking for another 5-10 minutes until the slices are darkened and crispy on the edges.
  7. Let the baking sheet cool for about 10 minutes on a wire cooling rack.  If you want to mop up some of the grease in the pan with paper towels, go for it.
  8. Once the bacon is a little cool and the glaze has had a chance to cool and stick to the bacon, line a plate with a stack of paper towels and move the bacon slices out of the baking pan and onto the paper towels.  Gently blot the slices (if you press too hard the paper towel may stick to the glaze) and then move to a warm plate for serving.  Enjoy!

Bell Pepper-Sausage Kolache & Apricot-Nectarine Kolache

Monday, August 20, 2012

kolache

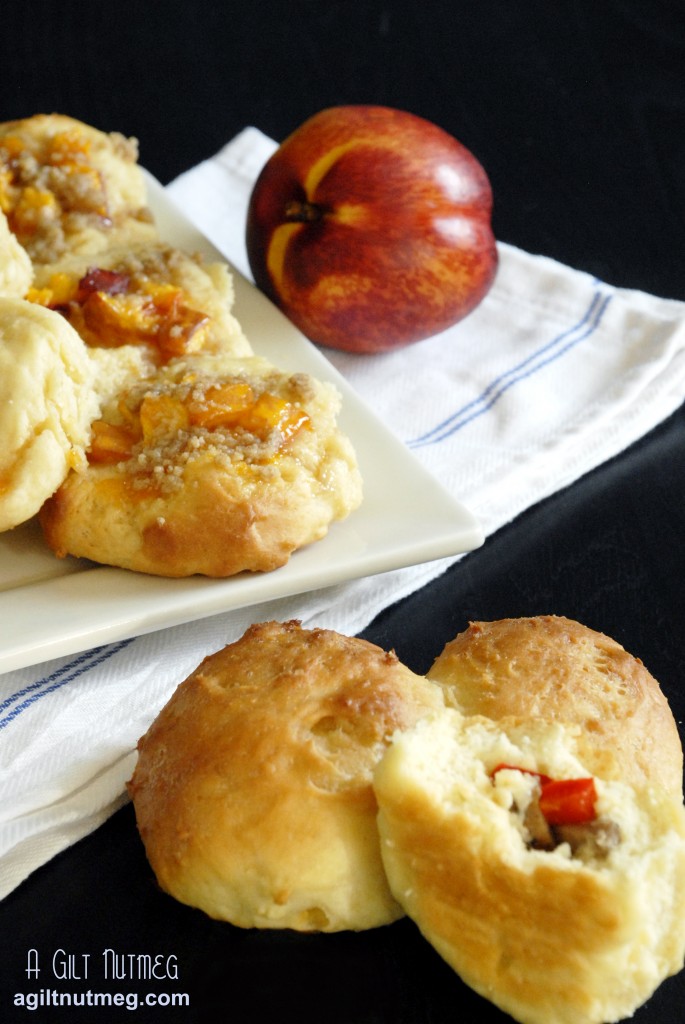
Being a part of a family that very proudly celebrates our Slovak heritage, I was fascinated to hear about Texas’ love affair with kolache, a Czech pastry.  Even better, kolache is a strongly featured recipe in The Pastry Queen—I’m so glad that I was able to circle back around and make it before Project Pastry Queen was officially over.  My biggest problem, it turns out, was just figuring out how to say the darn thing!  The world wide webiverse told me it was “ko-losh” or “ko-losh-ee”.  Enlisting the help of a Czech coworker, she said it was “ko-lotch-ee”.  I guess, in the end, it doesn’t matter, because—even though I’m still uneasy with all bread-making activities—these were mostly successful.  I’ve never eaten one made by someone else, so I don’t have anything to compare them to, but I can say that the dough is sweet and tastes very close to my favorite Cantonese Dim Sum BBQ Pork Filled Buns, albeit a little bit denser.  I know it’s a strange comparison, but in the end, it’s a small world, after all.

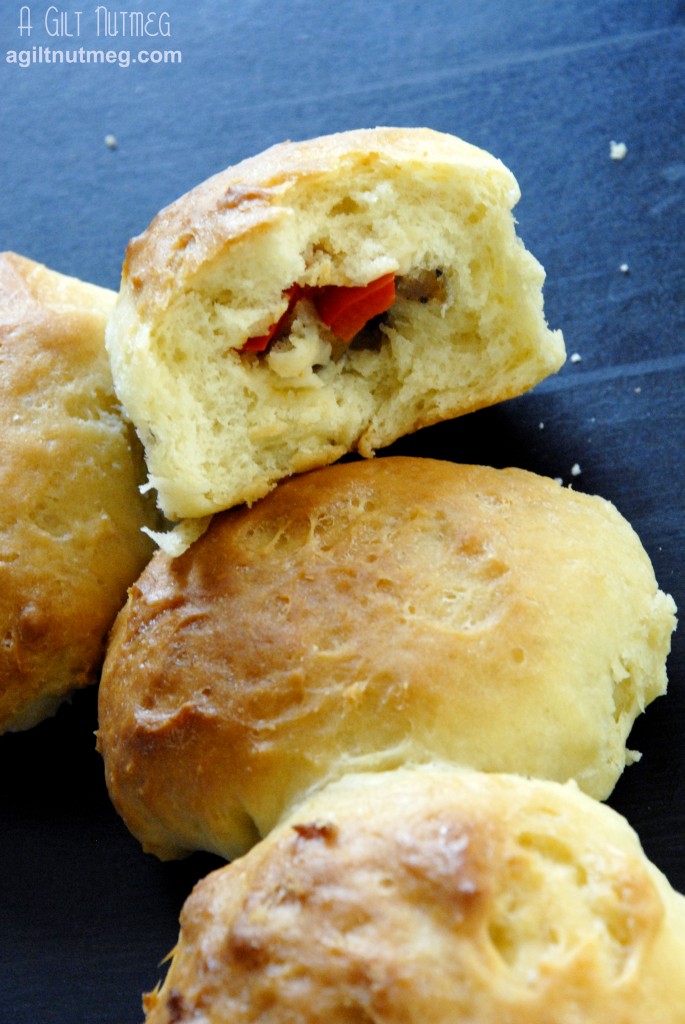
bell pepper sausage kolache

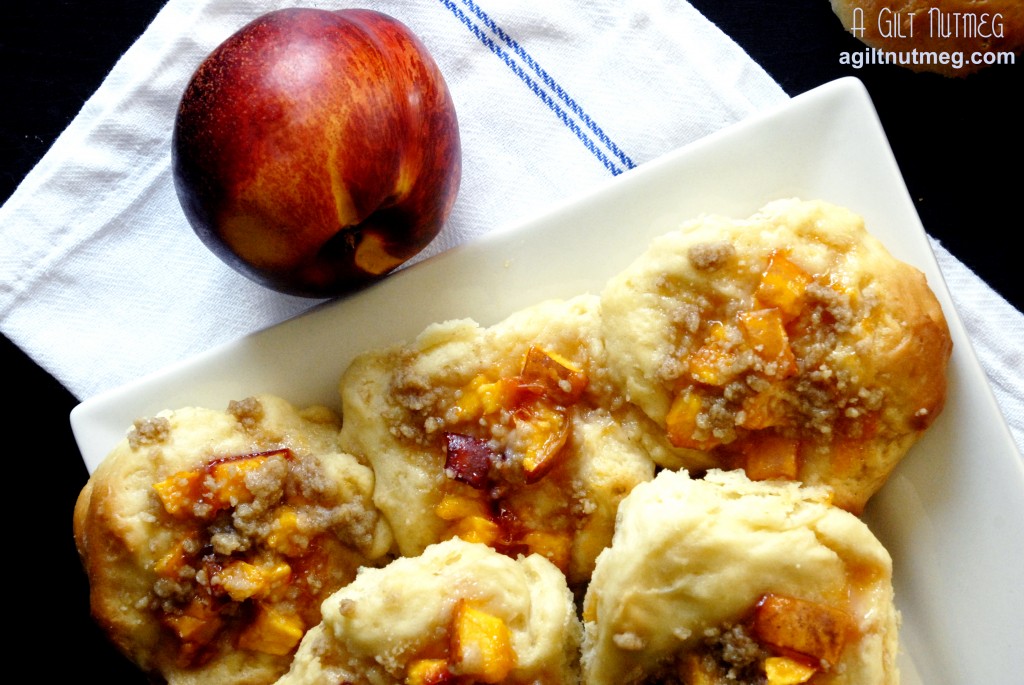
I split the recipe into half and made one half open-faced with nectarines, apricot jam, and brown sugar streusel.  The other half had the dough wrapped around a red bell pepper and sausage filling so that the filling was hidden inside.  I will say that I definitely have to work on my technique—as we all know here, bread dough and I don’t get along, so the nectarine kolache weren’t so much perfect little deep wells of fruit, but instead the fruit kind of hovered on top.  I also would add more of the savory filling next time because you can, obviously, never have enough sausage.  Overall, though, they were great!  The dough didn’t require any kneading, so, even though mine weren’t perfectly beautiful, I still recommend this recipe to anyone wanting to try yeast breads.  You literally just mix the dough, then stick in the fridge till morning and voila!

apricot nectarine kolache

Kolache
Makes 16-18 kolache
Dough adaptation directly from The Foodie Bride

Fillings inspired by The Pastry Queen

Dough (for a full recipe - 16-18 kolache)

  • 1 package (2 1/4 tsp) active dry yeast
  • 1/4 cup water, warmed to 110-115F
  • 1 cup milk, warmed to 110-115F
  • 4 Tbsp butter, melted and cooled to warm
  • 2 large eggs
  • 5/8 cup sugar + 1 teaspoon sugar
  • 1 tsp salt
  • 4 1/4 cups flour

Red Bell Pepper & Sausage Filling (for a half recipe - 8-9 kolache)

  • 1 cup cooked sausage, chopped (I used a chicken sausage)
  • 1 cup red bell pepper, chopped

Nectarine-Apricot Filling & Streusel (for a half recipe - 8-9 kolache)

  • 1 large nectarine, chopped
  • 1/4 cup apricot jam/jelly, melted
  • 2 tablespoons flour
  • 2 tablespoons brown sugar
  • 2 tablespoons chilled butter
  1. Add your warm water to your mixing bowl (or bowl of stand mixer) and stir in 1 teaspoon sugar..  Sprinkle yeast over the sugar water mixture and let stand 5 minutes until foamy.
  2. Add milk, butter, eggs, sugar and salt to bowl and mix on low until ingredients are thoroughly incorporated.
  3. Also on low, mix in half of the flour, wait until its incorporated, then mix in the second half of the flour, mixing just until incorporated.  My dough was pretty lumpy looking and, truthfully, I’m not sure if that’s how it’s supposed to look or not.
  4. Let the dough rest 1-2 hours, until doubled in size.  Punch the dough down (deflate it) and then cover it with plastic wrap and stick it in the fridge overnight.  If you’re in a rush, 4 hours is enough, but who doesn’t want the ease of just throwing something in the fridge and not worrying about it until morning?
  5. When ready to start, heat the oven to 375, line a baking sheet with parchment paper (or use non-stick spray) and divide the dough into balls.  They’ll be a bigger than golf balls, about 2 1/2″ wide.  Shawnda helpfully points out that the balls should weigh about 2.5 oz each.
  6. Let the dough rest for 15 minutes while you prepare the filling ingredients- make sure the bell pepper and sausage is chopped; combine the warmed apricot jam in a bowl with the chopped nectarine and stir to coat the nectarine.  You could easily make the streusel topping in a food processor, but it’s such a small amount that I just tossed the flour, brown sugar and butter into a mixing bowl and mushed it around with a fork and a butter knife until it was well combined and crumbly.
  7. If making sausage kolache, flatten out the balls of dough, press about a tablespoon of filling into each round of dough and then wrap the dough over the filling, pinching it shut.  Arrange the balls of dough with the seam side down on the baking sheet and arrange so that the balls are just an inch or so apart.
  8. If making open faced nectarine kolache, slightly flatten the balls and then poke a little well into the dough.  Fill the well with a tablespoon or so of fruit filling, then sprinkle the streusel topping over each one.  Arrange on the baking sheet so that the edges are just touching.
  9. Let the prepared kolache rest for 20 minutes or so and then bake for 20-25 minutes until golden brown on top.  I brushed some melted butter over the tops of the kolache warm from the oven, but that’s up to you.
  10. Serve warm and enjoy!

White Cheddar Poblano Grits

Wednesday, August 8, 2012

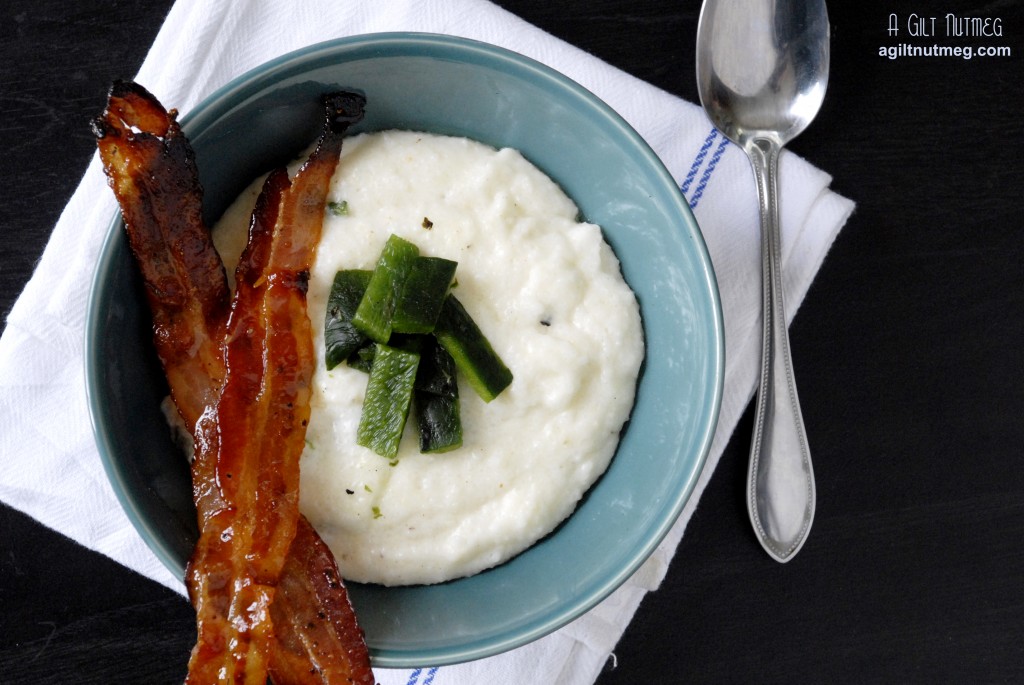
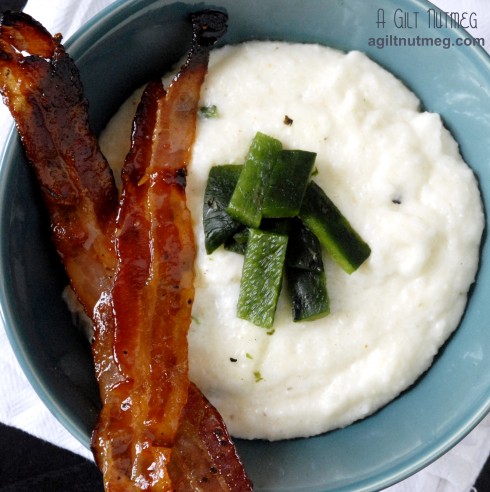
white cheddar poblano grits

My dear readers.  I am about to share with you one of my favorite recipes of all time.  I don’t know if words can even describe my love for this recipe, but I’ll try…  I first discovered it a few summers ago when a group of friends and I went to the Ace Hotel in Palm Springs for a bachelorette weekend away.  If you’ve never been to Palm Springs, imagine being put into a blazing hot oven, but there’s a pool.  I think it was 114 degrees when we were there and barely a drop of shade.  The heat just emanates off of every surface.  This may not sound like a very good weekend to you, but with nothing else to do but lounge in the pool, it somehow all equals up to be one of the most relaxing weekends you can have.  On our last morning there, we got breakfast by the pool and their “Poblano Cheddar Grits” caught my eye.  I knew I was in trouble after my first bite-I so carefully savored every tiny morsel that all of my friends actually left me at the table to go pack instead of watch me lick the bowl of this rich, flavorful, new favorite breakfast.

Back home, weeks later, I was still dreaming about the grits.  A trip back to the Ace was not in the question, so I went about trying to recreate them.  Searching for a recipe for White Cheddar Grits on Google actually brought up a recipe from a great restaurant in Atlanta, The Flying Biscuit.  Their Creamy Dreamy White Cheddar Grits are pretty famous and I was delighted to have a recipe from such a familiar place close to home to start as the basis of my recipe-they’re heavily decadent and snow white unlike any other grits recipes I’ve seen.  I quickly researched roasting techniques for some Poblano Peppers and voila!  Bacon is a requirement to crumble over the top (I’ve got some amazing Apple Cider-Maple Glazed Bacon for you on Friday) and I really can’t imagine a better breakfast.  Thanks to the Ace Hotel for introducing me to one of the recipe loves-of-my-life.


White Cheddar Poblano Grits
Adapted from The Flying Biscuit Cafe and Inspired by The Ace Hotel, Palm Springs
Serves 2-3 as a main dish, more if a side

  • 2 poblano chile peppers
  • 3 cups water
  • 1 cup half-and-half
  • 1.5 teaspoons kosher salt
  • heaping 1/4 teaspoon white pepper
  • 1 cup quick grits
  • 1/2 - 1 cup grated white cheddar cheese (to taste-1 cup is very cheesy) (I prefer mild white cheddar cheese over sharp)
  • 4 tablespoons unsalted butter, cubed
  1.  Roasting poblanos can happen one of two ways:  first, rub with olive oil, then grip them tightly in a pair of tongs and hold over your gas burner’s flame, turning until all sides are blackened and bubbly.  Only attempt this if you have metal tongs (my plastic coated ones may or may not be slightly melted now).  The other method involves rubbing them with olive oil, then placing in your oven set to broil, turning every few minutes until all sides are blackened and bubbly.  Either way, once blackened, put the peppers into a paper bag while you make the grits-they’ll sweat in there and the skin will be super easy to remove later.  Also good to note: the oven method will result in softer peppers in your grits, the gas burner method will result in slightly more crunchy peppers.
  2. In a medium-large saucepan, bring the water, half and half, and salt to a boil.
  3. Slowly pour the grits in, whisking the entire time.  Lower heat and let thicken 7-10 minutes, whisking frequently.
  4. While the grits are cooking, take the peppers and remove the outer burned skin so all you have left is the soft pepper flesh underneath.  Remove the seeds and ribs and slice into strips and then 1″ pieces.  If you prefer, you could roughly chop for smaller pieces.
  5. Stir the cheese into the grits until melted, then stir in the butter until also melted and smooth.
  6. Add the poblano pieces and stir gently in.  Taste to see if you want more salt or a little more white pepper.
  7. Serve with some delicious crispy bacon to crumble on top and enjoy!

White Peach Cream Cheese Tart

Monday, August 6, 2012

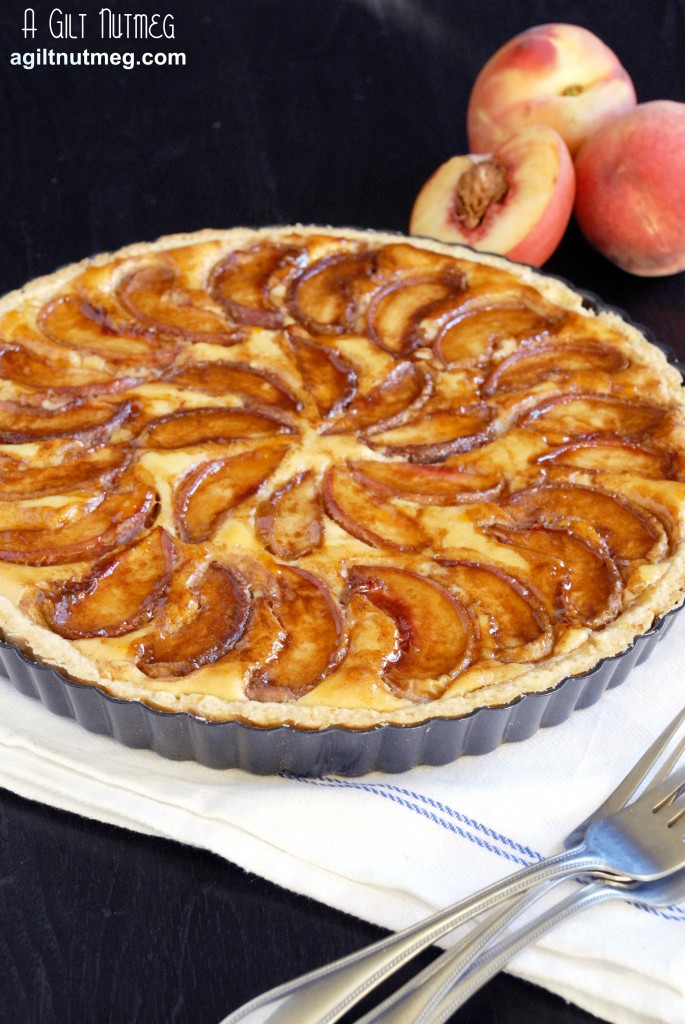
 white peach cream cheese tart

I turned the Way-Back Machine on for Project Pastry Queen this week, everybody!  The truth is, we’re nearing the end of the book and the final handful of remaining recipes aren’t the most interesting to most people.  As such, we’re going back to pick some recipes that were completed before most of us joined the group.  I’ve had this tart on my list of things to make for quite some time, but had to wait until peach season hit full stride, of course.

The truth with this tart is that I had it in the oven for approximately 1 and a half minutes before I realized that I had miscalculated my time and we had to leave for a performance at the Hollywood Bowl right that moment and not in the hour that I originally thought.  Cut to me hurriedly swiping the tart out of the hot oven, throwing it in the fridge and running out the door hoping to goodness I didn’t have flour hand prints all over my dark jeans.  I came back home and found that the peaches dipped in cinnamon and sugar macerated while sitting on the tart in the fridge, so there was peach juice all over the surface of the cream cheese filling. Oh well!  In to the oven it goes.

When I pulled it out, there was no sign of the juice anywhere-success!  But because I used white peaches (they were all that were ripe at the store), the cinnamon’s brown color was more dominant than the cheery yellow color of everyone else’s tarts.  Also, I a) forgot to peel them, but that’s no big deal and b) chose not to use halves of peaches as Rebecca suggests, instead going with a more elegant circular pattern that still covers the top of the cream cheese filling just fine.

White Peach Cream Cheese Tart
Makes one 10″ tart
Adapted from The Pastry Queen by Rebecca Rather

Lemon Zest Tart Crust

  • 2 cups flour
  • 1/2 teaspoon salt
  • 1/3 cup sugar
  • zest of one lemon
  • 11 Tbsp chilled butter, cut into Tbsp sized chunks
  • 1 egg
  • 1/4 cup heavy whipping cream

Filling

  • 8 oz cream cheese (1 package)
  • 1/2 cup sugar
  • 1/2 cup mascarpone cheese
  • 1 Tbsp vanilla extract
  • 2 eggs
  • 1/2 cup flour
  • 1/4 tsp salt

Topping

  • 2 teaspoons ground cinnamon
  • 1/2 cup sugar
  • 3-4 large peaches

Glaze

  • 1/4 cup apricot jam
  • 1 1/2 tsp brandy
  • 1 1/2 tsp water
  1. Combine the flour, salt, sugar and lemon zest in the bowl of an electric mixer and combine ingredients at low speed.
  2. Add the butter chunks one at a time to the flour mixture and continue beating until the mixture is crumbly and no large chunks of butter remain (the largest size should be pea-sized).
  3. Whisk together the egg and cream and pour into the flour mixture, beating on low until just incorporated.  Watching as the mixer beats on low speed, the dough should form a ball within seconds.  If it’s too dry, you can add a tablespoon of cream more.
  4. Spread a piece of plastic wrap on the counter, turn the dough out onto the saran wrap and form the dough into a round disk.  Wrap it with the plastic wrap and refrigerate for an hour.
  5. After an hour, generously flour a flat surface (and rub some flour onto your rolling pin) and roll the dough out to about 1/8″ thick.
  6. Once the right thickness, gently roll it up on your rolling pin and transfer it to your tart pan, pressing it into place and trimming off the edges that stick out over the top of the tart pan sides.
  7. At this point, you can heat the oven to 375 degrees and you might want to clean out your mixer’s bowl, too.
  8. In your mixer’s bowl, beat the cream cheese and sugar about 2 minutes, until well combined.
  9. Add the mascarpone and vanilla and beat until, again, well combined (you’ll probably need to use a spatula to scrape the sides of the bowl in the middle of this).
  10. Add the eggs and beat for about one minute until smooth, then add the flour and salt, beating just until combined.
  11. Pour the cream cheese mixture into the unbaked tart shell and set aside while you slice the peaches.
  12. Stir together the sugar and cinnamon in a medium bowl.
  13. Slice the peaches in half and then again into 6 slices per half.  Drop the slices into the cinnamon-sugar mixture and toss until the peaches are evenly coated.  Arrange the slices on top of the cream cheese filling, making sure to cover as much of the filling as possible.
  14. Bake for 50-57 minutes until the center is set and the edges are turning golden brown.
  15. In the final minutes before the tart comes out of the oven, heat the jam, brandy and water in a small saucepan over medium heat.  Bring to a boil for a minute or two, then let cool for five minutes.
  16. Once the tart comes out of the oven, brush the glaze over the tart and leave it to cool before serving.  Enjoy!

Black & White Banana Cream Pies

Friday, August 3, 2012

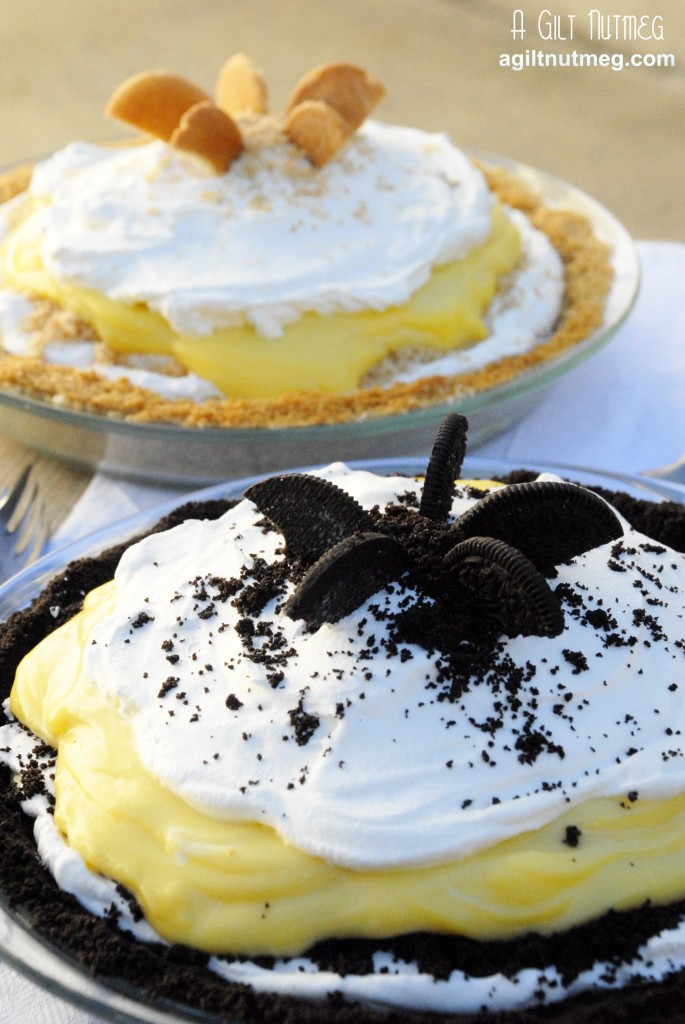
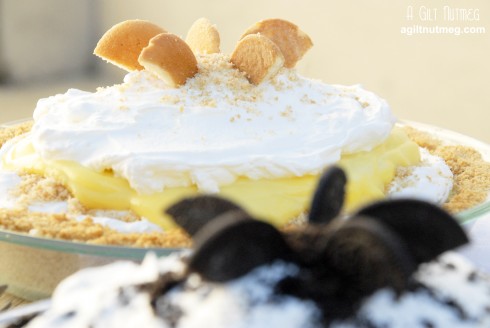
banana cream pies - angle

One of my all time favorite desserts- ALL TIME, I tell you- is Banana Cream Pie.  I suppose purists might object to my using Jell-O pudding as a base, though, so maybe we want to call it Banana Pudding Pie?  The jumping off point for this is, of course, the infamous Banana Pudding of the south-loads of fluffy Cool Whip, mounds of vanilla pudding, banana slices and lots of Nilla Wafer cookies lining the pan, softened from sitting in the pudding.  Personally, one of my favorite secret tricks is to use half vanilla pudding and half banana-flavored pudding, to up the flavor notch just a little bit, but plenty of people prefer using just the traditional vanilla.

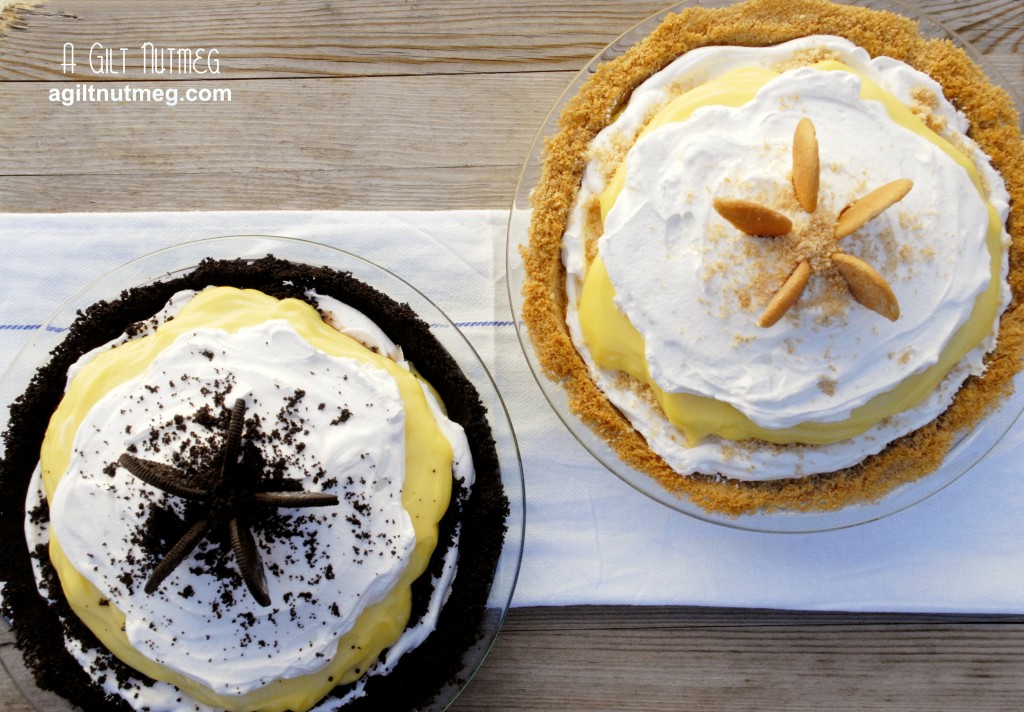
banana cream pies - overhead

When my friend told me she was throwing a surprise party for her boyfriend with a game theme and that his favorite dessert was Banana Cream Pie, the wheels started turning immediately.  We needed two pies, but how about we theme them to the evening and make “Black and White” Banana Cream Pies, to match the dice and dominoes?  All I would need to do is switch out the Nilla Wafers for some Oreos for a fun chocolate-covered banana twist!  Turning Banana Pudding into pies is extraordinarily simple, and just takes the extra step of crushing the cookies and baking them into a crust.  You really can’t make a simpler pie-plus, whatever doesn’t fit in the pie plate goes into a spare bowl to hide in the fridge and voila, Banana Pudding for yourself for later!

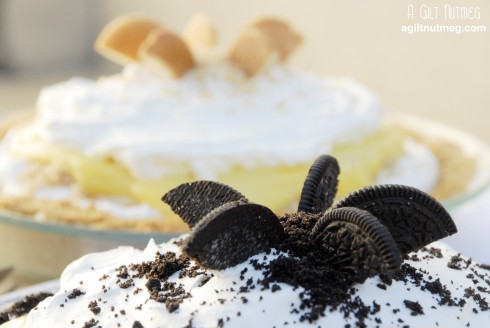
banana cream pies - oreo focus

banana cream pies - nilla wafer focus

Sure, you could make a traditional homemade pudding or use homemade cookies or easily whip up your own whipped cream, but I wouldn’t dream of using anything other than Jell-O instant pudding, Cool Whip and Nilla Wafers.  They all magically combine to form an impossibly light fluffy cloud of banana-vanilla-y sweetness on your tongue that is unmatchable.

Notes: The recipe below is for two pies, plus a small bowl of leftovers.  If you want to make just one pie, choose only one of the cookies to make into crust and buy two of the smaller boxes of pudding (around 3.5 oz) instead of the large boxes (around 5 oz).  You may have extra leftover pudding but, really, is that ever a bad thing?

Black and White Banana Cream Pies

Makes two 9″ pies

  • 1 large box (about 5oz) Jell-O Vanilla Flavor Instant Pudding
  • 1 large box (about 5oz) Jell-O Banana Flavor Instant Pudding
  • 1 box of Nilla Wafers
  • 1 tray of Oreo Cookies
  • 8 Tablespoons butter, divided into two bowls (4 Tablespoons each), and melted
  • 6 ripe bananas, sliced into 1/4″ thick slices
  • 1 large container (16 oz) regular Cool Whip
  1. Set your oven to heat to 375 degrees.
  2. In a large bowl, whisk together the milk and both packets of instant pudding.  Whisk for 2 minutes total until all of the lumps are gone.  Set the bowl in the fridge to set.
  3. Set aside 6 Nilla Wafers and 6 Oreos for decoration later.  In a food processor, process the Nilla Wafers until fine crumbs.  Drizzle the melted butter over the crumbs and process for a few more pulses until the crumbs are evenly coated.  Transfer the crumbs to a small bowl.  Wipe out the food processor bowl and repeat with the Oreos.
  4. In a 9″ glass pie plate, press about 2/3 of the Nilla Wafer crumbs evenly into the bottom and up on the edges of the plate, about 1/4″ thick.  Bake in the oven for 10-12 minutes and set on a wire cooling rack.  Repeat the process with the Oreo crumbs in another pie plate.
  5. To assemble the pies: Once the crusts are cool and your pudding is set thick, arrange an even layer of banana slices in the bottom of each crust.  Gently spread a layer of pudding, about 1 cup, over the bananas and to the edge of the crust, being careful not to push the banana slices around.  Spread about 1 cup of Cool Whip over the pudding in an even layer all the way to the edges of the crust.  Sprinkle a generous handful of cookie crumbs over each pie (matching the Oreo crumbs with the Oreo crust and so on, obviously).   If you have a deep dish pie plate, repeat the process, spreading the layers all the way to the crust, but if you have a normal, more shallow pie plate, like I used above, pile the layers a little higher in the middle and don’t spread them all the way to the edge.  This way you get some height, and still get all the pudding, but it doesn’t drip over the edges and make a mess.
  6. Verrrrrrrry carefully use a sharp knife to cut the Nilla Wafers in half.  Arrange them on top of the pie and sprinkle the top with a small handful of crumbs.  Repeat with the Oreos, but separate the layers and discard the cream before cutting.
  7. Refrigerate until chilled, at least an hour, but I prefer overnight so that the flavors have a chance to meld with each other.
  8. Settle down with a large slice and enjoy on a hot Southern Summer evening!


Salsa Verde

Wednesday, August 1, 2012

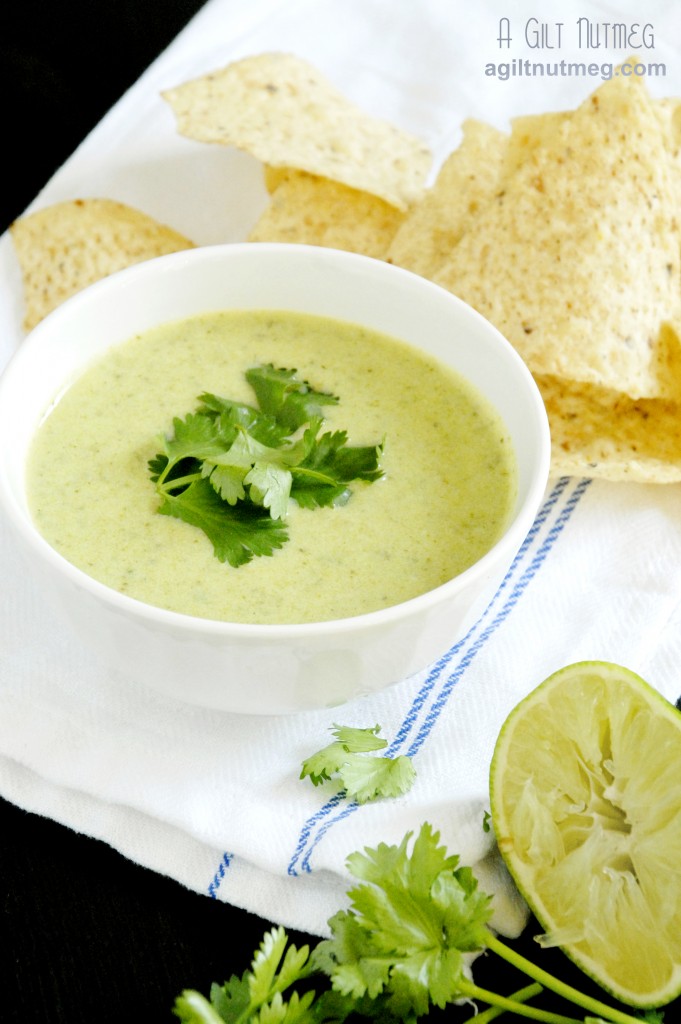
salsa verde

If you want something a little different from your average (and often flavorless) salsa from a jar in the grocery store, this quick salsa verde is a great break from the norm and super easy to make.  When we go to the Mexican restaurant near my apartment, I like to double dip my chips in both the red salsa and the salsa verde (which is Spanish for “green”) for a flavor combo better than each salsa on its own!

Salsa Verde
Makes about 1 cup
Adapted from Serious Eats

  • 1 large poblano chile, seeded and roughly chopped (very dark green, about the size of a bell pepper)
  • 2 serrano chiles, roughly chopped; discard seeds if you want a mild salsa (small skinny light green peppers, about 2” long)
  • 1 large tomatillo, quartered
  • 6 sprigs cilantro
  • 2 medium cloves garlic, chopped
  • 3/4 cup water
  • 1/2 cup sour cream
  • 1-2 tablespoons freshly squeezed lime juice
  • Kosher salt to taste
  1. Boil the chopped poblano chile, serrano chiles, tomatillo, cilantro, garlic, and water in a small sauce pan for 10 minutes.
  2. Pour the contents of the saucepan into a blender or a food processor (although be warned the food processor may leak a little bit as you blend, but not too badly).
  3. Stir in the sour cream, lime juice, and salt to taste
  4. Enjoy with tortilla chips and good company!