Entries Tagged as 'Pie'

Pi Day Redux

Thursday, March 14, 2013

3.14 = pi = PIE = THE MOST DELICIOUS DAY OF THE YEAR!  In celebration of 2013′s Pi/Pie Day, here’s a look back at my favorite pies over the course of A Gilt Nutmeg…


Black and White Banana Cream Pies

Black and White Banana Cream Pies - agiltnutmeg.com

Black and White Banana Cream Pies - agiltnutmeg.com

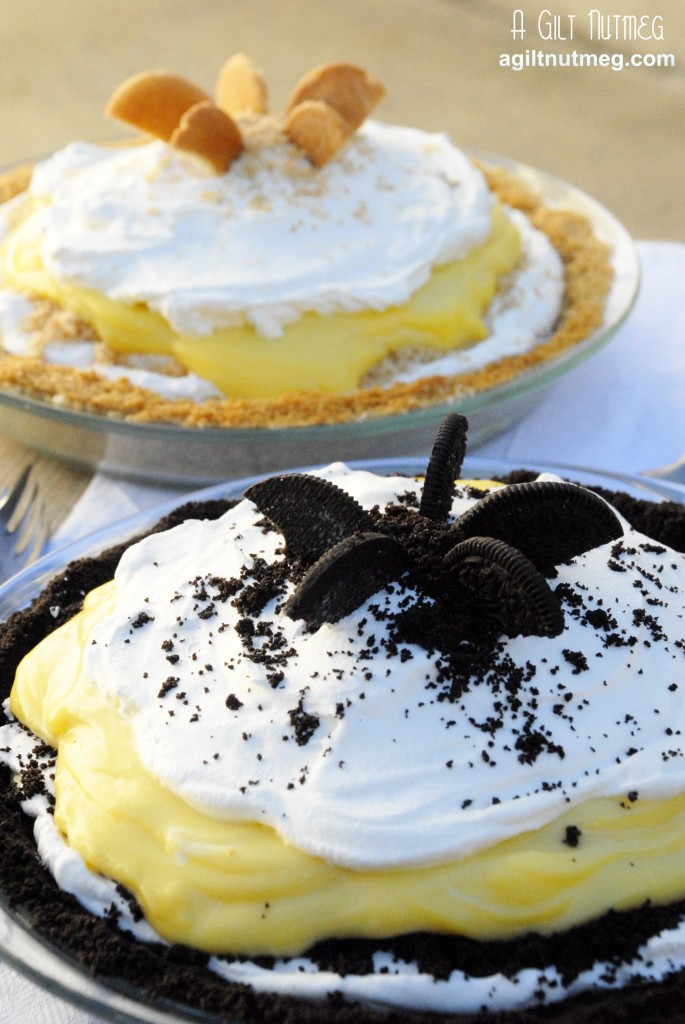
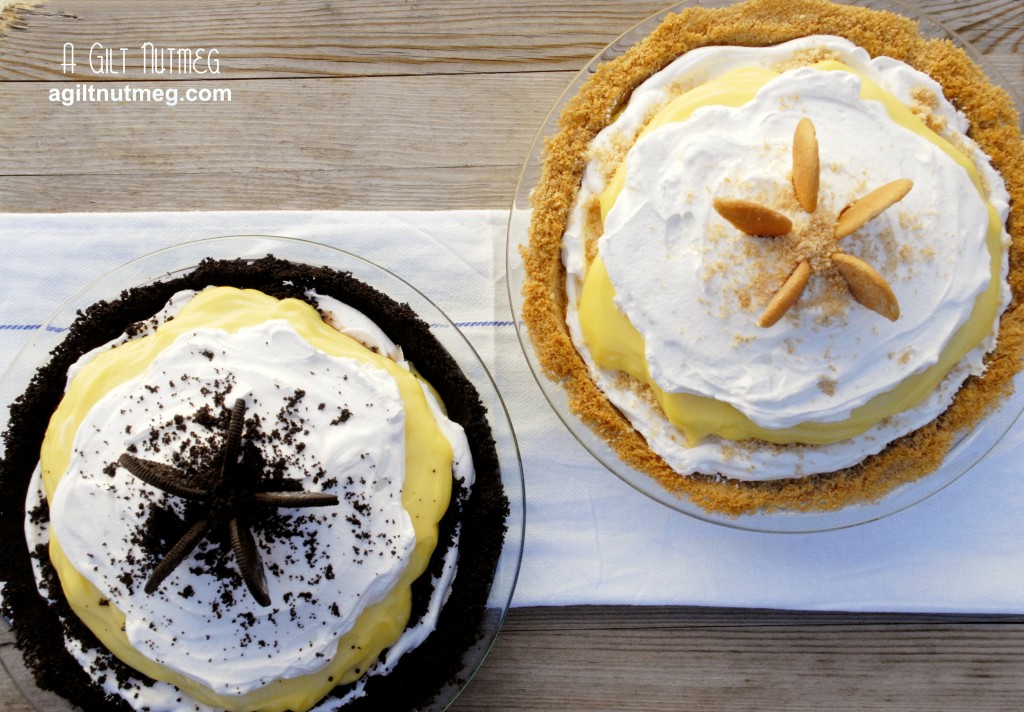
One of my favorites of all time, I themed these Banana Cream Pies for a friend’s party.  You really can’t go wrong with traditional “Nana Pudding” Nilla Wafers OR Oreos for a chocolate-covered banana twist.  In fact, why on earth would you choose?  Just make both!


Chocolate Coconut Pie for Passover

Coconut Chocolate Pie from agiltnutmeg.com

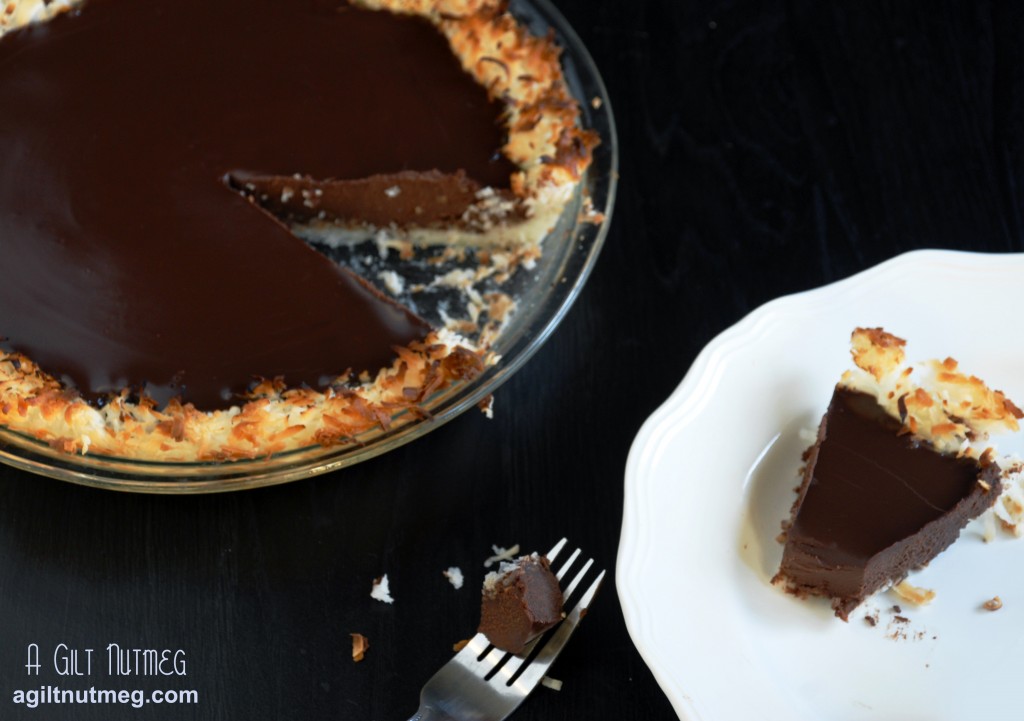
This Chocolate Coconut Pie was created with just 4 ingredients and is perfect for those people celebrating Passover but who can’t stand one more coconut macaroon.  With Passover in just a few weeks, this is definitely a recipe to tuck away for later.


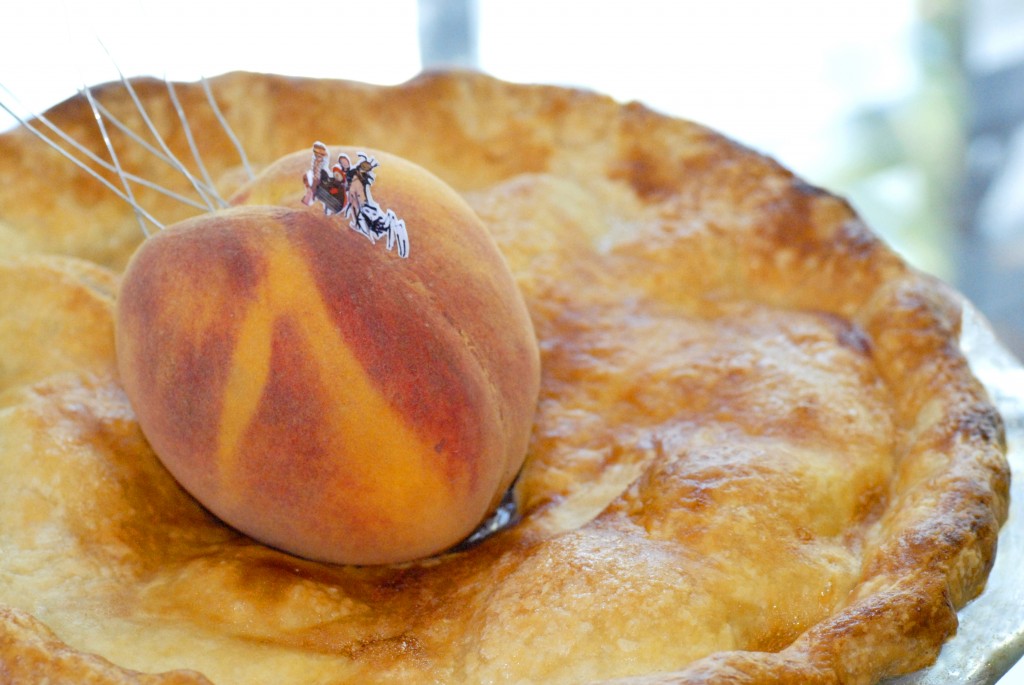
Bourbon Honey Peach Pie

Bourbon Honey Peach Pie - agiltnutmeg.com

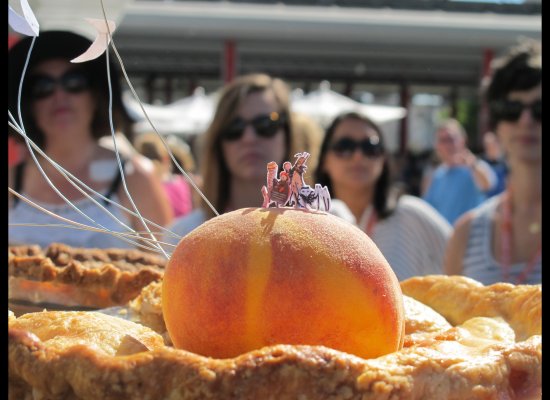
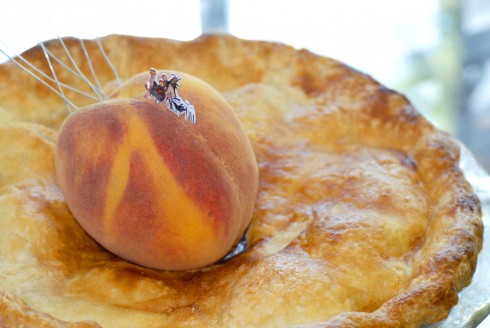
For those who haven’t been reading the blog as long, you may have missed my very proudest moment, when I won a blue ribbon at the Annual KCRW Good Eats Pie Contest for my Bourbon Honey Peach Pie.  It was entered in the Tim Burton-Inspired Category, hence the “James and the Giant Peach” decorations on top.  You don’t have to decorate yours with bugs, but this pie is truly one of the most outstanding recipes I’ve ever worked on.


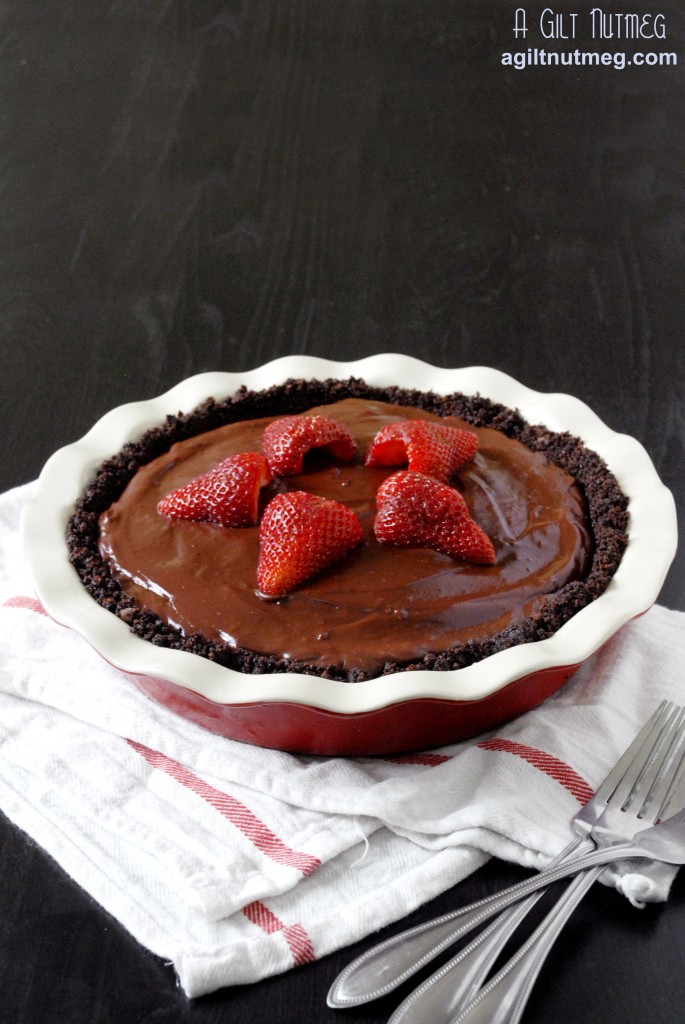
Chocolate & Strawberry Pie

Coconut Strawberry Pie from agiltnutmeg.com

You can’t go wrong with a chocolate-strawberry combination, and this Chocolate & Strawberry Pie is ridiculously easy to throw together.  There’s a touch of alcohol and spice in the chocolate pudding-like filling, which elevates it to an entirely new level of decadence.


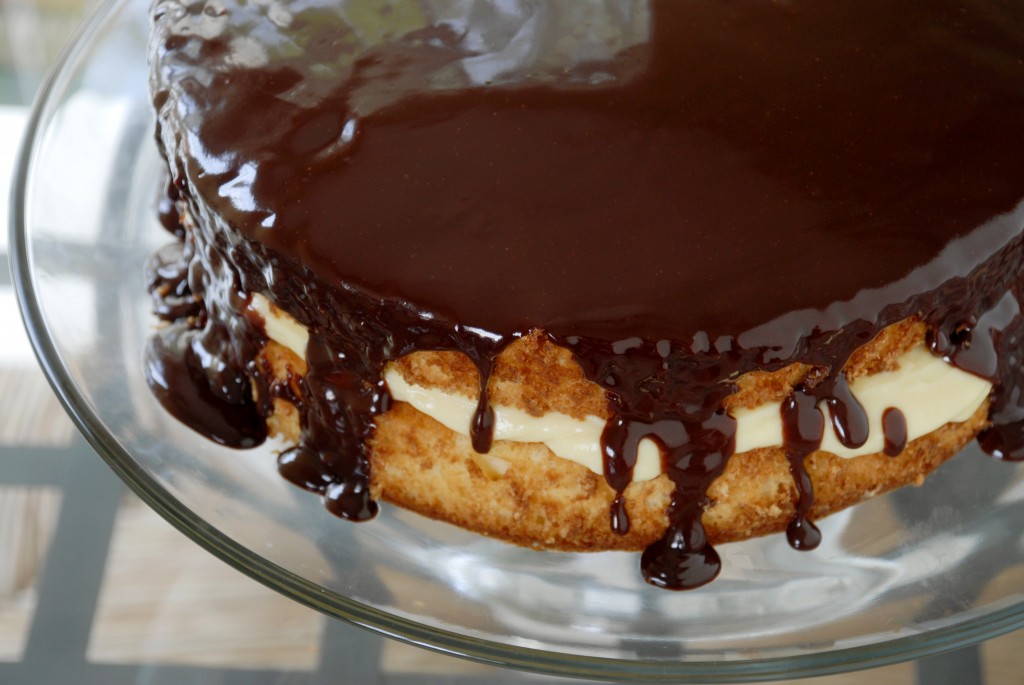
Boston Cream Pie

Boston Cream Pie

Okay, okay, you got me.  Boston Cream Pie is not a true pie, but darn if it doesn’t say “pie” in the name.  Besides, this is the recipe that taught me all about pastry cream and I happily jumped on that train and have never looked back.  I could eat pastry cream forever.  Seriously.

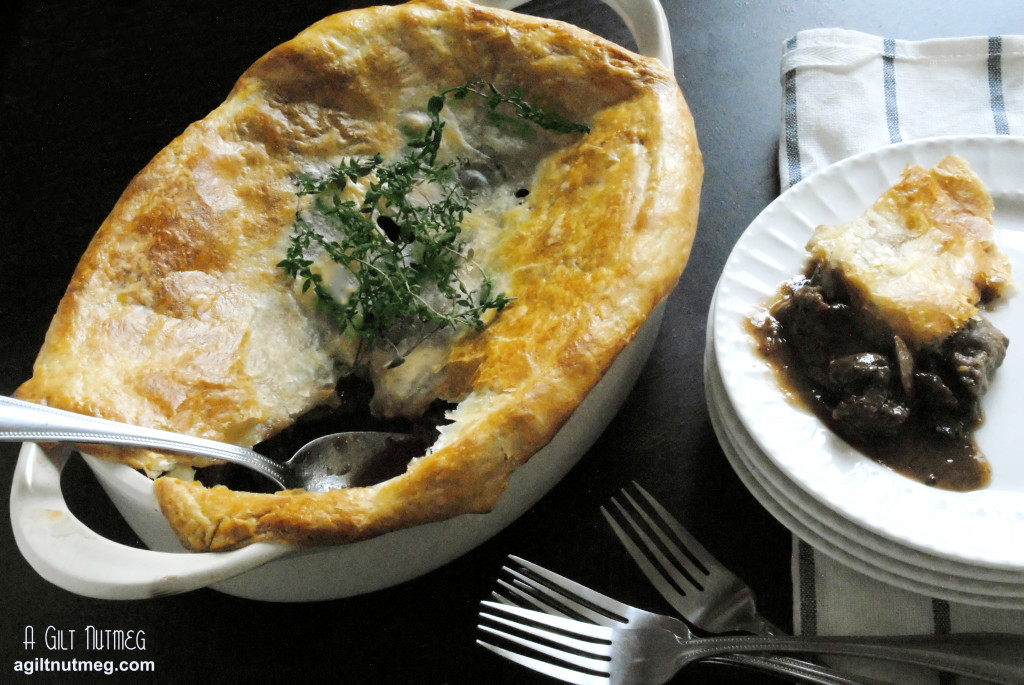
Steak and Guinness Pie

Tuesday, March 12, 2013

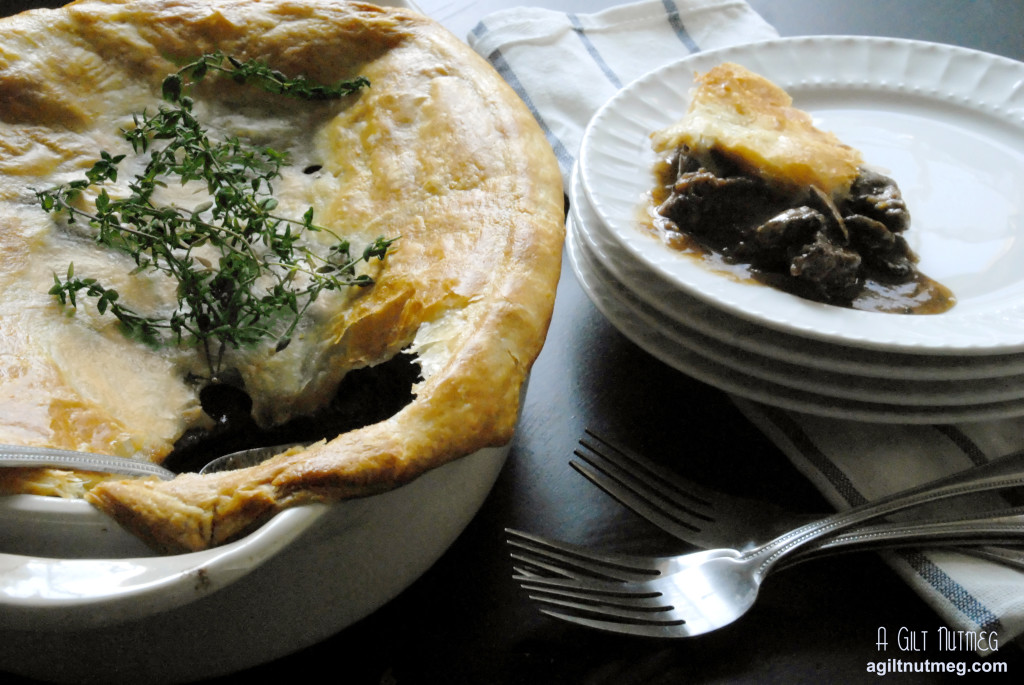
Steak and Guinness Pie - from agiltnutmeg.com

One of my favorite parts about living abroad in the UK was the food.  Don’t worry, I understand that you may have done a double take at the statement I just made.  It’s true, though, I loved the simple, hearty, food-every meal you ate, you could so easily see it being made a century ago to feed a family in front of a large cottage fireplace.

Given that LA weather has been rather up and down in temperature lately, and in honor of the upcoming St. Patrick’s holiday, Steak and Guinness Pie seemed like a no-brainer.  I don’t think I’ve come across a more satisfyingly hearty dish in my kitchen.  Each bite is so full of flavor that you don’t need to eat half the pie to feel like you got a full meal out of it.  While I do love the entirely savory pie (the steak, mushrooms and onions), I think the next time I make this I’ll add in some small potatoes and sweet roasted carrots to increase the veggie count and to stretch the pie even further than the 4-5 servings we already got out of it.  I still carry a card I purchased in Ireland with a saying on it very fitting for a food blog: “May you live as long as you want and never want as long as you live.”  Slainte!

 Steak and Guinness Pie - from agiltnutmeg.com

Steak and Guinness Pie
Adapted from The Complete Irish Pub Cookbook via Never Enough Thyme
Serves 4-5

  • 2 pounds lean chuck steak
  • 3 Tbs all-purpose flour
  • 1 tsp salt
  • 1/2 tsp black pepper
  • 5 Tbs oil, divided into 3 Tbs and 2 Tbs
  • 1 1/4 cups beef broth, divided into 1/4 cup and 1 cup
  • 1 medium onion, chopped
  • 8 oz Cremini mushrooms, sliced
  • 1 Tbs tomato paste (Trader Joe’s has this great tomato paste that comes in a tube like toothpaste.  No more wasting whole cans of it for just 1 or 2 tablespoons!)
  • 5 sprigs fresh thyme
  • 1 cup Guinness beer
  • 1 sheet frozen puff pastry, thawed
  • 1 egg yolk, lightly beaten with 1 Tbs of water
  1. Removing as much fat as possible (or as much as you can before you get frustrated and give up), and slice steak into 1″ chunks.
  2. Whisk together the flour, salt and pepper in a large bowl, add the steak chunks, and toss until steak pieces are fully coated by the flour mixture.
  3. In a cast iron or heavy bottomed skillet, heat the first 3 tablespoons of oil until shimmering.  Make sure the beef sizzles when it touches the oil before adding it to the pan and work in 2 or 3 batches so that you don’t overcrowd the pan; try not to push the beef around until fully browned on the bottom so that you get that deep color on the meat and the fond in the bottom of the skillet.  Once the beef is cooked mostly through and browned all over, transfer the beef to a dutch oven, pour the oil out of the skillet and return it to the heat.  Pour in 1/4 of beef broth to the hot pan, scraping up the browned bits from the pan; pour the stock and browned bits into the dutch oven with the beef.
  4. Add the last of the oil to the skillet and saute the onion and mushrooms over medium heat about 15 minutes until browned; transfer to the dutch oven.
  5. In the measuring cup the beef broth is waiting in, whisk in the tomato paste and add mixture to the dutch oven along with the thyme and stout.  Bring the contents of the dutch oven to a boil, reduce the heat to low and let it simmer, partially covered with the lid, for 90 minutes, then let mixture cool.
  6. Heat your oven to 425 degrees and make sure your puff pastry is completely thawed (it will break apart when you unfold it, otherwise).
  7. Transfer the cooled contents of the dutch oven to the dish you plan on baking your pie in, then drape the puff pastry over the top of the dish.  Trim the edges of the dough around the edge of the dish, leaving at least 1/4″ of hangover.  Wet your fingers and run them around the edge of the dish, under the dough, and press the dough against the wet edge of the dish.
  8. Use a knife to slice one or two slots into the crust for steam, then brush the top with the egg mixture.
  9. Bake for 25 minutes, until the crust is golden brown.
  10. Serve hot and enjoy!

Black & White Banana Cream Pies

Friday, August 3, 2012

banana cream pies - angle

One of my all time favorite desserts- ALL TIME, I tell you- is Banana Cream Pie.  I suppose purists might object to my using Jell-O pudding as a base, though, so maybe we want to call it Banana Pudding Pie?  The jumping off point for this is, of course, the infamous Banana Pudding of the south-loads of fluffy Cool Whip, mounds of vanilla pudding, banana slices and lots of Nilla Wafer cookies lining the pan, softened from sitting in the pudding.  Personally, one of my favorite secret tricks is to use half vanilla pudding and half banana-flavored pudding, to up the flavor notch just a little bit, but plenty of people prefer using just the traditional vanilla.

banana cream pies - overhead

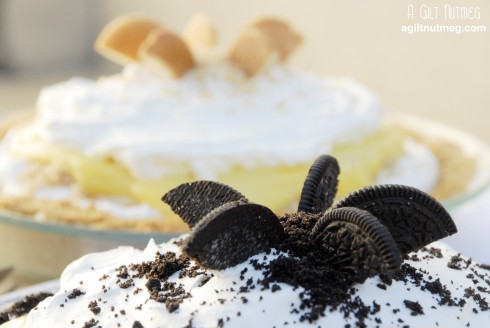
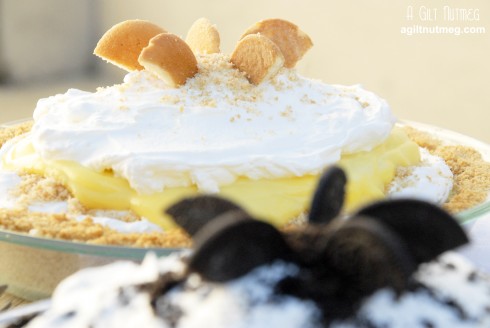
When my friend told me she was throwing a surprise party for her boyfriend with a game theme and that his favorite dessert was Banana Cream Pie, the wheels started turning immediately.  We needed two pies, but how about we theme them to the evening and make “Black and White” Banana Cream Pies, to match the dice and dominoes?  All I would need to do is switch out the Nilla Wafers for some Oreos for a fun chocolate-covered banana twist!  Turning Banana Pudding into pies is extraordinarily simple, and just takes the extra step of crushing the cookies and baking them into a crust.  You really can’t make a simpler pie-plus, whatever doesn’t fit in the pie plate goes into a spare bowl to hide in the fridge and voila, Banana Pudding for yourself for later!

banana cream pies - oreo focus

banana cream pies - nilla wafer focus

Sure, you could make a traditional homemade pudding or use homemade cookies or easily whip up your own whipped cream, but I wouldn’t dream of using anything other than Jell-O instant pudding, Cool Whip and Nilla Wafers.  They all magically combine to form an impossibly light fluffy cloud of banana-vanilla-y sweetness on your tongue that is unmatchable.

Notes: The recipe below is for two pies, plus a small bowl of leftovers.  If you want to make just one pie, choose only one of the cookies to make into crust and buy two of the smaller boxes of pudding (around 3.5 oz) instead of the large boxes (around 5 oz).  You may have extra leftover pudding but, really, is that ever a bad thing?

Black and White Banana Cream Pies

Makes two 9″ pies

  • 1 large box (about 5oz) Jell-O Vanilla Flavor Instant Pudding
  • 1 large box (about 5oz) Jell-O Banana Flavor Instant Pudding
  • 1 box of Nilla Wafers
  • 1 tray of Oreo Cookies
  • 8 Tablespoons butter, divided into two bowls (4 Tablespoons each), and melted
  • 6 ripe bananas, sliced into 1/4″ thick slices
  • 1 large container (16 oz) regular Cool Whip
  1. Set your oven to heat to 375 degrees.
  2. In a large bowl, whisk together the milk and both packets of instant pudding.  Whisk for 2 minutes total until all of the lumps are gone.  Set the bowl in the fridge to set.
  3. Set aside 6 Nilla Wafers and 6 Oreos for decoration later.  In a food processor, process the Nilla Wafers until fine crumbs.  Drizzle the melted butter over the crumbs and process for a few more pulses until the crumbs are evenly coated.  Transfer the crumbs to a small bowl.  Wipe out the food processor bowl and repeat with the Oreos.
  4. In a 9″ glass pie plate, press about 2/3 of the Nilla Wafer crumbs evenly into the bottom and up on the edges of the plate, about 1/4″ thick.  Bake in the oven for 10-12 minutes and set on a wire cooling rack.  Repeat the process with the Oreo crumbs in another pie plate.
  5. To assemble the pies: Once the crusts are cool and your pudding is set thick, arrange an even layer of banana slices in the bottom of each crust.  Gently spread a layer of pudding, about 1 cup, over the bananas and to the edge of the crust, being careful not to push the banana slices around.  Spread about 1 cup of Cool Whip over the pudding in an even layer all the way to the edges of the crust.  Sprinkle a generous handful of cookie crumbs over each pie (matching the Oreo crumbs with the Oreo crust and so on, obviously).   If you have a deep dish pie plate, repeat the process, spreading the layers all the way to the crust, but if you have a normal, more shallow pie plate, like I used above, pile the layers a little higher in the middle and don’t spread them all the way to the edge.  This way you get some height, and still get all the pudding, but it doesn’t drip over the edges and make a mess.
  6. Verrrrrrrry carefully use a sharp knife to cut the Nilla Wafers in half.  Arrange them on top of the pie and sprinkle the top with a small handful of crumbs.  Repeat with the Oreos, but separate the layers and discard the cream before cutting.
  7. Refrigerate until chilled, at least an hour, but I prefer overnight so that the flavors have a chance to meld with each other.
  8. Settle down with a large slice and enjoy on a hot Southern Summer evening!


Chocolate & Strawberry Pie

Wednesday, June 20, 2012

chocolate strawberry pie

I have been waiting to make this pie for almost 2 months.  I bought the strawberries and the cookies for the crust…then too much time would pass, I’d have to eat the strawberries that were about to go bad and go buy more while the cookies sat patiently unopened on the counter.  Repeat this scenario three or four times.  Last night, though, the stars aligned and I finally was able to make this perfect combination of chocolate and strawberries.  Because it’s a chilled pie, it’s great for the hot summer nights coming up and Lindsay, of Love and Olive Oil, who created the recipe, included some unusual flavors in the rich chocolate.  It has a touch of ginger and nutmeg that plays on your tongue in that first bite and as the pie warmed on the counter between rounds of slicing, we noticed the bourbon flavor became more pronounced.  And my favorite part, of course, were the strawberries.  You can’t see it in the photo, but there’s a whole layer of fresh, peak-of-ripeness strawberry halves lining the crust below that chocolate filling.  Expect to find me crying when strawberry season is over again in the fall.

Chocolate & Strawberry Pie
Adapted from Love & Olive Oil

For Crust:

  • 6 tablespoons unsalted butter
  • 1 ounce bittersweet chocolate, chopped
  • 7 ounces chocolate wafer cookies, about 30 cookies (I used 1/2 Oreos left over from a previous recipe and 1/2 Trader Joe’s Chocolatey Cookies.  Next time I’ll use all Oreos for their deeper chocolate flavor and crunchier texture)

For Filling:

  • 2/3 cup sugar
  • 1/4 cup cornstarch
  • 2 tablespoons unsweetened cocoa powder
  • 1/4 teaspoon ground ginger
  • 1/8 teaspoon ground nutmeg
  • Pinch of salt
  • 6 large egg yolks
  • 2 1/2 cups whole milk (I used 2 cups half and half and 1/2 cup of milk for a richer filling)
  • 6 ounces bittersweet chocolate, chopped
  • 1/2 tablespoon bourbon
  • 1 teaspoon vanilla extract
  • 1 pint strawberries, hulled and halved (or you can wait to cut them until just before you need them)
  1. Spray a pie plate with non-stick baking spray and set aside.
  2. Melt the butter in the microwave in a small, microwave safe bowl.  While the butter is still hot, add the chopped chocolate, let sit for a moment, then stir vigorously until the chocolate and butter are fully combined and the mixture looks like smooth chocolate.
  3. Process the cookies in a food processor until all pieces of cookie are turned into crumbs; transfer to a medium mixing bowl.
  4. Pour the melted butter-chocolate mixture over the crumbs and stir until the crumbs are evenly coated and moistened.
  5. Press the crumbs into the pie plate and move the plate into the freezer for 30 minutes while you make the filling.
  6. In a medium saucepan, whisk together the sugar, cornstarch, cocoa powder, ginger, nutmeg, and salt.
  7. Add the egg yolks and whisk until the yolks are fully incorporated.
  8. One half cup at a time, add the milk to the saucepan, mixing thoroughly each time before adding more.
  9. Turn the heat on under the saucepan to medium and heat the mixture, whisking frequently, until thickened and boiling.  It will take a little time for it to heat up-10-15 minutes, but you’ll find that once it hits temperature, it will all of a sudden and without warning, turn the consistency of pudding.  Once it reaches this stage, keep whisking as it is boiling for one full minute (be careful of your hands!  It splattered on me a little and boy did it hurt).
  10. Turn off the heat and add the chocolate.  Wait for a minute, then whisk until the chocolate is fully melted and smooth.
  11. Whisk in the bourbon and vanilla until fully incorporated.  Let the mixture sit for 5 minutes while you slice the strawberries, whisking occasionally.
  12. Take the crust out of the freezer and line it with a layer of strawberry halves, arranged so you can fit in as many strawberries as possible.
  13. Pour the filling over the strawberries and crust, smooth the top with the back of a spoon, add some strawberry decoration on top if you wish, and refrigerate for two hours before serving.  Enjoy!

Coconut Chocolate Pie

Monday, April 9, 2012

 coconut chocolate pie

It’s still Passover so I’m not too too late with this holiday approved dessert, I think.  Between all of the coconut macaroons and flourless chocolate cakes that come out this time of the year, this combo seemed like an obvious (and delicious) choice-and contrary to many holiday desserts, this one is so incredibly easy I could hardly believe it!  It only has 4 ingredients and takes practically no time to complete the steps, which was a major relief because those Hot Cross Buns put a temporary curse on my kitchen.  Nothing was working and after I ruined the lime creme I was making to fill coconut macaroon tart shells, I was sure I was going to have to go back to the grocery store at 10pm (typical me scenario) to get ingredients so that I could produce something (anything) for today’s post.  Then the kitchen fairies came out and, knowing I needed 8 oz of bittersweet chocolate for this recipe (which I already had the coconut for), I found a 4 oz bar of bittersweet chocolate and exactly 4 oz of bittersweet chocolate chips leftover from a previous recipe.

This recipe produces a crisp coconut macaroon “crust” and a creamy dense chocolate filling that will be perfect with a little bit of whipped cream to lighten it up.  While it is appropriate for Passover, since it is has no flour in it and is unleavened, I think this pie will be welcome at anyone’s spring table.  Chag Sameach!

Coconut Chocolate Pie
Adapted from Martha Stewart’s New Pies and Tarts

For the crust

  • 4 tablespoons unsalted butter, softened
  • 1 bag (about 14 oz) of shredded coconut

For the filling

  • 1 cup heavy cream
  • 8 ounces bittersweet chocolate, finely chopped
  1. Heat oven to 350 degrees.
  2. In a food processor, pulse about 1/3 of the coconut and butter together until well combined, 1-2 minutes.
  3. In a medium bowl, combine the coconut-butter mixture with the rest of the coconut and stir well until mixture is cohesive.
  4. Press the coconut into a 9″ pie plate so that it forms a crust and bake for 10-15 minutes.  If the edges start to brown too much, cover them with some tin foil.
  5. Once golden brown, move the crust to a wire cooling rack and let it cool completely before filling with the chocolate (this will allow the crust to crisp up first).
  6. While the crust is cooling, bring the heavy cream to boil in a small saucepan.
  7. Put the chopped chocolate into a medium bowl and pour the boiling cream over it.  Let it sit for a few minutes then whisk until it is smooth and no streaks of cream remain.
  8. Pour the chocolate into the tart shell and let it cool before moving it to the refrigerator to set completely for another hour or so.  Enjoy!


All-Sold-Out Chicken Pot Pies

Wednesday, December 14, 2011

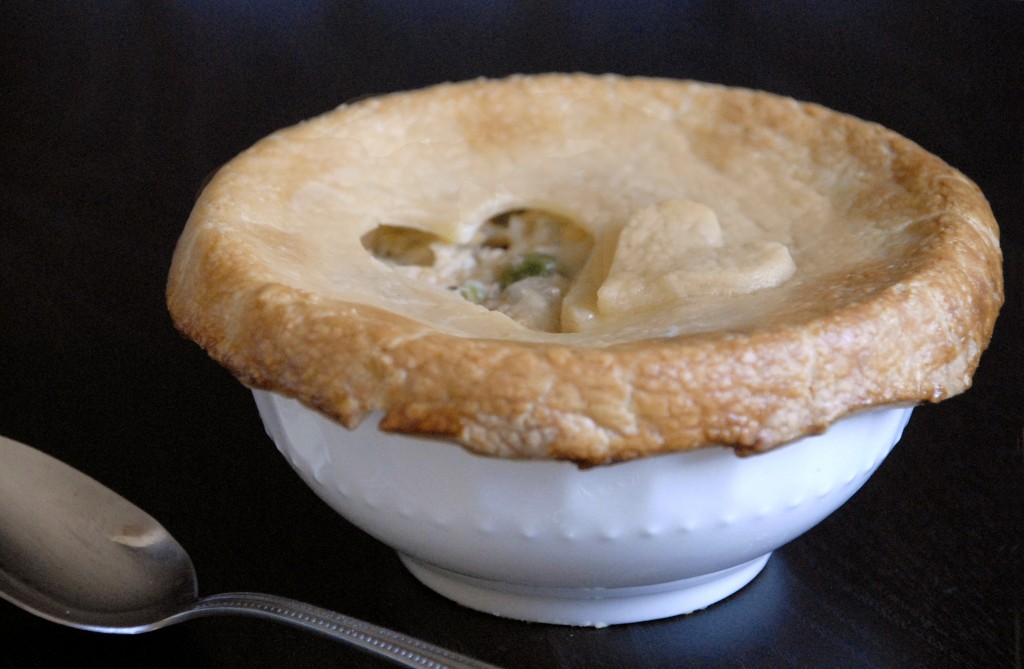
I love chicken pot pie.  It was (is) one of Mom’s signature dishes as I was growing up, and to this day I find I’m compelled to try it from every restaurant menu it appears on (which isn’t many, because it’s more a homey comfort food instead of high class fare).  So naturally, I’ve been looking forward to trying this recipe ever since I cracked open The Pastry Queen.

What can I say, but that it’s a great chicken pot pie!  I have certainly built up a criteria over the years, some of which this pie admittedly doesn’t qualify for, namely in two things:  I prefer puff pastry on top to crust (or the biscuits Mom tops hers with) and I prefer a higher sauce-to-filling ratio than this one provided, the opposite of which seems to be standard for chicken pot pie recipes I’ve tried at home.  But that all said, the filling is really a great combination of flavors-adding mushrooms and red bell pepper that I never would have used before, and I look forward to making this again and again!  I was surprised at Rebecca’s use of hot sauce and red pepper flakes but this was by no means a spicy dish: the hot sauce really gives an otherwise bland cream sauce dimension without overloading you on too many flavors.

I wish I loved the crust as much as the other girls did, but it felt a little heavy and dry to me (rolling it much thinner than Rebecca suggested helped a lot, though) so I think I’ll stick with puff pastry in the future-even just the frozen stuff does the trick.  As for the filling, it was so good that the only change I made was to add some dried thyme, since I’m of the opinion that most savory comfort food just isn’t comfort food without thyme in it.

Note: While I know many cooks prefer to prepare a mise en place (which means setting out all of your ingredients measured and chopped exactly how you need them before you start the recipe), this recipe lends itself well to those less-organized people (me) who prepare ingredients as they go.  While the potatoes and onions cooked, I chopped the bell pepper and mushrooms.  While the vegetables all cooked together, I shredded the chicken, and so on and so forth.

All-Sold-Out Chicken Pot Pies
Makes 6 Servings
Adapted from The Pastry Queen by Rebecca Rather

Filling

  • 3 tablespoons unsalted butter
  • 1 medium-size yellow onion, chopped
  • 3 cloves garlic, minced
  • 1 large russet potato, peeled and diced
  • 1 red bell pepper, diced
  • 8 oz. button mushrooms, sliced (I think 4 oz, half a package of mushrooms, is perfect but you can adjust to your tastes)
  • ½ teaspoon crushed red pepper flakes
  • 1 teaspoon dried thyme
  • salt and freshly ground black pepper
  • 1 purchased cooked rotisserie chicken, shredded
  • 1 (8 oz) package frozen peas

Cream Sauce

  • ½ cup (1 stick) unsalted butter
  • 1 cup all-purpose flour
  • 3 cups chicken stock
  • ½ cup heavy whipping cream
  • dash of hot pepper sauce, such as Tabasco
  • salt and white pepper

Crust

  • 1 cup (2 sticks) chilled unsalted butter, cut into 16 pieces
  • 3 cups all-purpose flour
  • 10 oz. chilled cream cheese
  • 1 tsp salt
  • ½ tsp white pepper
  • 1 large egg
  1. Melt the butter in a large pan over medium heat, add the potatoes and onions and saute for 5 minutes
  2. Add the bell pepper, garlic and mushrooms and saute for 15 minutes, until potatoes are soft; stir in the crushed red pepper and thyme; salt and pepper to taste.
  3. Add the shredded chicken and frozen peas, which will defrost in the heat of the filling, and set the pot aside while you make the cream sauce.
  4. Add butter for the cream sauce to a new sauce pan and let it melt.
  5. Gradually add the flour, whisking the whole time so that the butter and flour make a paste.
  6. Gradually add the chicken stock to the flour-butter paste, whisking thoroughly after each addition until you have a smooth sauce before adding more chicken stock; add the cream, hot pepper sauce; salt and white pepper to taste.  I will never forget my Mom’s advice to “cook the flour taste out.”  I stood over the stove and let it bubble for about ten minutes, tasting it every few minutes or so.  She’s absolutely right-it will taste just like flour until cooked long enough and then it starts to taste creamy and peppery instead.
  7. Pour the cream sauce over the chicken-vegetable mixture in the other pot and stir to combine.  Divide the filling up amongst the (oven proof) serving bowls you are using.  If you don’t want to do individual servings, you can do one big glass baking dish of it, which is how Mom always served it to the family.
  8. Heat the oven to 375 degrees.
  9. Pulse the flour and butter in a food processor until crumbly.
  10. Add the cream cheese, salt and pepper to the food processor and process until the dough forms a big ball.
  11. Dump the dough out onto a floured surface and roll it to 1/8″ thickness (Rebecca said 1/4″ but that was WAY too thick for me) with a floured rolling pin.
  12. Cut out rounds of dough that will drape over the sides of your bowls by about 1/2″, and drape over tops of bowls.
  13. Beat the egg with a splash of water and brush the crust with the egg mixture.
  14. Place pot pies on a baking sheet so you can put them all in and pull them out all at once.
  15. Bake for 20-25 minutes until golden brown on top and enjoy!


Banoffee Pie

Monday, November 7, 2011

My friend travels all over the world and, when it was decided she would get a surprise party this year for her birthday, “Where in the World is Mikaela?” was a theme we just couldn’t pass up.  Each of us signed up for a different country to represent and I, being the Anglophile that I am, chose England.

There’s a scene in “Love Actually” where Kiera Knightly’s character offers up some Banoffee Pie as a token of peace.  For years I wondered what this mysterious British dessert might be before I finally looked it up.  It’s much less exotic than I thought: banana-toffee pie.  The words are just squished together!  I had to make it to represent England for Mikaela’s party.  The pie is quite simple to make and, despite my misgivings, was surprisingly delicious!

That said, this pie also brought about my first major cooking injury-I tried to take my knuckle off with my mandolin slicer and as I type this, my finger is bandaged up in a full finger splint so that I can’t bend my finger and open up the cut again-I also can’t write, type, or do anything else normal with my right hand.  But I guess you live, you learn!  And like I said, the pie was great at least and by the end of the night, we were all standing around the dish, scraping out the scraps with spoons.

Banoffee Pie

  • 2 cans (14 oz) of sweetened condensed milk
  • 1 1/2 cups graham cracker crumbs
  • 2 sticks of butter, 1 melted
  • 1/4 cup brown sugar
  • 4 ripe bananas, sliced (but don’t slice your finger!)
  • 1 pint whipping cream
  • 1/3 cup powdered sugar
  • 1 1/2 teaspoons vanilla extract
  • 1/4 cup cocoa powder
  1. In a double boiler, heat the condensed milk for 1 1/2 hours, stirring occasionally.  The milk will turn a golden color.
  2. Preheat the oven to 350 degrees.
  3. Combine the graham cracker crumbs and stick of melted butter until fully combined and press evenly into a 9″ deep dish pie plate.  Bake for 5-9 minutes until golden and toasty smelling.  Let cool completely.
  4. Add butter and brown sugar to condensed milk after 1 1/2 hours, stirring until evenly combined.
  5. Pour 1/2 - 1/3  of the milk mixture (“toffee” at this point) into the cooled pie crust, layer the bananas in an even layer on the mixture, top with rest of the toffee, then transfer to fridge for 1 hour or more until completely cool.
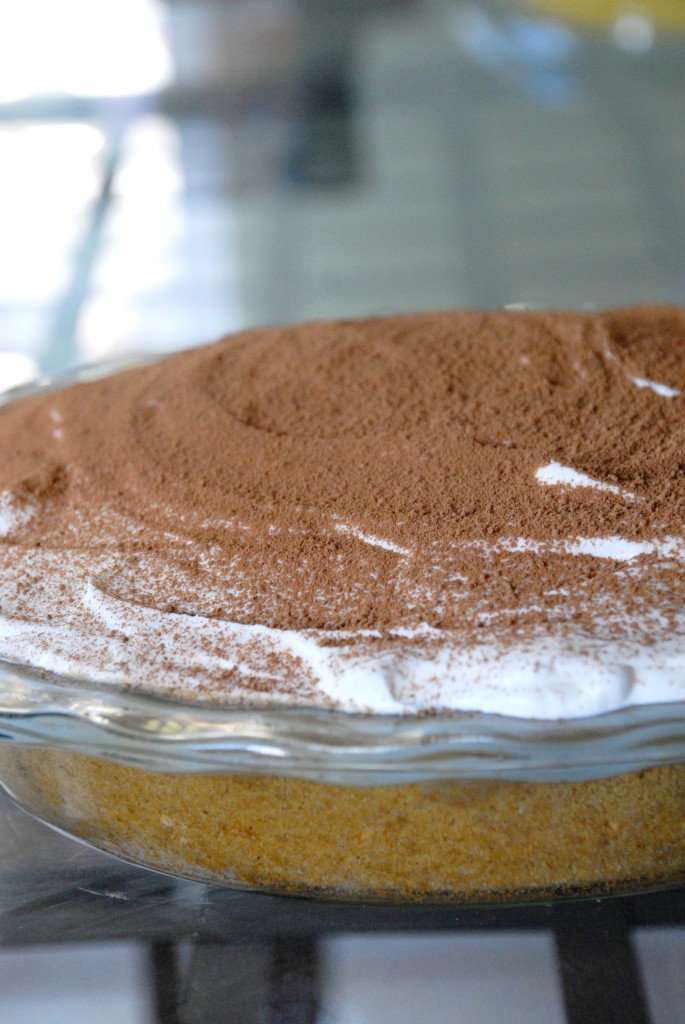
  6. Once cool, whip the cream, powdered sugar, and vanilla into a stiff whipped cream.  Top pie with whipped cream and dust with a layer of cocoa powder by sifting the powder over the top.  Enjoy!

Southern Comfort Apple Pie

Monday, October 31, 2011

You probably have a favorite apple pie recipe.  You should probably throw it out the window and replace it with this one.  The process, I admit, is slightly more involved than your average apple pie recipe, but it is absolutely worth it.  There’s apples, Southern Comfort, caramel, an overabundance of cinnamon…really, I hope that old recipe of yours is on the ground outside your window by now.

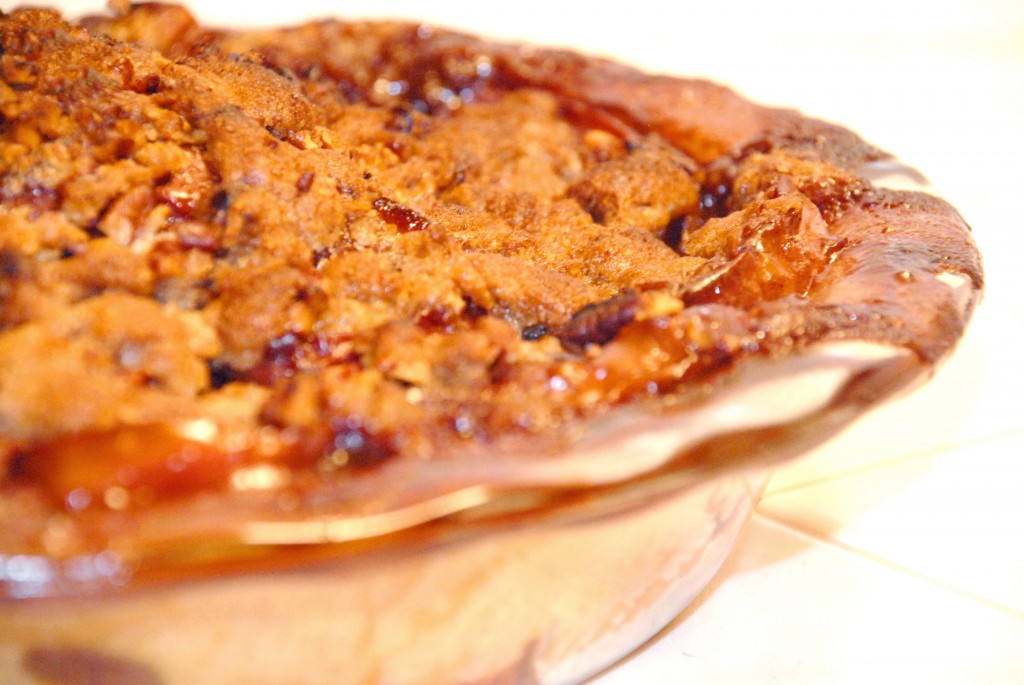
As I mentioned previously, I made this for a group of friends along with the Pumpkin Pie, but this pie was without a doubt the winner of the night.  There are only two tiny issues I had with this pie: 1) the caramel filling overflowed a great deal, but I’m sure that if the pie had a well-sealed full top crust instead of just a crumble topping, this wouldn’t have been as big a problem-good thing we had a pan on the rack below, or else I’m guessing we would have had to pay to have the oven cleaned in the place we had rented!… and 2) good Saigon Cinnamon is $8 at my grocery store and I had just purchased a new bottle.  This recipe cleaned out at least half the bottle and then some!  That said, I think the strong spicy cinnamon really made this pie the wonder that it was, so chintzing on mediocre cinnamon is a crime against this pie.

In the end, though, this is another recipe to save for Thanksgiving and I promise you’ll barely be able to sit through dinner before diving into this pie!  Like the Pumpkin Pie, I did cheat and use a store-bought crust that was too small for my deep dish pie plate, but if you’re looking for a homemade pie crust recipe, see my Bourbon Honey Peach Pie

To see how other members of Project Pastry Queen fell in love with this pie (I think it was unanimously love-at-first-bite), check them out here!

Southern Comfort Apple Pie
The Pastry Queen by Rebecca Rather

Topping

  • 1/2 cup chopped pecans
  • 1/3 cup sugar
  • 3 tablespoons dark brown sugar
  • 1/2 teaspoon ground cinnamon
  • 1/4 teaspoon salt
  • 1/3 cup all purpose flour
  • 1/3 cup chilled unsalted butter

1 unbaked pie crust

Filling

  • 5-6 medium size tart apples
  • 1/2 cup unsalted butter
  • 3 tablespoons ground cinnamon
  • 1 cup sugar
  • 3/4 cup Southern Comfort liqueur
  • 1/2 cup heavy cream

To Make the Topping:

  1. Preheat the oven to 375 degrees.
  2. In a food processor, process both sugars, the cinnamon, salt and flour for about 1 minute.
  3. Cut the butter into small pieces and add to the sugar-flour mixture.  Pulse about 10 - 15 times, until the mixture is crumbly.  DON’T over-process!  Mine turned into a big hunk of dough because I pulsed a few extra times and then thought “oh, if I keep pulsing, the blade will cut up the mixture into tiny pieces again.”  I don’t know where that logic came from because the opposite is true and I knew it.  I just stuck the mixture back in the fridge and crumbled it up with my fingers later.
  4. Stir in the pecans (and don’t try tasting it, because I made this mistake and may have ended up eating a quarter of the bowl of topping).  Refrigerate until ready to use.
  5. Line a 9″ deep-dish pie plate with pie dough.  Press it into place and crimp the edges.

To Make the Filling:

  1. Peel, core, and cut the apples into 1/4″ thick slices (I used one of those handy apple slicers and just cut each resulting slice in half).
  2. Melt the butter in a large skillet over medium-high heat.  When the butter starts to foam, add the apples and saute for 5-8 minutes (I had to somehow do mine in two batches because my 10″ skillet wasn’t large enough.  Either do two skillets at once, splitting the ingredients evenly between the two or be ready to clean up the mess you make on the stove spilling apples out of the pan).
  3. In a small bowl, stir together the cinnamon and sugar; sprinkle it on the apples and stir to combine.  Simmer the apples for another minute.
  4. Remove the apples from the skillet with a slotted spoon and onto a baking sheet, leaving as much of the butter-sugar-apple juices mixture in the pan as possible.  Make sure the apples are spread out in a single layer or else they’ll steam and get all mushy.
  5. Pour the Southern Comfort into the butter-sugar mixure in the pan.  Simmer the mixture over medium heat for at least 5 minutes, until the alcohol burns off (it shouldn’t sting your nose if you sniff the steam rising from it).
  6. Add the cream and continue cooking for 5-10 minutes until the mixture is thick as pourable caramel.
  7. Add the apples back to the skillet and toss the apples with the caramel sauce until evenly coated, then pour contents of pan into the unbaked pie crust.
  8. Sprinkle the crumble topping evenly over the apples and transfer dish to oven, making sure there is a tin-foil lined baking sheet on the rack below the pie to catch any juices that bubble over (if there’s a lot, the oven may smoke, which is okay as long as your pie doesn’t burn and the fire alarm in your house doesn’t go off).
  9. Bake for 50-60 minutes until the filling is bubbling and the topping is brown.
  10. Serving warm with ice cream or cooled off after dinner or however you may decide to enjoy it!

Bourbon Pumpkin Pie

Monday, October 17, 2011


Clearly I’ve been on a big bourbon-in-cooking kick lately, but this time it’s not my fault!  Tara chose the Bourbon Pumpkin Tart for Project Pastry Queen this week!

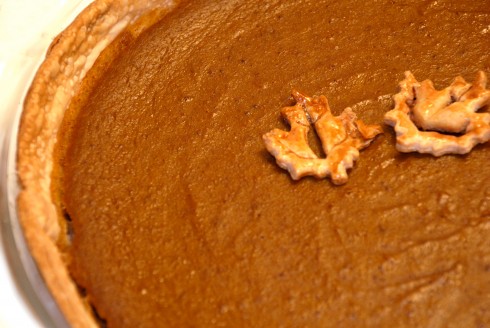
I do love pumpkin pie—it’s one of my all-time favorites, so I was excited to try a new version of it.  I have to admit, I found this one to be a little too spiced (I think it was the cloves), but the addition of bourbon was a lot of fun.  The changes I made to the recipe were out of necessity and not experimentation with my own version, unfortunately, because I made this pie in a kitchen that was not my own, hence the pie instead of the great tart idea and, because I skipped ahead a few weeks to also make the Southern Comfort Apple Pie which also had a crumb topping, I left the crumb topping off of this pumpkin pie so as not to be too redundant (I was cooking for a crowd, after all, and who needs crumble topping on both pies for dessert?).  I also regret to say that I used store-bought crust because, again, I was cooking for a crowd in a foreign kitchen (you can tell-look how it bubbles in the picture).  That said, making this recipe made me realize that the new pie plates I bought are actually deep-dish pie plates, because the rolled up pie crust I usually use in a pinch didn’t have any left over for crimping the edges!

I highly highly suggest you keep this recipe in the back of your mind for Thanksgiving, especially if you like a pumpkin pie chock-full of spices—and if not, just leave out the cloves and ginger and be sure to serve the pie with whipped cream to mellow the flavors out.  I’m posting the recipe as I made it, but if you would prefer to try the original tart version with crumble topping, as written in The Pastry Queen, head over to Tara’s blog (who, by the way made an absolutely gorgeous tart-it makes me wish I had saved this pie to make at home and hadn’t had to “dumb” mine down!).

Bourbon Pumpkin Pie
Adapted from The Pastry Queen by Rebecca Rathers

  • 1 can (15 oz) pure pumpkin
  • 3 large eggs
  • ½ cup sugar
  • ¼ cup firmly packed brown sugar
  • ¼ teaspoon salt
  • 1 teaspoon ground cinnamon
  • 1 teaspoon ground ginger
  • ½ teaspoon ground cloves
  • ½ teaspoon ground nutmeg
  • 1 tablespoon flour
  • ½ cup heavy whipping cream
  • ¼ cup bourbon
  • 1 refrigerated pie crust (for a homemade pie crust recipe, see my previous post on Peach Pie)
  1. Preheat oven to 350 degrees
  2. Roll out crust and gently ease it into a 9 inch pie plate.
  3. Add pumpkin to a large bowl and whisk in the eggs, one at a time until thoroughly incorporated.
  4. Add both sugars, salt, cinnamon, ginger, cloves, nutmeg and flour; whisk vigorously until combined.  Whisk in cream and bourbon.
  5. Pour the pumpkin mixture into the prepared pie crust and bake for 40-45 minutes or until the filling is set and doesn’t jiggle when you move the pie plate back and forth.
  6. Let cool 1 hour before serving and, as I mentioned before, serve with whipped cream!

James and the Giant Bourbon Honey Peach Pie

Wednesday, September 21, 2011

When I saw KCRW & LACMA were holding a pie contest, I was interested.  When I saw that there was a category just for pies inspired by Tim Burton, I was hooked.  I instantly started churning out ideas and sketching them out on scraps of paper….Jack the Pumpkin King Pumpkin Pie, Sweeney Todd “Meat” Pie, the Queen of Hearts’ Strawberry Tarts….the possibilities were endless!  I couldn’t have asked for a more inspiring and creative special category and I was disappointed to find out we could only enter one pie per category.  So instead of disguising my cast-off Tim Burton creations to be suitable for other categories (fruit, nut, savory, or cream/chiffon), I decided to focus all my creative and baking energy to making one really great pie: James and the Giant Peach Pie.

I felt, despite the fact that the judges were a total all-star panel, that pumpkin and strawberry and meat pies are so subjective to a judge’s mood on any given day…but that no one can actually turn down a really good peach pie, no matter what their mood.  Since it was for Tim Burton, I knew I had to go all out on themeing the pie and if there’s one thing I love it’s a challenge that combines baking and crafting.  In “James and the Giant Peach,” the characters live inside a peach floating across the English Channel, at one point being pulled by a large flock of birds.  So I went to the co-op, found the largest peach in the bin, and proudly carried it home, knowing it would be my centerpiece.  I held up the line at FedEx-Kinko’s while the guy at the desk and I printed out the characters in a few different sizes for me to experiment with (and mirror images of them, so no matter what side you looked at the pie from, you wouldn’t be staring at the white back of paper).  And I dashed through the craft store, wondering if I really needed a pair of needle nose pliers and wire cutters to pull off this project (I did).  The final result was a “giant” peach, the cast of characters merrily perched on top, being pulled by birds through waves of the English Channel pie crust.
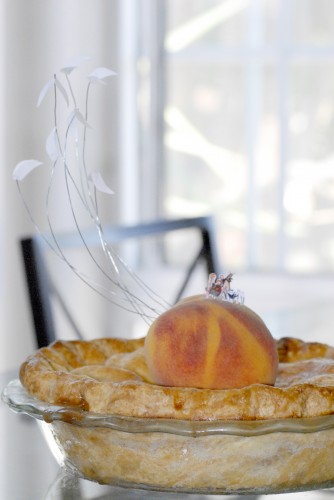
There were some hurdles to jump first, though.  I admit, though I love making pies, I normally have no patience for pie crust and just use frozen crust from the store (it could be because I make most of my pies around Thanksgiving when I have other things to worry about, like if I remembered the cranberries for the stuffing).  These pies had to be 100% homemade and, truthfully, I’m glad for it, because the process reminded me that crust really is so simple to throw together that I should take the time to do it more often.  The other hurdle was that in order to pull off my design element, I needed a little stand to hold the peach up at crust level and I didn’t know a single pizza store that still used those plastic stands to keep the box from drooping into the cheese.  Imagine my delight when the hero boyfriend called from a conference he was at in San Fransisco to say that he had triumphantly found and saved two pizza box stands and he would be home on Friday with them!

So with all challenges behind me and nothing left to do but bake a pie, I plunged ahead, making the crust on Saturday night and the pie early on Sunday morning, hoping it would cool off enough before having to bring it to LACMA for judging.  And when all that was said and done….
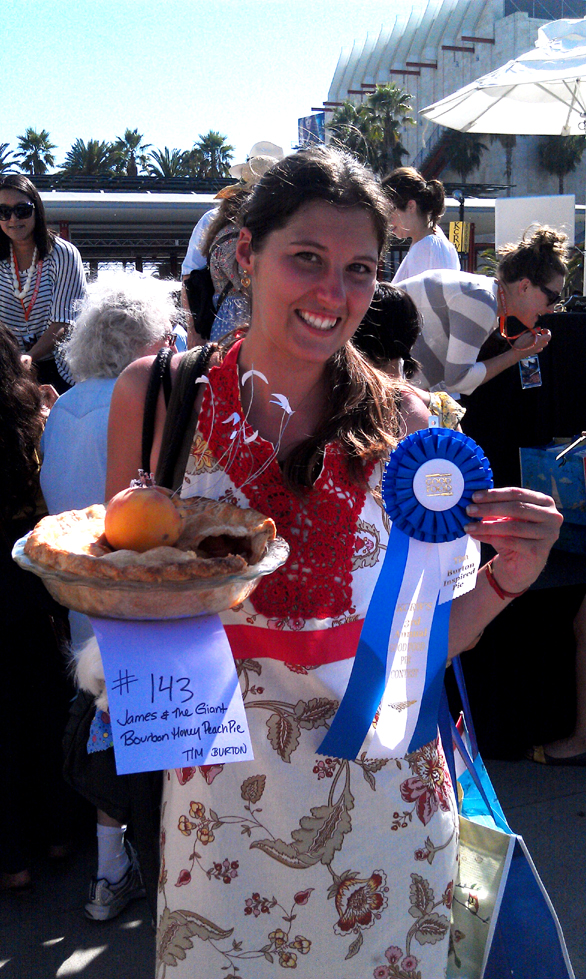
I placed first in the Tim Burton category!  My very first blue ribbon!  I was so nervous seeing my pie up on the judges’ table, but after my name was called, I was absolutely jumping for joy and so proud of what I had accomplished.  The boyfriend had been hiding inside the pie tent so that he could have first dibs at tasting some of the 250 pies entered in the contest, but came out to celebrate with me and join in my first paparazzi moment (after 3 years in LA, it’s about time, eh?).  I’m so grateful to all the friends who showed their support either by coming to the event or just offering moral fortitude for my first baking contest-it certainly paid off!  And now, dear readers, I pass the recipe on to you to share with your family and friends.  Award Winning Bourbon Honey Peach Pie, submitted for your pie-eating pleasure:

Bourbon Honey Peach Pie
adapted from Gourmet, July 2009 via Sassy Radish
crust adapted from Cook’s Illustrated

Pie Crust (enough for 2 crusts, a top and bottom)

  • 2 1/2 cups unbleached all-purpose flour
  • 1 teaspoon table salt
  • 2 tablespoons sugar
  • 12 tablespoons cold unsalted butter, cut into 1/4-inch slices
  • 1/2 cup chilled solid vegetable shortening , cut into 4 pieces
  • 4 tablespoons vodka , cold
  • 4 tablespoons ice water

Filling

  • 3 lb ripe peaches
  • 2 tablespoons cornstarch
  • 1 1/2 tablespoons all-purpose flour
  • 2 teaspoons fresh lemon juice
  • heaping 1/2 teaspoon cinnamon
  • heaping 1/4 teaspoon nutmeg
  • 1/4 teaspoon salt
  • 1/2 cup sugar
  • 1/4 cup honey
  • 2 tbsp bourbon
  • 1 tablespoon vanilla bean paste (or extract)
  • 2 tablespoons water
  • 3 tablespoons unsalted butter
  • 1 egg white
  • sugar for sprinkling
  1. Process 1 1/2 cups flour, salt, and sugar together in food processor until combined, about 2 one-second pulses.
  2. Add butter and shortening and process until homogenous dough just starts to collect in uneven clumps, about 10 seconds (dough will resemble cottage cheese curds with some very small pieces of butter remaining, but there should be no uncoated flour). Scrape down sides and bottom of bowl with rubber spatula and redistribute dough evenly around processor blade.
  3. Add remaining 1 cup flour and pulse until mixture is evenly distributed around bowl and mass of dough has been broken up, 4 to 6 quick pulses. Empty mixture into medium bowl.
  4. Sprinkle vodka and water over mixture. With rubber spatula, use folding motion to mix, pressing down on dough until dough is slightly tacky and sticks together. Flatten dough into 4-inch disk. Wrap in plastic wrap and refrigerate at least 45 minutes or up to 2 days.
  5. Place a foil lined baking sheet on the middle rack in your oven and preheat to 425 degrees.  This will ensure ,when you put the pie in the oven to bake on the already hot sheet, that the butter and shortening will melt and coat the flour faster, before the peach juices get to the flour.  If the butter and shortening melt first, you’ll get a flaky crust.  If the peach juices get to the crust first, you’ll get nothing but a soggy crust.  If you have been chilling your dough overnight, pull it out now so that it can soften.
  6. You can choose to peel the peaches or not.  If you do want to peel them, blanching them will make the process a lot easier.  I personally just didn’t want to take the time to peel them and the pie was, obviously, fine.
  7. Slice the peaches into 8 pieces per fruit, tossing them in a bowl as you go.
  8. Pour the lemon juice over the peaches slices.
  9. In a small bowl, mix the cornstarch, flour, cinnamon, nutmeg, and salt.  Pour the mixture over the peach slices and toss the peaches until evenly coated.
  10. Bring 1/2 cup sugar, honey, vanilla, and bourbon and water to a boil in a 1 1/2- to 2-qt heavy saucepan over medium-high heat, stirring until sugar has dissolved.  Boil without stirring, swirling pan occasionally so the mixture darkens in color evenly, until dark amber, about 5 minutes. (Tricked you!  You’re basically making vanilla honey caramel here!  But we’re not going all the way to caramel, instead we’re just cooking the sugar long enough to deepen the flavors and give it a hint of caramel flavor.)
  11. Remove from heat and add butter, swirling pan until butter is melted. Pour over fruit and toss the peaches until evenly coated.
  12. Sprinkle a generous amount of flour on top of the first dough round and roll out 1 piece of dough into a 13-inch round on a generously floured surface.  Gently roll the dough around the rolling pin and then unroll it into the pie plate, gently lifting the edges and settling it into the plate (at this point it is suggested that you chill the pie plate and crust while you roll out the other crust but truthfully, I was rushing and forgot and it was fine).  Roll out the second pie crust using the same flouring methods.
  13. Spoon (or dump) the peaches into the pie crusted plate and lay the second rolled out crust on top.  Trim the overhand so there’s just about a 1/2 inch left.  Going around the edge, you’ll seal the juices in best if you fold the edge of the crust underneath itself before crimping or decorating it.  Cut a hole about 2″ wide in the center of the top pie crust for steam to vent out.
  14. Brush the crust with the egg white and then sprinkle with sugar.  Both will make the crust shiny and delicious!
  15. Bake pie on hot baking sheet 20 minutes. Reduce oven temperature to 375°F. Continue to bake until crust is golden-brown and filling is bubbling, about 50 minutes more-tent tin foil over the top of the pie if the crust starts to brown too much. Cool pie to room temperature, 3 to 4 hours.