Entries Tagged as 'Seafood'

Salmon Croquettes

Wednesday, April 11, 2012

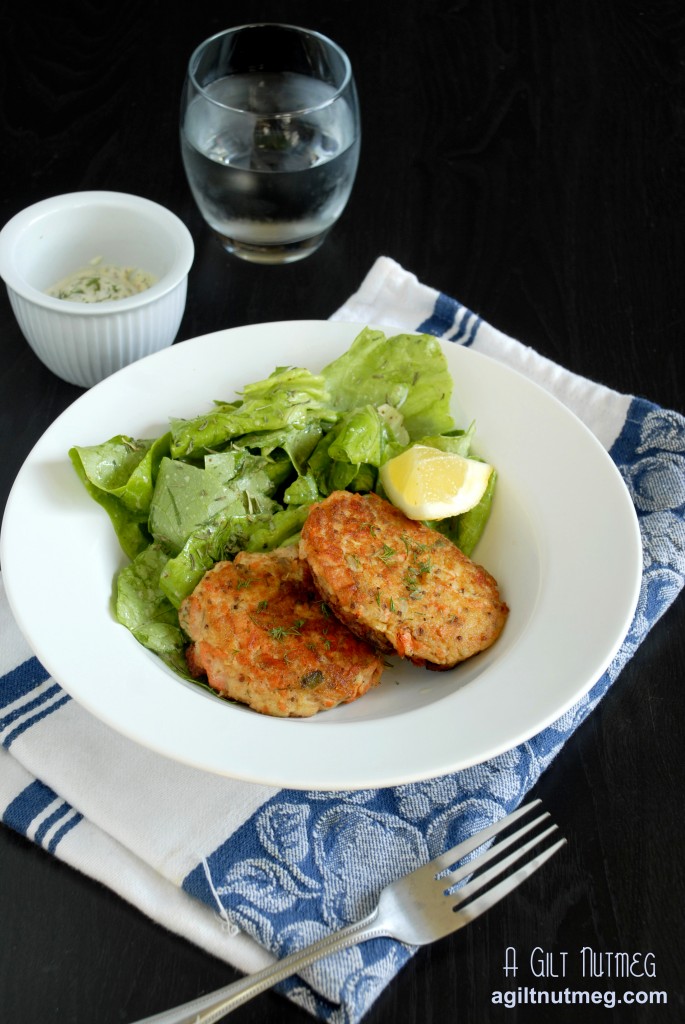
salmon croquettes

When I am making salmon for dinner, my favorite side dish to serve with it is whipped potatoes.  To me, nothing beats the soft, buttery potatoes in contrast to the flavorful, flaky fish-pair it with a simple salad and I’m in fish heaven.  While I love salmon, I’ve never been a huge fan of salmon croquettes because the binders (crackers, bread crumbs) were overbearing in flavor or unappealing in texture; the fish just always seemed to get lost.  Imagine my delight when I found this recipe for salmon croquettes that used mashed potatoes as a binder!

The texture is certainly a bit more delicate than your average croquette, but these croquettes put me right up there in fish heaven again and I’m so glad I’ve found this recipe.  Instead of an overwhelming breadcrumb flavor and texture, you get those wonderful mashed potatoes and flaky salmon mixed in with fresh dill, lemon zest, and scallions.  Even better, there’s a dill Dijon mayonnaise that pairs with it and, long story short, I will be happily eating these for days to come.  For those big eaters out there, I know the above picture looks like a pretty light meal, but these are surprisingly filling!
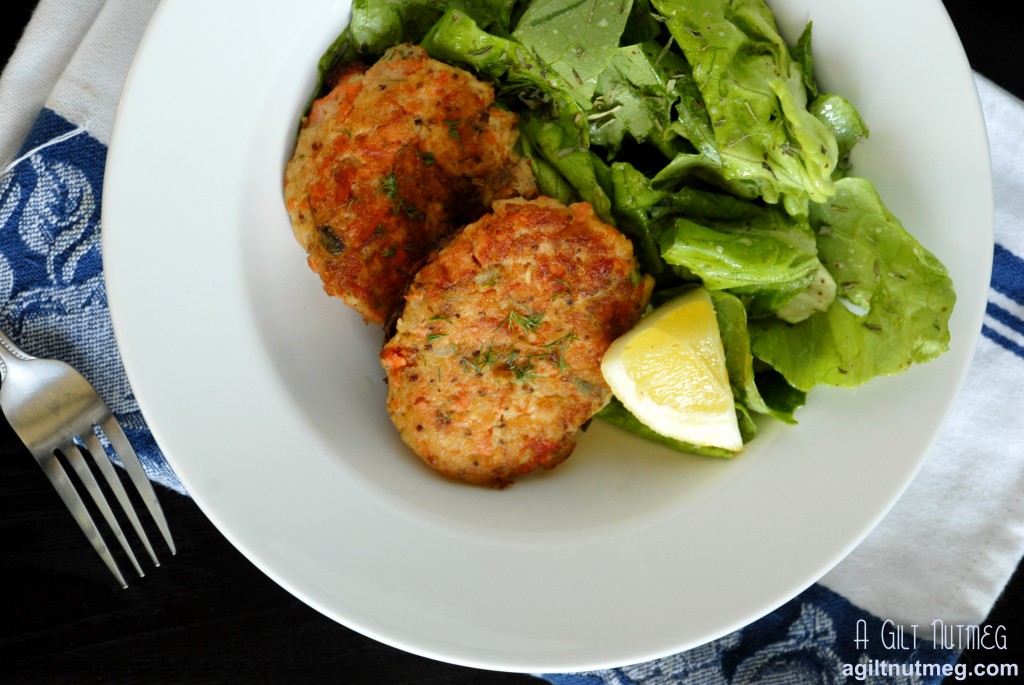
 

salmon croquettes


Pan Fried Salmon Croquettes
Adapted from Bon Appetit
Makes 12 medium sized cakes

  • 1/2 cup mayonnaise
  • 2 Tablespoons Dijon mustard
  • 3/4 pound salmon fillet, preferably sockeye
  • olive oil for brushing
  • 1 1/2 lbs russet potatoes, diced
  • 1 teaspoon kosher salt
  • 1 egg + 1 egg yolk, lightly beaten
  • 2 tablespoons chopped fresh dill (my secret: instead of chopping with a knife, I just use scissors and cut it over the bowl)
  • 2 scallions, thinly sliced
  • lemon zest from 1 large lemon
  • 1/2 teaspoon cayenne pepper
  • 1/2 teaspoon paprika
  • black pepper to taste
  • vegetable oil for frying
  1. Combine the mustard and mayonnaise in a small bowl.  Measure out 1/3 cup of the mixture for the croquettes and refrigerate the rest for later.
  2. Brush the fish with olive oil and bake in a 400 degree oven for about 12 minutes.  Set it aside to cool and in the meantime…
  3. Cover the diced potatoes with water, sprinkle some salt in, and boil until tender.  Drain the potatoes and let cool; mash them or use a stick blender until smooth.  (When I used the stick blender they got a little sticky and gummy, but I figured this was fine considering they were being used as fish glue).
  4. Remove the skin and any bones from the fish, move it to a medium bowl and using two forks, flake it into large pieces.
  5. In a large bowl, combine the mashed potatoes, salt, egg, dill, scallions, lemon zest, cayenne pepper, paprika and black pepper.
  6. Fold the Dijon mayonnaise mixture and salmon into the mashed potatoes mixture until thoroughly combined.
  7. Line a baking sheet with parchment paper or waxed paper.  Spoon (I used an ice cream scoop and it worked perfectly) the mixture into 12 even portions onto the prepared baking sheet, cover loosely with plastic wrap and put the sheet into the fridge.  You want to leave them in the fridge for at least an hour; I fried up a few for dinner that night and left the rest in the fridge overnight and they were great for dinner the next night, so prepping all of this the night before will mean a super fast dinner the next night.
  8. Heat a few tablespoons of vegetable oil in a large pan and add 3-4 cakes, flattening or shaping them into rounds as necessary (err on the side of more oil rather than less, as I found that the cakes stuck to the pan a bit when I used less oil).  Fry until golden brown on each side, about 3 minutes on each side.  I put the lid on the pan while I waited, to cut down on grease splatter and ensure that the cakes were hot enough to fully cook through.
  9. When ready to serve, add about a Tablespoon of lemon juice (I just squeeze a quarter of a lemon in that I had lying around) and any left over fresh dill to taste to the Dijon mayo sauce and serve the cakes with a lightly dressed salad.  Enjoy!

Up next to try: freezing the patties for a super quick dinner down the line and seeing how these turn out if I were to bake them instead of fry them.  Trust me, it won’t take long for me to get around to these again!

Spicy Butter-Steamed Ginger Halibut

Wednesday, March 28, 2012

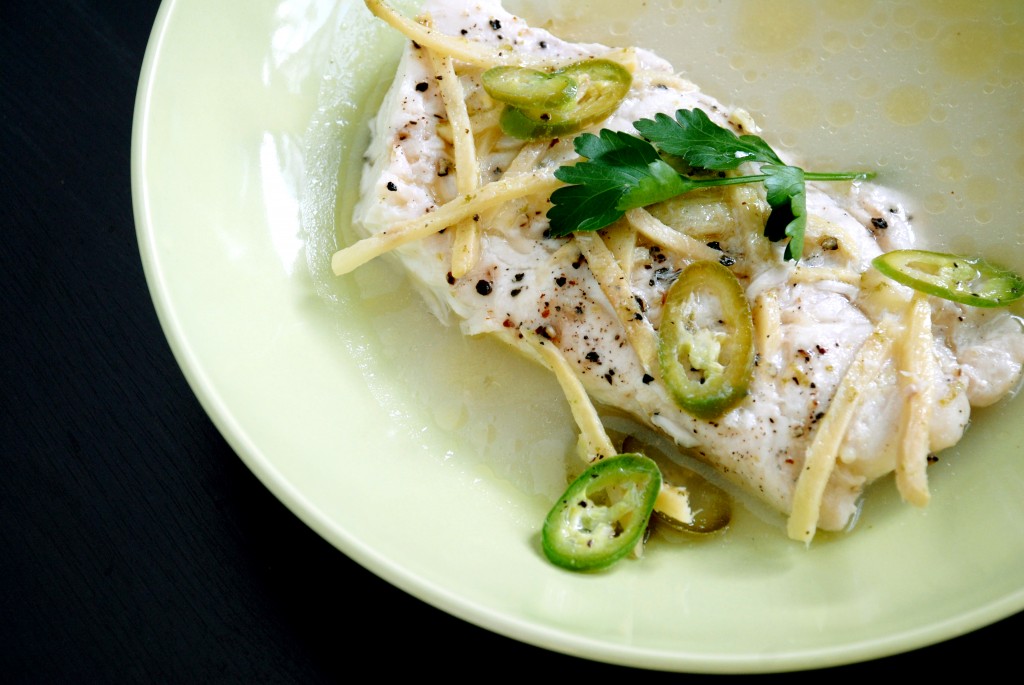
butter steamed ginger halibut

Clearly I’ve been on a bit of an Asian flavors inspired kick lately, but oh what a delicious kick it is-and this fish certainly doesn’t disappoint in the tasty department.  As soon as I saw this in Food & Wine, I knew I wanted to make it.  It has a myriad of different flavors and, with the exception of preparing the ingredients, it literally takes 5 minutes to cook the juiciest, moistest fish I’ve ever had at home.

The recipe did call for sea bass, but I couldn’t handle the $26.99 a pound for sea bass at my local fish market, so I went for halibut which is similar in flavor and texture.  You create a makeshift steamer for your fish with a pie plate so that you don’t lose the juices.  What results is tender fish with ginger and serrano chile notes in a buttery luscious broth that I’m looking forward to making again very soon!

Spicy Butter-Steamed Ginger Halibut
Adapted from Food & Wine

  • four 7 oz halibut fillets
  • 1 1/2″ piece of ginger, peeled and cut into matchsticks
  • 1 serrano chile, sliced thin
  • 1 garlic clove, minced
  • zest and juice of 1 lime
  • salt and pepper
  • 4 Tablespoons of butter, in small pieces
  1. Before starting, find a glass or ceramic pie plate that will fit inside a large, deep skillet (I suggest this now because I was scrambling to find this when I was half way done with the recipe).  2 pieces of halibut will fit per pie plate, so I used two pie plates and switched them out when the first was done cooking.  Make 3 smalls aluminum balls about the size of golf balls, flatten them slightly and put them in the skillet. Fill the skillet with an inch or two of water and turn the heat on so that it will boil while you’re preparing the fish.
  2. In a small bowl, mix the ginger sticks, chile slices, minced garlic, and lime zest together.
  3. Arrange the pieces of fish in the pie plates (skin side up, if there is skin) and cut 4 shallow slashes in the top of each piece of fish.
  4. Sprinkle the ginger mixture evenly over the top of the fish and season the fish with salt and pepper.
  5. Dot the surface of the fish with the butter and drizzle the lime juice evenly over the fish.
  6. Carefully place the pie plate in the skillet, balanced on the aluminum balls, and cover the skillet tightly with a lid.
  7. Let the fish steam for 5 minutes and then pull it out of the steamer.
  8. Serve immediately and be sure to pour the buttery broth over the fish (my favorite part) and enjoy!

Note: the chile is very spicy, so be careful when handling and also when eating.  Get rid of the seeds if you want to reduce the heat a bit.

Cilantro Lime Shrimp

Wednesday, January 18, 2012

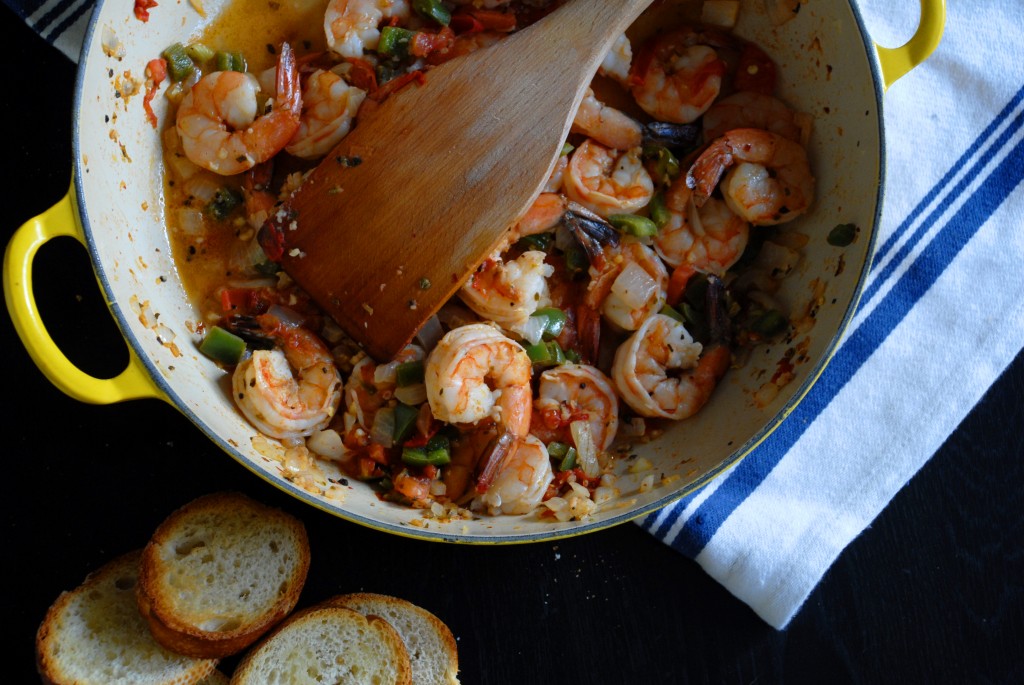
cilantro lime shrimp

The Boyfriend had a very tough day.  So what else is a girl to do but put his favorite classical music on, light the candles, and greet the poor guy with the dish in the picture above?  To top it off, I still had one more creme brulee left in the fridge.

If you’re looking for a super easy dinner, look no further.  It basically involves chopping things and throwing them in a pan to cook until done-that’s it!  It’s a delicious, satisfying meal despite the fact that I didn’t even pair it with any side dishes-just the crusty toasted bread for soaking up those delicious juices.  I think my favorite part is the spice that the jalapeno adds because it doesn’t hit you over the head with a crazy burning, but it does give a gentle yet firm heat that really balances great with the cilantro and lime juice.  We actually just ate directly out of the pan so that we didn’t lose a single ounce of the flavorful liquids and also to cut down on dishes because…if you saw my kitchen right now…well, you’d understand why.

Overall, I was just ecstatic with how this dish came out and I can’t wait to finish up the leftovers for lunch tomorrow.  I can’t imagine a more delicious, quick dish to spice up a weeknight!

Cilantro Lime Shrimp
Adapted from Lana’s Cooking
Serves 2 and a half

  • 1 tablespoon butter
  • 1 tablespoon olive oil
  • 3 cloves garlic, minced or put through a garlic press
  • 1 medium onion, diced
  • 1 jalapeno, diced (I left the seeds intact, which meant more heat.  If you want less spice, remove the seeds)
  • ¼ teaspoon red pepper flakes
  • ½ teaspoon Mexican oregano
  • 2 Roma tomatoes, diced
  • 1 lime
  • pinch of salt
  • a few grinds of black pepper
  • 1 pound shrimp, shelled and deveined (I found it was MUCH cheaper to buy uncooked shrimp)
  • a few large pinches of fresh cilantro leaves
  1. Add oil and butter to pan and heat over medium heat until melted and combined.
  2. Add onion and saute for a few minutes before adding the jalapeno and garlic-be sure to have a few windows open and don’t inhale the vapors unless you want burning nose and eyes (so much worse than onion tears!).
  3. Cook until the onions start to turn translucent, a few minutes, and then add the red pepper flakes and oregano.
  4. Add tomatoes and cook until soft, about 5 minutes.
  5. Zest the lime over the pan and then slice it into halves or quarters and squeeze the juice into the pan; add the salt and pepper.
  6. Add the shrimp and cook until just opaque-overcooking is easy, which is why I prefer purchasing uncooked shrimp (if it’s so easy to overcook, you don’t need a head start!).  The shrimp did take longer to cook than I expected, so I put the lid on and just let it cook, checking frequently to make sure I took it off the heat the instant the shrimp were all pink.
  7. Toast some bread (I sliced a baguette) brushed with some butter or olive oil under the broiler and enjoy!

Lobster BLT

Tuesday, July 5, 2011

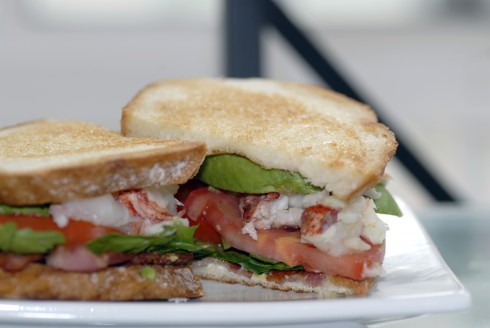
This sandwich will change how you feel about BLTs forever.  It will change how you feel about lobster forever.  Basically, you need to try this sandwich as soon as you can.  And if you don’t like lobster (!?) or can’t eat shellfish, then this will give you a really great basic BLT sandwich that I promise you’ll love more than any BLT you’ve ever had, just by switching up a few of the basic steps that make for a mediocre BLT.  Since BLTs are my favorite sandwiches, trust me, I’ve had my fair share of poorly made BLTs-the toast is too toasted and the bacon is super crisp and all of this leaves the roof of your mouth completely torn up and worst of all, there isn’t any flavor other than mayo-how is that possible!?

Trick one: fresh ingredients.  Best to make this sandwich when things like tomatoes are actually in season so you don’t have a bland sandwich.  Lobster was on sale when I bought mine so I got a little tail for $6-8 and just froze it until I was ready to make this.  You’ll note that I have garlic infused olive oil listed in the ingredients.  I suggest you find a bottle of this stuff right this moment-drop what you’re doing and just go.  You will thank me later.  You can use it in a TON of dishes and, really, it’s really one of the secrets to making this a great sandwich.  If you don’t like garlic you can use butter instead.

Lobster BLT with Citrus Mayonnaise
makes 1 delicious sandwich

  • 1 lobster tail
  • 3 slices bacon
  • arugula
  • ripe tomato
  • ripe avocado
  • 1 tablespoon mayonnaise
  • 1 teaspoon lemon zest
  • 2 tablespoons lemon juice
  • 2 pieces high quality rustic round loaf sandwich bread such as sourdough
  • garlic infused olive oil (or butter)
  • salt and pepper
  1. Get a pot of water boiling with a steamer basket inside.  Once the pot is at a rolling boil, place the lobster tail inside and cover the pot with the lid.  Let the tail steam 5-10 minutes.  The shell will turn red and the meat will be a pearly white.  Truthfully, I’d rather have my shellfish underdone rather than overdone (it gets chewy) but if you’d rather have it well done, leave it in for a few minutes longer just to be safe.  When it’s done, take the steamer out and run the tail under cold water to stop it from cooking any more; set aside.
  2. Set three strips of bacon frying.  One of the secrets to this sandwich: do not cook the bacon till crispy! Fry it until done, but still floppy.  Again, if this makes you nervous, go ahead and fry the living daylights out of it, but your sandwich won’t be as delicious because you’ll be eating carbon bacon.
  3. While the bacon is frying (don’t forget to flip it half way through!), slice your avocado and tomato and chop up your lobster tail.  Don’t worry about being gentle with the shell-you’re chopping up the meat anyway.  I took a large chef’s knife, placed it along the underside of the tail and pressed down until the softer under part cracked.  Then I was able to pry the shell apart and pull out the tail.  Chop coarsely.
  4. At this point, your bacon is likely finished; Place the finished bacon on a paper towel to soak up that extra grease you don’t need, turn off the burner, and take a wadded up paper towel and wipe the frying pan clean of the bacon grease while it’s still hot.
  5. Stir together the mayonnaise, lemon zest, and lemon juice-I preferred more lemon juice than not, as I actually don’t like the taste of mayo.
  6. Turn the burner on again under your frying pan.  Lightly brush both sides of your bread with the garlic olive oil (or just lightly butter each side) and toss the bread, one piece at a time into the frying pan, frying each side until golden-this is one of the secret tricks to the sandwich.  Instead of toast so stiff that everything falls out from between the slices, this warm, garlic-buttery delicious bread is still soft enough to not scratch the roof of your mouth, but sturdy enough to hold all of the ingredients.
  7. Finally, assemble!  Spread the citrus mayo on one of the bread slices, layer with bacon, arugula, tomato (salt and pepper here), lobster chunks, and avocado.

Like I said, game changer in the sandwich world-I’m never going back to bad diner BLTs.