Entries Tagged as 'Cake'

Southern Caramel Cake

Thursday, April 4, 2013

Southern Caramel Cake from agiltnutmeg.com

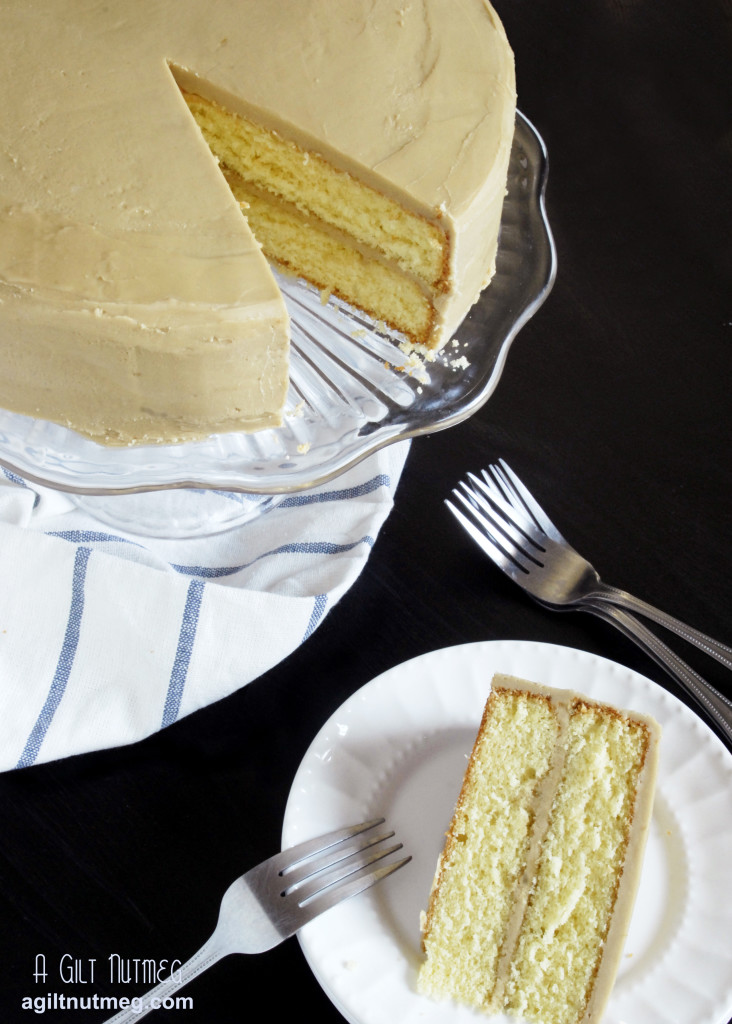
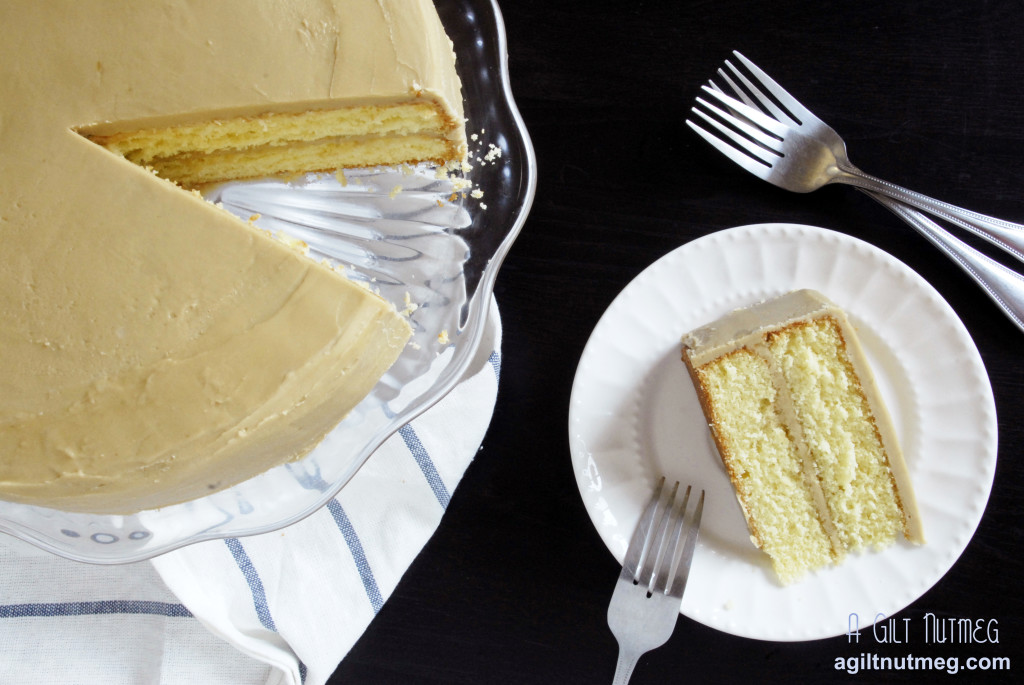
My Aunt Fannie Mae is famous in my family for her Red Velvet cake.  As such, Red Velvet was the traditional Southern layer cake that I remember growing up with (well, that and the Coconut Cake we always had at Christmas, but that wasn’t homemade).  It wasn’t until recently that I started learning about other Southern layer cakes long steeped in tradition- Hummingbird Cake, German Chocolate Cake, and now Caramel Cake.  Out of those three I just listed, Caramel Cake “takes the cake” by far in my opinion (pun intended).  I mean, really:  it’s got fantastically fluffy yellow cake layered with frosting that tastes exactly like a Werther’s Original candy.  It was irresistible!  Granted, I don’t have an overly sweet-tooth, so only one slice was plenty for me, but that one slice was outstanding.  The one tricky aspect was the frosting-as it cools, a crystallized sugar crust forms on the frosting (delish!) instead of whipped soft creaminess of buttercream frosting, so you have to frost quickly and not aim for too smooth a finish.
Southern Caramel Cake from agiltnutmeg.com

Southern Caramel Cake
from America’s Test Kitchen Season 12

  • 1/2 cup buttermilk, room temperature
  • 4 large eggs, room temperature
  • 2 tsp vanilla extract
  • 2 1/4 cups all-purpose flour
  • 1 1/2 cups granulated sugar
  • 1 1/2 tsp baking powder
  • 1/2 tsp baking soda
  • 3/4 tsp salt
  • 2 sticks (16 Tbs) unsalted butter, cut into pieces and softened
  • 1 1/2 sticks (12 Tbs) unsalted butter, cut into pieces and softened, divided into 8 Tbs and 4 Tbs
  • 2 cups packed brown sugar
  • 1/2 tsp salt
  • 1/2 cup heavy cream
  • 1 tsp vanilla extract
  • 2 1/2 cups confectioners’ sugar, sifted
  1. Heat the oven to 350 degrees and spray two 9″ round cake pans with baking spray.
  2. In a large measuring cup, whisk together the buttermilk, eggs and vanilla.
  3. In a large bowl, combine flour, granulated sugar, baking powder, baking soda and salt at low speed with an electric mixer.
  4. Add the butter, one piece at a time, until the chunks are no bigger than pea-sized.
  5. Add half of the buttermilk mixture to the butter-dry ingredients mixture and beat for one minute on medium speed until fluffy.  Slowly pour in the rest of the buttermilk and continue to beat on medium speed until just incorporated.
  6. Divide the batter evenly between the two pans and bake 20-25 minutes until golden brown.  While the cakes are baking, if you have just one bowl for your stand mixer and it is now dirty, take the time to wash it because you’ll need it for the frosting.
  7. Cool cakes in pans for 10 minutes before removing them from pans and letting them finish cooling on wire racks before frosting.  If your cakes rose a bit too much in the middle, let them cool and then level off the tops with a serrated knife before frosting.  I’ve also seen caramel cake with 4 very thin layers of cake instead of 2 thick layers.  To do this, equally cut the 2 individual cakes horizontally so that you end up with 4 thinner cake layers and frost a thin layer between each layer of cake.
  8. In a large saucepan, melt together the first 8 tablespoons of butter, brown sugar and salt.  When small bubbles appear around the edge of the pot after 5 or so minutes, whisk in the heavy cream and heat until the bubbles appear again a minute later. Remove from heat and whisk in vanilla extract.
  9. Pour the sugar mixture into a large mixing bowl and turn the electric mixer on to low.  Slowly add in the confectioners’ sugar until fully incorporated.
  10. Bump the speed up to medium and beat the frosting mixture for 5 minutes, until it is pale brown and no longer hot (but still warm).
  11. Drop the 4 Tbs of butter in, one piece at a time, and beat for another 2 minutes until butter is fully incorporated.
  12. To frost, place one cake on your cake plate, dollop about 1 cup of frosting on top of the cake and spread it evenly over the cake.  Add the second layer on top and frost the top and side of the cakes with the remaining frosting.  As I mentioned above, frost quickly!  Test Kitchen says you can microwave the frosting for 10 seconds or so to soften it back up, if necessary.
  13. Since it tastes like a rich Werther’s Original candy, be sure to have a glass of milk on hand when you cut a slice.  Enjoy!

Peach Pound Cake

Tuesday, September 11, 2012

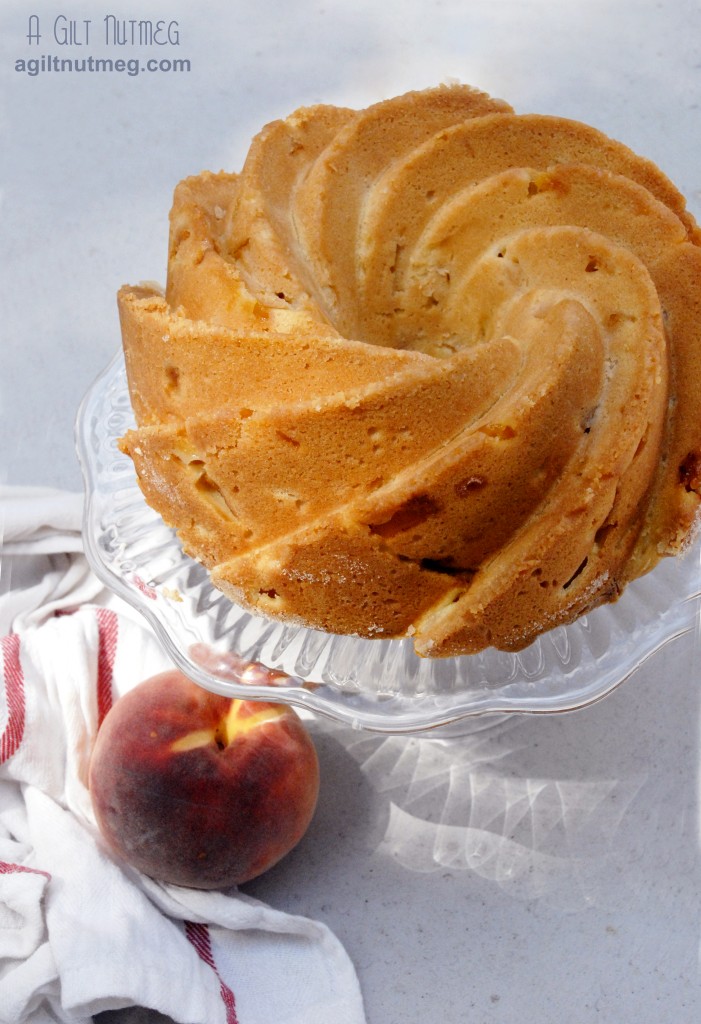
peach pound cake

Okay, okay, I’ve been AWOL.  The truth is…summer finally got to me!  Summer in LA is a very slow starter and it doesn’t even get legitimately warm enough for beach weather until August.  Of course that means that my apartment in Beachtown, which doesn’t need air conditioning 11 out of the 12 months of the year, is all of a sudden sweltering.  Standing in the hot kitchen was, truthfully, the last thing I want to do, especially when I could hop on my beach cruiser and head down the breezy coast instead.  But I’m back and I want to share one last grab at Summer’s bounty with this Peach Pound Cake!

I hope that you’ve still got a handful of peaches hanging around at the grocery store, even if Fall apples are breathing down their necks, ready to take their spot in the produce section.  This cake is a cinch to throw together, has a tasty sugar crust and features my favorite summer fruit, so get on it while you still can!

Peach Pound Cake
Adapted from The Fresh Market, via Annie’s Eats

  • 1 cup butter
  • 2 1/4 cups sugar plus 1/4 cup sugar set aside
  • 4 eggs
  • 1 teaspoon vanilla extract
  • 2 3/4 cups all-purpose flour plus 1/4 cup flour set aside
  • 1 teaspoon baking powder
  • ½ teaspoon salt
  • 3 large fresh peaches, peeled, pitted and chopped
  • 1/4 teaspoon nutmeg
  • 1/2 teaspoon cinnamon

  1. Heat oven to 350 degrees.  Spray a bundt pan with baking spray and sprinkle generously with the 1/4 cup of sugar that was set aside.  Make sure to evenly cover the whole pan with sugar, shaking and tilting the pan to cover every inch.  Gently dump out the extra, without knocking too much of what’s already stuck to the pan.
  2. In a large mixing bowl, cream together the remaining sugar and butter, beating for 5 minutes.  While that’s beating, in a separate medium bowl, whisk together the 2 3/4 cups flour, baking powder, and salt.
  3. Add the eggs, one at a time, then add the vanilla and beat until well combined.
  4. Add the flour mixture, a little at a time, stopping after the streaks of flour have disappeared.
  5. In a small bowl, mix the 1/4 cup of flour, nutmeg and cinnamon, then toss with the peaches until the peaches are evenly coated in the flour-spice mixture.
  6. Fold the peaches into the batter (it will be quite a thick batter, so it’ll take a little bit of elbow grease) and transfer the batter to the prepared bundt pan, spreading so that it’s evenly distributed in the pan.
  7. Bake for 1 hour and 10 minutes, until the top is golden brown.
  8. Let it cool on a wire cooling rack before slicing.  Enjoy!

Plum Blueberry Upside Down Cake

Wednesday, July 25, 2012

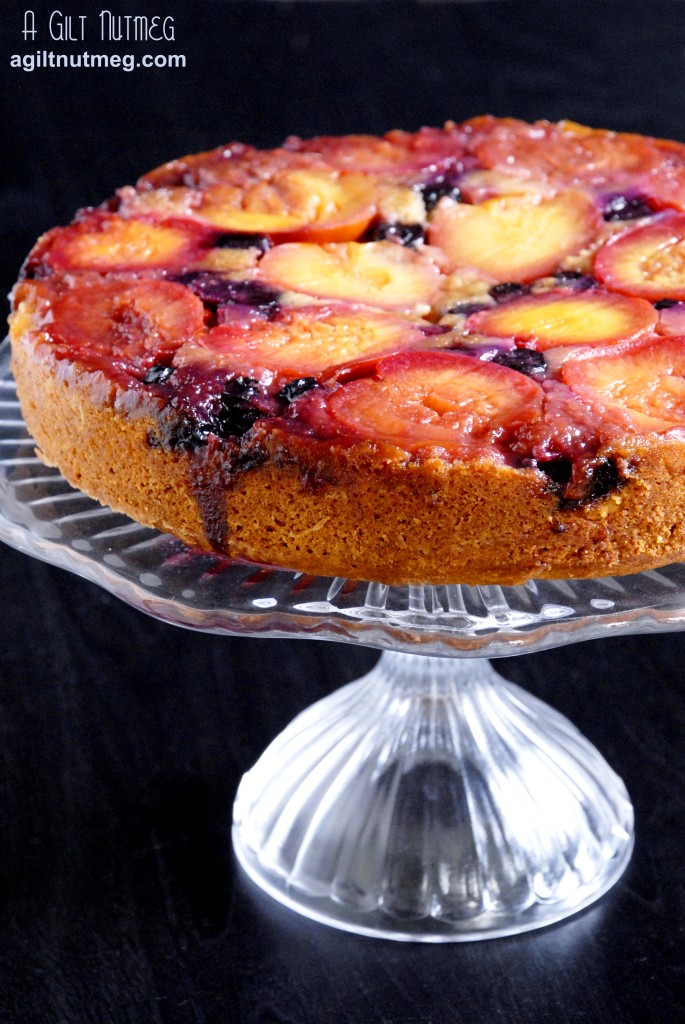
plum blueberry upside down cake

My CSA box came this week with a bag of plums.  I do like plums but they’re not my favorite to eat by themselves, so I started trying to figure out ways to utilize them.  I made Plum Butter last summer, but wanted to try something new.  The box also had some blueberries, so when I found a recipe for spiced plum and raspberry cake, my mind immediately turned to those blueberries.

The cake was such a hit at the office that I didn’t even get a chance to try it, but I’ll take that as a sign that it was great!

Plum Blueberry Upside Down Cake
Adapted from Martha Stewart Living, Sept 2001

  • 10 Tbsps unsalted butter, room temperature, divided into 2 Tbsp and 8 Tbsp
  • 1/3 cup packed light-brown sugar
  • 6-8 medium red plums, halved and pitted
  • 1/4 cup blueberries
  • 1 1/2 cups all-purpose flour
  • 1 tsp ground cinnamon
  • 3/4 tsp baking powder
  • 1/4 tsp baking soda
  • 1/4 tsp salt
  • 1/4 tsp grated nutmeg
  • 3/4 cup granulated sugar
  • 1 tsp pure vanilla extract
  • 3 large egg yolks
  • 1/2 cup sour cream
  1. Heat oven to 375 degrees.  Spray a 9″ springform pan with non-stick baking spray and line the bottom with a round of parchment paper.
  2. In a small saucepan, melt and whisk the brown sugar and 2 Tbsp of butter together over low heat until melted and thoroughly mixed.  Pour the mixture into the springform pan and use a spoon or spatula to spread the mixture relatively evenly over the bottom of the pan (don’t worry about being too neat or covering every inch of the pan).
  3. Place the plums, cut flat side down facing the bottom of the pan, evenly spaced within the pan and fill in the spaces between the plums with the blueberries.
  4. In a medium bowl, whisk together the flour, cinnamon, baking powder & soda, salt and nutmeg and set aside.
  5. With an electric mixer, beat together the rest of the butter (8 Tbsp) with the granulated sugar for 5 minutes, until light and fluffy.
  6. Beat the vanilla extract in as well as the egg yolks, one at a time.
  7. Mix in half of the flour mixture, then mix in the sour cream, then the rest of the flour mixture until just incorporated.
  8. Gently spread the batter in the pan over the plums and blueberries, being careful not to move them around too much.
  9. Lay a square of tin foil onto a cookie sheet and place the springform pan on top of the foil, to catch drips.
  10. Bake for about 60 minutes, until golden brown on top and an inserted tester comes out clean.
  11. Let cool for one hour on a wire cooling rack, then invert onto a plate and remove the springform pan and parchment paper from the top of the cake.  Serve with ice cream or whipped cream and enjoy!

Pineapple Coconut Cobbler

Friday, July 20, 2012

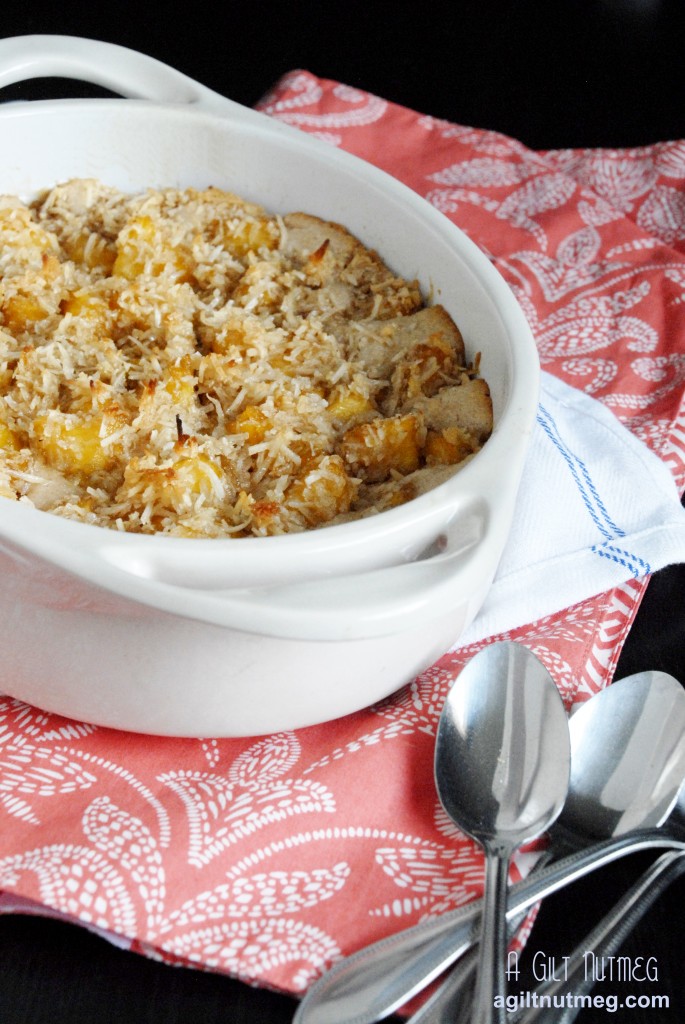
coconut pineapple cobbler

When I think of cobbler, I always think of berries, or maybe peaches.  Pineapple had never EVER crossed my mind to put in cobbler and, I confess, now that I’ve made it, I can’t stop thinking about it.  The same thing happened when I moved to California, where fresh pineapple is much more abundant-I never went back to canned pineapple again.  This cobbler is a delicious tropical version of a very traditional dessert and one you should give a try as soon as you can!

When I found this recipe, it was good the first time, but I felt like it could use some spicing up, so I tweaked it to include flavors that would compliment the tropical fruit featured-ginger, vanilla, rum.  I think it’s perfection, as long as you have a scoop of vanilla ice cream to compliment it on your plate.

Pineapple Coconut Cobbler
Adapted from Patrick Callarec, executive chef, Aulani

  • 1 medium pineapple, peeled, cored and diced
  • 1/3 cup brown sugar
  • 1 cup shredded coconut (if you want a less sweet cobbler, track down some unsweetened coconut)
  • 1/2 cup all-purpose flour
  • 1/2 cup sugar
  • 1/2 cup milk
  • 1/4 cup butter, melted
  • 1/4 teaspoon baking powder
  • Pinch of salt
  • 1/4 teaspoon cinnamon
  • 1/8 teaspoon ginger
  • 3/4 teaspoon vanilla
  • 1 Tablespoon rum
  1. Heat oven to 350 degrees.  Spray a baking dish with baking spray-you can use an 8 x 6″ square pan as the original recipe suggested, but I used a 2 quart oval baking dish.
  2. In a large saute pan, stir the pineapple and brown sugar together until melted and bubbling.  Let the mixture simmer and bubble for 10 minutes, stirring occasionally stirring.
  3. After sauteing, pour the mixture into a small bowl and add the coconut.  Mix together until the coconut is evenly coated in the melted brown sugar-pineapple mixture (or until the pineapple is evenly coated in coconut, depending on which way you look at it) and set aside.
  4. In a medium bowl, whisk together the remaining ingredients-flour, sugar, milk, butter, baking powder, spices and rum.
  5. Pour the batter into the prepared baking dish and evenly distribute the pineapple-coconut mixture over the top of the batter.
  6. Bake for 40-45 minutes until the edges are golden brown.
  7. Serve warm with vanilla ice cream and enjoy!

Lime Meringue Cake

Monday, July 16, 2012

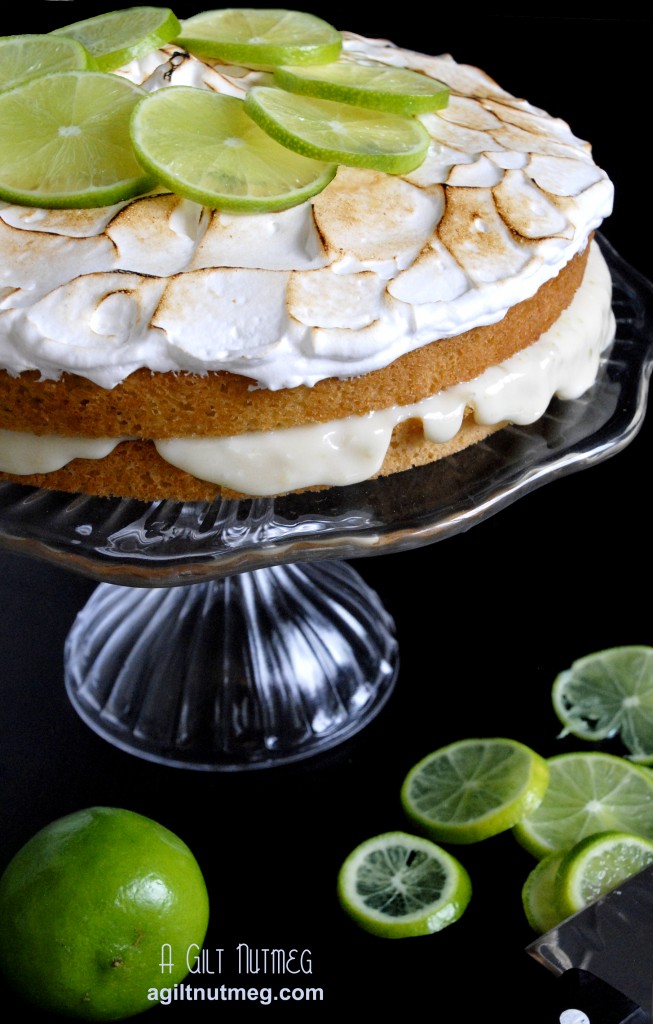
key lime meringue cake

I absolutely love Key Lime Pie.  I really think it’s got to be in my top 5 list of favorite desserts…although I’m sure that list is changing all the time.  Despite it being one of my favorites, I wanted to find a twist on the usual pie to bring to my cousin’s 4th of July gathering in Anaheim, and thought this cake might be just the trick.  You don’t usually see meringue as a topping on cake, but I think the effect overall was quite delicious.  It’s a little more sturdy than a traditional Key Lime Pie, with the pie filling sandwiched between two thin layers of sponge cake instead of sitting on top of a pie crust.

Just a few notes: I used normal limes instead of Key limes just because I like the stronger lime punch that normal limes give, plus they’re easier to find and and there’s less time spent juicing.  Also, I used meringue powder instead of egg whites for the meringue topping, just to play on the safe side.  Traditional egg white meringue recipes are a dime a dozen on the internet; the link below will give you one.

Lime Meringue Cake
Adapted from Eating Well; meringue from Wilton

  • 1/2 cup all-purpose flour
  • 1/3 cup cake flour
  • 1/4 teaspoon salt
  • 4 large eggs at room temperature
  • 2/3 cup sugar
  • 1 teaspoon vanilla extract
  • 1 teaspoon freshly grated lime zest
  • 3 tablespoons canola or vegetable oil
  • 1 can (14 oz) sweetened condensed milk
  • 1/3 cup lime juice
  • 1 teaspoon freshly grated lime zest
  • 1 tablespoon meringue powder
  • 1/4 cup cold water
  • 6 tablespoons plus 2 teaspoons granulated sugar
  1. Heat oven to 350 degrees and spray two 9″ cake pans with baking spray.
  2. In a medium bowl, whisk together the all purpose flour, cake flour, and salt; set aside.
  3. In a large bowl, beat the eggs and sugar on medium-high speed until doubled in volume, about 10 minutes.  Add the vanilla and lime zest, beating for one more minute.
  4. Very gently fold the oil into the egg and sugar mixture until fully incorporated.
  5. Also very gently, fold the flour mixture into the egg, sugar and oil mixture until the white streaks are gone.  Folding in the flour in three or so parts will help make sure you don’t find giant pockets of flour not incorporated later.
  6. Divide the batter between the two cake pans and tap the pans on the counter so that the largest of the air bubbles come to the surface.
  7. Bake for 20-22 minutes until an inserted toothpick comes out clean.  I warn you, the cakes may look a little strange.  At least, they did for me.  The tops were totally pocked with popped air bubbles.  But it did taste great, so no worries!
  8. While the cakes are baking, whisk the condensed milk, lime juice, and lime zest together in a small-medium bowl that you won’t be needing later.  Put it in the fridge to thicken for 30 minutes.
  9. Let the cakes cool for ten minutes on wire racks before turning them out of their pans and cooling.
  10. In a large bowl, add the meringue powder, the water and half the sugar (3 tablespoons + 1 teaspoon).  Whip at high speed for 5 minutes.
  11. Gradually add the rest of the sugar and whip for 5 more minutes.
  12. Spread the meringue on top of one of the cake layers.  Brown the meringue either by using a kitchen torch, or by placing the cake layer on a cookie sheet and putting it under your oven’s broiler element.
  13. To assemble the cake, place the remaining cake layer on the plate you plan on serving the cake on, spread the lime filling over the layer, then add the layer with the meringue on top.  Top with lime slices, if you desire, for decoration and enjoy!

Coffee Cake

Wednesday, June 27, 2012

coffee cake

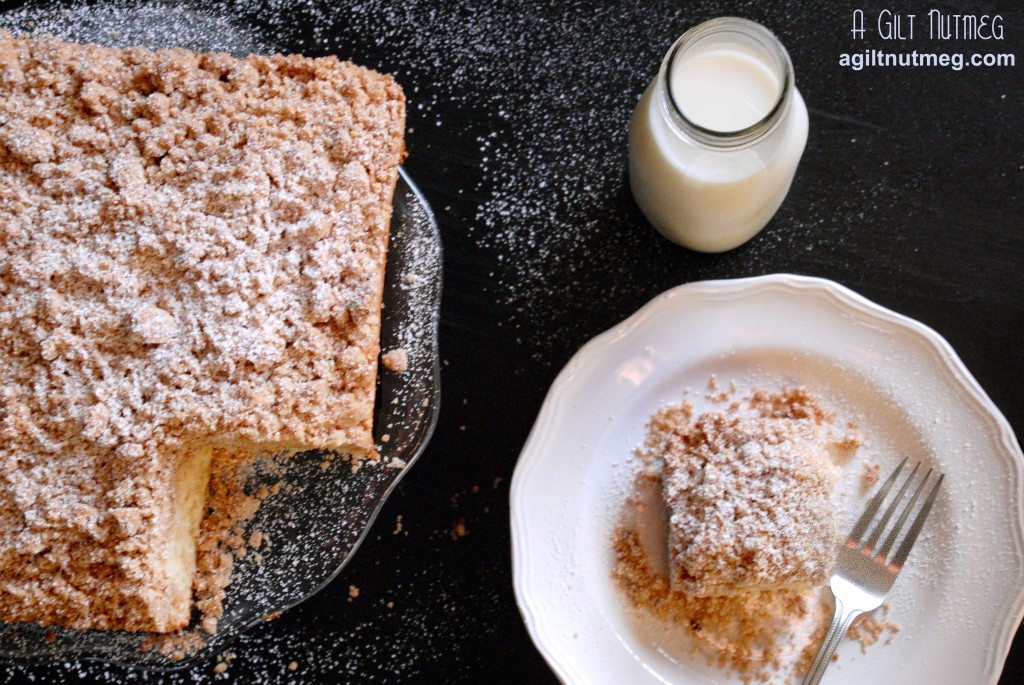
This recipe is not lying when it uses the term “cake”.  Cooks Illustrated modified their yellow cake recipe into New York Style Coffee Cake; it literally is cake for breakfast, so tread carefully.  That said, this cake is delicate and light as a feather and I was quite impressed with its soft texture.  I was short on a few ingredients so I had to make some changes (adding lemon juice to milk to sub in for buttermilk), while at the same time I was rushing around the kitchen, trying to get back into the groove of baking and therefore did not read the instructions carefully enough.  I mixed the crumb topping ingredients in the wrong order, resulting in a very different texture than what Cooks was calling for.  I also didn’t have enough cake flour, so I made sure to use the cake flour I had left for the cake itself (since the light-fluffy texture the cake flour would contribute to was so important there) and sub in some all-purpose flour for the topping.  Between the mixing incorrectly and the AP flour, I think the topping didn’t turn out for the best (it was super super crunchy), but any shortcomings here were my own fault, not the recipe, and I’m looking forward to trying it again.  I’ve included the recipe as it reads from Cooks below, so you don’t have to make the same mistakes I did.  (Or, if you do want that crunchy topping, use AP flour—for the topping only—and mix all the dry topping ingredients together before adding the butter instead of waiting to add the flour last after the butter.)


New York Style Crumb Cake
Cooks Illustrated, May 2007

Crumb Topping

  • 1/3 cup sugar
  • 1/3 cup dark brown sugar
  • ¾ teaspoon ground cinnamon
  • 1/8 teaspoon table salt
  • 8 tablespoons unsalted butter (1 stick), melted and still warm
  • 1 ¾ cups cake flour

Cake

  • 1 ¼ cups cake flour
  • ½ cup sugar
  • ¼ teaspoon baking soda
  • ¼ teaspoon table salt
  • 6 tablespoons unsalted butter (3/4 stick), cut into 6 pieces, softened but still cool
  • 1 large egg
  • 1 large egg yolk
  • 1 teaspoon vanilla extract
  • 1/3 cup buttermilk
  • Confectioners’ sugar for dusting
  1. Pull out a piece of aluminum foil about 16” long and fold it in half, lengthwise, so you have a long skinny strip.  Place it in the bottom of an 8×8” baking pan; this will act as a sling to help you pull the cake out after baking.  Spray the pan and foil with non-stick baking spray and set aside.
  2. In a medium bowl, mix the sugar, brown sugar, cinnamon and salt until combined.
  3. Using a wooden spoon or spatula, stir the butter in until combined, then stir the flour in, forming a dough.  Set aside.
  4. In a large bowl or a standing mixer bowl, mix together on low speed the flour, sugar, baking soda and salt.
  5. Still on low speed, drop in the pieces of butter, one at a time, until there are no large pieces of butter left and the mixture looks like crumbles, 2 minutes or so.  I stepped away for just a moment when this was going on and I came back not a few seconds later and it had already passed the crumble stage and amassed into one large piece of dough, so it will happen quickly.
  6. Add the egg, egg yolk, vanilla and buttermilk to the butter-sugar mixture and beat on medium high speed for at least one minute until the batter turns light yellow and uniform.
  7. Pour the batter into the prepared pan and smooth out the top with a spatula.
  8. Using your fingers, break up the crumble topping into pea sized pieces and sprinkle over the top of the cake.  I remember from Home Ec class back in 6th grade, that when making crumb cake you should always start your crumbles in the corners and then work towards the middle (and Cooks backs this up, too).
  9. Bake for 35-45 minutes until a tester comes out clean and the topping is golden brown.
  10. Let cool on a wire rack for half an hour before digging in with a glass of milk or a cup of coffee.  Enjoy!

Strawberry Cake

Monday, June 4, 2012

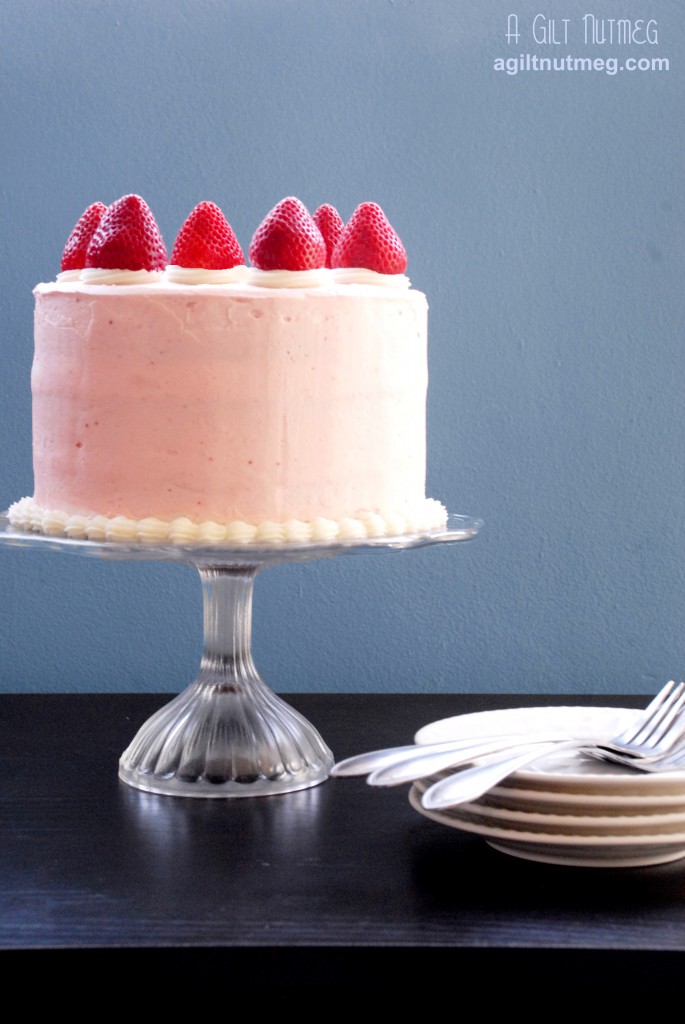
Mission: a birthday cake for a little girl.  Obstacle:  it must be bright pink.  Naturally, my mind immediately turned to the rows and rows of boxes full of ripe strawberries at the market.  What could be more perfect for a little girl’s spring princess birthday party than a strawberry cake?  Sweetapolita had just the recipe I was looking for, which included some strawberry jell-o to the batter to up the color from a gentle soft pink hue to bright hot pink.  Although I don’t have pictures of the inside, you’ll have to take my word for it-this was a seriously pink cake!  The jell-o also gave an otherwise light and fluffy cake a bit of a firmer, dense texture, but in a good, rich-tasting way, not in a “I accidentally used too much flour” way.

strawberry cake - close up

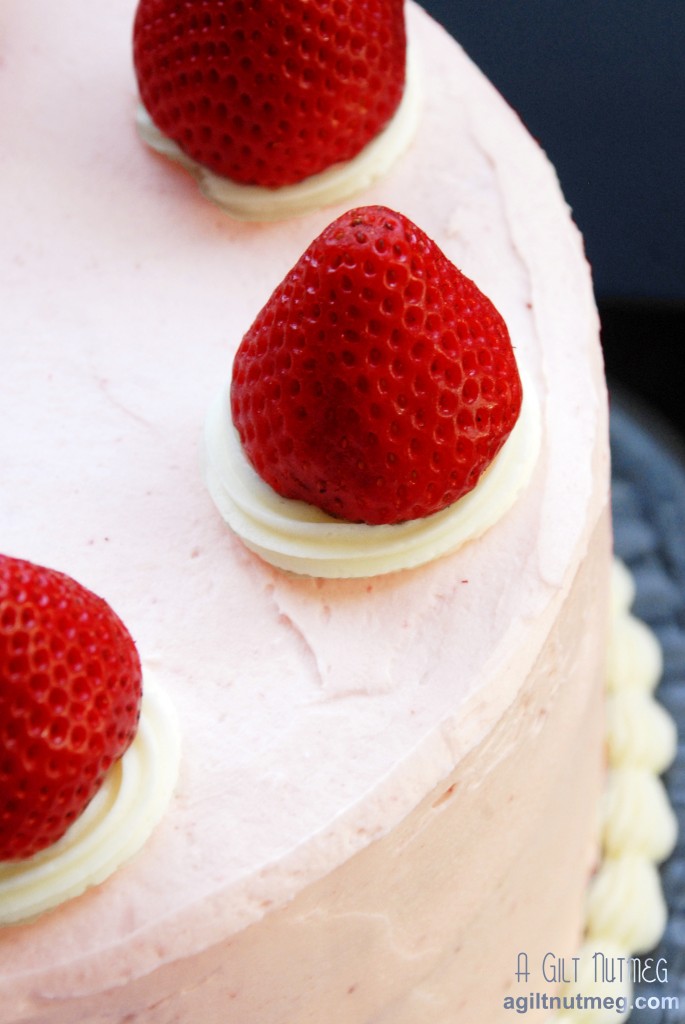
Then I strained some strawberry puree for the buttercream frosting and covered that pink cake in more pink.  To top it off, I picked the brightest, most perfect strawberries from the bunch to place on top of the cake.  If you squint, it’s almost like a crown or a castle, perfect for the pink princess theme!  As if you need any more encouraging, just as Sweetapolita promises, this cake tastes exactly like strawberry ice cream…so why are you still reading?  Go bake!

Notes: This recipe makes three layers, 8″ across, so you’ll need 3 specific 8″ pans for this cake.  Many bloggers have discussed how a three layer 8″ cakes have the most pleasing ratio of width to height, and I must say that I’m on board with them.  Also, going forward, I would make 1 1/2 recipes of the frosting, as it was a bit thin on the sides-you can just barely make out the layers through the frosting in the photo above.  That said, it would be strictly for aesthetic purposes; I don’t love tons of frosting, and many people said it was just the right ratio of cake-to-frosting so you can go based on your own preferences.

Strawberry Cake
Adapted from Sweetapolita

  • 1 lb box of strawberries
  • 1 cup milk
  • 1 Tablespoon vanilla extract
  • 3 cups cake flour
  • 1 Tablespoon baking powder
  • 3/4 teaspoon salt
  • 1 3/4 cups sugar
  • 1 box (3 oz) strawberry jell-o
  • 1 cup butter, room temperature
  • 4 eggs

Frosting

  • 3 sticks + 2 Tablespoons unsalted butter, softened
  • 4 cups powdered sugar, sifted
  • 1 Tablespoon milk
  • 1 1/2 teaspoons vanilla extract
  • pinch of salt
  • 3 Tablespoons of strained strawberry puree (you don’t want seeds in your frosting!)
  1. Heat oven to 350 degrees; line your three cake pans (8″ width) with parchment paper rounds and spray with nonstick baking spray (and pull out your butter to soften, if you haven’t already)
  2. Pick out the 6 prettiest strawberries and set aside for the top of the cake; hull and puree a handful of the remaining strawberries to get 1/4 cup of puree plus 3-5 tablespoons of puree for the frosting later (I love my hand held stick blender and the “smoothie cup” it comes with for this purpose).
  3. In a small mixing bowl, whisk together the milk, vanilla, and 1/4 cup strawberry puree; set aside.
  4. In a medium mixing bowl, sift together the flour, baking powder, and salt; set aside.
  5. In a large bowl, beat the butter, sugar and jell-o with an electric mixer on high speed for 5 minutes.
  6. Add the eggs to the butter-sugar mixture, one at a time, letting each egg fully incorporate before adding the next (and scrape down the sides of the bowl as necessary).
  7. Add approx 1/3 of the dry ingredients to the eggs/butter/sugar batter, 1/2 of the liquid ingredients, the second 1/3 of the dry ingredients, the last of the liquid ingredients and then the last of the dry ingredients.  Stop mixing as soon as that last streak of white flour disappears.
  8. Divide the batter equally among the three prepared cake pans and bake for about 30 minutes.  A toothpick or cake tester should come out clean when poked into the cake.  The cake won’t brown too much on top at all.
  9. Let the cakes cool on wire cooling racks for 10 minutes before taking them out of the pans and letting them sit on the racks until fully cooled.
  10. To make the frosting, whip the butter in an electric mixer for 8 minutes on medium speed; the butter should be super super soft and fluffy.
  11. Add the powdered sugar, milk, vanilla, and salt, and beat until fully incorporated and the frosting is creamy.
  12. If you plan on doing some white frosting decorations on your cake, take out about 3/4 cup of frosting and set it aside now.
  13. Add the strawberry puree and beat until frosting is smooth and creamy.
  14. To assemble the cake, spread a 1/2″ layer of frosting on the first cake layer, top with the second cake layer and spread another 1/2″ layer of frosting.  Add the last cake layer on top.
  15. Spread a very thin layer of frosting over the top and sides of the cake, then refrigerate for 30 minutes.  (I know this “crumb layer” step seems like a waste of time, but I promise, this is the first time I gave it a try and I fully understand now why it is necessary.)
  16. Spread the rest of the frosting over the cake in an even layer, refrigerate for 30 minutes and then decorate with your white frosting.  I did a piped border around the bottom of the cake, then piped little circles at intervals around the top edge of the cake and nestled the hulled strawberries on each of the rings.  Enjoy!

Apple Cinnamon Mini Loaves with Apple Brandy Glaze

Monday, May 14, 2012

apple cinnamon loaves with apple brandy glaze

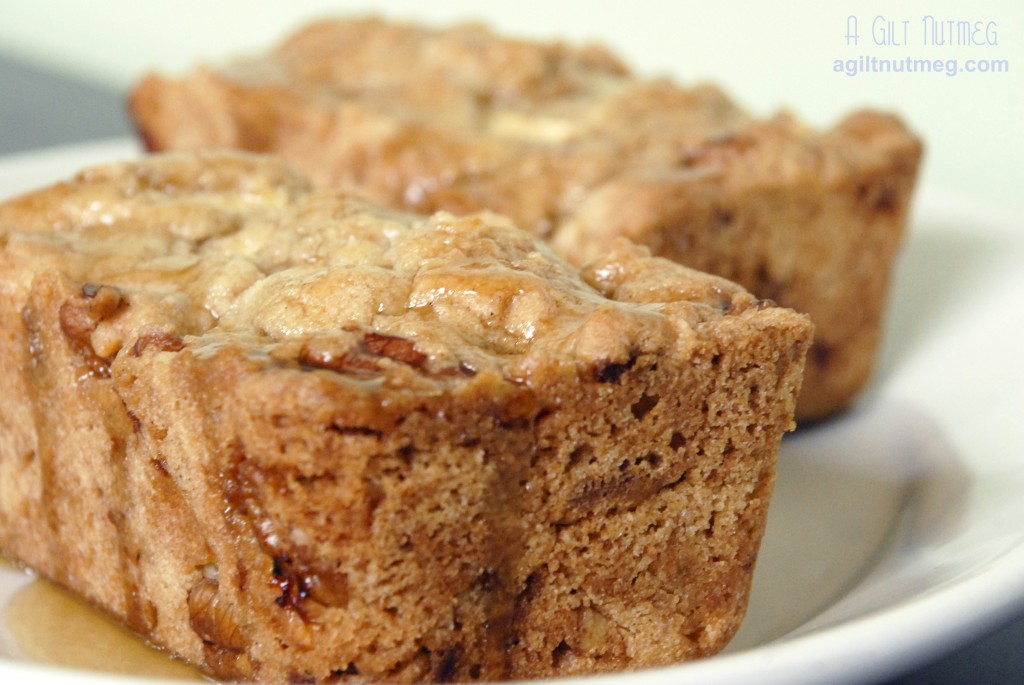
In trying to pick this week’s PPQ recipe, I chose these little cake loaves thinking they might be nice for Mother’s Day Brunches.  What I didn’t realize was that I might come across one of my new favorite recipes from The Pastry Queen.  These little loaves are super moist yet they have a great crunchy-chewy crust and the nutty spicy apple flavor is just phenomenal.  The cakes are not too sweet and perfect for any time of the day…which is bad news for me because it means I’ll be eating them morning, noon and night if I can.  You can bake it as one big cake instead, but mini loaf pans are super cheap at Sur la Table and I think they’re totally worth the few dollars investment (especially around the holidays).

I only made two changes to Rebecca’s original recipe: first, since I had limited time and only 2 loaf pans, I made a half recipe.  The Boyfriend loves spice more than anything so I dutifully used the original cinnamon and nutmeg measurements instead of halving them and they turned out so well that I will absolutely be doubling the amount when I make a full sized batch next time.  I almost worry about the lack of spicy flavor there could have been if I had followed the original recipe.  Second, I didn’t feel like hunting down a bottle of Calvados (an apple brandy), so instead of the 1 Tablespoon of Calvados, I subbed 1 Tablespoon of apple juice and 1 Tablespoon of normal brandy and just let it boil off a little longer.  I think the result was just as good as the original.

Really, I can’t say enough about how much I love this recipe.  It strikes exactly the right chord of sweetness, crunch, nuttiness, and soft moist cake texture.  Since we finished the two mini loaves I made today for Mother’s Day within minutes, I am absolutely coming home from the office tomorrow and using up the rest of my apples on another batch.

Be sure to check out the other Project Pastry Queen-ers versions here!

Mini Apple-Cinnamon Loaves with Apple-Brandy Glaze
Adapted from The Pastry Queen by Rebecca Rather
Makes 5 Mini Loaves

Loaves:

  • 1 1/4 cup vegetable oil
  • 2 cups sugar
  • 2 large eggs
  • 2 tsp vanilla
  • 3 cups flour
  • 1 tsp cinnamon
  • 1 tsp nutmeg
  • 1/2 tsp baking soda
  • 1 tsp salt
  • 3 large apples, peeled, cored and diced (I used Granny Smith apples)
  • 1 cup pecans

Glaze:

  • 1/4 cup unsalted butter
  • 1/3 cup packed light brown sugar
  • 1 Tbsp light corn syrup
  • 1 Tbsp apple juice
  • 1 Tbsp brandy
  1. Heat the oven to 350 degrees.  Grease 5 miniature loaf pans (sized approximately 6″ x 4″ x 2″) and set aside.
  2. In a large bowl, whisk together the oil, sugar, eggs and vanilla until thoroughly combined.
  3. In a separate bowl, mix together the flour, cinnamon, nutmeg, baking soda and salt.
  4. Add the flour mixture to the oil mixture until fully incorporated.
  5. Rebecca helpfully pointed out that the batter will be very stiff at this point, not very liquid, so it will be a little difficult to mix in the apples and pecans, but it works.  I didn’t want to use my stand mixer in case it broke up the apples into mush, so I pulled the bowl off the mixer and stirred the apples and pecans in by hand with a wooden spoon.  Mix in until they’re evenly distributed.
  6. Press the batter into the loaf pans so that the pans are about 3/4 full and smooth the tops out with the back of the spoon.
  7. Bake for 55-60 minutes; an inserted toothpick should come out clean and they should be a light golden brown on top.
  8. Cool in the pan for 10 minutes then take the loaves out of the pan and let them finish cooling on a wire rack.
  9. While the cakes are cooling, melt the butter in a small saucepan whisk in the brown sugar, corn syrup, apple juice and brandy.  Let it simmer for 5 minutes so it can thicken and then spoon a couple of spoonfuls of the glaze over each loaf.
  10. Let the cakes fully cool and the glaze dry for at least an hour before wrapping them-if they even last that long!  Enjoy!

French Yogurt Cake

Friday, May 4, 2012

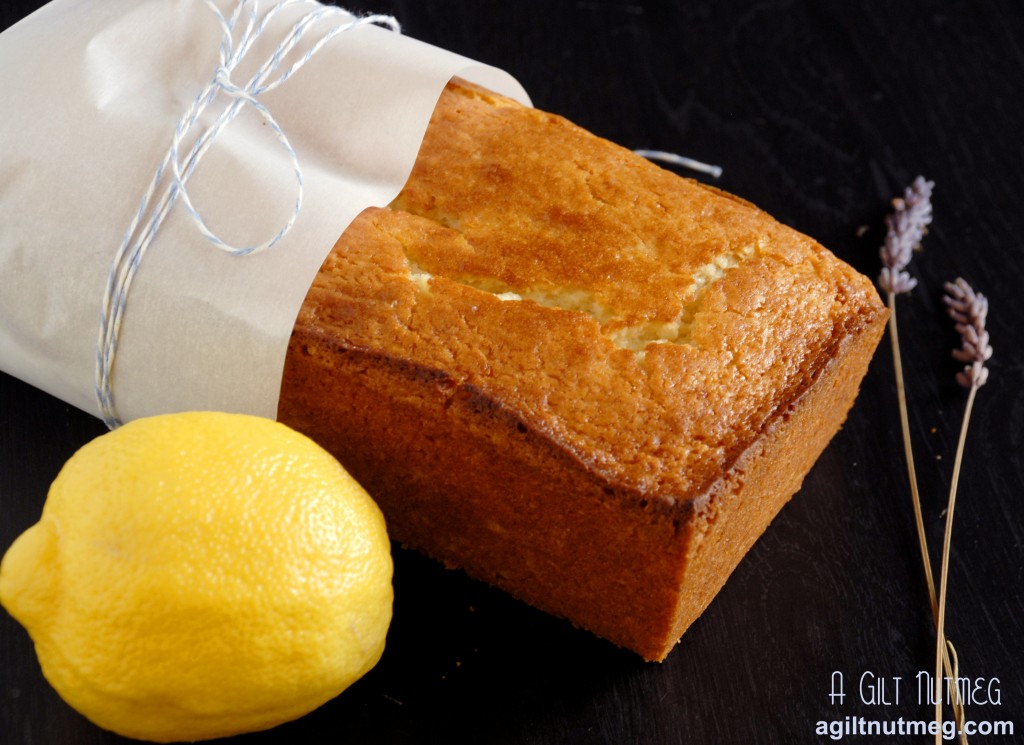
french yogurt cake

Lots of people tell me that baking is hard for them, but I’m always right there assuring them it’s not as hard as it seems.  With baking being so daunting, many people are only willing to attempt the back of a cake mix box; “Add”, “Stir”, “Bake”.  This recipe has just a few extra steps beyond that and it looks beautiful, but guess what?  It’s the first recipe a child in France is given to try.  If they can do it, you certainly can too, right?

The cake itself is very close to a pound cake-a close cousin, if you will-yet with a distinctly lighter texture and a very bright tangy lemon and yogurt flavor.  It’s perfect for spring and the various brunches that are always popping up around this time.  Make it for friends, or, if yours is a family that enjoys baking regularly, give it to your child to try making on their own.  It’s the French way, after all!

**Edit: I made this cake Thursday night and just got home today, Friday, from work to find nothing but CRUMBS.  Between me, The Roommate and The Boyfriend, this cake was clearly a huge winner-lasting less than 24 hours has to be a sign!

French Yogurt Cake
Adapted from Bon Appetit, May 2012

  • 1 1/2 cups flour
  • 2 teaspoons baking powder
  • 3/4 teaspoon kosher salt
  • 1 cup sugar
  • Zest of 1 lemon
  • 3/4 cup whole-milk Greek yogurt
  • 1/2 cup vegetable oil
  • 2 large eggs
  • 1/2 teaspoon vanilla extract
  1. Heat oven to 350 degrees and grease the inside of a loaf pan (I used a 8 1/2 x 4 1/4-inch sized pan) with baking spray.
  2. In a medium bowl, combine the flour, baking powder and salt.
  3. In large bowl, add the sugar and lemon zest, then with your fingers, pinch and mash the sugar.  You’re getting all that good lemon flavor incorporated into the sugar, so work with it for at least a minute, probably two minutes.  You’ll know it’s done when the sugar starts to look crumbly.
  4. Add the yogurt, oil, eggs and vanilla to the sugar lemon mixture and stir until smooth.
  5. Add the flour mixture to the wet ingredients and fold them in.  You don’t want to just stir them in, but do keep folding until the batter is mostly smooth.
  6. Pour the batter into the prepared pan, smooth out the batter on top, and bake for 45-50 minutes, until golden brown on top and hollow sounding when you tap it on top.
  7. Let cool in the pan for 15 minutes, then invert it onto a wire rack to finish cooling before eating.  Enjoy!


Tres Leches Cake

Friday, March 23, 2012

tres leches cake

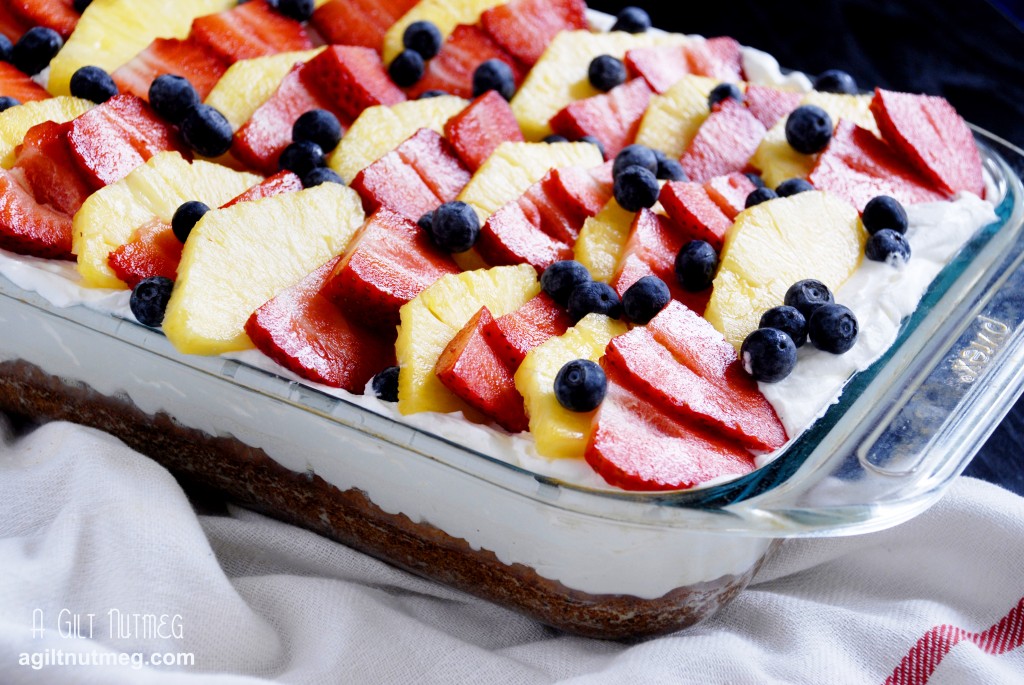
When I asked my friend Anna what cake she wanted for her birthday last week, I didn’t know what to expect.  I think, at least, I had expected a request that I had experience in making, so when she immediately asked for a Tres Leches Cake, I knew two things: a) I had never made a Tres Leches Cake and b) you can’t let the Birthday Girl down on her birthday.  So off I went in the name of research.  A coworker mentioned she didn’t like Tres Leches Cake because it was too mushy; I made a mental note to make sure my cake was creamy, but not cake mush.  Anna had also requested fresh fruit on top, so I tried to do some research into what fruit is traditionally used.  The Pioneer Woman said maraschino cherry, but Anna (and Martha Stewart) said any sort of fresh fruit is the way to go, so I found fruit that would not only taste good together but also look nice with lots of vibrant colors-it was her birthday, after all, and she deserved a beautiful cake.

Wouldn’t you know, despite it being my first time making it, everyone loved it!  I’m so pleased that my first Tres Leches was a success and now I’m looking forward to trying other recipes for Tres Leches, just to see how they vary.  This one, courtesy of Martha Stewart, was an eggy sponge cake.  The milks it was soaked in added a creaminess that lingered on your tongue but that didn’t disintegrate the cake (so that you were definitely eating cake and not mush) and the whipped cream and fruit on top gave the cake a deceptively light, fresh feel.  One of the keys here was fresh, ripe pineapple, a flavor that went very well with the cake and had a beautiful golden yellow color.  I think a dash of cinnamon would be fun to add next time-Churro flavored Tres Leches Cake, anyone?

Tres Leches Cake
Recipe Adapted from Martha Stewart

  • 1/2 cup butter, melted and cooled, plus extra for baking dish
  • 1 1/2 cups flour
  • 1 teaspoon baking powder
  • 1/2 teaspoon coarse salt
  • 5 large eggs
  • 1 cup sugar
  • 1 teaspoon vanilla extract
  • 1 can (14 oz) sweetened condensed milk
  • 1 can (12 oz) evaporated milk
  • 1 cup heavy cream (for cake)
  • 2 cups heavy cream (for whipping later to top cake)
  • sliced fruit for topping; I used fresh pineapple, strawberries and blueberries
  1. Heat the oven to 350 degrees.  Butter a 9×13″ glass baking dish and set aside.
  2. In a medium bowl, mix together flour, baking powder and salt.
  3. In a large bowl, beat together the eggs and sugar for a total of 4 minutes; the mixture should be very light in color and very thick.  Add the vanilla and beat until incorporated.
  4. With the mixer on low so your flour doesn’t fly everywhere, add the flour in a little at a time and continue mixing just until the flour is incorporated.
  5. With a spatula, gently fold in the melted and cooled butter.
  6. Pour the batter into the prepared baking dish and bake it in the oven for 30-35 minutes, until evenly golden brown on top.  (Martha warns that if you are using a metal baking dish, the cake will be done in half the time, so keep an eye on it.)
  7. Immediately after taking the cake out of the oven, whisk together the condensed milk, evaporated milk, and 1 cup of heavy cream in a medium bowl.  Take a fork and stab the warm cake repeatedly all over the surface.  Slowly pour the milk mixture over the cake.  It will absorb some of it right away, but plenty will pool up around the edges of the baking dish- have patience!  It will all get soaked up into the cake.
  8. Let the cake finish cooling and in the meantime, whip the remaining 2 cups of heavy cream until stiff peaks form.  Spread the whipped cream over the cooled cake.
  9. Decorate with the sliced fruit and enjoy!  I normally avoid putting baked cakes in the fridge as it dries them out and effects flavor, but this one is in no danger of drying out, plus it’s soaked through with cream and milk, so be sure to keep it in the fridge until you’re ready to eat it.