Entries Tagged as 'Savory'

Homemade Chicken Stock

Monday, April 8, 2013

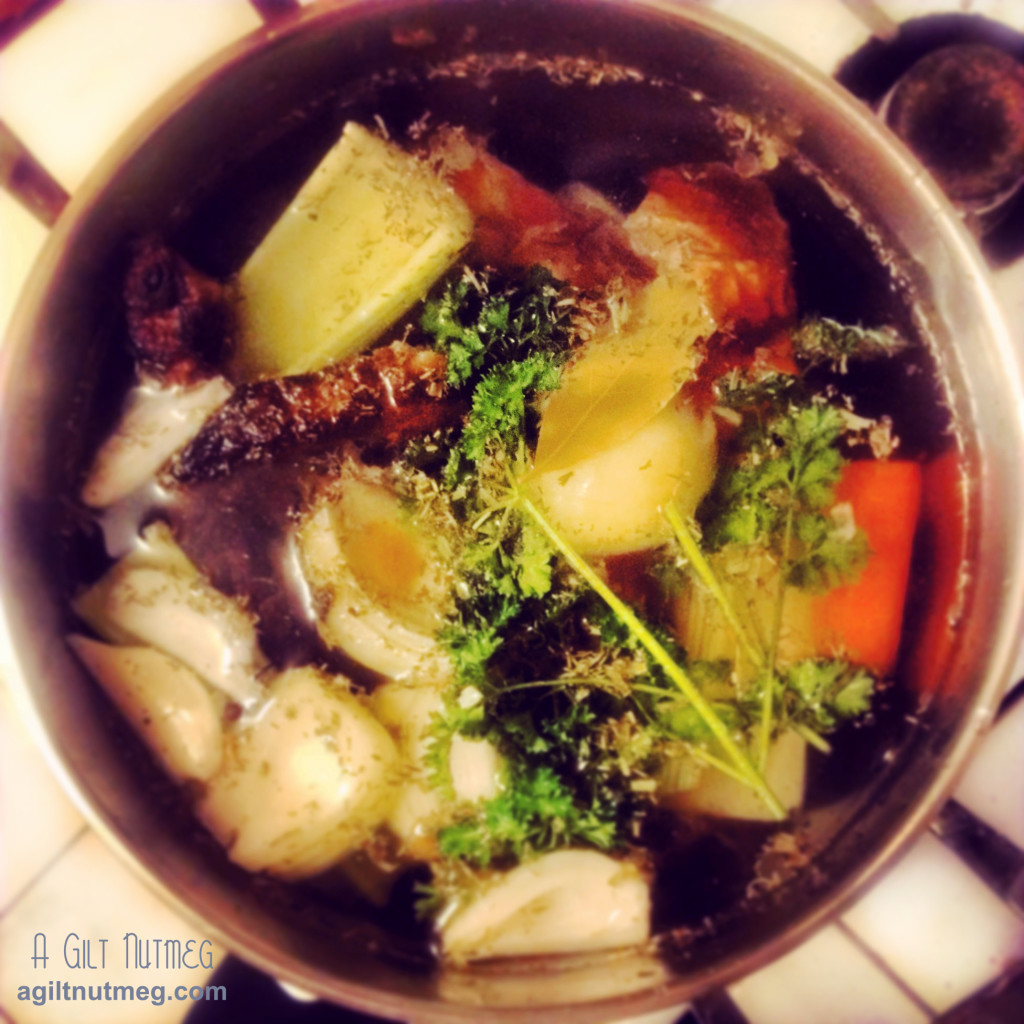
Homemade Chicken Stock - from agiltnutmeg.com

Nothing makes me feel more “Suzy Homemaker” than making homemade chicken stock.  You get more stock than you can use in a given time (freezer!), it tastes so much better than what comes out of a box and, incredibly, there’s almost nothing to clean up afterwards.  Throw the ingredients in a pot, turn on a movie for a few hours while it simmers, and voila: one step closer to being healthier and more homemade.

Homemade Chicken Stock
Loosely adapted from Martha Stewart

  • 1 roasted chicken carcass, most of the meat removed (*Note: this chicken was leftover from Easter; I brined it overnight in buttermilk and Williams-Sonoma Apples & Spice Turkey Brine)
  • 2 medium carrots, peeled and cut into 6 pieces
  • 1 large celery stalk, cut into 3 pieces
  • 1 medium white onion, peeled cut into 4 pieces
  • 3 large sprigs of parsley
  • 1 teaspoon salt
  • 1/2 teaspoon whole peppercorns
  • 2 dried bay leaves
  • 1 teaspoon (at least) of other dried herbs: I used about 1/2 tsp of dried dill, 1/2 tsp dried tarragon and 1/2 tsp dried herbs de Provence (I used the herbs de Provence because I was out of dried thyme, which you can use instead)
  1. Combine all ingredients in a 6 qt stock pot, cover with water about an inch from the edge of the pot and bring to a fast simmer, but not a boil.
  2. Reduce heat to low, so that the simmer is very slow and leave uncovered for 2 hours.
  3. If foam appears, skim it off the surface.
  4. Once two hours is up, remove largest pieces of chicken and strain stock through a fine mesh sieve.
  5. Store in refrigerator until needed, or freeze if you won’t be using it in the next few days.
  6. Enjoy some tasty soups or risottos!  Best of all, you don’t always have to follow a soup recipe; throwing things together into a pot at random often delivers just as tasty a meal.  With the first half of this soup stock, I heated 5 cups of stock in a large pot, threw in 2 packs of ramen noodles (discarded the flavor packets), a few handfuls of sliced scallions, a few handfuls of frozen edamame, a Tablespoon or so of soy sauce and, after turning the heat off before serving, added some pre-cooked shrimp with the tails removed so they would heat up in the broth but not overcook.  Voila!  Asian-inspired almost-sort-of-but-not-really ramen soup that was super tasty.  Just decide on the flavor profile you’re craving and go wild!

Steak and Guinness Pie

Tuesday, March 12, 2013

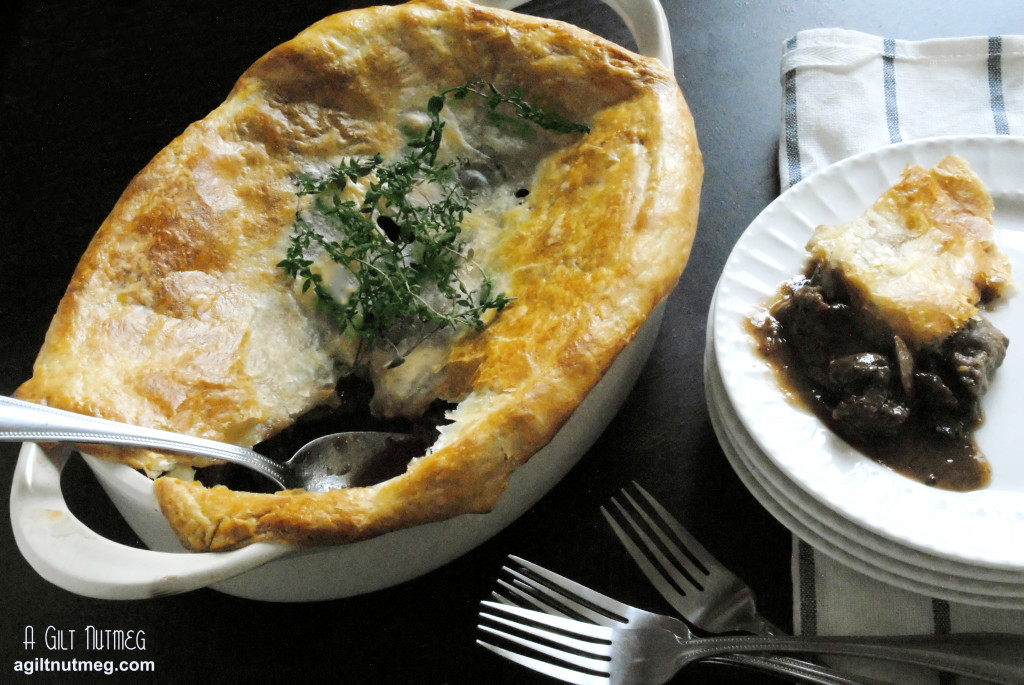
Steak and Guinness Pie - from agiltnutmeg.com

One of my favorite parts about living abroad in the UK was the food.  Don’t worry, I understand that you may have done a double take at the statement I just made.  It’s true, though, I loved the simple, hearty, food-every meal you ate, you could so easily see it being made a century ago to feed a family in front of a large cottage fireplace.

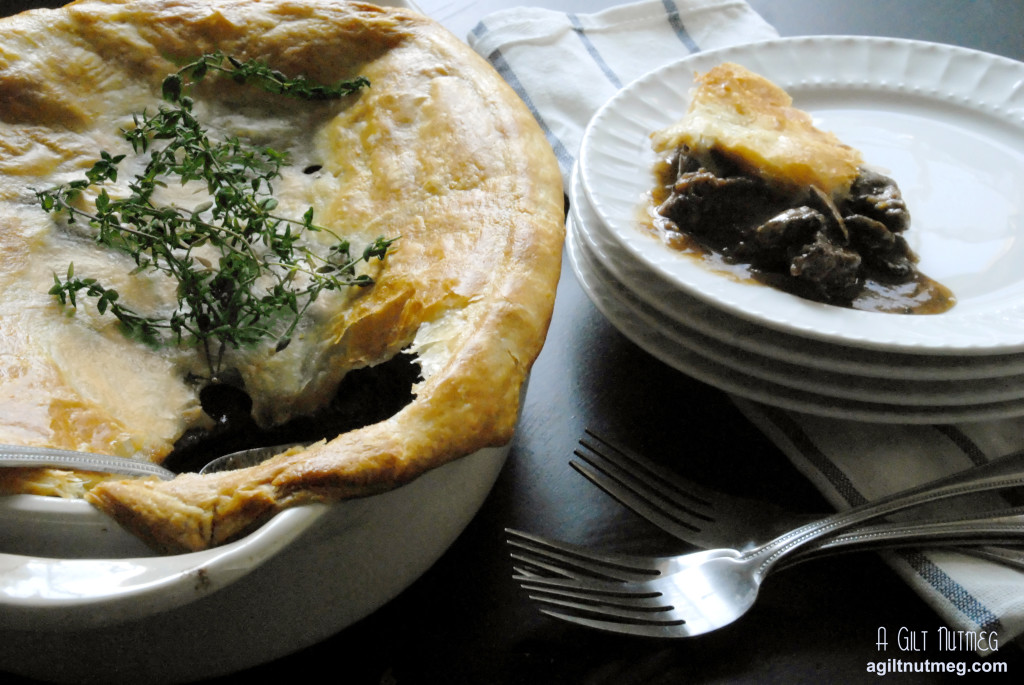
Given that LA weather has been rather up and down in temperature lately, and in honor of the upcoming St. Patrick’s holiday, Steak and Guinness Pie seemed like a no-brainer.  I don’t think I’ve come across a more satisfyingly hearty dish in my kitchen.  Each bite is so full of flavor that you don’t need to eat half the pie to feel like you got a full meal out of it.  While I do love the entirely savory pie (the steak, mushrooms and onions), I think the next time I make this I’ll add in some small potatoes and sweet roasted carrots to increase the veggie count and to stretch the pie even further than the 4-5 servings we already got out of it.  I still carry a card I purchased in Ireland with a saying on it very fitting for a food blog: “May you live as long as you want and never want as long as you live.”  Slainte!

 Steak and Guinness Pie - from agiltnutmeg.com

Steak and Guinness Pie
Adapted from The Complete Irish Pub Cookbook via Never Enough Thyme
Serves 4-5

  • 2 pounds lean chuck steak
  • 3 Tbs all-purpose flour
  • 1 tsp salt
  • 1/2 tsp black pepper
  • 5 Tbs oil, divided into 3 Tbs and 2 Tbs
  • 1 1/4 cups beef broth, divided into 1/4 cup and 1 cup
  • 1 medium onion, chopped
  • 8 oz Cremini mushrooms, sliced
  • 1 Tbs tomato paste (Trader Joe’s has this great tomato paste that comes in a tube like toothpaste.  No more wasting whole cans of it for just 1 or 2 tablespoons!)
  • 5 sprigs fresh thyme
  • 1 cup Guinness beer
  • 1 sheet frozen puff pastry, thawed
  • 1 egg yolk, lightly beaten with 1 Tbs of water
  1. Removing as much fat as possible (or as much as you can before you get frustrated and give up), and slice steak into 1″ chunks.
  2. Whisk together the flour, salt and pepper in a large bowl, add the steak chunks, and toss until steak pieces are fully coated by the flour mixture.
  3. In a cast iron or heavy bottomed skillet, heat the first 3 tablespoons of oil until shimmering.  Make sure the beef sizzles when it touches the oil before adding it to the pan and work in 2 or 3 batches so that you don’t overcrowd the pan; try not to push the beef around until fully browned on the bottom so that you get that deep color on the meat and the fond in the bottom of the skillet.  Once the beef is cooked mostly through and browned all over, transfer the beef to a dutch oven, pour the oil out of the skillet and return it to the heat.  Pour in 1/4 of beef broth to the hot pan, scraping up the browned bits from the pan; pour the stock and browned bits into the dutch oven with the beef.
  4. Add the last of the oil to the skillet and saute the onion and mushrooms over medium heat about 15 minutes until browned; transfer to the dutch oven.
  5. In the measuring cup the beef broth is waiting in, whisk in the tomato paste and add mixture to the dutch oven along with the thyme and stout.  Bring the contents of the dutch oven to a boil, reduce the heat to low and let it simmer, partially covered with the lid, for 90 minutes, then let mixture cool.
  6. Heat your oven to 425 degrees and make sure your puff pastry is completely thawed (it will break apart when you unfold it, otherwise).
  7. Transfer the cooled contents of the dutch oven to the dish you plan on baking your pie in, then drape the puff pastry over the top of the dish.  Trim the edges of the dough around the edge of the dish, leaving at least 1/4″ of hangover.  Wet your fingers and run them around the edge of the dish, under the dough, and press the dough against the wet edge of the dish.
  8. Use a knife to slice one or two slots into the crust for steam, then brush the top with the egg mixture.
  9. Bake for 25 minutes, until the crust is golden brown.
  10. Serve hot and enjoy!

Wild Rice & Mushroom Soup

Thursday, February 7, 2013

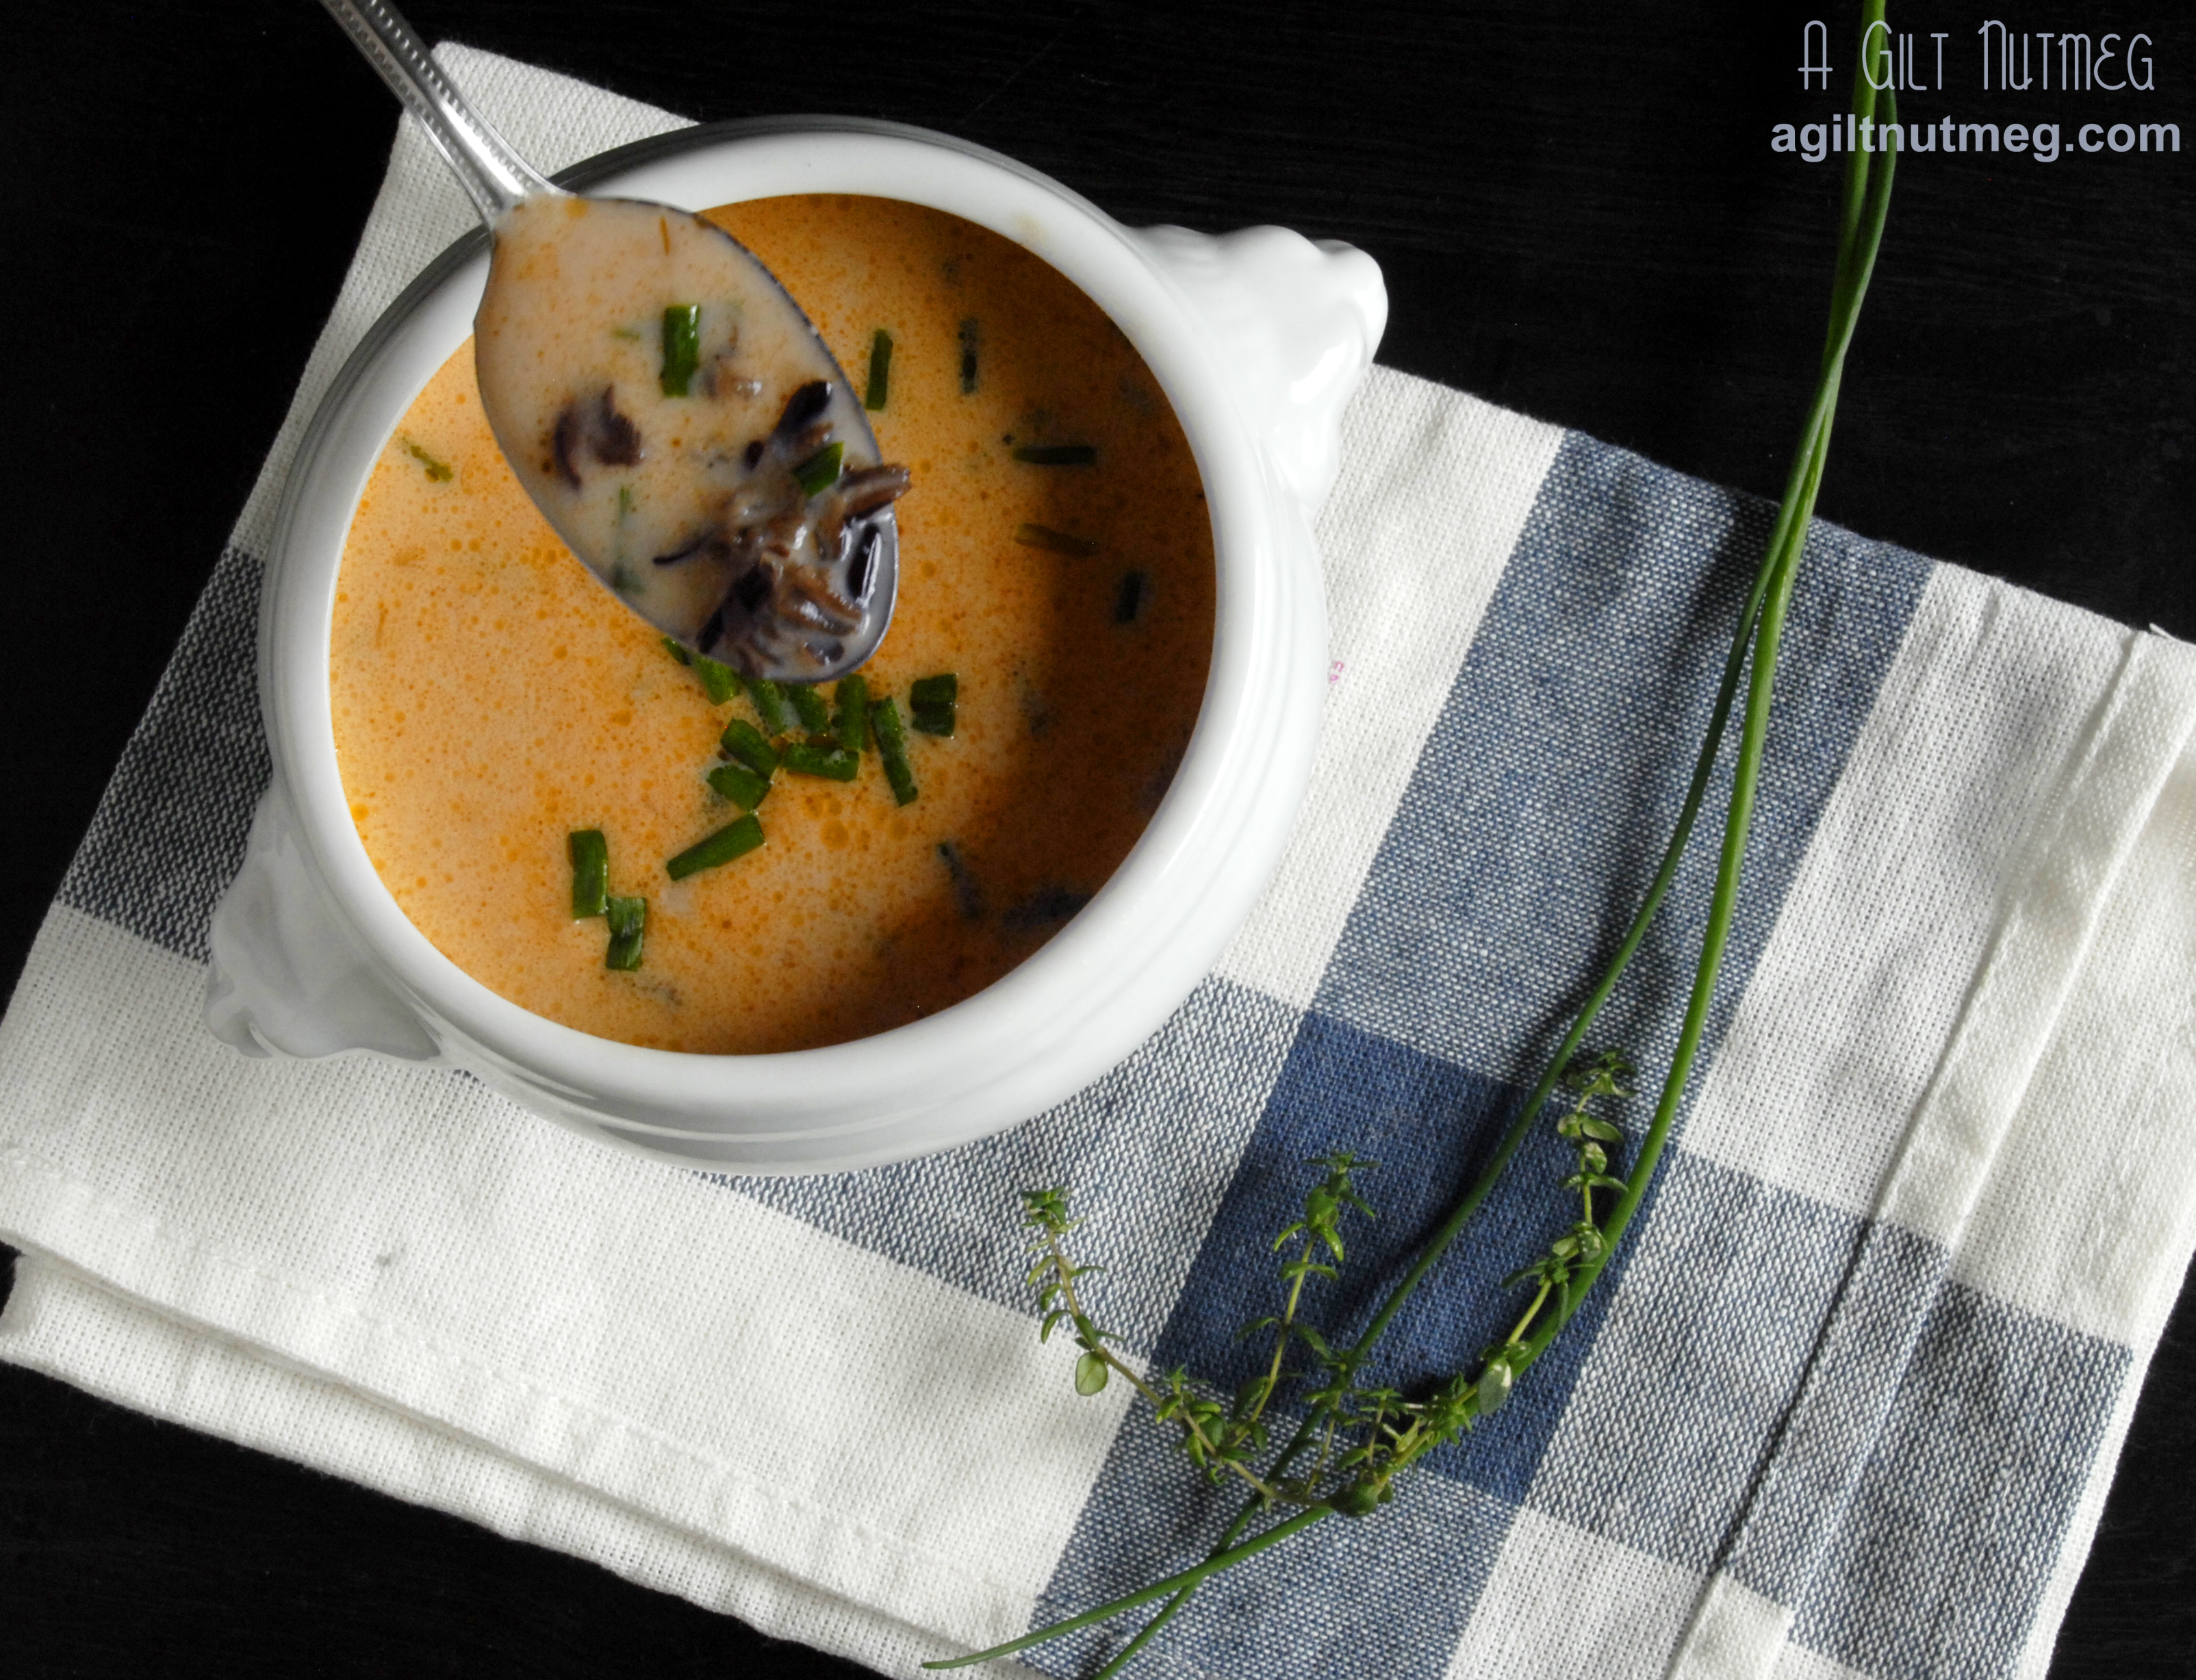
Wild Rice & Mushroom Soup - A Gilt Nutmeg


This holiday, spent at home in Georgia, my little sister insisted that she wanted to make a recipe for mushroom soup she saw in the latest Cooks Illustrated.  I will be the first to admit that I wasn’t particularly excited about it, as mushrooms are not my favorite at all.  I’m really working hard on liking mushrooms, but the thought of  thick meaty slices of mushroom scared me: in soup there was nothing to hide them under!  Cut to Christmas dinner and I remember specifically saying “give me only a little, so I’ll have room for dinner” and then cut to me finishing that first bowl and scrambling to the pot to fill up my bowl beyond that tiny little first taste I had.  Somewhere during that taste, I had somehow forgotten that I don’t like mushrooms.

Folks, this is not your average mushroom soup; in fact, it’s not what you would expect from mushroom soup at all.  Instead of a heavy, thick, cream based soup that most of us are used to, this is a brothy soup that some how still tastes and feels creamy, despite having so little actual cream in it.  The mushrooms and wild rice are a wonderful texture contrast to each other (chewy vs soft) and also to the broth; the lemon zest and chives add an unexpected twist of bright flavor.  It’s salty and savory yet light and refreshing all at the same time.  Even if you’re a little hesitant to give mushrooms such a spotlight, you should give this soup a try for a delicious surprise -and if you do love mushrooms, all the better!

Note: I couldn’t find dried shiitake mushrooms, except for in large packages that cost $12 or more.  Instead I just bought 2 fresh shiitake mushrooms for a total of 60 cents and set them out on a saucer on my countertop to dry over the course of a week or so.  Low tech, but it worked, so I can’t complain.  To turn the mushrooms to dust, CI suggests a spice grinder or a blender.  I have neither of those, so I used a flat nutmeg grater to great effect.  My boyfriend used the top of my pepper grinder to grind up the little bits that were too little to grate without scraping my fingers.

Wild Rice & Mushroom Soup
Barely Adapted from Cooks Illustrated, Jan 2013
Serves 6-8

  • 1/4 ounce dried shiitake mushrooms, rinsed and grated to powder (see note above)
  • 4 1/4 cups water
  • 1 sprig fresh thyme
  • 1 bay leaf
  • 1 garlic clove, peeled, plus 4 cloves, minced
  • Salt and pepper
  • 1/4 teaspoons baking soda
  • 1 cup wild rice
  • 4 tablespoons unsalted butter
  • 1 pound white mushrooms, sliced 1/4″ thick (you can buy two bags of Trader Joe’s presliced mushrooms)
  • 1 onion, chopped fine
  • 1 teaspoon tomato paste
  • 2/3 cup dry sherry or dry vermouth
  • 4 cups low-sodium chicken broth
  • 1 tablespoon soy sauce
  • 1/4 cup cornstarch
  • 1/4 cup cold water
  • 1/2 cup heavy cream
  • 1/4 cup minced fresh chives
  • 1/2 teaspoon finely grated lemon zest
  1. Set oven to 375 degrees and while it’s heating, bring the water, thyme, bay leaf, garlic clove, 3/4 tsp salt, pepper, and wild rice to a boil in an ovenproof dutch oven.
  2. Add the wild rice, bring back to a boil, then cover and move the pot to the oven to bake for 40 minutes (or until rice is tender and chewy).
  3. Over a large mixing bowl, pour the dutch oven’s contents into a fine mesh sieve.  Pull out the bay leaf, thyme stem and garlic clove and discard.  Pour the rice liquid into a 4 cup measuring cup and add water until you have 3 cups of liquid total.
  4. Put the now-empty dutch oven on the stove and melt the butter over medium high heat.  Add the mushrooms, onion, 4 minced garlic cloves, 3/4 tsp salt, 1 tsp pepper and tomato paste and let brown, stirring every once in a while.  I thought it was taking too long and realized my heat was too low- as soon as I turned the heat up, I got the deep brown bits (called fond) on the bottom of the pan I was looking for.
  5. Add the sherry (or vermouth, which is what I substituted) and scrape up the brown fond on the bottom of the pan and continue cooking until almost all of the liquid gone from the pan.
  6. Add ground shiitake mushrooms, rice liquid, chicken broth, and soy sauce and bring the pot to a boil.  Lower the heat so the pot comes back down to a simmer and let it simmer for 20 minutes.
  7. In a small bowl, whisk together the corn starch and 1/4 cup of water until dissolved, then stir into the soup pot and let cook for 2 or 3 more minutes.
  8. Turn off the heat and stir in the rice, cream, chives, and lemon zest.  Serve hot and enjoy!


Maple-Cider Glazed Bacon

Wednesday, August 22, 2012

maple cider glazed bacon

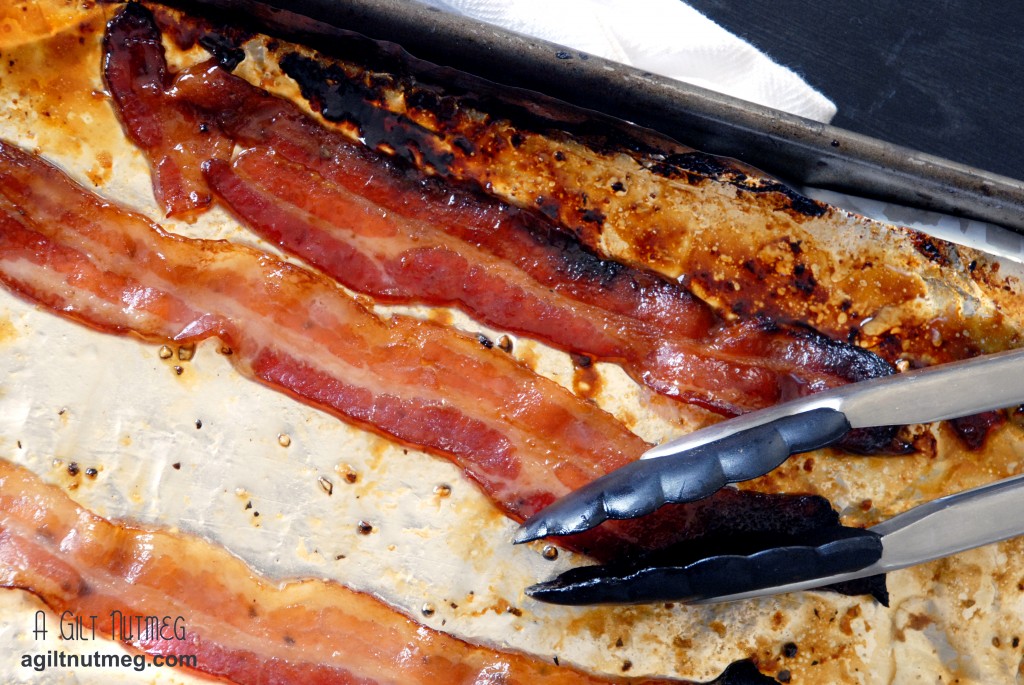
So when I said “I have bacon for you this Friday” I bet you didn’t think I meant “1 1/2 weeks later on a Wednesday”, did you?  Stuff got in the way, but here’s the bacon!  It’s outrageously good, so you should probably just quit whatever you’re doing and head to your oven right now.  Seriously, look at the picture below:

Could there be bacon any more glossy and translucent?  Look at that glaze!  It’s practically shellacked on.  Best of all, this bacon is baked in the oven so you don’t have to think twice about it while you’re still cooking eggs or something.  While not as covered in spices and herbs as other glazed bacon I’ve come across here in LA’s trendy restaurants, this bacon has a sweet/savory finish that is still going to leave you fighting over that last piece.  And, of course, if you want to experiment with all those herbs and spices, go for it!  I bet thyme or some Cajun seasoning would be great!

Maple-Cider Glazed Bacon
Makes 1 package of bacon
Was initially my own creation, but then I found The Spontaneous Hausfrau
already thought of it, so I have to give her credit for helping with ratios

  • 1 cup apple cider
  • 2 Tablespoons maple syrup (try to find the real thing here, not the corn syrup version)
  • 1 package of your favorite bacon
  • salt & pepper
  1. Heat the oven to 450 degrees.
  2. In a small saucepan, boil the apple cider and maple syrup until reduced to about half.  Let it cool slightly as you’re laying out the bacon.
  3. Cover a rimmed baking sheet in tin foil and arrange your bacon in rows on the sheet.  You don’t want them overlapping, but if you want to fit a whole package, you’ll likely have to pack those babies in pretty tightly next to each other.  Personally, I know the bacon is going to be sizzling in its own grease in the oven and I love that thought, but if that’s not your thing, you can arrange the bacon on wire cooling racks on your baking sheet so that the grease drips off as it bakes.  Just know that some of your glaze will drip off too!
  4. Using a basting brush, generously brush about half the glaze over the top of the bacon, then grind salt and pepper over the top of the bacon.
  5. Bake for about 10 minutes until the bacon is sizzling and darkening in color.  Flip the bacon slices and baste with the remaining cider.
  6. Continue baking for another 5-10 minutes until the slices are darkened and crispy on the edges.
  7. Let the baking sheet cool for about 10 minutes on a wire cooling rack.  If you want to mop up some of the grease in the pan with paper towels, go for it.
  8. Once the bacon is a little cool and the glaze has had a chance to cool and stick to the bacon, line a plate with a stack of paper towels and move the bacon slices out of the baking pan and onto the paper towels.  Gently blot the slices (if you press too hard the paper towel may stick to the glaze) and then move to a warm plate for serving.  Enjoy!

Bell Pepper-Sausage Kolache & Apricot-Nectarine Kolache

Monday, August 20, 2012

kolache

Being a part of a family that very proudly celebrates our Slovak heritage, I was fascinated to hear about Texas’ love affair with kolache, a Czech pastry.  Even better, kolache is a strongly featured recipe in The Pastry Queen—I’m so glad that I was able to circle back around and make it before Project Pastry Queen was officially over.  My biggest problem, it turns out, was just figuring out how to say the darn thing!  The world wide webiverse told me it was “ko-losh” or “ko-losh-ee”.  Enlisting the help of a Czech coworker, she said it was “ko-lotch-ee”.  I guess, in the end, it doesn’t matter, because—even though I’m still uneasy with all bread-making activities—these were mostly successful.  I’ve never eaten one made by someone else, so I don’t have anything to compare them to, but I can say that the dough is sweet and tastes very close to my favorite Cantonese Dim Sum BBQ Pork Filled Buns, albeit a little bit denser.  I know it’s a strange comparison, but in the end, it’s a small world, after all.

bell pepper sausage kolache

I split the recipe into half and made one half open-faced with nectarines, apricot jam, and brown sugar streusel.  The other half had the dough wrapped around a red bell pepper and sausage filling so that the filling was hidden inside.  I will say that I definitely have to work on my technique—as we all know here, bread dough and I don’t get along, so the nectarine kolache weren’t so much perfect little deep wells of fruit, but instead the fruit kind of hovered on top.  I also would add more of the savory filling next time because you can, obviously, never have enough sausage.  Overall, though, they were great!  The dough didn’t require any kneading, so, even though mine weren’t perfectly beautiful, I still recommend this recipe to anyone wanting to try yeast breads.  You literally just mix the dough, then stick in the fridge till morning and voila!
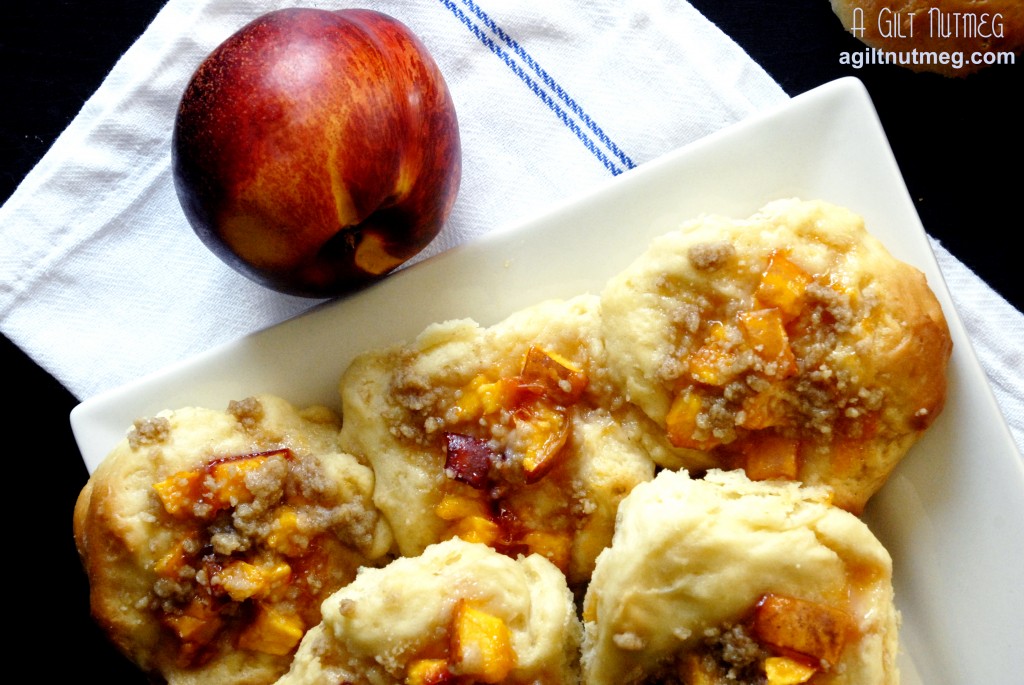
apricot nectarine kolache

Kolache
Makes 16-18 kolache
Dough adaptation directly from The Foodie Bride

Fillings inspired by The Pastry Queen

Dough (for a full recipe - 16-18 kolache)

  • 1 package (2 1/4 tsp) active dry yeast
  • 1/4 cup water, warmed to 110-115F
  • 1 cup milk, warmed to 110-115F
  • 4 Tbsp butter, melted and cooled to warm
  • 2 large eggs
  • 5/8 cup sugar + 1 teaspoon sugar
  • 1 tsp salt
  • 4 1/4 cups flour

Red Bell Pepper & Sausage Filling (for a half recipe - 8-9 kolache)

  • 1 cup cooked sausage, chopped (I used a chicken sausage)
  • 1 cup red bell pepper, chopped

Nectarine-Apricot Filling & Streusel (for a half recipe - 8-9 kolache)

  • 1 large nectarine, chopped
  • 1/4 cup apricot jam/jelly, melted
  • 2 tablespoons flour
  • 2 tablespoons brown sugar
  • 2 tablespoons chilled butter
  1. Add your warm water to your mixing bowl (or bowl of stand mixer) and stir in 1 teaspoon sugar..  Sprinkle yeast over the sugar water mixture and let stand 5 minutes until foamy.
  2. Add milk, butter, eggs, sugar and salt to bowl and mix on low until ingredients are thoroughly incorporated.
  3. Also on low, mix in half of the flour, wait until its incorporated, then mix in the second half of the flour, mixing just until incorporated.  My dough was pretty lumpy looking and, truthfully, I’m not sure if that’s how it’s supposed to look or not.
  4. Let the dough rest 1-2 hours, until doubled in size.  Punch the dough down (deflate it) and then cover it with plastic wrap and stick it in the fridge overnight.  If you’re in a rush, 4 hours is enough, but who doesn’t want the ease of just throwing something in the fridge and not worrying about it until morning?
  5. When ready to start, heat the oven to 375, line a baking sheet with parchment paper (or use non-stick spray) and divide the dough into balls.  They’ll be a bigger than golf balls, about 2 1/2″ wide.  Shawnda helpfully points out that the balls should weigh about 2.5 oz each.
  6. Let the dough rest for 15 minutes while you prepare the filling ingredients- make sure the bell pepper and sausage is chopped; combine the warmed apricot jam in a bowl with the chopped nectarine and stir to coat the nectarine.  You could easily make the streusel topping in a food processor, but it’s such a small amount that I just tossed the flour, brown sugar and butter into a mixing bowl and mushed it around with a fork and a butter knife until it was well combined and crumbly.
  7. If making sausage kolache, flatten out the balls of dough, press about a tablespoon of filling into each round of dough and then wrap the dough over the filling, pinching it shut.  Arrange the balls of dough with the seam side down on the baking sheet and arrange so that the balls are just an inch or so apart.
  8. If making open faced nectarine kolache, slightly flatten the balls and then poke a little well into the dough.  Fill the well with a tablespoon or so of fruit filling, then sprinkle the streusel topping over each one.  Arrange on the baking sheet so that the edges are just touching.
  9. Let the prepared kolache rest for 20 minutes or so and then bake for 20-25 minutes until golden brown on top.  I brushed some melted butter over the tops of the kolache warm from the oven, but that’s up to you.
  10. Serve warm and enjoy!

White Cheddar Poblano Grits

Wednesday, August 8, 2012

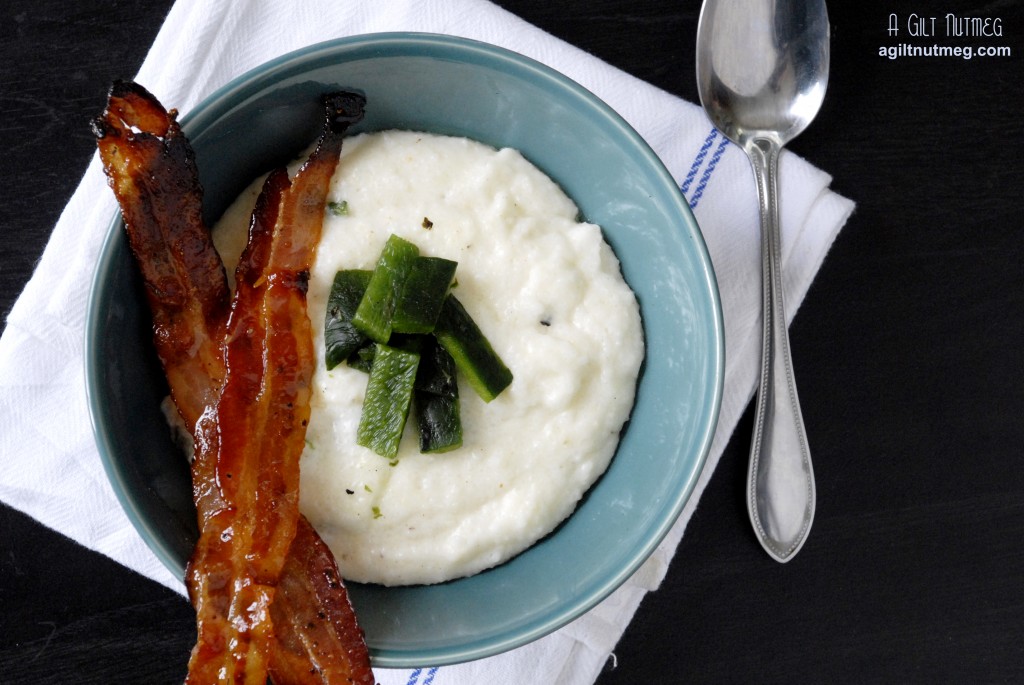
white cheddar poblano grits

My dear readers.  I am about to share with you one of my favorite recipes of all time.  I don’t know if words can even describe my love for this recipe, but I’ll try…  I first discovered it a few summers ago when a group of friends and I went to the Ace Hotel in Palm Springs for a bachelorette weekend away.  If you’ve never been to Palm Springs, imagine being put into a blazing hot oven, but there’s a pool.  I think it was 114 degrees when we were there and barely a drop of shade.  The heat just emanates off of every surface.  This may not sound like a very good weekend to you, but with nothing else to do but lounge in the pool, it somehow all equals up to be one of the most relaxing weekends you can have.  On our last morning there, we got breakfast by the pool and their “Poblano Cheddar Grits” caught my eye.  I knew I was in trouble after my first bite-I so carefully savored every tiny morsel that all of my friends actually left me at the table to go pack instead of watch me lick the bowl of this rich, flavorful, new favorite breakfast.

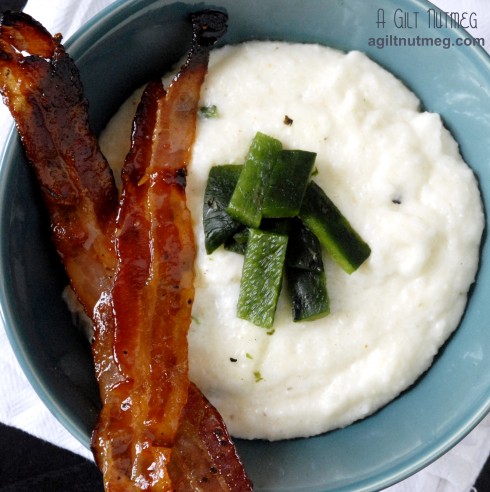
Back home, weeks later, I was still dreaming about the grits.  A trip back to the Ace was not in the question, so I went about trying to recreate them.  Searching for a recipe for White Cheddar Grits on Google actually brought up a recipe from a great restaurant in Atlanta, The Flying Biscuit.  Their Creamy Dreamy White Cheddar Grits are pretty famous and I was delighted to have a recipe from such a familiar place close to home to start as the basis of my recipe-they’re heavily decadent and snow white unlike any other grits recipes I’ve seen.  I quickly researched roasting techniques for some Poblano Peppers and voila!  Bacon is a requirement to crumble over the top (I’ve got some amazing Apple Cider-Maple Glazed Bacon for you on Friday) and I really can’t imagine a better breakfast.  Thanks to the Ace Hotel for introducing me to one of the recipe loves-of-my-life.


White Cheddar Poblano Grits
Adapted from The Flying Biscuit Cafe and Inspired by The Ace Hotel, Palm Springs
Serves 2-3 as a main dish, more if a side

  • 2 poblano chile peppers
  • 3 cups water
  • 1 cup half-and-half
  • 1.5 teaspoons kosher salt
  • heaping 1/4 teaspoon white pepper
  • 1 cup quick grits
  • 1/2 - 1 cup grated white cheddar cheese (to taste-1 cup is very cheesy) (I prefer mild white cheddar cheese over sharp)
  • 4 tablespoons unsalted butter, cubed
  1.  Roasting poblanos can happen one of two ways:  first, rub with olive oil, then grip them tightly in a pair of tongs and hold over your gas burner’s flame, turning until all sides are blackened and bubbly.  Only attempt this if you have metal tongs (my plastic coated ones may or may not be slightly melted now).  The other method involves rubbing them with olive oil, then placing in your oven set to broil, turning every few minutes until all sides are blackened and bubbly.  Either way, once blackened, put the peppers into a paper bag while you make the grits-they’ll sweat in there and the skin will be super easy to remove later.  Also good to note: the oven method will result in softer peppers in your grits, the gas burner method will result in slightly more crunchy peppers.
  2. In a medium-large saucepan, bring the water, half and half, and salt to a boil.
  3. Slowly pour the grits in, whisking the entire time.  Lower heat and let thicken 7-10 minutes, whisking frequently.
  4. While the grits are cooking, take the peppers and remove the outer burned skin so all you have left is the soft pepper flesh underneath.  Remove the seeds and ribs and slice into strips and then 1″ pieces.  If you prefer, you could roughly chop for smaller pieces.
  5. Stir the cheese into the grits until melted, then stir in the butter until also melted and smooth.
  6. Add the poblano pieces and stir gently in.  Taste to see if you want more salt or a little more white pepper.
  7. Serve with some delicious crispy bacon to crumble on top and enjoy!

Salsa Verde

Wednesday, August 1, 2012

salsa verde

If you want something a little different from your average (and often flavorless) salsa from a jar in the grocery store, this quick salsa verde is a great break from the norm and super easy to make.  When we go to the Mexican restaurant near my apartment, I like to double dip my chips in both the red salsa and the salsa verde (which is Spanish for “green”) for a flavor combo better than each salsa on its own!

Salsa Verde
Makes about 1 cup
Adapted from Serious Eats

  • 1 large poblano chile, seeded and roughly chopped (very dark green, about the size of a bell pepper)
  • 2 serrano chiles, roughly chopped; discard seeds if you want a mild salsa (small skinny light green peppers, about 2” long)
  • 1 large tomatillo, quartered
  • 6 sprigs cilantro
  • 2 medium cloves garlic, chopped
  • 3/4 cup water
  • 1/2 cup sour cream
  • 1-2 tablespoons freshly squeezed lime juice
  • Kosher salt to taste
  1. Boil the chopped poblano chile, serrano chiles, tomatillo, cilantro, garlic, and water in a small sauce pan for 10 minutes.
  2. Pour the contents of the saucepan into a blender or a food processor (although be warned the food processor may leak a little bit as you blend, but not too badly).
  3. Stir in the sour cream, lime juice, and salt to taste
  4. Enjoy with tortilla chips and good company!

Bacon and Cheddar Scones

Wednesday, July 18, 2012

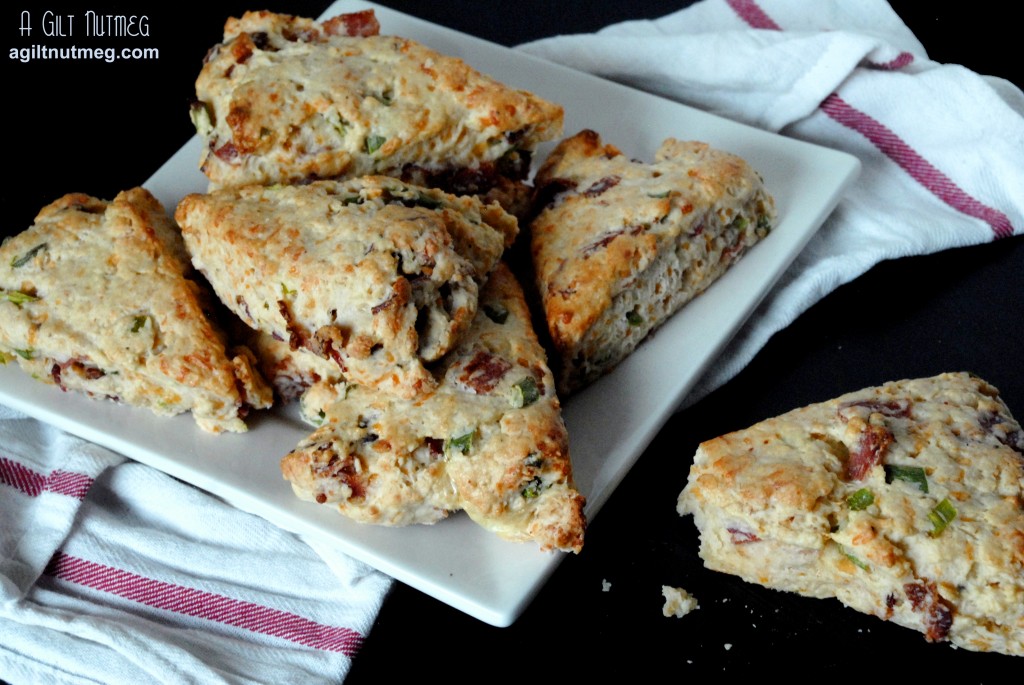
bacon cheddar scones

I’m so glad I went back and made sure to try this recipe for Project Pastry Queen, because these are really fantastic scones!  I’d never made a savory scone before, so I was curious about how these would turn out.  In the end, they’re a meal in themselves-hearty, filling, and satisfying.  There’s sharp cheddar cheese, smoky bacon, fresh green onions, and piquant black pepper.  All that’s missing for breakfast are the eggs, but those aren’t hard to scramble up.  Everyone who ate these gave them rave reviews, so I’m definitely adding them to my regular breakfast/brunch menu for when something a little special is in order!

Be sure to check out Emily’s Ruf Love blog, who chose this recipe, as well as the rest of the PPQer’s take on the recipe.

Bacon and Cheddar Scones
Adapted from The Pastry Queen by Rebecca Rather

  •  3 cups flour
  • 1 tablespoon baking powder
  • 1 teaspoon salt
  • 2 teaspoons freshly ground black pepper
  • 1/2 cup chilled butter, cut into cubes
  • 1 1/2 cups grated Cheddar cheese
  • 4 green onions, thinly sliced
  • 10 slices of bacon, cooked and chopped into 1″ pieces
  • 3/4 to 1 1/2 cups buttermilk
  • 1 egg
  • 2 tablespoons water
  1. Heat the oven to 400 degrees.  Cook the bacon and chop it, if you haven’t already done so.
  2. In a large bowl on low speed, combine the flour, baking powder, salt and pepper.
  3. With the mixer still on low speed, add the cubes of butter one at a time, until the mixture is crumbly.  You want pieces no bigger than peas.
  4. Add the cheese to the bowl and turn off the mixer as soon as the cheese is incorporated into the mixture.
  5. Put the electric mixer away and, with a wooden spoon or sturdy spatula, mix in the green onions, bacon, and 3/4 cup of the buttermilk until combined.  You want to do as little stirring as possible or else your scones will be tougher than a boot.  If there are still crumbles that sit in the bottom of the bowl, add a teensy bit of buttermilk at a time until the dough sticks all together and can be squished into a ball.
  6. Lightly flour a cutting board and turn the dough ball out onto the board.  Pat the dough into a round shape and, with a floured rolling pin, roll the dough out until it’s a circle 8″ wide.
  7. Using a large knife, cut the round into 8 wedges.
  8. In a small bowl, whisk together the egg and water and brush the mixture over the tops of the scones.
  9. Move the scones to an ungreased baking sheet and bake for approximately 18 minutes until golden brown on top.
  10. Definitely warm them up again in a 350 degree oven for 10-15 minutes if you’re going to serve them later.  Enjoy with a tall glass of milk!

Bleu Cheese, Sausage & Crimini Mushroom Pizza

Wednesday, June 13, 2012

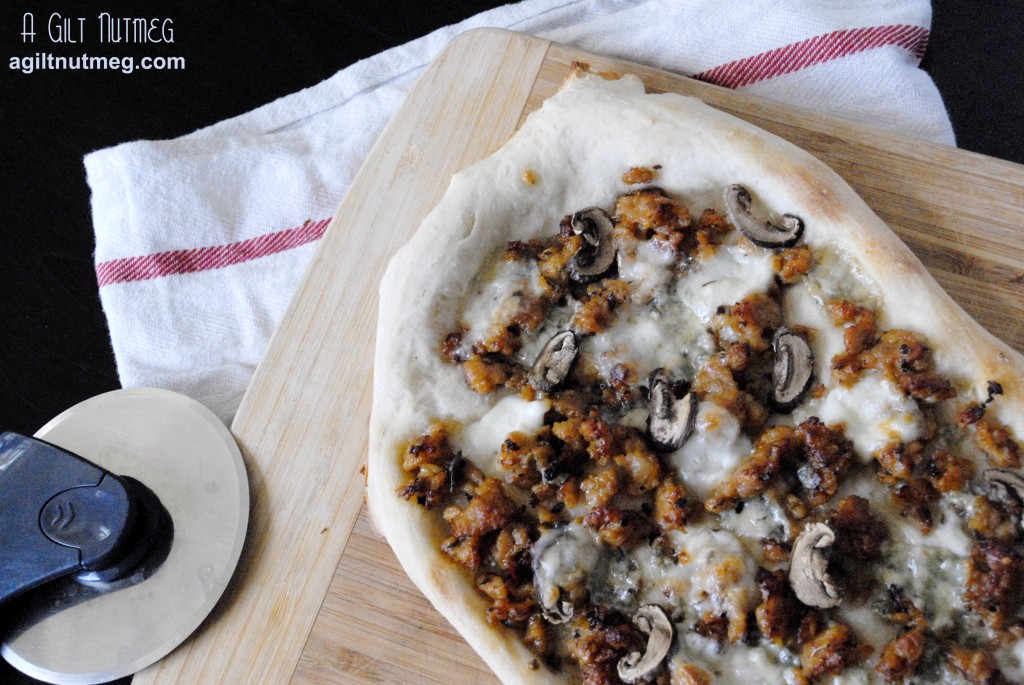
Last month I had the great pleasure and honor of making dinner for a number of friends from college who had come to visit from the East Coast.  I wanted something to serve that would be fun and that would cater to everyone’s different tastes, but that would also be fast and enable me to wander back and forth from the kitchen to chat.  I decided on pizza night, which definitely meant fast, wouldn’t break the bank, and allowed me to get creative.   We ended up with 4 different types of pizza:  Traditional Margarita, Rosemary & Red Potato, Roasted Veggie and Hummus (recipe to come!), and Bleu Cheese, Sausage & Crimini Mushroom.  All four were a hit!

This pizza was definitely the most hearty of the four.  The flavors are all strong, but work together instead of competing on your taste buds.  Pizza is one of those great recipes that you can whip up in no time and get on the table within minutes of starting, and this recipe is definitely going into normal rotation for pizza night.

Bleu Cheese, Sausage & Crimini Mushroom Pizza
Makes 2 small-medium pizzas

  • 1 package of Trader Joe’s refrigerated pizza dough
  • 2 chicken sausages, casings removed (I chose Trader Joe’s Sweet Italian Chicken Sausage)
  • 1 teaspoon dried oregano (optional)
  • Garlic infused olive oil (optional)
  • 1/2 cup Crimini mushrooms, sliced
  • 1/2 cup bleu cheese crumbles
  • 1 container Bocconcini (small mozzarella balls in water), sliced or 1 large ball of fresh Mozzarella, sliced (just don’t get the shredded bagged kind)
  1. Place an unrimmed cookie sheet in your oven or place a rimmed baking sheet upside down on the rack in your oven.  Heat the oven to 500 degrees with the sheet inside.
  2. While the oven is heating, remove the casings from the sausage and fry it up in a pan, breaking up the sausage into small pieces.  At this point, I added about 1 teaspoon of dried oregano to the sausage in the pan, because I felt it could do with a little more flavor, but this is entirely up to you and the sausage you chose.  When fully cooked through, move the sausage to a plate covered in a thick stack of paper towels so that the grease can drain.
  3. After the oven is good and hot (about 30 minutes), remove the cookie sheet and put it on a heat-safe counter, but leave the oven on.
  4. Break the pizza dough into two even pieces and stretch the first piece out gently with your hands, letting gravity do most of the work.  I always prefer this to rolling it out with a rolling pin, but you will absolutely end up with an oddly shaped pizza this way-I think it gives it character.
  5. Gently lay the stretched pizza dough onto the hot baking sheet (the goal here is to get the bottom of the crust baking first while you top the pizza, so that the dough cooks more evenly.  If you have some of that garlic infused olive oil, brush about a tablespoon or two over the crust.
  6. Sprinkle on about half of your sausage, half of your mushrooms, half of your bleu cheese and half of your mozzarella on top of all of that (adding the mozzarella last will help the toppings stick to your pizza better).  Of course, adjust to your tastes.  I like a little less of the bleu cheese, as it’s a super strong flavor.
  7. Return the baking sheet with the pizza now assembled on top to the oven and let it bake for 10-15 minutes, until the crust is starting to turn golden brown and the mozzarella is bubbly and also just starting to brown.
  8. Let cool for 5 minutes before cutting with a pizza cutter and enjoy!

Roasted Yellow Summer Squash Salad

Wednesday, May 30, 2012

roasted yellow summer squash salad

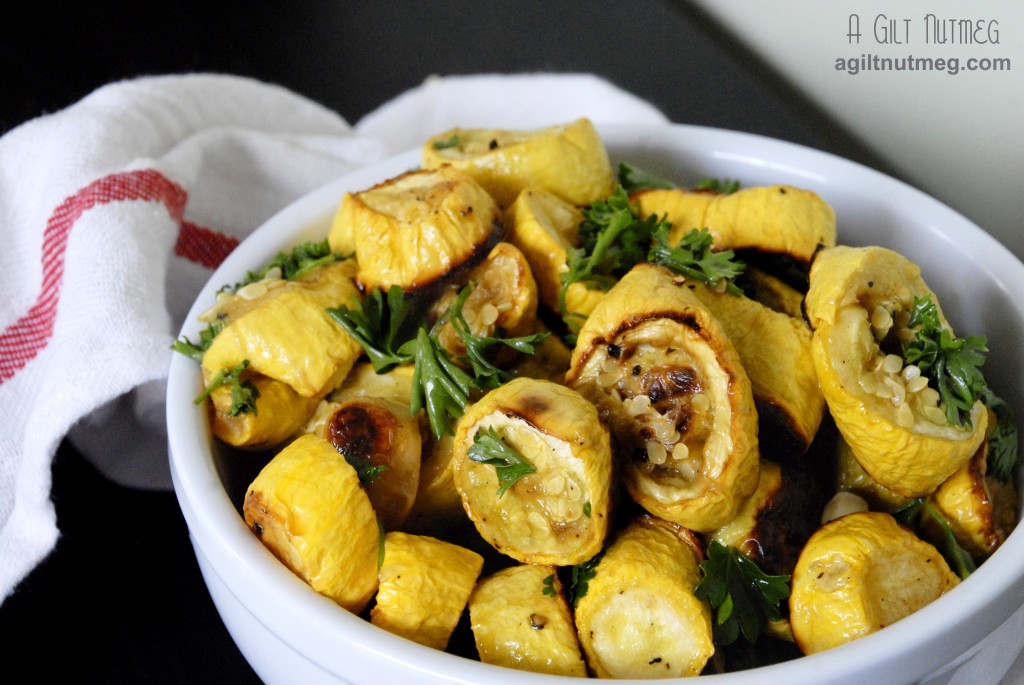
I can’t remember not liking yellow squash.  Actually, that’s only partially true-I’m sorry, Mom & assorted other relatives, I never liked Squash Casserole, but that’s mostly because of the onions.  Other than that, you can happily feed me yellow squash any way you can: grilled, fried, sauteed, stir fried, roasted, baked in this awesome vegetable lasagna I made this weekend…the possibilities are endless.  When you want yellow squash fast and portable, this is the recipe you should turn to; I made it for a picnic and it was fantastic both warm (I snuck some out of the oven) and cooled after being transported in the picnic basket.  Full of roasted squash flavor, the parsley and lemon bring out fresh acidic flavor notes and the olive oil deepens the flavor profile.  This was the easiest dish I made for that entire picnic, so don’t hesitate to give it a try!

Roasted Yellow Squash Salad
Adapted from Martha Stewart
Serves 4-5

  • 5 lbs yellow squash, sliced into 3/4″ - 1″ thick rounds
  • 6 cloves garlic
  • 3 tablespoons olive oil
  • coarse salt and pepper
  • 1 large handful of fresh parsley (either flat-leaf or curly-leaf fine)
  • freshly squeezed juice from one large lemon
  1. Heat oven to 475 degrees and line one or two rimmed baking sheets with tin foil.
  2. In a large mixing bowl, combine the sliced yellow squash, garlic cloves, 2 tablespoons of olive oil, and salt and pepper and mix with your hands until the squash is thoroughly coated in the oil and seasonings.
  3. Spread out the seasoned squash in an even layer on the baking sheets and bake for 45 minutes to an hour until the squash is nicely browned (be sure to check underneath-my squash were almost too dark on the bottom and I wouldn’t have realized it because the top wasn’t even close to that brown).
  4. Pull the baking sheets out of the oven and let the squash cool on the sheets.
  5. Move the squash back into that big mixing bowl, add the last tablespoon of olive oil, the parsley and lemon juice and toss to coat.  Add extra salt and pepper if you think necessary.
  6. Serve warm, room temperature, or cold from the fridge, it’s up to you, because it will be delicious either way!  Enjoy!