Entries Tagged as 'Food as Gifts'

Pineapple Jam

Friday, June 8, 2012

Two Decembers ago, The Boyfriend came home to Georgia with me for his first Southern Christmas and, in a very thoughtful gesture, my Dad made a Pineapple Pie our first night home—fitting, considering pineapples are the universal sign for “welcome”.  I remember Dad remarking on how much he loved pineapple pie and it stuck with me, mostly because I don’t remember us ever really making it before that Christmas.

Usually resigned to seeing my family only once a year, I have the rare pleasure of seeing my family this weekend—and it’s not even a holiday!  Since Father’s Day is only a week away, I decided to take the opportunity to make Dad a little gift.  Remembering the Pineapple Pie, I was pleased as punch when I came up with an idea to make Pineapple Jam, a fitting summer twist on the pie.  I haven’t told him yet, so no one ruin the surprise until tonight, okay?

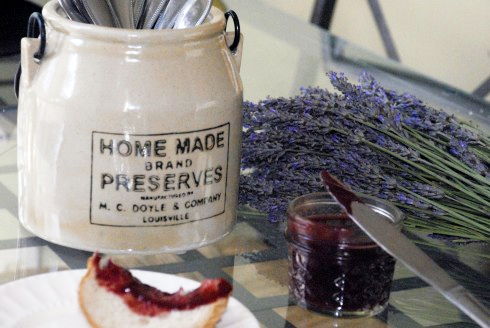
For those of you nervous about jam-making, this makes a very small batch and one that is relatively quick as well.  It’s a great starter into the world of jam and canning!  That said, I do wonder if what I made is more like Pineapple jelly rather than jam, but either way it’s a delightfully sweet and acidic flavor that you wouldn’t normally find at the grocery store.  Even better, if you’re not a breakfast person, you can use it as a glaze for ham or chicken instead.

Finally, you’ll notice in the photo that one jar is darker than the other.  I made one jar of plain Pineapple Jam (to showcase the clean sweetness I love about pineapple) and, to make things interesting, I stirred a little bit of vanilla bean paste and some powdered ginger into the other jar while the jam was still hot.  Since the jars have been through the canning process so they were airtight for my parents to be able to travel back home with, I admit I haven’t been able to taste it, but I promise I will report back here with Dad’s thoughts—fingers crossed he loves it.  I’ve listed the ingredients for the variation at the bottom if you don’t want to wait for our word on it.

Update: Dad loved both jams!  He said that initially his favorite was the plain jam and finished that jar first, but he let me know later that after the Ginger-Vanilla flavor had a chance to mellow and meld in the fridge, that it turned out to be his favorite after all.  So just know, you’ll want this flavored jam to “age”  a little bit, but you’ll be rewarded with a wonderful depth of flavor.

Note:  For canning, you’ll need two ½ pint jars, plus an extra little Tupperware or jar for whatever doesn’t fit into the first two jars—you’ll throw this extra in the fridge to eat in the next week or so without having to worry about the canning process since there will be too much air in that last jar to go through canning.

Pineapple Jam
Adapted From Coleen’s Recipes
Makes 2-3 cups

  • One can (20 oz) crushed pineapple
  • 1 ¼ cups pineapple juice
  • 1 ¾ oz fruit pectin powder
  • 3 cups sugar
  1. Start a large pot of water boiling and in the meantime, wash your jars and lids with hot soapy water.  Set the jars and lids into the pot of water and let them boil for ten minutes (about the time it takes to measure out the ingredients and make the jam).  Doing this keeps the jars hot so that they don’t crack and break, which would happen if you put hot jam into cold jars.
  2. In a large saucepan, combine the pineapple, juice and pectin and stir continuously until boiling.  Make sure the pectin is completely dissolved and no blobs of powder remain.  If you want a smoother jam, you can use a stick blender to blend the pineapple a little bit (later I wondered if this is why mine came out more jelly like in texture.  I won’t blend it next time).
  3. After it’s boiling, add the sugar, stirring until dissolved, and bring it back to a rolling boil.  Coleen says to bring it “a boil you can’t stir down”, which was an excellent way to put it, and let it boil for 1 minute.
  4. Spread a clean towel on your kitchen counter and (I just use normal kitchen tongs) carefully pull the jars and lids out of the hot water and wipe them down with another clean towel (be careful, they’re hot!).  Keep the pot boiling in the meantime.
  5. Skim the foam off the top of the boiling jam and discard.
  6. Ladle the jam into the waiting jars, filling the jars to within ¼” of the top rim.  Wipe off any jam that you dripped on them, and quickly screw the lids on (they don’t need to be super tight, just tight enough that you’ll be able to unscrew them without issue later).
  7. Carefully lower the lidded jars into the boiling water and let them boil for 10 minutes.  Putting a towel in the bottom of the pot will reduce some of the racket of the jars rattling around.
  8. After ten minutes is up, take the jars out and set them on another clean towel on your counter.  Press the lids—they should be tight and not pop up and down.  If they pop up and down when you press, put them back in the water for another 5 minutes.  I will admit that the last time I made a large batch, some of the lids popped up and down slightly and I was just too tired at that point to put them back in the water, so I left them on the counter and when I came back in the morning, tada!  They were tight in the morning and didn’t pop.  But then, I’ve always been a little lax when it comes to rules like that and I’ve never gotten food poisoning, so I’ll leave that call up to you.
  9. The jars that have been through the canning process can be left out until ready to give as gifts or to use yourself, but once you open them, put them in the fridge.  The leftovers that didn’t fill up a whole jar should go straight into the fridge.  Enjoy on toast or as a glaze to spice up whatever meat you’re cooking that night!


Variation: Ginger-Vanilla Bean Pineapple Jam

If you want your whole batch to be flavored, stir in a ½ teaspoon of ground ginger and 2/3 teaspoon of vanilla bean paste (or seeds of ½ a scraped vanilla bean, plus a splash of extract).  If you want one jar flavored and one plain, ladle the jam into the jars and then stir ¼ teaspoon of ground ginger and 1/3 teaspoon of vanilla bean paste directly into one of the jars before canning.

Nonpareils

Friday, December 23, 2011

Since we tackled one of the hardest candies yesterday, today we’re going the opposite route-something supremely easy and something that will be fun for the whole family to help with.  Best of all, you can tailor them to your own taste, be it milk chocolate, dark chocolate, or even adjust the sprinkle colors to match the holiday or season.  I made these specifically this year for my Uncle Steffen, who loves these, so I hope that the box has made its way through the post office system before he reads this!

An adult should take over the melting of the chocolate part, but after that, feel free to let kids pull up a stool, spoon the chocolate, and sprinkle the beads.

Also be sure to add your email address in the upper right hand corner of the website-you’ll get all of these recipes emailed directly to you!

Nonpareils

Adapted from Martha Stewart

  • 2 bars of your favorite chocolate (about 4 oz each)
  • 1/2 teaspoon of pure vegetable shortening
  • 1/4 cup of sugar beads (I bought two bottles and used almost all of both…but then again I wasn’t very careful about reserving the ones that didn’t stick to the chocolate right away)
  1.  Line a baking sheet with parchment paper.
  2. In a double boiler, melt the chocolate and shortening together.  (or use a makeshift double boiler like I do-simmer a pot of water and then just put a metal mixing bowl over the top of it to melt the chocolate in)
  3. Spoon the chocolate into little pools about the size of a quarter.
  4. Let the chocolate cool on the sheet for 20 minutes then come back and sprinkle the sugar beads very generously over the chocolate.  I actually sprinkled once, let them set for a few minutes, then sprinkled again over any areas short of sprinkles.  Also, make sure to wait the full 20 minutes or else the sprinkles will just settle down into the chocolate and your candy won’t be very pretty.
  5. Let chocolates cool over night and then gently remove them in the morning.  Enjoy!

Lemon-Vanilla Bean Body Scrub

Wednesday, December 21, 2011

Ready or not, the holidays are officially here!  Hannukah started last night and Christmas is just 4 days away.  Do you have all your gifts ready?  Food planned?  Christmas caught me off guard this year, but I’m pleased to say that I do have a few tricks up my sleeves!  I know you come here to read about food, but since this wonderful scrub is made of all edible ingredients, I’m going to let it slide.

Before I go any further, I can say that I tested it last night before bottling it and it. is. divine.  As I was getting into bed last night I couldn’t stop rubbing my hands together over and over again.  It’s a great gift for co-workers or friends and just about the only step that takes any time is squeezing the lemon, which spends all of a minute to accomplish, so it’s perfect for any of you who waited until the last second to take care of gifts.

This is going to be a busy rest of the week on the blog-I have lots of candy recipes for you to make for the holidays, so keep checking back every day!  I’ll post Monday’s Project Pastry Queen recipe (Lemon Glazed Cranberry Loaf Cake) on Saturday, early, so that you will have a chance to make it for Christmas day if you wish, and I’ll take Monday off-a girl’s gotta rest, after all!

Lemon-Vanilla Bean Body Scrub
makes 2-3 cups of scrub
Adapted from Under the Table and Dreaming

  • 1 1/2 cups sugar (an exfoliant)
  • 1 cup safflower oil (inexpensive at the supermarket and is a good source of vitamin E!)
  • juice from 1 lemon
  • seeds scraped from 1 vanilla bean
  1. Stir ingredients until well combined.
  2. Spoon into jars and enjoy!

To ready them for giving as gifts, tie them up with a ribbon (I loved the spoon Stephanie attached to hers) and a tag.  You can see the tags I made above, on the back they say:

  1. Scrub over rough or dirty hands (or anywhere on body)
  2. Rinse
  3. Enjoy silky smooth skin!


Finally, you may have noticed that I finally got my mailing list back in order!  If you would like to receive an email each time I post something new, enter your email address above in the right hand corner; you’ll get an email asking to confirm, and voila-delicious recipes delivered three times a week to your inbox!

Plum Butter

Monday, July 25, 2011


plum butter - a gilt nutmeg


Every fall I eagerly await apple season: it means apple juice, apple sauce, and caramel apples (never mind the fact that I’m actually allergic to apples…I just pretend like I’m not).  My favorite of all apple treats though, is apple butter.  But looking at the calendar, it’s in the middle of summertime and apple butter time isn’t even close!  That said, summertime is a cook’s dream because of the wide variety of fresh produce available.   So instead of whining about apple butter not being in season, why not take summer’s best fruits and make them into fruit butter instead??  And thus, plum butter was born.

Deliciously tart, a little sweet and a little spicy, plum butter is one of my new favorite ways to wake up on a summer morning.

Because I brought my batch of plum butter to an event in Venice and since there would be no refrigeration, I had to go through the canning process to ensure the people taking home my plum butter wouldn’t keel over with botulism.  That said, while hot and steamy for sure, the canning process is really not the big deal everyone makes it out to be.  Three easy steps:  1) heat the jars in water so they don’t break when you put hot food in them 2) fill with food 3) boil the jars for 5 minutes and then turn off the burner and let the water cool for 5 minutes before taking the jars out of the water.  Seriously, that’s it.  I couldn’t believe it either!

Even better news: if the plum butter isn’t leaving your house and you’re planning on eating it within a few weeks, then all you need to do is stick it in the fridge and call it good.  No steamy canning needed!  If you want to make a lot and store it in your pantry, then canning is necessary.  Truthfully, I haven’t tried freezing it yet, but I bet that would be a great option if you have just an extra jar or two but don’t want to go through the canning process.  Anyone out there who tries it, let me know!  So now, without further ado…summer’s finest at it’s most concentrated deliciousness.

Note: I made two batches of butter, one in my cast iron Le Creuset and the other in my normal stainless steel cookware.  The batch made in my Le Creuset thickened much faster than the one in my stainless steel pot.  I highly suggest using a cast iron pot if you have it.

Also Note: The canning instructions I wrote out below are for sea level altitude, since I’m right here on the coast.  Apparently boiling times are longer for higher altitudes.  Of course, I am no canning expert, this being my first time, so definitely consult the instructions that come with your new tray of canning jars!

Plum Butter
makes about 4 cups
adapted from Martha Stewart

  • 3 1/2 lbs plums (I used the larger black plums instead of red plums)
  • 1 1/4 cup sugar
  • 1 cup water
  • 3/4 teaspoon cardamom
  • 3/4 teaspoon cinnamon
  1. Dice plums into approximately 1″ pieces (about 8 pieces per half) and discard pits
  2. Put plums, sugar, and water into 6 qt pot, bring to a boil then reduce to a simmer (I forgot what I was doing and it boiled over, just fyi, it could happen to you); cook until fruit is very soft, approx 20 minutes
  3. Puree contents of pot in blender.  I used a food processor, which worked fine, but it is not liquid tight and I certainly had to wipe down the base of the processor after it a all said and done because some of the puree had worked its way up up under the blade and out underneath the workbowl.
  4. Return puree to sauce pan and add cinnamon and cardamom, stir.
  5. Cook puree down until thick and spreadable, about 3 hours, stirring often to prevent scorching.  I used a regular balloon whisk to stir the butter and by the end, when you take the whisk out, it is thick enough that you will see an imprint left behind of the whisk tines.
  6. While the puree is in the homestretch of thickening, place your mason jars and the flat parts of the lids into a large pot, cover with water and turn the burner on very low.  The point is just to warm up the jars and lids so that they won’t shatter when you put hot food into them (leave the rings out of the water so they’re cool for you to twist them onto the jars later).
  7. When the jars are warm and the butter is fully thickened to your liking, fill the jars up with butter, stopping about a 1/2 inch from the top of the rim to leave some air in the top of the jar.  Place a flat lid on the jar and twist on the ring.
  8. Heat up another large pot of water to simmering and put jars full of butter into the simmering water.  Turn up the heat to boil the water; boil jars for 5 minutes.  Turn off the burner and leave the jars in the water (you’ll see bubbles still escaping from under the jar lid during the cool down phase, this is good).  Take the jars out and set them on a towel on the counter top.  The instructions say to leave the jars undisturbed for 12-24 hours (I did not have that luxury of time).  You’ll know you’ve done a successful canning job if the lid is firm and doesn’t pop up and down when you press on it.  Some of mine popped slightly after I took them out of the pot, but were firm when I came back in the morning.  If the jars still pop, put them in the fridge and just eat them soon instead of shelving them.

P.S. if you want alerts on each post that I write (I try to post M/W/F), follow my blog on Facebook!

Rum-Glazed Spiced Pecans

Tuesday, June 28, 2011

So you’re throwing a 4th of July BBQ and you want some small munchies for guests to nibble on instead of the typical celery and carrot sticks with onion dip.  These pecans are your answer!  They’re supremely easy to quickly toss together, so they won’t add any extra stress to your party day planning.  I was annoyed that I had to go out and buy a whole bottle of dark rum just for the recipe’s 1 tablespoon, but I’m glad for it now because I make this recipe quite frequently and I warn you, you’ll experience the same: once you put these out, they won’t last long, so make a double batch.

Rum-Glazed Spiced Pecans
improved upon from Cooks Illustrated
Makes 2 cups

  • 2 cups raw pecan halves (8 ounces) (at my grocery store this means a 1 1/2 cup bag plus a tiny 1/2 cup bag, which never fails to annoy me, esp since the tiny bag’s nuts are always pulverized instead of the “pecan halves” advertised)
  • Spice Mix
  • 2 tablespoons granulated sugar
  • 1/2 teaspoon kosher salt
  • 1/2 teaspoon ground cinnamon
  • 1/4 teaspoon ground cloves
  • 1/4 teaspoon ground nutmeg
  • 1 1/2 tablespoons rosemary, ground so that needles are in small pieces
  • Rum Glaze
  • 1 tablespoon dark rum
  • 2 teaspoons vanilla extract
  • 1 teaspoon light brown sugar
  • 1 tablespoon unsalted butter
  1. Heat oven to 350 degrees.  Line rimmed cookie sheet with parchment paper and spread pecans in even layer.  Toast 3 minutes, shake pan to redistribute nuts, and continue to toast until fragrant and color deepens slightly, about 3 minutes longer.   I personally prefer slightly less toasted pecans, but you can toast them to your heart’s desire, of course.  Transfer cookie sheet with nuts to wire rack.
  2. For the spice mix: While nuts are toasting, stir together sugar, salt, cinnamon, cloves, nutmeg and rosemary in medium bowl; set aside.
  3. For the glaze: Bring rum, vanilla, brown sugar, and butter to boil in medium saucepan over medium-high heat, whisking constantly-I am serious about the MEDIUM sized saucepan: the first few times I made this recipe I always decided, “well, it’s just a small amount of ingredients, I’ll use a small saucepan” and then I get to the next step and have to transfer the mixture to a bigger pot, cursing myself for forgetting AGAIN to follow instructions as written.
  4. Pour in the toasted pecans, stirring constantly with wooden spoon until nuts are shiny, which takes just a couple minutes; there should be no syrup left anywhere in the pan but on the nuts.
  5. Transfer glazed pecans to bowl with spice mix; toss well to coat. Return glazed and spiced pecans to parchment-lined cookie sheet to cool (can be stored in an airtight container for up to 5 days).

Strawberry Marshmallows

Thursday, June 23, 2011

Summer is officially here-the calendar says so, even though June means the opposite of beach weather here where I live.  Summer to me means fresh fruit and it means campfires and this recipe combines both with spectacular results!  As you know from my caramel recipe from last week, I am certainly new on the candy making scene, but it really isn’t as scary as I initially thought.  That said, this recipe for marshmallows is just as easy, but certainly a step up if only for the number of steps involved and TOTALLY, without a doubt, worth the effort.  (I might point out that, while kids love candy, candy making isn’t the best idea to do WITH kids-serious boiling liquid and lots of down time doing nothing but staring at sugar waiting to change colors probably aren’t a good match.  Get the kids involved when it’s time to a) cut the marshmallows out with cookie cutters if you choose or b) when it’s time to eat!)

These marshmallows were part 2 of the 3 part thank you gift I gave to my aunt and uncle and I think these were the star of the show!  The boyfriend was heard to say, “these aren’t marshmallows…these are…fluffier…creamier…better…” and then he sort of trailed off while he continued to stare at the one he was eating.  I was impressed that such a little amount of strawberry puree would make such strongly flavored and scented marshmallows-you can smell these from across the room and they are a beautiful vibrant pink until you dust them with the powdered sugar!

I, for one, cannot WAIT to try toasting these over a campfire for s’mores.  Strawberry seems like a great flavor to add to the chocolate and graham cracker flavor profile and these strawberry marshmallows really turn the dial up from “kids treat” to “adult treat”.

Strawberry Marshmallows
adapted from Smitten Kitchen
makes a 9 x 13 pan, number of marshmallows depends on how small you cut them

  • 2 tablespoons plus 2 1/2 teaspoons Knox unflavored gelatin (in grocery store next to the Jell-O)
  • 1/2 cup cold water, divided
  • 1/2 cup cold strawberry puree
  • 2 cups granulated sugar
  • 1/2 cup light corn syrup
  • 1/4 teaspoon salt
  • 2 large egg whites
  • 1 tablespoon vanilla
  • 1 cup confectioner’s sugar
  1. Oil bottom and sides of a 13- by 9- by 2-inch baking pan or dish and dust bottom and sides with confectioners’ sugar.
  2. In a large bowl (I would go with a metal bowl, since the boiling sugar mixture will go into this later and pouring something that hot into plastic always makes me nervous), mix the 1/2 cup strawberry puree with just a little splash of the 1/2 cup of cold water, sprinkle gelatin over mixture and let stand to soften.
  3. In a 3-quart heavy saucepan heat granulated sugar, corn syrup, what’s left of the 1/2 cup of cold water and salt over low heat, stirring with a wooden spoon, until sugar is dissolved. Increase heat to medium to bring mixture to a boil.  As with the caramel, don’t stir the mixture, just gently swirl the pan occasionally until a candy or digital thermometer registers 240°F, about 12 minutes (again, as with the caramel, I fashioned a tin foil sling to hold the candy thermometer at the right floating height in the mixture).  Remove pan from heat and pour sugar mixture over gelatin mixture, stirring until gelatin is dissolved and all lumps are gone, just a few minutes.
  4. With an electric mixer, beat the sugar-gelatin mixture on high speed until about tripled in volume.  It will take about 10 minutes and you’re aiming for puffy and thick.  It was quite the experience for me with my little hand mixer-by the time it was almost ready, I couldn’t touch the beaters to the bottom of the bowl anymore because mixture was so much higher in volume now and the sticky marshmallow would crawl up beater arms almost to the motor-which I have to admit is a little scary, because you start to wonder if you’re going to ruin your mixer by getting marshmallow goo in the motor and how are you going to finish your recipe without an electric mixer, much less afford a new one!?
  5. Once your fluff is puffy enough, set the bowl aside and rinse off your beaters with very hot water to make the sugar melt instead of gunking up your sponge.  In a separate medium bowl, beat egg whites until they just hold stiff peaks.  Add the egg whites into the bowl of marshmallow fluff and on low-medium speed, beat the whites and vanilla into sugar mixture until just combined.
  6. Pour mixture into baking pan and, based on every single other food blogger’s suggestion, do not try to get every drop of fluff out of the bowl.  Take a spatula and gently work the mass of fluff out of the bowl and down into the pan; leave the scraps or else you will end up a very sticky mess.  Gently shake the pan to make sure it’s evenly distributed, but resist the urge to smooth out the top of the marshmallow with your spatula.  That will also cause a mess and the swirls, in the end, are quite charming.
  7. Sift 1/4 cup confectioners sugar evenly over top. Chill marshmallow in the fridge, uncovered, until firm, at least three hours, and up to one day.
  8. Run a thin knife around edges of pan and invert pan onto a large cutting board.  Lift up a corner of the pan and, using your fingers, pry a corner of the marshmallow out and slowly work the rest of the soft slab out onto the cutting board.  With a lightly oiled pizza cutter (or large knife), cut the marshmallow into cubes.  You can also use cookie cutters for fun shapes-the sky’s the limit!  Sift remaining confectioners’ sugar back into your now-empty baking pan, and roll the marshmallows through it in a couple of batches, making sure that all sides of the marshmallow are coated.  If the sugar gets packed down, use a spoon to fluff it again.  I let my marshmallows sit out overnight and they were slightly sticky again in the morning so I re-coated them with the sugar before packing them away.

Vanilla Bean Salted Caramels

Thursday, June 16, 2011

So after watching too many people suffer horrible sugar burns on Food Network Challenge, I came to the conclusion that candy making was too scary and too expensive should I end up in the emergency room.  And then, as always, I found a recipe that just looked too good to pass on-I lusted after it for months.  And then, the time came where they would work as a perfect gift.  The stars all aligned and I, Emily, became a candy maker.

As typical, I breezed through the recipe and wondered, really, what was I so afraid of?  This is nothing to say of my cooking skills-I have to read a recipe step 6 times in a row because I’ll miss a teeny part of a step that will ruin a whole dish-it’s more so a commentary on how we all just psyche ourselves out over things that seem difficult and scary but only because we’ve never tried it.  And look at what happens when you give things a whirl: homemade caramels!  Super impressive and much more delicious than the cheap cubes that have been sitting in the grocery store since last Halloween (even Rolo caramel filling isn’t as good as it used to be).  So without further ado….

Vanilla Bean Salted Caramels
slightly modified from Annie’s Eats
makes an 8×8 inch pan; actual count is based on how big you cut the pieces

Emily’s Notes:  You will need a candy thermometer; they’re about $5 at the grocery store.    I adore Nielsen-Massey Vanilla Bean Paste.  It’s not so much a paste-it has the consistency of maple syrup and TOTALLY worth the $8 at Williams-Sonoma.  When it’s $10 for one single vanilla bean, why wouldn’t you buy this instead with similar results?  The bottle lasted me about a year.  I use it in place of regular vanilla when I want fancy little specks in whatever I’m making and when I want a stronger vanilla flavor than just extract (you’ll want a tiny spatula to make sure you get every drop of the paste out of the measuring spoon).  Furthermore, this blog was almost titled something with “Vanilla” in it because I. LOVE. VANILLA.  It is the finest of the flavors.  Whenever I make a recipe, I always fill the measuring spoon over the mixing bowl and let it spill over in a faux “whoops!” moment, hence the “and then some” in the ingredient list.  I’ll bet I get as much as twice the vanilla I’m supposed to sometimes…but it’s delicious.

  • 1 cup heavy cream
  • 5 tbsp. unsalted butter
  • ½ tsp. vanilla extract (and then some)
  • 1 tablespoon vanilla bean paste (and then some)
  • 1¼ tsp. fleur de sel, or other fancy salt, plus more for garnish
  • 1½ cups sugar
  • ¼ cup light corn syrup
  • ¼ cup water
  1. Line the bottom and sides of an 8-inch square baking dish with parchment paper. Lightly butter the parchment.  (I recently discovered “Martha Wrap” at the grocery store: parchment paper on one side, foil on the other so you get the non-stick parchment benefits, but it’s stiff like foil so you can line a pan with it and it will actually STAY PUT! Genius!)
  2. In a small saucepan, combine the cream, butter, vanilla extract, vanilla bean paste, and fleur de sel.  Heat over medium-high heat and bring to a boil.  Stir often, to keep the paste moving around in the mixture.  Remove from the heat and set aside.
  3. In a medium saucepan, combine the sugar, corn syrup, and water.  Heat over medium-high heat, stirring occasionally until the sugar is dissolved.  Boil, without stirring but gently swirling the pan occasionally, until the mixture is a light golden caramel color.  Keep an eye on it-I stayed in the kitchen and washed the dishes I’d dirtied while it boiled.  It was clearish for forever and then I turned away just as it was starting to brown slightly-when I turned back after cleaning a dish,  it was already approaching too dark!  At this point, I took a picture of the pot and sent it to my boyfriend saying “Look what I’m playing with!  The boiling contents of this pot will give you third degree burns!”.  Seriously, once you’re in the middle of the process you’ve already forgotten that this is supposedly scary and hard to do and you are instead confident enough to joke about it.
  4. Vigorously stir the cream mixture for a moment or two, to re-distribute the vanilla beans,  and carefully stir the cream mixture into the caramel –  pour slowly and stir constantly.  Continue simmering the mixture until it registers 248˚ F on a candy thermometer (I fashioned a little tin foil rope sling so that it stayed upright in the pot-don’t let the tip touch the bottom of the pot, make sure it’s floating somewhere in the middle of the sugar syrup).
  5. Immediately remove from the heat and pour into the prepared pan.  Tap the pan gently on the counter to get all the air bubbles rising towards the top.  Let cool for 30 minutes, then sprinkle lightly with additional fleur de sel-I have Balinese Sea Salt from Williams-Sonoma that I love (even got my roommate seeing the light on fancy salt!), but it’s huge pyramids.  I ground it up with a mortar and pestle so the grains were finer for sprinkling.
  6. Pop in the fridge and continue to let sit until completely set and cooled.  I used a buttered pizza cutter to slice them.  Wax paper is ideal for wrapping them-you can cut them into squares and wrap them like Christmas presents, or you can cut them into small rectangles and wrap them like Tootsie Rolls!  Personally, I like the smaller Tootsie Roll method: perfect bite size and easier to wrap.

These will make pretty soft caramels that will stretch when you try to pull pieces off (which is why I prefer the smaller Tootsie Roll size).  They will hold their shape for the most part, but are easy to roll up into the wrappers and then conform to the round shape.  I made them as a gift, and they were well received, thankfully, so I highly suggest it.  I actually made three recipes that night after I got home from work (and went to bed at a decent hour), which is a testament to how easy these are that I could squeeze them in.

I left the caramels out on the kitchen counter for a few days and during those few days the weather in Beach-town, USA turned cloudy and humid (humid, at least, for SoCal).  They got a little greasy and melty, which I hear is common caramel behavior for humidity, so all my friends in the South-hurry and make this before you start getting 100% humidity days.  Which also means…save this recipe and don’t forget these for Christmas time!