Entries Tagged as 'Veggies'

Wild Rice & Mushroom Soup

Thursday, February 7, 2013

Wild Rice & Mushroom Soup - A Gilt Nutmeg


This holiday, spent at home in Georgia, my little sister insisted that she wanted to make a recipe for mushroom soup she saw in the latest Cooks Illustrated.  I will be the first to admit that I wasn’t particularly excited about it, as mushrooms are not my favorite at all.  I’m really working hard on liking mushrooms, but the thought of  thick meaty slices of mushroom scared me: in soup there was nothing to hide them under!  Cut to Christmas dinner and I remember specifically saying “give me only a little, so I’ll have room for dinner” and then cut to me finishing that first bowl and scrambling to the pot to fill up my bowl beyond that tiny little first taste I had.  Somewhere during that taste, I had somehow forgotten that I don’t like mushrooms.

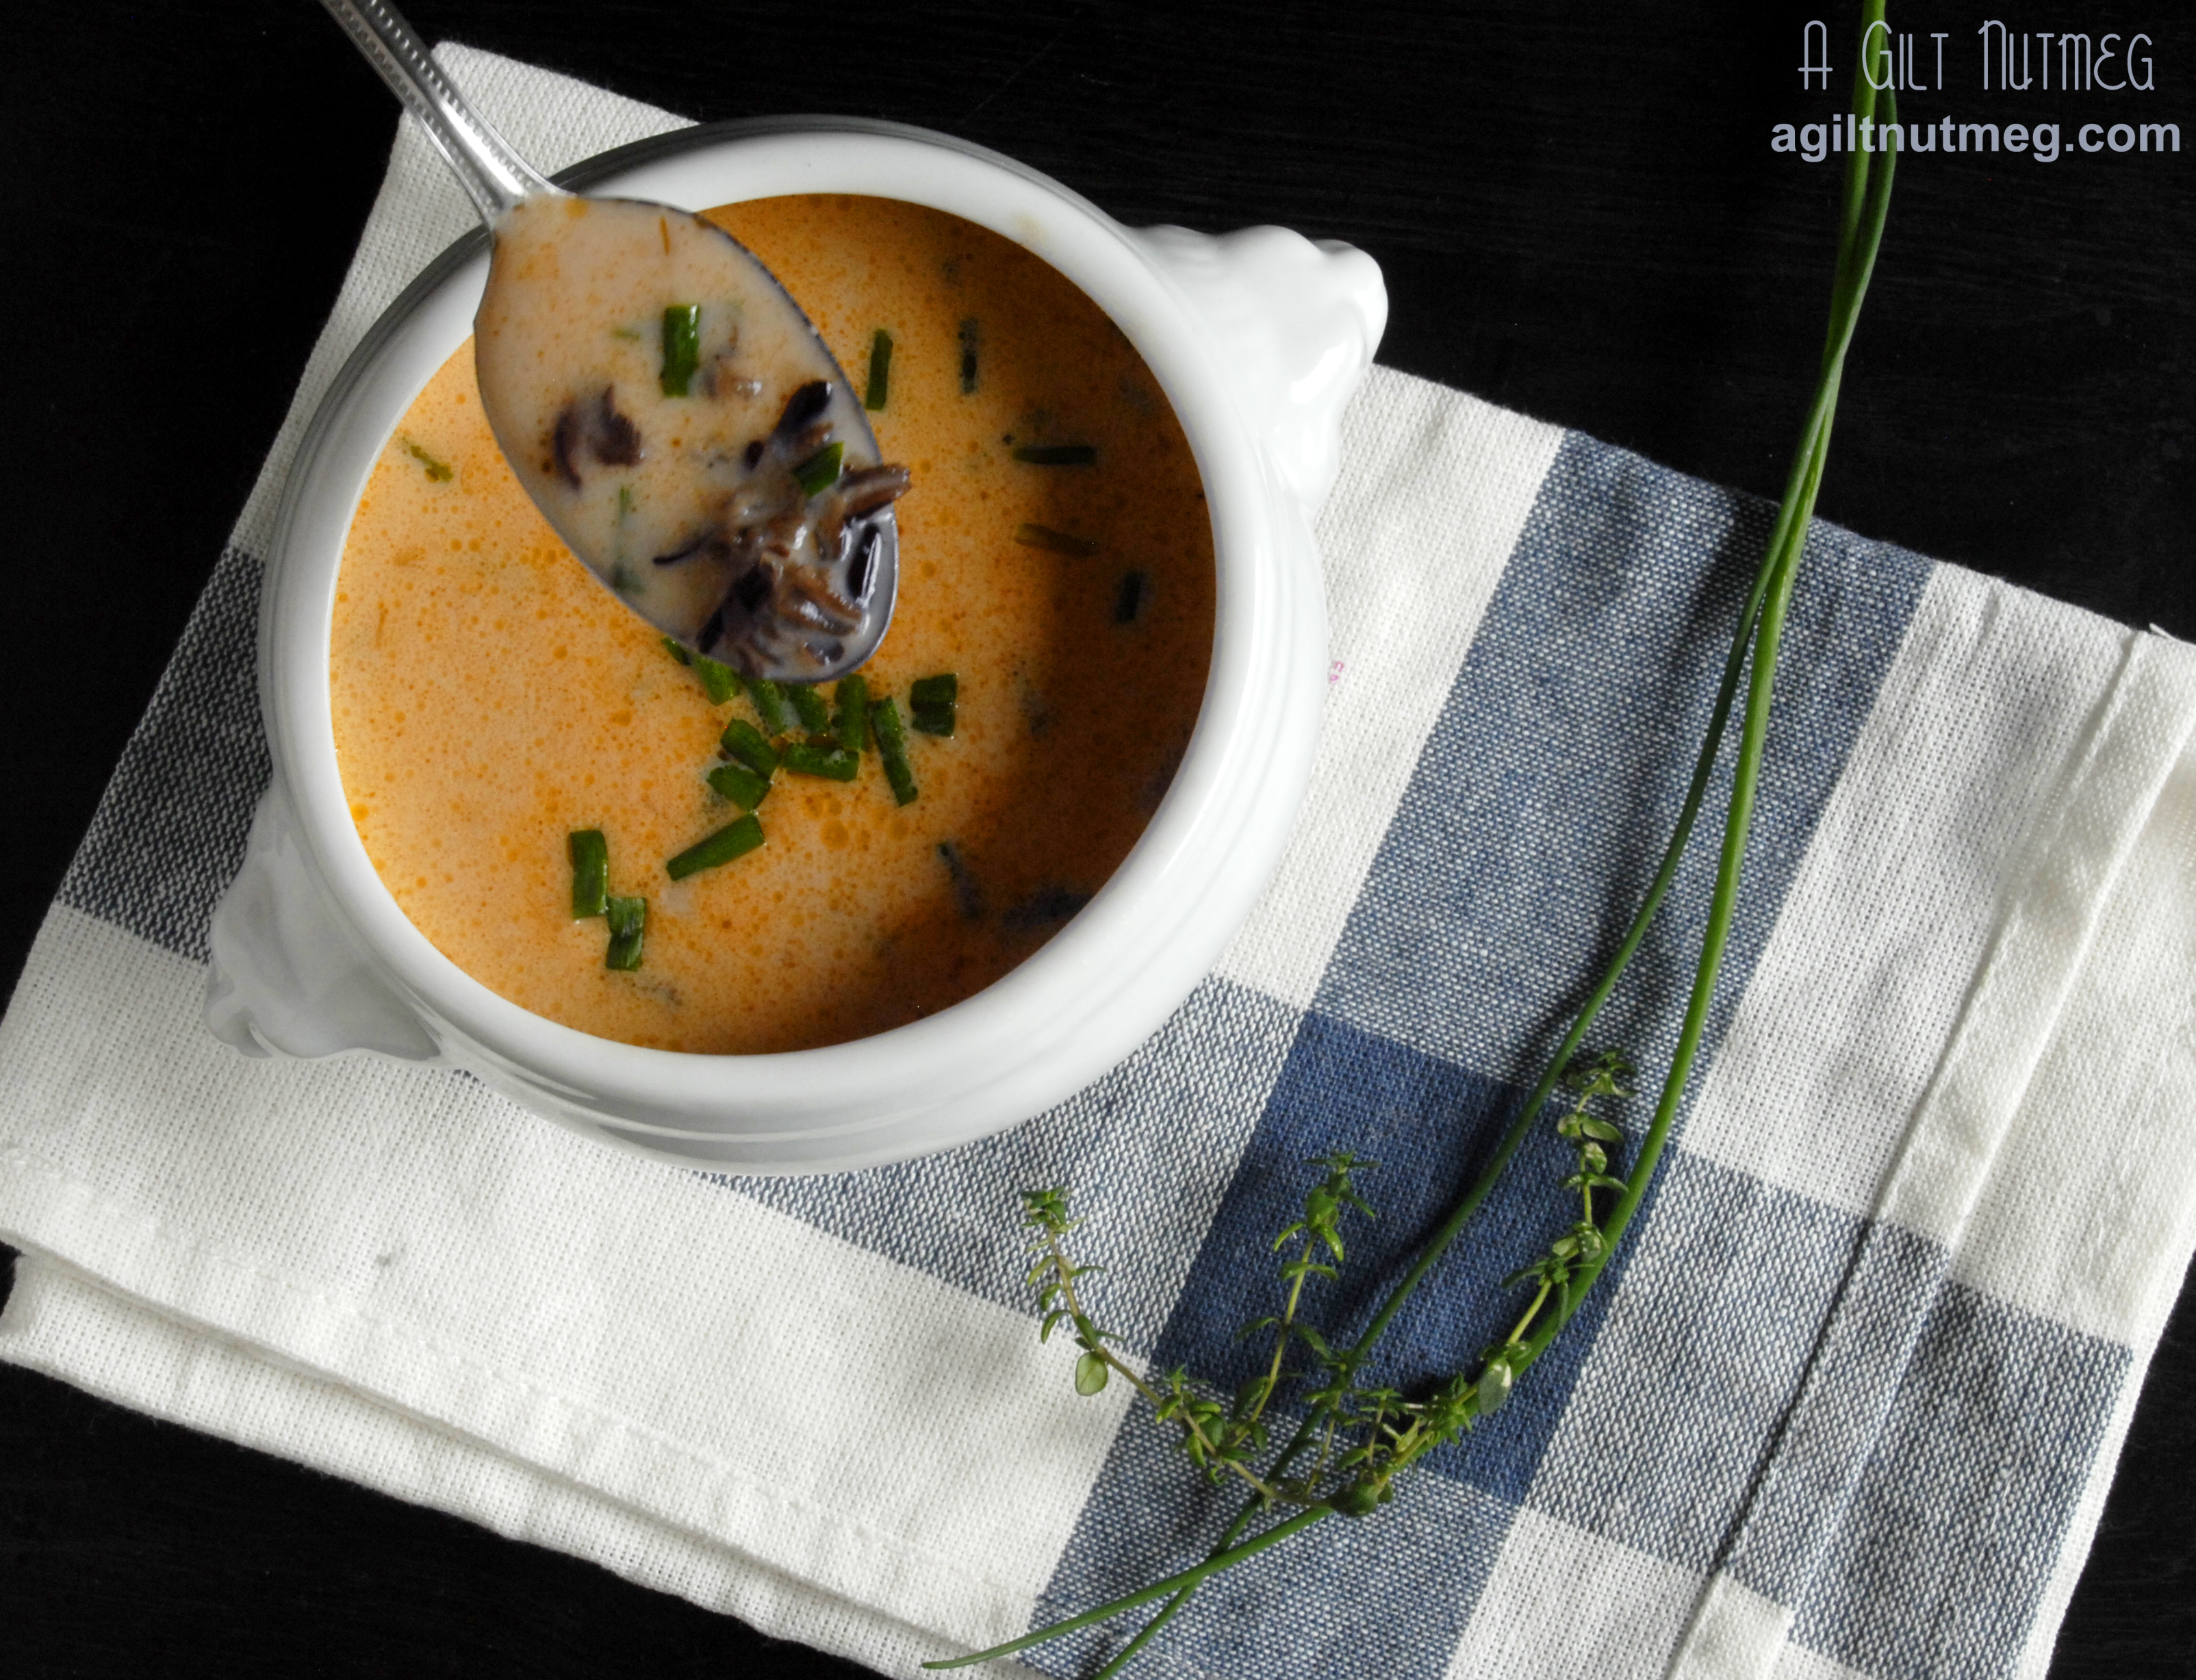
Folks, this is not your average mushroom soup; in fact, it’s not what you would expect from mushroom soup at all.  Instead of a heavy, thick, cream based soup that most of us are used to, this is a brothy soup that some how still tastes and feels creamy, despite having so little actual cream in it.  The mushrooms and wild rice are a wonderful texture contrast to each other (chewy vs soft) and also to the broth; the lemon zest and chives add an unexpected twist of bright flavor.  It’s salty and savory yet light and refreshing all at the same time.  Even if you’re a little hesitant to give mushrooms such a spotlight, you should give this soup a try for a delicious surprise -and if you do love mushrooms, all the better!

Note: I couldn’t find dried shiitake mushrooms, except for in large packages that cost $12 or more.  Instead I just bought 2 fresh shiitake mushrooms for a total of 60 cents and set them out on a saucer on my countertop to dry over the course of a week or so.  Low tech, but it worked, so I can’t complain.  To turn the mushrooms to dust, CI suggests a spice grinder or a blender.  I have neither of those, so I used a flat nutmeg grater to great effect.  My boyfriend used the top of my pepper grinder to grind up the little bits that were too little to grate without scraping my fingers.

Wild Rice & Mushroom Soup
Barely Adapted from Cooks Illustrated, Jan 2013
Serves 6-8

  • 1/4 ounce dried shiitake mushrooms, rinsed and grated to powder (see note above)
  • 4 1/4 cups water
  • 1 sprig fresh thyme
  • 1 bay leaf
  • 1 garlic clove, peeled, plus 4 cloves, minced
  • Salt and pepper
  • 1/4 teaspoons baking soda
  • 1 cup wild rice
  • 4 tablespoons unsalted butter
  • 1 pound white mushrooms, sliced 1/4″ thick (you can buy two bags of Trader Joe’s presliced mushrooms)
  • 1 onion, chopped fine
  • 1 teaspoon tomato paste
  • 2/3 cup dry sherry or dry vermouth
  • 4 cups low-sodium chicken broth
  • 1 tablespoon soy sauce
  • 1/4 cup cornstarch
  • 1/4 cup cold water
  • 1/2 cup heavy cream
  • 1/4 cup minced fresh chives
  • 1/2 teaspoon finely grated lemon zest
  1. Set oven to 375 degrees and while it’s heating, bring the water, thyme, bay leaf, garlic clove, 3/4 tsp salt, pepper, and wild rice to a boil in an ovenproof dutch oven.
  2. Add the wild rice, bring back to a boil, then cover and move the pot to the oven to bake for 40 minutes (or until rice is tender and chewy).
  3. Over a large mixing bowl, pour the dutch oven’s contents into a fine mesh sieve.  Pull out the bay leaf, thyme stem and garlic clove and discard.  Pour the rice liquid into a 4 cup measuring cup and add water until you have 3 cups of liquid total.
  4. Put the now-empty dutch oven on the stove and melt the butter over medium high heat.  Add the mushrooms, onion, 4 minced garlic cloves, 3/4 tsp salt, 1 tsp pepper and tomato paste and let brown, stirring every once in a while.  I thought it was taking too long and realized my heat was too low- as soon as I turned the heat up, I got the deep brown bits (called fond) on the bottom of the pan I was looking for.
  5. Add the sherry (or vermouth, which is what I substituted) and scrape up the brown fond on the bottom of the pan and continue cooking until almost all of the liquid gone from the pan.
  6. Add ground shiitake mushrooms, rice liquid, chicken broth, and soy sauce and bring the pot to a boil.  Lower the heat so the pot comes back down to a simmer and let it simmer for 20 minutes.
  7. In a small bowl, whisk together the corn starch and 1/4 cup of water until dissolved, then stir into the soup pot and let cook for 2 or 3 more minutes.
  8. Turn off the heat and stir in the rice, cream, chives, and lemon zest.  Serve hot and enjoy!


Roasted Yellow Summer Squash Salad

Wednesday, May 30, 2012

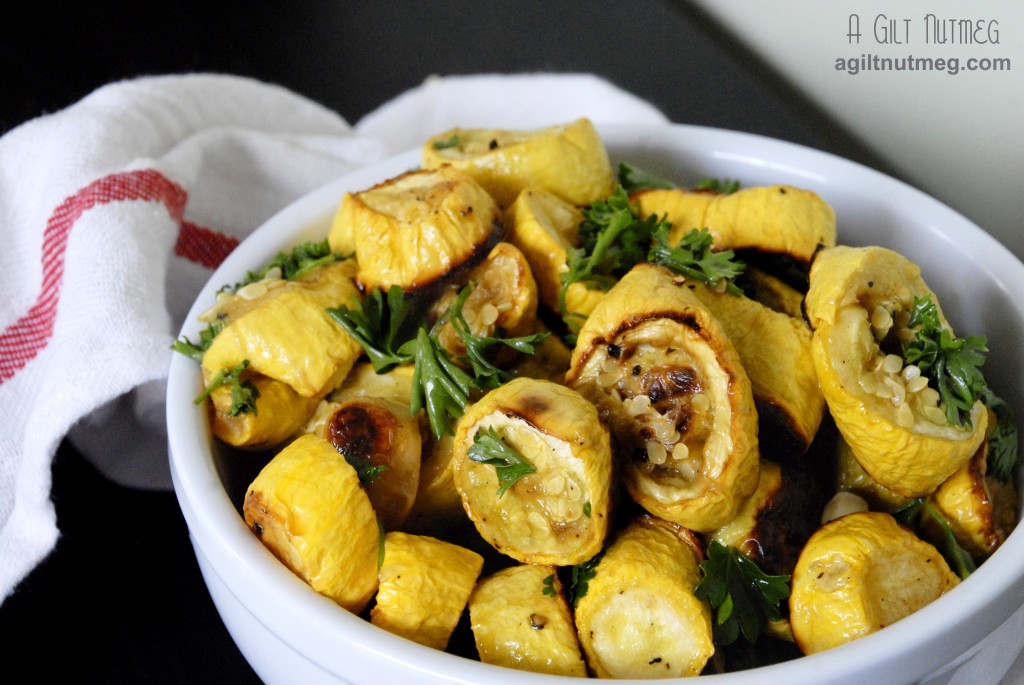
roasted yellow summer squash salad

I can’t remember not liking yellow squash.  Actually, that’s only partially true-I’m sorry, Mom & assorted other relatives, I never liked Squash Casserole, but that’s mostly because of the onions.  Other than that, you can happily feed me yellow squash any way you can: grilled, fried, sauteed, stir fried, roasted, baked in this awesome vegetable lasagna I made this weekend…the possibilities are endless.  When you want yellow squash fast and portable, this is the recipe you should turn to; I made it for a picnic and it was fantastic both warm (I snuck some out of the oven) and cooled after being transported in the picnic basket.  Full of roasted squash flavor, the parsley and lemon bring out fresh acidic flavor notes and the olive oil deepens the flavor profile.  This was the easiest dish I made for that entire picnic, so don’t hesitate to give it a try!

Roasted Yellow Squash Salad
Adapted from Martha Stewart
Serves 4-5

  • 5 lbs yellow squash, sliced into 3/4″ - 1″ thick rounds
  • 6 cloves garlic
  • 3 tablespoons olive oil
  • coarse salt and pepper
  • 1 large handful of fresh parsley (either flat-leaf or curly-leaf fine)
  • freshly squeezed juice from one large lemon
  1. Heat oven to 475 degrees and line one or two rimmed baking sheets with tin foil.
  2. In a large mixing bowl, combine the sliced yellow squash, garlic cloves, 2 tablespoons of olive oil, and salt and pepper and mix with your hands until the squash is thoroughly coated in the oil and seasonings.
  3. Spread out the seasoned squash in an even layer on the baking sheets and bake for 45 minutes to an hour until the squash is nicely browned (be sure to check underneath-my squash were almost too dark on the bottom and I wouldn’t have realized it because the top wasn’t even close to that brown).
  4. Pull the baking sheets out of the oven and let the squash cool on the sheets.
  5. Move the squash back into that big mixing bowl, add the last tablespoon of olive oil, the parsley and lemon juice and toss to coat.  Add extra salt and pepper if you think necessary.
  6. Serve warm, room temperature, or cold from the fridge, it’s up to you, because it will be delicious either way!  Enjoy!

Herbed Cucumber Bites

Wednesday, May 23, 2012

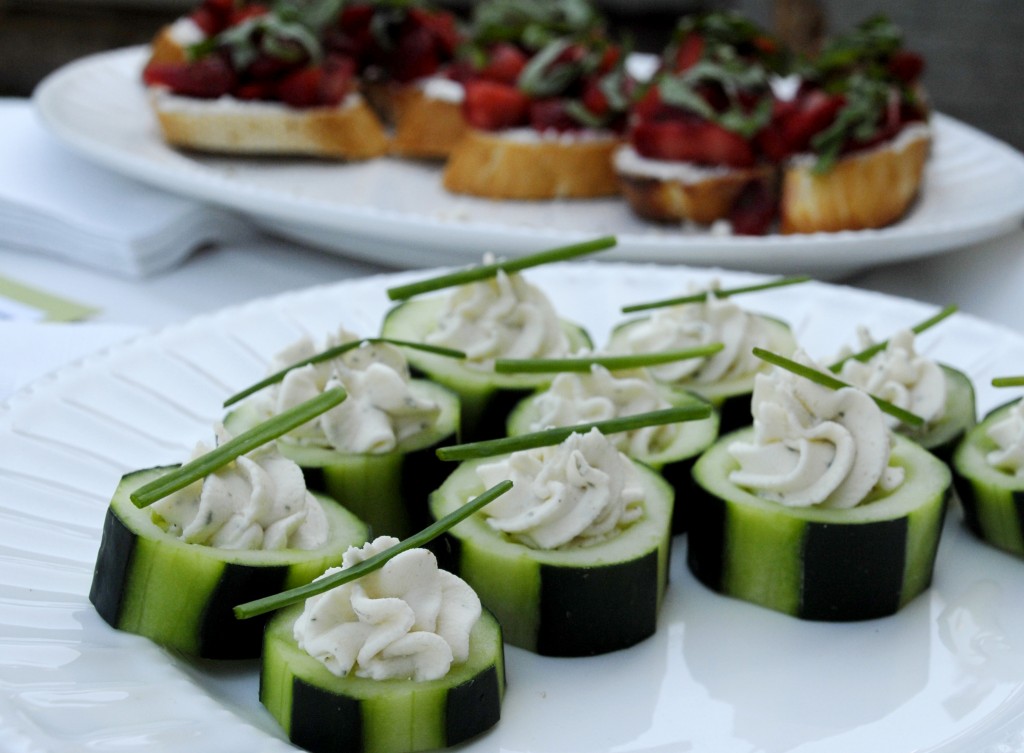
herbed cucumber bites

At the bridal shower a few weeks back, I was sure the Margarita Cupcakes would be the hit of the party.  If not them, then maybe the Strawberry Bruschetta.  Never did I expect these little cucumber bites might actually be the winner of the afternoon!  They’re the only appetizer I completely ran out of ingredients on and everyone kept remarking on how delicious they were.  Best of all, they’re ridiculously easy to make and shockingly addictive-you’ll find yourself going back and popping another in your mouth every chance you get!

Herbed Cucumber Bites
Ever so barely adapted from Annie’s Eats
Makes approximately 3 dozen

  • 5-6 large cucumbers
  • 3 boxes of Garlic Herb Boursin cheese
  • 6 tablespoons heavy cream
  • Chives
  1. In a small bowl, mash and mix the Boursin and cream until creamy and fully combined.
  2. Using a vegetable peeler, peel long lengthwise strips from the sides of the cucumbers, about 4-6 strips, depending on how large your cucumbers are.  By doing this, when you slice the cucumbers, they’ll have those great stripes.
  3. Slice the cucumbers into 1/2″ - 1″ slices.
  4. Using a spoon, scoop out the seeds from the center, leaving a little bit of cucumber in the bottom of the cup to hold the cheese in.  You can slice and scoop the cucumber pieces the night before if you want, just store in an airtight container in the fridge, along with the cheese mixture.
  5. Fill a pastry bag, fitted with a star tip, with the Boursin mixture and pipe the cheese mixture into each cucumber slice.  You’ll want to move in a small circular motion to make sure every bit is filled.
  6. Snip chives into pieces about 1 1/2″ long and adorn each cucumber bite with one piece of chive.
  7. Arrange on a platter and enjoy!

Zucchini Rice

Wednesday, May 2, 2012

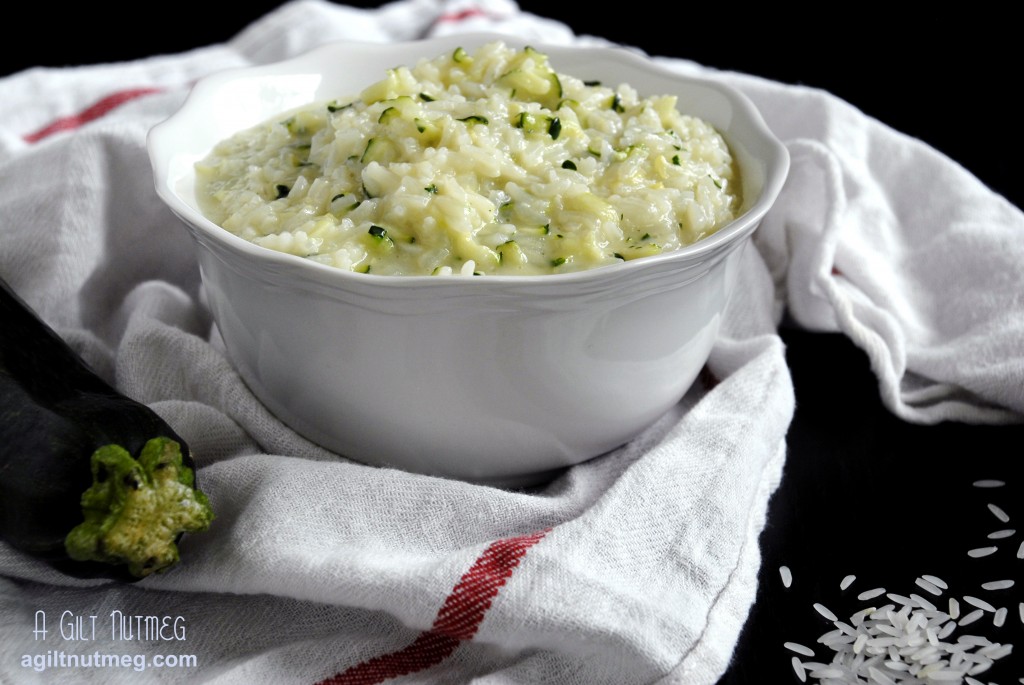
zucchini rice

I have a busy week this week, so I’ve been making some quick dishes and sneaking in some veggies wherever I can to keep my nutrients level up.  This cheesy zucchini rice is quick and comforting and I imagine would go well with any protein you’d care to pair it with (I ate mine with a chicken I roasted a few days ago), while at the same time getting in at least a little bit of vitamins in there.  In fact, and not that I don’t like zucchini, but I was pretty surprised at how little I was able to taste the zucchini in this dish both flavor and texture wise, so if you have picky kids out there, this would likely be a great side dish to try on them!

Zucchini Rice
Adapted from Pink Parsley

  • 2 cups chicken broth
  • 1 cup jasmine rice, or other long grain white rice
  • 2 Tablespoons butter
  • 1 large zucchini, grated on the large holes of a grater
  • 1 cup shredded cheddar or gruyere
  • salt to taste
  1. If the instructions on the rice call for it, rinse the rice.
  2. In a saucepan, bring the chicken broth to a boil, add the rice, cover it with a lid and bring the heat down to low.
  3. Cook the rice for 20 minutes, then turn off the heat.
  4. Drop the butter and zucchini into the pot on top of the rice, replace the lid and let it stand for 5 minutes so that the zucchini softens in the steam.
  5. After the 5 minutes, stir the zucchini into the rice, then stir the cheese into the rice and season with salt to taste.  Enjoy!

Spinach & Prosciutto Stuffed Twice-Baked Sweet Potatoes

Friday, April 27, 2012

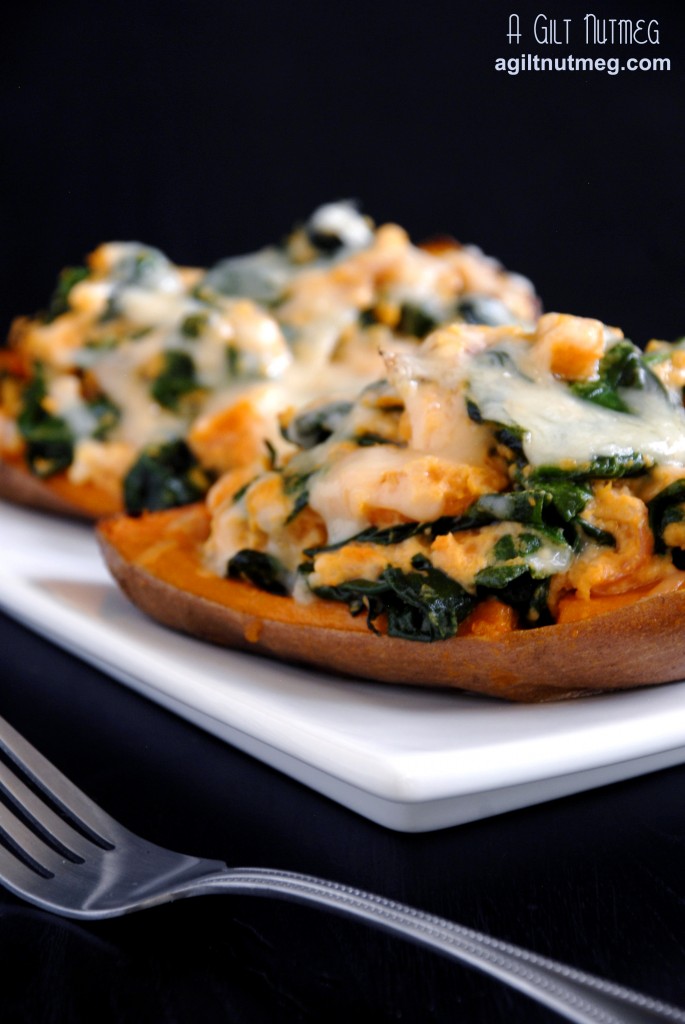
spinach twice baked sweet potatoes

In the latest issue of Bon Appetit, they have a little blurb about getting the most out of your food; it turns out our bodies need help in absorbing certain nutrients.  The easiest example is Vitamin D and Calcium: our bodies need vitamin D to be present in order to better absorb calcium, which is why milk is now usually fortified with vitamin D.  Simple! Right?  Clearly, I was fascinated with this article and started wondering how I could incorporate this new found knowledge into my everyday diet so I got started right away with the energy-boosting Vitamin C and Iron combo.  Vitamin C is the helper here and an increased amount of iron will help raise energy levels, so I started hunting for recipes that might fit the bill.

I’ve had this recipe from Pinch of Yum saved for quite a while and I used it as a base to create my own stuffed twice-baked sweet potatoes.  All I can say is…these potatoes are delicious!  You hardly remember that you’re eating healthily and you feel great afterwards.  I tried to make a few healthy switches (greek yogurt instead of sour cream, a little bit of homemade ricotta instead of cream cheese) and some additions (prosciutto is also high in iron and adds some salty crunch), but the base still stands: sweet potatoes, which are high in vitamin C and spinach, which is high in iron.  After just one of these potatoes each, my dinner guest and I were stuffed and couldn’t eat any more.  Even better, they heat up beautifully, so these are some leftovers you’ll be happy to eat.

Spinach & Prosciutto Stuffed Twice-Baked Sweet Potatoes
Adapted/Inspired by Pinch of Yum
Serves 4

**See notes below

  • 2 large sweet potatoes (I tried to find some that when cut in half would make good boats that would stand up on their own)
  • 2 tablespoons butter
  • 1 shallot, minced
  • 3 slices of prosciutto
  • 1 bag of fresh baby spinach
  • 1/4 cup plain Greek yogurt
  • 2 tablespoons creamy homemade ricotta (or substitute cream cheese)
  • approx 1/4 cup shredded Gruyere (I used Trader Joes’ Cheddar & Gruyere Mélange)
  1. Bake the sweet potatoes in a 350 oven for 1 hour or until soft when poked with a fork.  When the potatoes are done, set them aside to cool for 10 minutes or so before slicing in half, lengthwise.
  2. Leave the oven on 350 degrees after you take out the potatoes and lay the three slices of prosciutto on a baking sheet covered in aluminum foil.  Bake for 5 minutes, flip the prosciutto slices and bake for 5 minutes longer.  Leave the oven on again and set the prosciutto aside.
  3. In the meantime, melt the butter in a large pan and saute the shallot until soft.  (The shallots were still a little too pronounced in “oniony” flavor for me, so next time I’ll let them go much longer and caramelize them a bit instead.)
  4. When the shallots are soft, turn the heat off under then pan and dump the bag of spinach into the pan, stirring slowly as the spinach leaves wilt.  You don’t want them turned to mush, just darkened and a little softened-the residual heat from the pan should be enough to accomplish this.
  5. Once the potatoes have cooled a bit, slice them in half length wise and gently scoop out the insides of the potato, leaving a 1/2″ or more of potato in the skin, to keep the skin sturdy.  Brush the skins with some olive oil and put them in the oven for 10 minutes.
  6. While those are baking, in a large bowl, mix together the insides of the sweet potatoes, the yogurt, ricotta, spinach-shallot mixture and then rip the prosciutto into small pieces into the bowl and mix until well combined.
  7. Take the potato skins out of the oven, divide the filling from the bowl evenly into the skins, then sprinkle the cheese over the tops of the filling and bake for another 10 minutes until the filling is heated and the cheese melted.  Enjoy!

**Cooking Notes: I went to my local Italian deli for some suggestions about what sort of meat to add instead of bacon, which I felt was too strongly flavored.  Sadly, they weren’t much help, but when I decided on prosciutto, the guy tried to give me thick slices “for baking”-he clearly didn’t understand what I was aiming for!  I whispered to the person cutting it to go ahead and slice it thin like they would for sandwiches so that it would turn out nice and crispy.

Also, this recipe is for 2 potatoes, which make 4 servings (one half potato each).  The thing about sweet potatoes, however, is that, unlike white potatoes, the skin often cleanly separates from the potato, which makes carving out a sturdy little boat very difficult.  Anticipating this, I roasted three potatoes and picked out the 4 halves that didn’t separate and saved the other 2 to eat later.

Carrot Vichyssoise

Monday, April 2, 2012

Carrot Vichyssoise

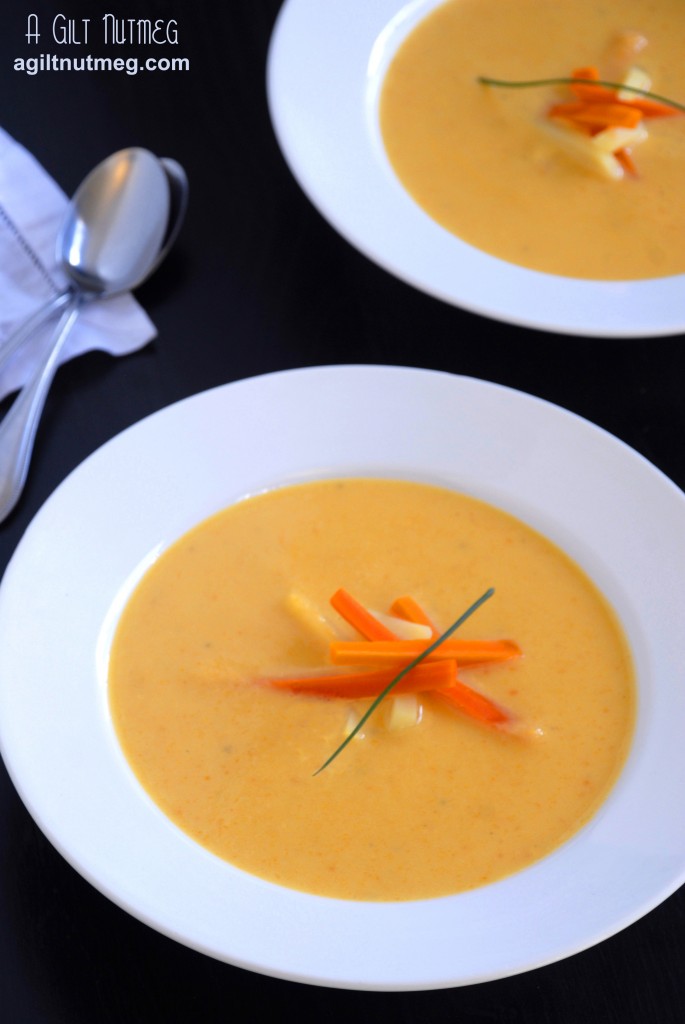
Here I was, on a Friday afternoon, pondering where my next week of blogging might go, when it occurred to me to  check the calendar.  And boy howdy am I sure glad I did, because I had no idea that Easter and Passover were only a week away!  Of course, the blog week took shape very quickly thereafter and the first holiday cooking I’m tackling is Easter.  I wanted to do something “appropriate” (spring…bunnies…you get the idea), but I did Carrot Cake  a few weeks ago for Project Pastry Queen and I wasn’t yet ready to blog about the traditional ham or lamb, so I had to get creative.

Wanting something a little out of the standard Easter fare, I was delighted to stumble across this recipe for Carrot Vichyssoise.  Vichyssoise is a potato leek cream soup served cold and this variation brings carrots to the mix, which adds a lively flavor and color to the soup.  I thought it might be hard to enjoy eating cold soup, just because hot soup, no matter the weather, is one of my favorite things in the world, but this soup is filling yet light and refreshing at the same time and the cold didn’t bother me at all.  It will be a fantastic part of your Easter supper and, if you just can’t deal with the cold, it’s great hot, too.  The Easter Bunny will be pleased!

Carrot Vichyssoise
Adapted from Whole Living
Serves 6

  • 3 large leeks (about 1 1/2 lbs), white and light green part sliced into 1/4″ pieces
  • 2 cloves of garlic, minced or pressed
  • 4 Yukon Gold potatoes (about 1 1/2 lbs), peeled; 3 diced, 1 set aside
  • 5 large carrots (about 9 oz), peeled; 3 sliced, 2 set aside
  • 2 1/2 cups low-sodium chicken broth
  • 2 cups water
  • 1 1/2 teaspoons salt
  • 1/8 teaspoon fresh ground pepper
  • 2 cups whole milk
  • chives for garnish
  1. Add about a tablespoon or two of olive oil to a large pot and turn the heat on to medium-low.  Add the leeks and garlic and cover with the pot lid, cooking for about 15 minutes.
  2. Add the diced potatoes, sliced carrots, chicken broth, water, salt and pepper.  Bring the pot to a boil and then turn the heat down so it’s simmering for 20 minutes.
  3. Once the vegetables are tender, turn off the heat, stir in the milk, and either transfer the mixture to a blender, or use a stick blender right in the pot to blend until smooth.
  4. Let the soup cool (I transferred it to a large glass bowl to speed the cooling along), then move it to the refrigerator to chill.
  5. While the soup is chilling, set a small pot of water to boil and make a small bowl of ice water.  Grab that last potato and the 2 extra carrots and slice them into small matchstick shaped pieces about 2 inches long
  6. Boil the matchstick potatoes and carrots for 3-4 minutes, until just tender (you don’t want them too soft) and then drain the pot.  Add the carrots and potatoes into the ice water to stop them from cooking any further.
  7. When ready to serve, ladle the soup into bowls and garnish with the potato and carrot matchsticks and the chives.  Be sure to share some with the Easter Bunny and enjoy!

Baked Crispy Asparagus with Blue Cheese Dipping Sauce

Friday, February 10, 2012

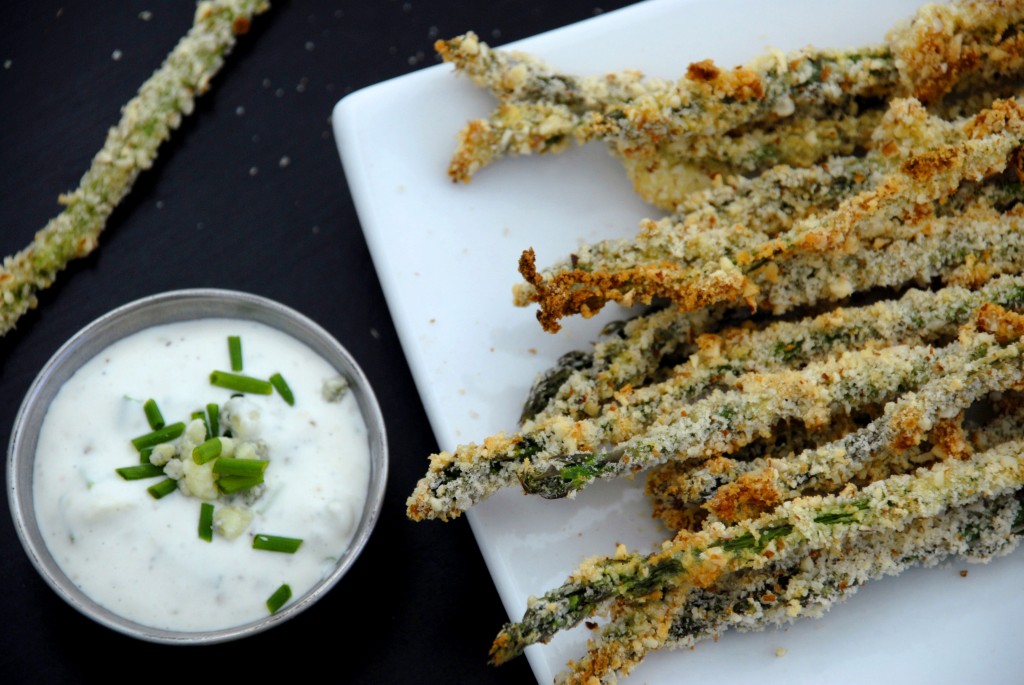
baked crispy asparagus fries

I’m a pretty picky eater.  And because of that, when I buy certain ingredients for recipes, I buy them in the smallest amount, knowing sadly that some of it will go to waste.  I try to encourage The Roommate and The Boyfriend to eat up, but to no avail.  So here I was with a partial container of sour cream, a partial carton of buttermilk, a partial package of chives, and a partial container of blue cheese crumbles in the fridge.  I also bought beautiful asparagus yesterday, spur of the moment, because whereas a pound is normally around $5, it was on sale for 99 cents!  (I had to explain to my East Coaster friends that it wasn’t discounted because it was gross, but that So Cal is having a lovely warm mild winter so asparagus is growing early like crazy and they’re trying to sell it as fast as they can.)

So here I am browsing Pinterest and I see a pin for crispy asparagus with dipping sauces.  Curious, I scan the recipe and I start thinking, “…buttermilk, I have that!…sour cream, I have that!…blue cheese, I have that!” and so all of that, paired with the fact that this beautiful asparagus needed to be eaten, I knew exactly what I was making when I got home.

and now I can say, this is a phenomenal recipe!  I have never had so much fun eating asparagus.  Roommate, Boyfriend, and I couldn’t stop eating them and I honestly can’t believe that ingredients I normally don’t like (mayo, sour cream, etc…notice a white gloppy pattern?) all come together to make such a delicious sauce.  Bonus: the asparagus is baked so it’s super healthy-and let’s just leave it at that and not think about whether the dipping sauce is healthy or not, shall we?


Baked Crispy Asparagus with Blue Cheese Dipping Sauce
Adapted from SpoonForkBacon
Makes 1 lb of asparagus and almost 1 cup of dipping sauce

Asparagus

  • 1 lb of thin asparagus spears, tough ends removed
  • 1 cup almonds
  • 2 cups panko bread crumbs
  • 2/3 cup flour
  • 4 eggs
  • cooking spray

Dipping Sauce

  • 1/4 cup light mayonnaise
  • 1/4 cup light sour cream
  • 1/4 cup crumbled blue cheese
  • 2 tablespoons milk
  • 1 1/2 tablespoons chives, chopped
  • 1 teaspoon fresh lemon juice
  • salt and pepper to taste
  1. Heat oven to 375 degrees and cover a baking sheet with parchment paper.
  2. In a food processor, process the almonds and panko bread crumbs until finely ground and combined (I used whole almonds because they were on sale, so I processed them up first for a few seconds before adding the panko crumbs.  If you buy pre-sliced almonds, just throw the panko and almonds all in at once).
  3. In three separate dishes, put the flour in one dish, put half the almond-panko mixture into another and 2 of the eggs, beat with a fork, into the third.  I started with just half the almond-panko mixture and half of the eggs in the pans because the panko gets a little clumpy when the egg drips in it and then the egg gets a little clumpy when the panko falls in it.  Basically, you need a half-time to rinse the pans out and start fresh.
  4. Roll the asparagus in the flour, dip it into the egg, then dip it into the almond-panko mixture and lay it in rows on the cookie sheet.
  5. Once all the asparagus is rolled, dipped and dipped again, lightly spray the asparagus on the cookie sheet with cooking spray and then put it in the oven to bake for about 15 minutes until golden brown.
  6. While the asparagus is baking, put all the ingredients for the dipping sauce into a small bowl and mix until thoroughly combined.
  7. Serve the asparagus hot and dipping sauce cold and enjoy!

Blue Cheese & Red Potato Tart

Monday, February 6, 2012

blue cheese red potato tart

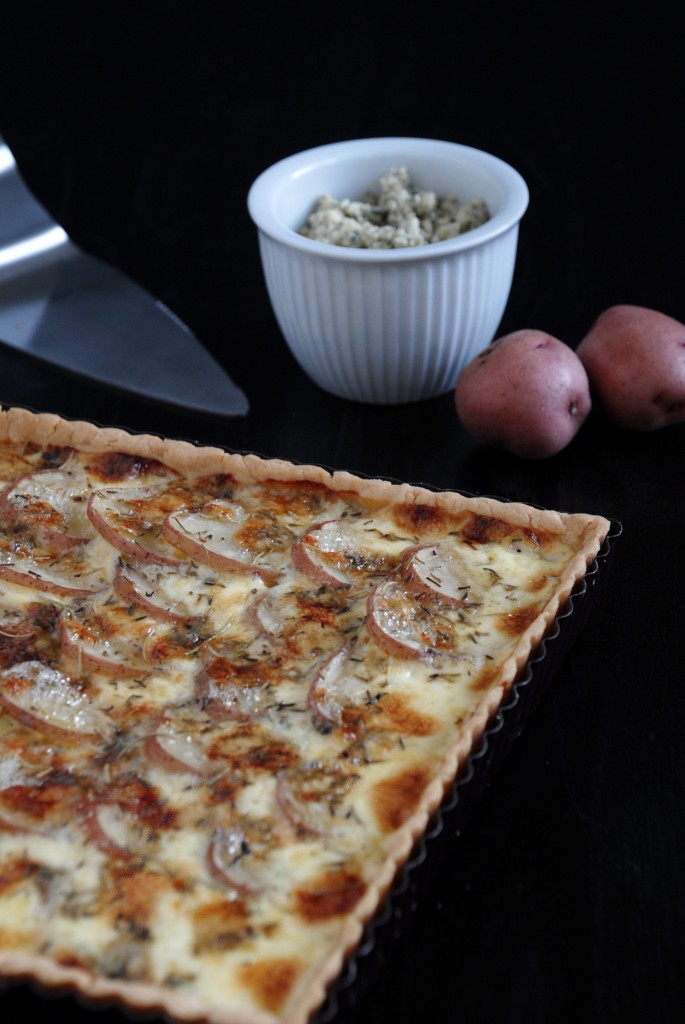
I think one of the first blog recipes I saved away to cook someday was Lindsay of Love and Olive Oil’s Blue Cheese and Red Potato Tart.  It sounded so familiar yet exotic at the same time and I’m ashamed to admit that it sat in my virtual recipe box for a year and a half now.  But when some lovely red potatoes showed up in my CSA box last week I just felt it:  it was finally time to make this tart that I’ve been dreaming about for so long.

The crust turns out perfectly tender, the potatoes are creamy and the blue cheese gives just the right amount of tang.  The Boyfriend and I had this and a salad for dinner, but I bet it would be fantastic with some sausage crumbles on it and served for a brunch.

Blue Cheese & Red Potato Tart

Adapted from Love & Olive Oil (who adapted it from Smitten Kitchen who adapted it from Gourmet)

Crust:

  • 1 1/4 cups flour
  • 1 tablespoon plus 2 teaspoons cornstarch
  • 1/4 teaspoon salt
  • 6 tablespoons unsalted butter, cubed
  • 1 egg

Filling:

  • 1 lb small red potatoes, sliced into 1/4″ slices (but wait until the crust is in the fridge to slice the potatoes so they don’t turn brown!)
  • about 1/2 cup crumbled blue cheese
  • 1 cup heavy cream
  • 1 egg yolk
  • thyme & rosemary to your liking (about a teaspoon or two of both)
  • finishing sea salt for seasoning afterwards
  1. Combine the flour, cornstarch and salt in a food processor and pulse a few times to combine.
  2. Add the cubed butter to the food processor and pulse until the contents look like coarse cornmeal.
  3. Add the egg and run the processor for 1-2 minutes until the dough forms large (approx pea sized or larger) clumps.
  4. You can, at this point, either squish the dough together and roll it out with a rolling pin on a floured surface, but I just dumped the crumbs into the tart pan (a 9″ circle is best; I used a 9″ square pan) and pressed them evenly into the pan.
  5. Chill the tart pan in the refrigerator for 30 minutes.
  6. Preheat the oven to 350 and slice your potatoes into 1/4″ slices.
  7. Arrange the potato slices slightly overlapping in the crust and sprinkle the blue cheese evenly over the potatoes.
  8. In a small bowl (I did it directly into my glass liquid measuring cup) whisk the egg yolk into the heavy cream and pour it over the potatoes-since my square tart pan wasn’t as large as Lindsay’s round one was, I left about 1/2″ - 1″ of liquid in the measuring cup just to make sure it didn’t over flow.  I just made sure that the potatoes were barely covered by the cream.
  9. Sprinkle the thyme and rosemary evenly over the tart.
  10. Bake the tart until bubbling and browned, 40-50 minutes.
  11. Let the tart cool for a few minutes and enjoy!

Roasted Butternut Squash Pizza

Friday, January 20, 2012

butternut squash pizza

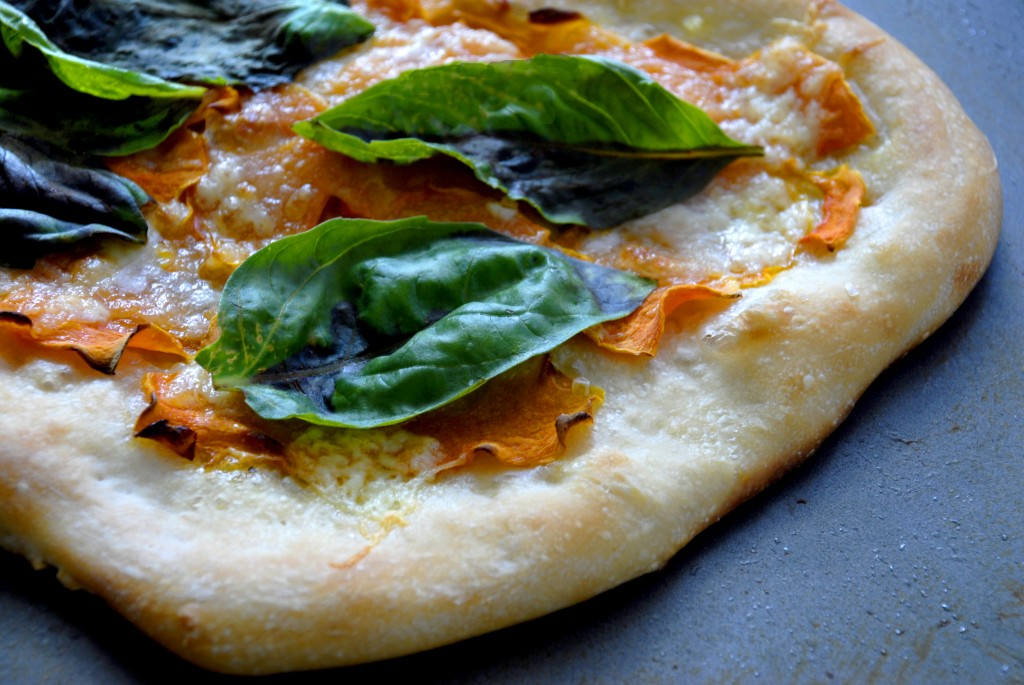
I have a new favorite pizza place here in Beachtown.  It’s called Stella Rossa and I have NEVER had pizza like Stella Rossa makes pizza.  They let their dough ferment for 18 hours so the crust that they put in front of you hot from the oven isn’t so much like pizza dough as it is more like fresh, airy, crusty, delicious French bread.  The pizza I love the most at Stella Rossa is an incredible seasonal option on the menu, topped with thin slices of roasted butternut squash, Applewood smoked bacon, Talleggio cheese, and sweet basil. I NEVER would have paired butternut squash with basil but wouldn’t you know that it’s perfect!  I would have defaulted to sage, like most of us would, but I now know that basil and butternut squash are like Romeo and Juliet-people try to keep them separate but secretly they are perfect together.

I’m not ready yet to start out on my own with making pizza crust just yet, especially when Trader Joe’s has such great tasting dough ready made in their fridge, but boy did I want this pizza at home!  So I mandolined some butternut squash, tried to find some acceptable cheeses to substitute and some good basil.  I left the bacon off, just because, but you feel free to add it to your pizza.  Truly, this pizza is a fantastic quick dinner that’s a break from the normal tomato based pies.

Butternut Squash Pizza
Makes 2 medium pizzas
Inspired by Stella Rossa

  • 1 small butternut squash, peeled, seeded and sliced thin enough to see through
  • 3-4 small mozzarella balls in water, sliced
  • about 1/4 cup shredded Harvati cheese
  • bacon, crumbled (optional)
  • handful of fresh basil
  • 1 package of Trader Joe’s plain pizza crust, divided into two parts
  1.  Lightly olive oil a baking sheet and put it into the cold oven.  Heat the oven with the baking sheet in it to 450 degrees.
  2. Once the oven and pan are heated, take the pan out and place it on a heat-safe surface.  Working quickly, take one part of the pizza dough and gently stretch it out into a thin round.  The easiest way I’ve found to do this is to hold the dough in the air by one edge to let gravity do it’s magic and focus on stretching out the thicker outer edge of the dough (the middle will thin itself out naturally as you stretch the edge out).  Arrange the stretched out dough onto the hot oiled baking sheet.
  3. Top the dough with the ingredients-squash first, the two cheeses and the bacon crumbles if you are using them.  Leave the basil off for now.
  4. Move the baking sheet back into the oven and bake for about 10 minutes, until the crust and cheese is lightly browned; remove from oven.
  5. Lay the basil leaves on top of the hot pizza (they’ll wilt a little), cut into slices, and enjoy!

Roasted Cabbage

Friday, December 30, 2011

I know a lot of you are trying to eat healthy after the holidays and as part of your New Year’s Resolutions.  I can warn you that this is the last healthy recipe of 2011 and that you should probably just ignore the blog for a week because I’m starting off the year with something that will derail that diet of yours before January 2nd is even done.

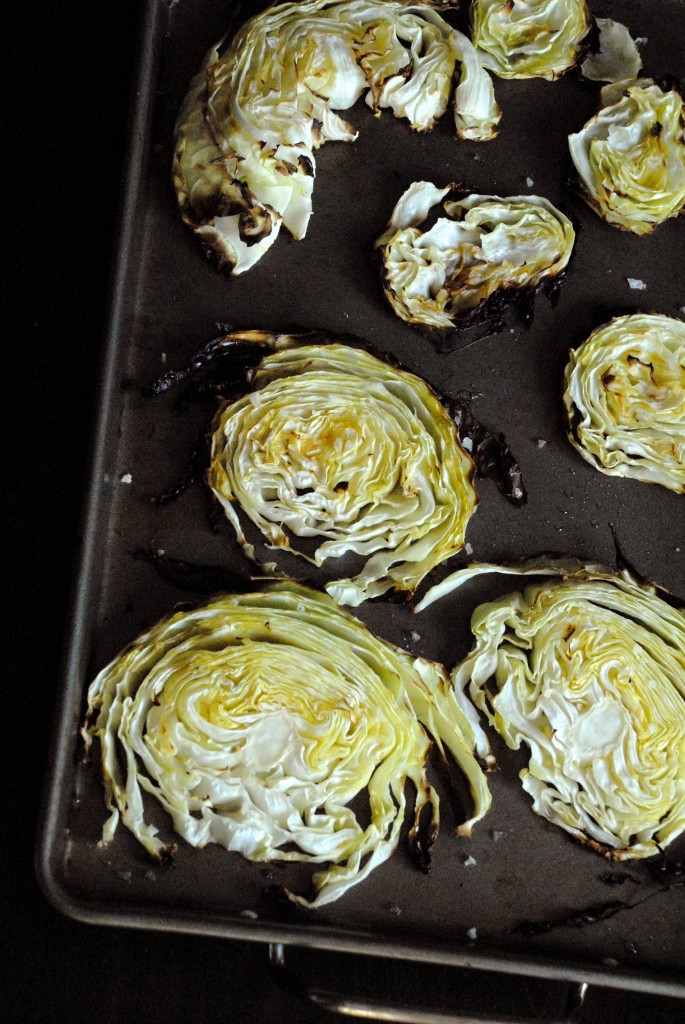
Now that all said, I really do love cabbage.  I don’t know why or how I came to love cabbage, but I really do love it.  Mom would always steam it and add butter and salt to it (never pepper, which hides the natural sweetness of the cabbage for some reason).  Steamed cabbage isn’t very pretty, though, so I’m willing to bet it won’t convert any non-cabbage eaters, whereas this recipe just might.  Roasted in olive oil and sprinkled with salt, I could barely wait for the cabbage to cool before I was picking the rounds up off the cookie sheet with my fingers and eating them as if they were some odd looking savory cookie.  With hardly any work involved, this is a great way to start off the new year with a healthy kick as a side dish or even just a delicious snack!

Roasted Cabbage

Adapted from Martha Stewart

  • 1 head of green cabbage
  • olive oil
  • sea salt
  1. Preheat oven to 400 degrees and brush a cookie sheet with olive oil (I pour a little in the pan then swirl it all over with a paper towel).
  2. Slice cabbage into thin slices, about 1/2″ - 3/4″ thick and arrange on oiled cookie sheet.
  3. Lightly drizzle more olive oil over cabbage slices and sprinkle with sea salt.
  4. Roast in oven for 30-40 minutes until the outside edges are starting to get toasty and crunchy and the inside is tender.
  5. Serve immediately and enjoy!