Entries from January 30th, 2012

American Beauty Cake

Monday, January 30, 2012

Before we proceed, I need to warn you about something: Rebecca named this cake the “American Beauty Cake”…mine turned out uglier than a bug.  BUT it tastes so incredible-SO incredible-that for once I don’t even care that it doesn’t look good.  If you want to make it for a special occasion, either do a practice one ahead of time so you can tweak how it’s appearance or just make it and cut it into slices in the kitchen to serve to guests so that the presentation is better (like I did in the picture above, to hide how ugly mine looked as one big cake).

So…imagine this…rich, dense flourless chocolate cake…a light, milk chocolate mousse…a thick chocolate ganache on top…all frozen so that the mousse is like a fluffy ice cream.  I’m not a huge chocolate person, but this cake is enough to make me a believer.  It’s even better than an actual ice cream cake because the mousse is so decadent yet it’s not hard as a rock like ice cream gets.  Once you taste this cake, there’s no turning back.

Now I know I’ve probably instilled the fear of the baking gods into your heart with this recipe, but truly, the point of cooking is to make something enjoyable for yourself or friends and family in the comfort of your own home and not, as much as I wish it to be true, to be a Martha Stewart incarnate and turn out perfect desserts every time.  This is one of those cases where you should just do it, not worry about the little things, and then absolutely savor the amazingly delicious dessert that is about to come out of your kitchen.  Now go enjoy!


American Beauty Cake

from The Pastry Queen by Rebecca Rather


Cake

  • 2 sticks unsalted butter (1 cup total)
  • 12 oz bittersweet chocolate, chopped (my stand by is Ghiradelli)
  • 6 eggs
  • 1 cup sugar
  • 1 tablespoon vanilla extract
  • 2 tablespoons dark rum (you really get a hit of rum in the aftertaste, so you can either leave it out or you can substitute something else in like Kahlua for coffee flavor or maybe Bailey’s Irish Cream for a more hazelnutty flavor)

Milk Chocolate Mousse

  • 1/4 cup unsalted butter
  • 10 oz premium milk chocolate (I used Lindt)
  • 3 eggs-separated, since you’ll be whipping the egg whites by themselves later (clearly I forgot to do this or wouldn’t be emphasizing it)
  • 3 tablespoons sugar
  • 1 tablespoon vanilla extract
  • 1 cup chilled heavy whipping cream

Dark Chocolate Glaze

  • 4 oz bittersweet chocolate, chopped
  • 1/4 cup light corn syrup
  • 1/2 cup heavy whipping cream
  • 1 1/2 teaspoons vanilla extract


Cake

  1. Before we get started, I’m going to warn you exactly why I think my cake turned out so un-pretty: Rebecca’s instructions basically say that you’ll bake the cake in a normal 9″ cake pan, the cake will only take up half the pan’s height, and you will fill the rest of the pan with mousse which when frozen will make a perfectly shaped round layered mousse-cake.  After my cake baked, it actually rose higher than the edge of the pan and didn’t fall back down as Rebecca had promised, so there was no room for the mousse in the pan.  I ended up taking my cake out of the pan, freezing the mousse in the pan separately, then plopping the cake on top of the frozen mousse, using a little leftover unfrozen mousse as glue and sticking the whole tall mess in the freezer again.  To make matters worse, since I didn’t grease the pan before putting the mousse in, I was worried that it would stick to the pan and let the pan sit in boiling water for 20 seconds instead of ten, so it melted too much.  So, long story short, I made it work, and I’m going to post Rebecca’s instructions as she wrote them below in case yours goes all according to plan.  If not, just refer back to this giant paragraph for how to pull it together.
  2. Heat oven to 350 degrees.  Line the bottom of a 9″ cake pan with parchment paper and spray with non-stick baking spray.
  3. Put a large pot with about 2″ of water in it on the stove to simmer and in a metal bowl set on top of the large pot, melt the butter and chocolate, stirring until smooth, then removing from heat.  (Leave the pot of water, you’ll need it again soon)
  4. Whisk the eggs and sugar in a separate large bowl, then whisk the chocolate mixture into the sugar-egg mixture.  Add the vanilla and rum and mix until well combined.
  5. Pour the batter into the prepared cake pan, place the cake pan into a large roasting pan, then carefully pour water into the bottom of the pan until it reaches about 2/3 of the way up the cake pan.
  6. Place cake-pan-in-water-in-roasting-pan into the oven and bake for 35-40 minutes, until firm to the touch  As I noted before, Rebecca mentions it will rise while baking and then sink back down as its cooling.  Cool the cake in its pan on a wire rack.

Mousse

  1. Heat the large pot of water on the stove to simmering again and in a large metal bowl set over the pot of water, melt the butter and milk chocolate, setting aside to cool after it’s been melted and stirred.
  2. Beat the eggs and sugar until well combined, stir in the vanilla, then the chocolate mixture.
  3. In a clean metal bowl and using an electric mixer, beat the egg whites on high speed until stiff shiny peaks form.
  4. Gently fold the egg whites (1/3 at a time) into the chocolate mixture with a spatula until mostly combine-it’s okay for it to be a bit lumpy still.
  5. In another bowl, whip the cream until soft peaks form-not any stiffer because your mousse will turn out super lumpy.
  6. Gently fold the cream into the chocolate-egg white mixture, and you’ll find that any of the egg white lumps will go away for a smooth mousse.  It’s okay if there are a few white streaks left.
  7. Spread the mousse over the cooled cake in the pan, wrap tightly with plastic wrap or aluminum foil and freeze for 6 hours or more.  (At this point the cake can stay frozen for 3 weeks.)

Dark Chocolate Glaze

  1. Note: don’t make the glaze until the cake’s been frozen for those 6 hours.
  2. Bring the cream, corn syrup and vanilla to a boil in a small saucepan.
  3. Place the chocolate into a small bowl and pour the boiling cream mixture over the chocolate.  Stir until smooth.

To Assemble

  1. Again, this is how Rebecca wrote the recipe, but I had to go a completely different route.  For the janky way, read my first paragraph above.  If everything went right for you in your magical kitchen, read on:
  2. Remove cake from freezer and dip the bottom of the cake pan into a large pan of hot water for 10 seconds, to loosen it.
  3. Invert it onto a plate (that isn’t the one you want to serve it on) so that the cake part is on top and mousse is on bottom, then invert it again onto the plate you do want to serve it on so that the mousse is on top.
  4. Pour the glaze over the cake, spreading it onto the sides (this was hard for me, since I had a layer of melted mousse to contend with).
  5. Let the glaze set for 1 hour, cover with tin foil or plastic wrap again and freeze until ready to serve-it’ll melt if you just leave it out!


Banana Bread Baked Oatmeal

Friday, January 27, 2012

Oatmeal can be pretty bland and banana bread is so full of sugar and oil that it’s not particularly a healthy way to start off your day.  So let’s brainstorm for a moment….if we took oatmeal…and made it taste like banana bread………I think we’re on to something!  I’m really loving the idea of baked oatmeal because it truly gives an entirely different texture to the dish-instead of mushy lumpy blah-ness, you get something full of flavor and texture-a great way to start your day off!

This great (and cheap) breakfast idea is so simple and tastes so good it’s really hard to believe that it’s so healthy for you.  Just throw the ingredients together in a dish, bake for a little while and voila: with almost no work you’ve got a healthy, hearty breakfast that will not only keep you full for a long time, but also sneakily satisfy your sweet tooth without much sugar at all.  Trickery!  One of my friends on the weekend trip to the cabin suggested this would be a great pre-workout meal because it’s full of fiber, complex carbs and bananas, yet tastes much better than a protein shake because of all the cinnamon, nutmeg and vanilla in it.

If I was in the mood for a more standard softer oatmeal, I wonder if that super crunchy texture would be fixed by letting the mixture soak overnight in the fridge…experiments to try!  But, truly, this recipe is so good as it is, I’ll let you have it now and tweak it yourself if you so choose.  This was the last recipe I made at the cabin in the woods (without my camera), so next week we’re kicking it off with a crazy rich dessert that could only be made in my own familiar-to-me kitchen.  Also, be sure to subscribe to the blog in the upper right corner of your screen-you’ll get my posts emailed to you whenever there’s something new!

Banana Bread Baked Oatmeal

Adapted from Budget Bytes

  • 4 bananas, mashed
  • 1/3 cup brown sugar
  • 2 eggs
  • 1/2 teaspoon salt
  • 1 teaspoon vanilla extract
  • 1/2 teaspoon baking powder
  • 1/2 teaspoon baking soda
  • 1/2 teaspoon of cinnamon
  • 1/4 teaspoon of nutmeg
  • 2 cups milk
  • 2 1/2 cups steel-cut oats
  • 1/2 cup walnuts, chopped
  1. Heat oven to 350 degrees and butter or non-stick spray a 9×9 inch baking dish.
  2. In a large bowl, stir together all of the ingredients except for the milk, oats, and walnuts.
  3. Once everything is thoroughly combined, stir in the milk.  Once THAT is thoroughly combined, add the oats, stir till combined, then finally stir in the walnuts.
  4. Pour oatmeal batter into the prepared baking dish and cover with tin foil.  Bake for 30 minutes, remove the foil and bake for another 15 minutes.
  5. Serve hot and enjoy!  I like to pour some milk over mine and maybe an extra dash of cinnamon and brown sugar.

Blackberry Breakfast Cake

Wednesday, January 25, 2012

Blackberries…Cake…Breakfast….I think that The Boyfriend has never heard a more delightful combination of three of his favorite words in the same phrase.  Needless to say, this was an absolute hit.  It was a little more light, airy, and crumbly than normal cake, which must be why it’s called “breakfast cake”, since it really lent itself to being paired with other hearty breakfast items (like the phenomenal Baked Eggs Benedict my dear friend Anna made) without being overbearing and too filling.

The recipe I found on The Dainty Chef (via Pinterest) uses blueberries and my intention was to do the same until I went to the store and was faced with a sign declaring “Buy one carton of fresh blackberries, get TWO free”.  I don’t even like blackberries, but it was such a crazy deal that I still bought them, hoping maybe The Boyfriend would eat them, since I know he enjoys them.  I think they really went perfect with the cake recipe; because the berries are so big and there are so many of them, the cake ends up delicate and full of berry flavor in every bite.  If berries are showing up in your market, jump on this recipe right now!  If not, promise me you’ll tuck it away to try this summer the instant you spot any kind of berry.

Buttermilk Blackberry Breakfast Cake

Adapted from The Dainty Chef

  • ½ cup unsalted butter, room temperature
  • 2 tsp. lemon zest or more — zest from 1 large lemon
  • 1 cup sugar
  • 1 egg, room temperature
  • 1 tsp. vanilla
  • 2 cups flour
  • 2 tsp. baking powder
  • 1 tsp. kosher salt
  • 2 containers of fresh blackberries or other berries (I’m referring to the small flat containers my grocery store offers blackberries in.  You want at least 2 cups of berries, whatever you choose)
  • ½ cup buttermilk
  • extra sugar for sprinkling
  1. Heat oven to 350 degrees and grease a 9X9 inch baking pan.
  2. Cream the butter with lemon zest and sugar for 2-3 minutes.
  3. Add the egg and vanilla, beating until combined.
  4. Whisk together flour, baking powder and salt in a separate small bowl.
  5. Mix a little of the flour mixture into the butter and sugar mixture, then a little of the buttermilk, combining thoroughly each time and continuing to alternate between the two until everything is mixed in.
  6. Gently fold the blackberries in to the mixture.
  7. Spread the batter into the prepared baking pan and bake.  Dainty Chef said to bake 35-45 minutes, but I think I let mine in for closer to an hour or even a little more.  It could be because I was in a strange mountain cabin with an oven I’m not used to, but I definitely went way beyond 35 minutes.
  8. Let cool for 15 minutes and enjoy!  It would be great with whipped cream if you want to eat just that, but eggs and bacon are perfect too!

Petite Pavlovas with Lemon Cream and Fresh Fruit

Monday, January 23, 2012

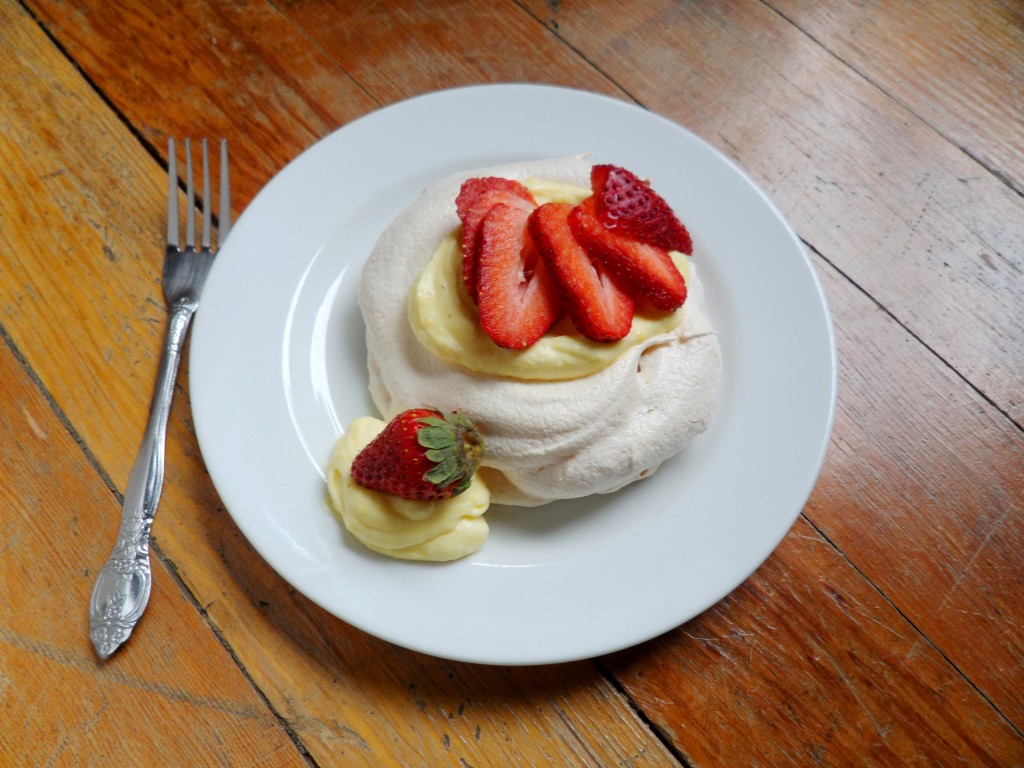
petite pavlova with lemon cream and fresh fruit

First of all, I apologize for my photo; I’ve been in a mountain cabin all weekend and left my fancy-schmancy camera at home.  Now…

This is a story of a girl and her meringue.  Growing up in Georgia in the summer, you KNEW when there was humidity.  It was the suffocating, sticky kind that made temperatures even in the 80s insufferable.  Here in Southern California, no such thing exists.  Where I work in “The Valley”, it gets to be 110 degrees there, but with very low humidity so I barely notice the heat sometimes.  At home in Beachtown, we get foggy nights and mornings here and there, sure, but I never feel any humidity there either.  So imagine my frustration the last time I tried to make something with meringue (PPQ’s Divinity project) only to utterly fail.  Oh that was not a good night in the kitchen, let me tell you, and The Boyfriend has never seen me so upset that I had to leave the kitchen for the evening.  I scoffed at suggestions that it might be the humidity only to begrudgingly check the weather-you should have seen my jaw drop when I read that humidity had been 95% that night.  No WONDER I failed so spectacularly!  I will never again question whether humidity has an effect on a recipe-but I do wonder why I don’t feel almost 100% humidity in California…why isn’t it so suffocating as it is in Georgia?  If you’re a meteorologist, please, explain this to me.

When I got word that it was my turn to host Project Pastry Queen, I scanned the list of recipes left to choose from; we’re starting to slim down the list considerably, so eliminating the elaborate cakes that I don’t need sitting in my kitchen and the savory options that are just a teensy bit less fun to make, I didn’t have many choices.  The pavlovas caught my eye, though…given my big fat meringue failure last time, I was hesitant.  But, since I fancy myself a plucky adventurer, I officially submitted pavlovas as my recipe for the week and started checking the humidity nightly.  I knew I was going on a business trip the week I was to host and on a mini-vacation that weekend, so all this meant was that I had to make the recipe ahead of time so I could be ready to post even if I wasn’t in the kitchen.  So back to me checking the humidity nightly…the days started to tick down…I thought I still had some time…then three days…then two…and then the last night before I left for vacation the humidity was 89% and I packed my handheld mixer and my spatula in the hopes that maybe, just maybe, I could make the pavlovas at the cabin I was meeting my friends at for the weekend.  And then at the cabin it rained all Friday night and Saturday morning.  I was pretty sure at this point that I was cursed and I despaired that I was going to have to post the recipe for PPQ without having actually made it.  I kept obsessively checking the weather, however, and when at the last minute on Saturday night the humidity miraculously went from somewhere in the 70s down to 22% I scrambled into action and hustled to the kitchen.  I was suspiciously eyeing my progress the entire time and was surprised to find myself with beautifully whipped up egg whites at the end.  Still wary and prepared for failure, I traced the circles onto the parchment paper, spooned the meringue onto the sheets, put them in the oven and crossed my fingers.  After an hour, you’re supposed to turn off the oven and leave the pavlovas in the oven for another hour or overnight without ever opening the oven door.  This morning I cautiously approached the oven…opened the door…I couldn’t believe my eyes at these beautiful little puffs of meringue sitting in the oven!

So this is a tale of failure (boo) and success (yay!); I hope the story doesn’t scare you, because really, if you just pay attention to the humidity in the first place, you won’t have any problem whatsoever.  It truly is a beautiful, elegant little dessert that should not inspire fear whatsoever (especially because it was named after a ballerina, which isn’t scary at all).  I do admit that I forgot my camera at home, so please excuse the less than stellar photograph, as it’s pretty hard to put together a make-shift photo studio at a cabin in the woods.

Please check PPQ for the other members’ pavlovas; I’m sure they’re all going to be gorgeous!


Petite Pavlovas with Lemon Cream and Fresh Fruit
from The Pastry Queen by Rebecca Rather
Serves 4

Meringue

  • 4 large egg whites (save 3 of the yolks for the lemon cream)
  • 1/2 teaspoon cream of tarter
  • pinch of salt
  • 1 1/4 cups sugar (superfine sugar is best)

Filling

  • 3 egg yolks, plus 2 whole eggs
  • 1/3 cup sugar
  • 1/4 cup freshly squeezed lemon juice
  • 1/4 cup champagne or brut sparkling wine
  • 3 tablespoons chilled unsalted butter, cut into 4 pieces
  • 1/2 cup chilled heavy whipping cream
  • 2 tablespoons powdered sugar
  • 1 cup fresh fruit, sliced

Meringue

  1. Heat oven to 300 degrees.  Line 2 baking sheets with parchment paper.  Trace 4 evenly spaced 4″ diameter circles on each piece of parchment paper (I used a small bowl to trace).
  2. Using an electric mixer (fitted with a whisk attachment, if you have more than one choice), beat the egg whites, cream of tarter, and salt on high speed about 2 minutes until soft peaks form (which means that when you pull the beaters out of the egg whites, they’ll make soft little curls off the tips of the beaters that flop over).
  3. Add the sugar, very patiently, 2 tablespoons at a time, and continue beating the egg whites on high speed until stiff peaks form (when you pull the beaters out of the egg whites, the curls won’t flop over, they’ll stand up pointy).
  4. Spoon the meringue onto the baking sheets using the traced circles as a guide.  Use the back of a spoon to build up a 1″ rim on each meringue round.
  5. Bake the meringues for 1 hour.  Turn off the oven and leave them inside the closed oven for another hour, or you can just leave them in the closed oven overnight if you want.  (Rebecca says if you wrap them well, they’ll keep for 2 days at room temp or 3 weeks if they’re frozen).

Filling

  1. Whisk the egg yolks, eggs, sugar, lemon juice and champagne in a large bowl set over a saucepan filled with 2″ of simmering water.  Cook about 15 minutes, whisking occasionally, until the mixture thickens.
  2. Whisk the butter into the lemon mixture, one piece at a time.
  3. Cook about 10 minutes longer, whisking occasionally.  The lemon filling will be thick and pudding-like.
  4. Cover the filling with plastic wrap, pressing the wrap into the surface of the curd, sealing it and leaving no air between the wrap and the filling.  Refrigerate it for at least 1 hour or up to 3 days.
  5. Using an electric mixer (again with a whisk attachment if you have the option), beat the cream in a large bowl on high speed until soft peaks form.  Add the powdered sugar and beat until thoroughly combined.  Fold the whipped cream into the cooled lemon filling.
  6. Spoon the lemon filling into the meringue shells and top with the fruit.  Serve immediately and enjoy!

Roasted Butternut Squash Pizza

Friday, January 20, 2012

butternut squash pizza

I have a new favorite pizza place here in Beachtown.  It’s called Stella Rossa and I have NEVER had pizza like Stella Rossa makes pizza.  They let their dough ferment for 18 hours so the crust that they put in front of you hot from the oven isn’t so much like pizza dough as it is more like fresh, airy, crusty, delicious French bread.  The pizza I love the most at Stella Rossa is an incredible seasonal option on the menu, topped with thin slices of roasted butternut squash, Applewood smoked bacon, Talleggio cheese, and sweet basil. I NEVER would have paired butternut squash with basil but wouldn’t you know that it’s perfect!  I would have defaulted to sage, like most of us would, but I now know that basil and butternut squash are like Romeo and Juliet-people try to keep them separate but secretly they are perfect together.

I’m not ready yet to start out on my own with making pizza crust just yet, especially when Trader Joe’s has such great tasting dough ready made in their fridge, but boy did I want this pizza at home!  So I mandolined some butternut squash, tried to find some acceptable cheeses to substitute and some good basil.  I left the bacon off, just because, but you feel free to add it to your pizza.  Truly, this pizza is a fantastic quick dinner that’s a break from the normal tomato based pies.

Butternut Squash Pizza
Makes 2 medium pizzas
Inspired by Stella Rossa

  • 1 small butternut squash, peeled, seeded and sliced thin enough to see through
  • 3-4 small mozzarella balls in water, sliced
  • about 1/4 cup shredded Harvati cheese
  • bacon, crumbled (optional)
  • handful of fresh basil
  • 1 package of Trader Joe’s plain pizza crust, divided into two parts
  1.  Lightly olive oil a baking sheet and put it into the cold oven.  Heat the oven with the baking sheet in it to 450 degrees.
  2. Once the oven and pan are heated, take the pan out and place it on a heat-safe surface.  Working quickly, take one part of the pizza dough and gently stretch it out into a thin round.  The easiest way I’ve found to do this is to hold the dough in the air by one edge to let gravity do it’s magic and focus on stretching out the thicker outer edge of the dough (the middle will thin itself out naturally as you stretch the edge out).  Arrange the stretched out dough onto the hot oiled baking sheet.
  3. Top the dough with the ingredients-squash first, the two cheeses and the bacon crumbles if you are using them.  Leave the basil off for now.
  4. Move the baking sheet back into the oven and bake for about 10 minutes, until the crust and cheese is lightly browned; remove from oven.
  5. Lay the basil leaves on top of the hot pizza (they’ll wilt a little), cut into slices, and enjoy!

Cilantro Lime Shrimp

Wednesday, January 18, 2012

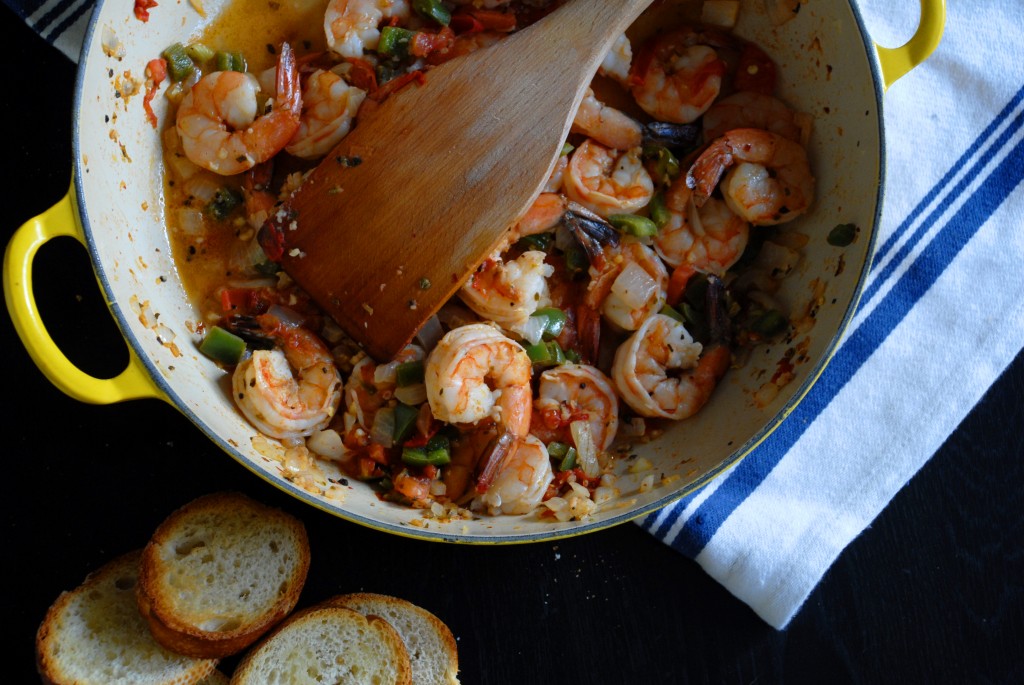
cilantro lime shrimp

The Boyfriend had a very tough day.  So what else is a girl to do but put his favorite classical music on, light the candles, and greet the poor guy with the dish in the picture above?  To top it off, I still had one more creme brulee left in the fridge.

If you’re looking for a super easy dinner, look no further.  It basically involves chopping things and throwing them in a pan to cook until done-that’s it!  It’s a delicious, satisfying meal despite the fact that I didn’t even pair it with any side dishes-just the crusty toasted bread for soaking up those delicious juices.  I think my favorite part is the spice that the jalapeno adds because it doesn’t hit you over the head with a crazy burning, but it does give a gentle yet firm heat that really balances great with the cilantro and lime juice.  We actually just ate directly out of the pan so that we didn’t lose a single ounce of the flavorful liquids and also to cut down on dishes because…if you saw my kitchen right now…well, you’d understand why.

Overall, I was just ecstatic with how this dish came out and I can’t wait to finish up the leftovers for lunch tomorrow.  I can’t imagine a more delicious, quick dish to spice up a weeknight!

Cilantro Lime Shrimp
Adapted from Lana’s Cooking
Serves 2 and a half

  • 1 tablespoon butter
  • 1 tablespoon olive oil
  • 3 cloves garlic, minced or put through a garlic press
  • 1 medium onion, diced
  • 1 jalapeno, diced (I left the seeds intact, which meant more heat.  If you want less spice, remove the seeds)
  • ¼ teaspoon red pepper flakes
  • ½ teaspoon Mexican oregano
  • 2 Roma tomatoes, diced
  • 1 lime
  • pinch of salt
  • a few grinds of black pepper
  • 1 pound shrimp, shelled and deveined (I found it was MUCH cheaper to buy uncooked shrimp)
  • a few large pinches of fresh cilantro leaves
  1. Add oil and butter to pan and heat over medium heat until melted and combined.
  2. Add onion and saute for a few minutes before adding the jalapeno and garlic-be sure to have a few windows open and don’t inhale the vapors unless you want burning nose and eyes (so much worse than onion tears!).
  3. Cook until the onions start to turn translucent, a few minutes, and then add the red pepper flakes and oregano.
  4. Add tomatoes and cook until soft, about 5 minutes.
  5. Zest the lime over the pan and then slice it into halves or quarters and squeeze the juice into the pan; add the salt and pepper.
  6. Add the shrimp and cook until just opaque-overcooking is easy, which is why I prefer purchasing uncooked shrimp (if it’s so easy to overcook, you don’t need a head start!).  The shrimp did take longer to cook than I expected, so I put the lid on and just let it cook, checking frequently to make sure I took it off the heat the instant the shrimp were all pink.
  7. Toast some bread (I sliced a baguette) brushed with some butter or olive oil under the broiler and enjoy!

Espresso Crème Brûlée

Monday, January 16, 2012

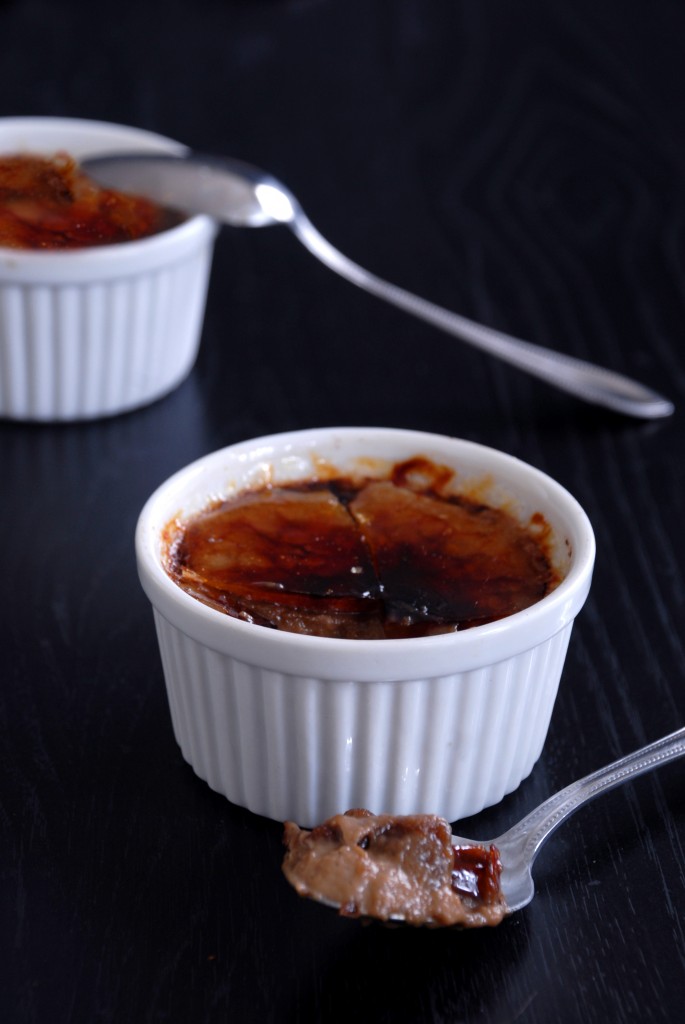
espresso creme brulee

I have to admit that I always thought creme brulee was a very hard, very fancy dessert, which is why you only really saw it in restaurants.  Now that I’ve made it, I realize it’s incredibly easy and that’s probably why you always see it in restaurants-because it takes practically no effort for the kitchen staff to make, yet it looks spectacularly difficult and fancy.  Truly, it’s almost embarrassing how easy this recipe is and I feel like I’ve exposed some sort of great restaurant chef secret.

This recipe from our dear Pastry Queen is espresso flavored and if you like coffee, this is definitely the dessert for you.  So rich and full of flavor (that espresso powder is impressive!), I could only eat half the ramekin before having to call it quits.  If you’ve been reading my blog for any sort of time, you’ll know my outright obsession with vanilla and, while this recipe was very good, I can’t wait to make creme brulee without the addition of the espresso powder next time, especially because I now know it takes next to no effort.

The one thing I know stopping most of you is lack of a kitchen torch in your cabinet.  When I made that chocolate meringue tart a few months ago, I was in the kitchen whining to myself about how terrible my lack of broiler element in my oven was and how a kitchen torch would make everything better.  Little did I know that The Boyfriend sitting in the living room actually heard me whining from the kitchen in between his episodes of Star Trek and, lo and behold, guess what I got for my birthday in December!  This was the grand exciting first use and I couldn’t be happier with it.  If you don’t have a kitchen torch, you can use the broiler element in your oven, which I don’t have, so I would have been S.O.L. if it weren’t for such a generous partner-in-crime.

Check out Sarah’s beautiful chocolate covered espresso bean garnish here (she even has video!) and the rest of the PPQ members here.

Warning: as is typical with many desserts, this needs to sit in the fridge for 3 hours after baking to cool, so if you’re making it for company, make it the night before or the morning of.


Espresso Crème Brûlée

Serves 6

From the Pastry Queen by Rebecca Rather

  • 1/4 cup whole milk
  • 2 3/4 cups heavy cream
  • 1 tablespoon espresso powder (I got King Arthur brand espresso powder at Sur la Table)
  • 1 vanilla bean (or 1 tablespoon vanilla bean paste + if you’re Emily, an extra splash of plain vanilla extract)
  • 7 large egg yolks
  • 2/3 cup plus about 1/2 cup sugar for the crust later
  1. Heat the oven to 300 degrees and lightly butter your ramekin dishes.  Rebecca suggests using six 6oz ramekins but I have a ragtag collection of two 5oz, two 6oz, and two 7oz.  It all evens out and my point is that you should just use whatever works that is close-ish in size and not stress over finding 6oz ramekins.
  2. In a non-reactive saucepan (which means not aluminum or copper), combine milk, cream, espresso powder and vanilla (if you’re using a bean, scrape the seeds off the pod and add both seeds and empty pod to the cream) and heat until boiling.  As soon as it boils, turn off the heat.
  3. In a large mixing bowl, whisk the egg yolks with the 2/3 cup sugar until thoroughly combined, then, slowly pour the hot cream mixture into the egg yolks, whisking the whole time until fully mixed in.
  4. Strain the mixture through a sieve into another bowl to catch the vanilla bean pod and any little bits of egg that may have cooked.
  5. Place the prepared ramekins into a baking dish that is taller than the ramekins and fill the ramekins almost to the tippy top with the cream mixture (my ramekins have a rim about a 1/4″ from the top that I used as my stopping point.  Rebecca suggests filling them to the absolute top-to accomplish this, she puts the pan of ramekins in the oven before filling them to the brim, so they don’t spill during transport).
  6. Put the baking dish with ramekins in it into the oven and, using a measuring cup or whatever you have on hand (I used a gravy boat that was surprisingly perfect for the task), pour water into the pan until it reaches about 2/3 of the way up the the outside of the ramekins.  (A “water bath” like this was one of those cooking things I was always scared to do but…really, I’m just lame.  All it is is pouring water in a pan.  What on earth was I scared about?)
  7. Bake the custard for 1 hour, checking every so often on them.  If they bubble or if they start to brown on top, reduce the oven temp to 250.  Mine were fine, and I usually find that my oven runs a little hot.  Bake them until they’re slightly jiggly but not liquid.  They’re going to look an ugly dull grey for now, but they’ll be prettier with the sugar crust later.
  8. Remove the ramekins from the water bath pan and let them cool on a wire rack for 30 minutes, then transfer the fridge for 3 hours.
  9. When you’re ready to eat, sprinkle a layer of sugar on top of the custard-just barely enough so that you can’t see the custard underneath.  When you torch it, you want it to be easily cracked with a spoon.  You may notice in my photo that I put waaay too much sugar on top and ended up with a thick slab of sugar candy on top.  It looked like a layer of glass after it cooled.  You want it to be more thin, crispy, and bubbly, like Sarah’s.  If you over sugar, no worries!  It’ll still taste fantastic, you may just have a piece of candy to slam through with your spoon instead of a more delicate topping you gently tap.  Hold the torch a few inches away from the dish and keep it moving over the surface until the sugar melts and turns bubbly and brown.  Let cool for a minute or two to harden and then serve immediately.  Enjoy!

Peanut Butter Chocolate Pretzel Cookies

Friday, January 13, 2012

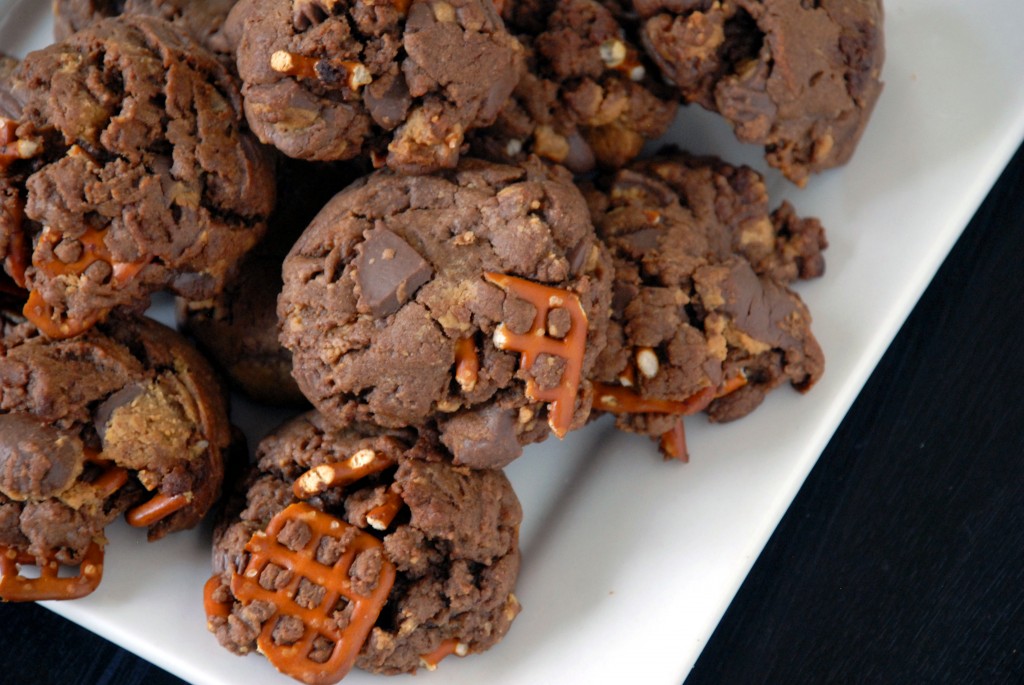
peanut butter reeses pretzel cookies

I make sure to keep a light heart on this blog and, since the topic is food, it’s not hard to do.  But I want to say that 2011 was a tough year for many people close to me and the hardest year of all was likely for my dear friend Erin and her family.  Her father was simultaneously diagnosed with stomach cancer and prostate cancer and the strength this tight-knit family has shown in spite of it all is awe-inspiring.

The hardest part about stomach cancer is that eating is of much less interest than it was before.  I can’t imagine such an important part of my life as food or eating suddenly being unpleasant and difficult to accomplish and it’s this very reason that stomach cancer is one of the most trying types of cancers to deal with.

In a bid to spread some holiday cheer and good will to a family that so much deserves it, I wanted to bake cookies but feared Erin’s dad wouldn’t be able to enjoy them.  I was assured that he does get cravings so I set about making cookies that would satisfy any craving that might pop up-sweet, salty, soft, crunchy.  The resulting cookies won’t win any beauty contests, but boy do they sure hit the spot.  They have chocolate, peanut butter, Reese’s peanut butter cups and buttery pretzels all rolled into one.

I hear tell the whole family enjoyed them, including Erin’s dad-which is exactly what I had hoped for.

Peanut Butter Chocolate Pretzel Cookies

Adapted from Annie’s Eats

  • 1½ cups plus 2 tbsp. all-purpose flour
  • 6 tbsp. Dutch-process cocoa
  • ½ tsp. baking soda
  • ½ tsp. coarse salt
  • ¾ stick (6 tbsp.) unsalted butter, at room temperature
  • ¼ cup plus 2 tbsp. creamy peanut butter
  • ½ cup sugar
  • ½ cup brown sugar
  • 1 large egg
  • 1 tsp. vanilla extract
  • 2 tbsp. milk
  • 1 bag of coarsely chopped mini peanut butter cups **see first step before chopping
  • 1 cup of pretzels (I used “Butter Snaps”), broken
  1. Start by throwing the bag of peanut butter cups into the freezer.  Annie, being the kitchen genius that she is, figured out that this makes unwrapping and chopping much much easier.  Heat the oven to 350 degrees and line cookie sheets with parchment paper.
  2. In an extra bowl, mix the flour, cocoa powder, baking powder and salt.
  3. In a separate bowl, use an electric mixer to beat the butter, sugar and peanut butter for 1-2 minutes.  Add in the egg, vanilla extract, and milk and beat until incorporated.
  4. On low speed, add the mixed dry ingredients to the wet mixture until fully incorporated.
  5. Add the pretzel pieces and fold in with a spatula.  If you’re short on time, just dump in all the chopped peanut butter cups and fold them in as well with a spatula.  If you want to make the cookies a little prettier, divide the cups in half, fold the first half into the batter and save the other half to press into the tops of the cookies later before baking.
  6. Drop large spoonfuls of the dough (Annie suggests about 3 tablespoons worth; I used my 2″ ice cream/cookie dough scoop) on to the prepared baking sheets.  My dough was a bit crumbly, no doubt due to the massive amount of “add-ins” to the dough.  Just press the dough mounds back together if they’re falling apart.  If you saved any peanut butter cups, press those gently into the tops of each cookie now.
  7. Bake for 12-14 minutes and take out, even if they look a little underdone.  Let cool on the baking sheet for 10 minutes and then transfer to a wire cooling rack.


Like I said, 2011 was a bit of a tough year, but here’s hoping that 2012 brings health and happiness to Erin’s family.

Stomach Cancer Purple Awareness Ribbon

Wicked Good Boston Cream Pie

Wednesday, January 11, 2012

boston cream pie

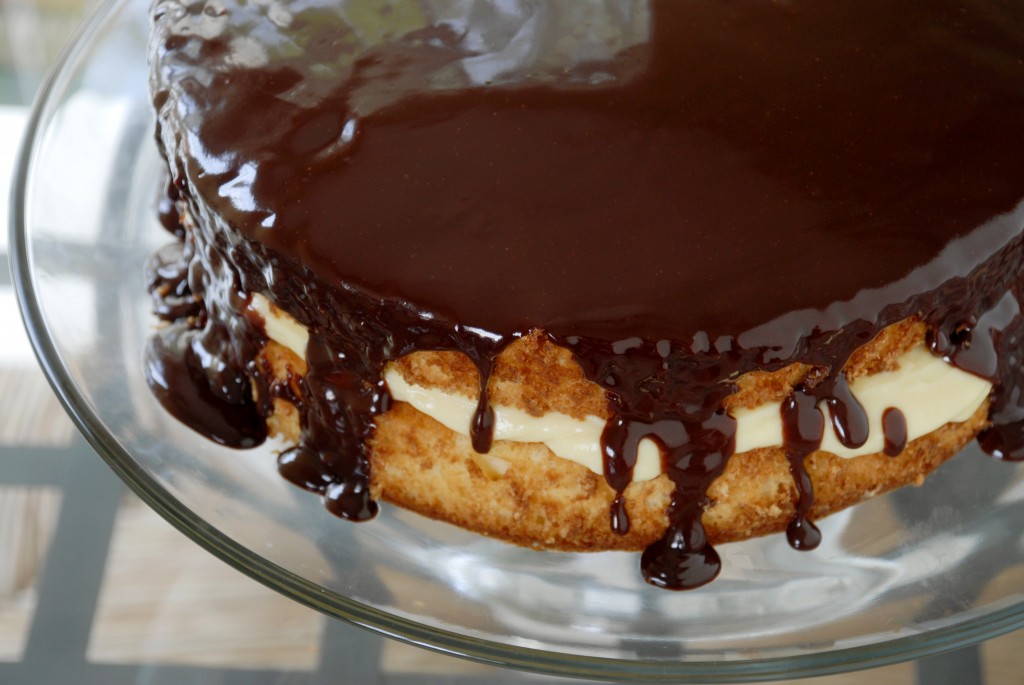
It’s The Boyfriend’s birthday today!  I obviously had to celebrate by posting a cake and I love this one because it’s a little out of the ordinary.  Instead of the typical cake + lots of super rich frosting, Boston Cream Pie has a vanilla pastry cream filling and a chocolate ganache glaze.  Considering I’m not the biggest fan of frosting (gasp!) and could eat an entire bowl of pastry cream for dessert and be completely satisfied, this cake is definitely a big winner in my book.  And The Boyfriend will eat any cake, so I excitedly set about making it for the first time.

I definitely suggest you do a little bit of weight-lifting in the days prior and have a book on the ready, because you’re going to be whisking this pastry cream on the stove for a good 10 minutes or so.  The cake is a “hot-milk sponge cake” and it’s made in a bit of an unusual way-instead of the typical mix the dry-mix the wet-mix together method, you mix the dry, heat the wet, beat the eggs and sugar, add the hot liquid and add the dry ingredients in.  It’s really quite easy, just different!

A warning that you should have plenty of time to make this cake, though, as the pastry cream needs to refrigerate for 2 hours, the cakes need to cool fully before you assemble the cake, and the whole thing should chill for 3 hours before cutting so that it stays intact.  Long story short: make the cake the night before you need it and don’t start making it at ten o’clock at night.


Wicked Good Boston Cream Pie

Adapted from Cooks Illustrated March 2011

Pastry Cream

  • 2 cups half-and-half
  • 6 large egg yolks
  • 1/2 cup sugar
  • pinch of table salt
  • 1/4 cup unbleached all-purpose flour
  • 4 tablespoons cold unsalted butter, cut into four pieces
  • 1 1/2 teaspoons vanilla extract

Cake

  • 1 1/2 cups unbleached all-purpose flour
  • 1 1/2 teaspoons baking powder
  • 3/4 teaspoon table salt
  • 3/4 cup whole milk
  • 6 tablespoons (3/4 stick) unsalted butter
  • 1 1/2 teaspoons vanilla extract
  • 3 large eggs
  • 1 1/2 cups sugar

Glaze

  • 1/2 cup heavy cream
  • 2 tablespoons light corn syrup
  • 4 oz bittersweet chocolate, chopped


Pastry Cream

  1. Heat half-and-half in a saucepan until just simmering.  While that’s heating, whisk together the egg yolks, sugar, and salt in a mixing bowl.  Add flour and mix thoroughly.
  2. Once the half-and-half is just starting to simmer, turn off the heat and measure out a 1/2 cup of the half-and-half.  Whisking the mixture constantly, slowly pour the 1/2 cup of half-and-half into the egg yolk mixture.  I have a great set of mixing bowls that have rubber on the bottom so they don’t slide on the counter when doing tasks like this…but I wasn’t using a bowl from that set this time, so I had to request The Boyfriend’s assistance to hold the bowl for me while I whisked and poured at the same time.  For those who like fancy cooking terms, this is called “tempering” and the goal is to warm up the egg yolks before adding them to the hot half-and-half.  If you were to just dump the yolks in cold, the eggs would cook and you’d end up with scrambled eggs instead of pastry cream.
  3. Now that the egg yolks are warmed up, turn the burner under the saucepan up to medium and whisking constantly again, pour the egg yolk mixture into the saucepan with the rest of the half-and-half.  Whisk for a full minute then reduce the heat to medium-low and continue whisking for 8 minutes.  (I was reading my recipe off my laptop so I was able to peruse the internet during those 8 minutes.)
  4. After the 8 minutes, turn the heat back up to medium and whisk for 1-2 minutes.  You’ll know it’s ready when if you stop whisking just for a second, big bubbles will burst on the surface of the cream.
  5. Turn off the heat and stir in the vanilla and butter chunks until melted and incorporated.
  6. Strain the pastry cream through a fine sieve into a medium bowl.  Lightly grease a piece of parchment paper and press it, greased side down onto the cream and move the bowl to the fridge to chill for at least 2 hours.

Cake

  1. Heat oven to 325 degrees and make sure the oven rack is in the center position.  Grease two 9″ cake pans, cut rounds of parchment paper to fit in the bottom, and grease those on top, too.
  2. Whisk flour, baking powder, and salt together in medium bowl.
  3. Heat milk and butter and vanilla in small saucepan over low heat until butter is melted (turn off the heat once the butter melts so that the mixture can cool for a little bit before the next step).  In the meantime, whip the eggs and sugar for 5 minutes on with your mixer on high speed for 5 minutes.
  4. Whisking constantly, pour the warm milk mixture over the egg-sugar whipped mixture and whisk until incorporated.  Add the dry ingredients and whisk thoroughly.
  5. Immediately pour the batter evenly between the two prepared cake pans.  Bake for 20-22 minutes until tops are light brown and a toothpick inserted comes out clean.
  6. Let cakes cool for 2 hours in the pan (I just let mine sit out overnight and made the glaze and assembled everything the next morning, knowing we wouldn’t dig into the cake until later in the day).  To get the cakes out later, run an knife around the edge of the pan and invert the pans and carefully peel the parchment paper off.
  7. Place one cake on the platter you intend to serve the cake on.  Remove the parchment paper cover and stir the pastry cream just to loosen it up, then spread it over the first cake with an offset spatula.  Place the second cake on top of the pastry cream with the flat bottom side up.  Refrigerate again while you’re making the glaze.

Glaze

  1. Bring cream and corn syrup to simmer in a saucepan over medium heat. Turn off the burner and add chocolate and stir until smooth. Let stand, stirring occasionally, until thickened slightly, about 5 minutes.
  2. Pour glaze onto center of cake. Use an offset spatula to spread glaze around the top of the cake, letting it drip over the sides. Chill finished cake 3 hours before slicing.  Enjoy!


Caramel-Filled Brownies

Monday, January 9, 2012

If you are on a New Year’s Resolution Diet, STOP READING.  I’m about to share with you what I’m pretty sure is the richest, most decadent dessert to ever come out of my kitchen.  What’s more, my favorite blogger, Annie of Annie’s Eats, says it’s her favorite dessert of 2011 and that’s really saying something because the things that come out of her kitchen are just mind-blowing.

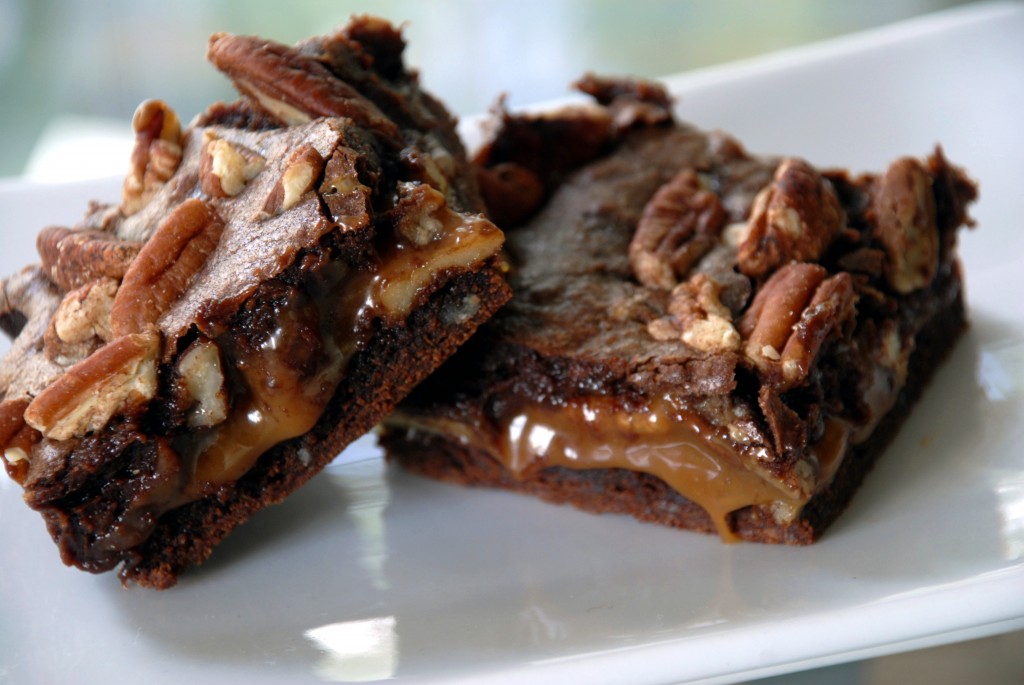
Rich chocolate, toasty pecans, and a layer of caramel that is soft and oozy in just the right way-it’s like a more substantial turtle candy than a baked good.  Beth of The Powdered Plum chose them back in March of 2011 for Project Pastry Queen and I’m so glad I had a wildcard week to go back and try them, because I can’t imagine not having this recipe around.  These brownies are here at the office today to celebrate January birthdays (albeit a bit late-I can’t believe the flu put me in bed for a whole week!) along with a Boston Cream Pie that I’m pretty sure is going to be MY favorite dessert and I can’t wait to hear what everyone thinks! (Clearly I have no respect for my co-workers and their diets…or I can just say that I’m “testing them”-whatever doesn’t get eaten, after all, comes home with me!)

(Note: In writing out the recipe now, I realize I only used 1 stick of butter instead of 2 in the first step.  Doh!  The brownies taste fantastic, though, so if you want to leave out a stick of butter in the name of health, go for it.  Also, perhaps because I added that splash of water I write about in the instructions below, the top layer is very fudgy, almost lava cake style, while the bottom layer is a bit stiffer, almost chewy-which makes sense because it was also baked twice.  I also took the brownies out at the 20 minute mark on the dot so perhaps the top layer should have baked a tad longer but I do love how fudgy they turned out!)

Caramel-Filled Brownies

Adapted from The Pastry Queen by Rebecca Rather

  • 2 cups pecans, chopped (Rebecca always toasts her pecans at 350 degrees for about 7-9 minutes but I always skip this step.)
  • 1 cup (2 sticks) unsalted butter
  • 12 oz bittersweet chocolate, coarsely chopped
  • 1 1/2 cups sugar
  • 4 eggs
  • 1 tablespoon vanilla extract
  • 1 1/4 cups flour
  • 1/2 tsp salt
  • 14 oz caramel candies, unwrapped (I used Werther’s caramels)
  • 1/3 cup heavy whipping cream
  1. Heat oven to 350 degrees.  Line a 13 x 9″ baking dish with tin foil and GREASE THE HECK out of the tin foil.  If you don’t get every inch of the foil, the brownie and caramel will stick to it like there’s no tomorrow.
  2. Melt butter in a small saucepan and add the chopped chocolate, stirring until everything is melted and smooth, then pour the chocolate into a large bowl.
  3. Mix the sugar, eggs, and vanilla, mixing by hand for about 2 minutes.  Mix in the flour and salt until thoroughly combined.
  4. Pour approximately half the batter into the baking dish and bake for 20 minutes.
  5. Once the first half of the brownies are done and cooling (let cool for at least 20 minutes), in a small saucepan melt the caramel candies in the whipping cream, whisking until smooth.  Stir in half the pecans and pour immediately over the baked brownies.
  6. At this point, the leftover brownie batter was super stiff and Rebecca warns you won’t be able to easily spread it, so I added a splash of water to the batter to give it a little more “flow”.  It could be because I forgot that extra stick of butter in the first step, but I’m not sure-just use your best judgement when you get to this step in your own kitchen.  Evenly pour the rest of the brownie batter over the top of the caramel.  It will be almost impossible to smooth the brownie mixture over the caramel (they’ll just mix together instead of staying separate layers), so be sure to pour the batter as evenly as possible.  Smooth as best you can (I had a rim of caramel around the outside edge where I couldn’t get the batter to reach).
  7. Sprinkle the rest of the pecans over the top of the batter and bake for another 20 minutes.
  8. Let the brownies cool completely in the pan before cutting.  The caramel will still be oozy even after they cool, so no need to worry about that.  Rebecca suggests popping them in the freezer for 30 minutes to speed cooling if you just can’t wait.  Enjoy!  (and get right back on that New Year’s Diet as soon as you finish the pan)