Entries from February 27th, 2012

Rum Pecan Pound Cake

Monday, February 27, 2012

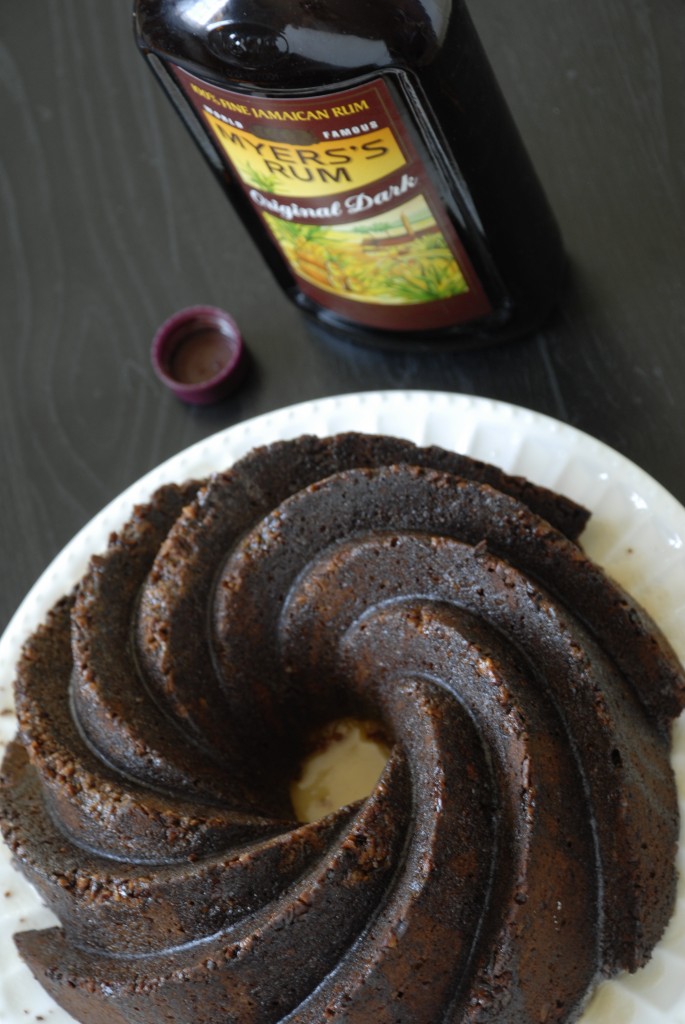
rum pecan pound cake

If you don’t like rum, then this is not the recipe for you: this is a VERY rummy pound cake.  I’m not sure why exactly my cake turned out so very dark-I baked it to the time Rebecca suggested and it didn’t seem overbaked on top, so I was quite surprised to see it pop out of the mold this color.  The cake sure tasted fine and was certainly the right buttery color on the inside, so I’m not too worried.

Overall, I’m not the biggest fan of rum, but if you want an adult cake for an adult gathering, this is certainly a recipe you should give a try.

Shawnda picked this recipe and you can see how the other PPQ’ers liked the recipe here.

Totally Rummy Pound Cake
from The Pastry Queen by Rebecca Rather

For the cake:

  • 1 1/2 cup pecans
  • 2 sticks unsalted butter, room temperature
  • 2 1/2 cups sugar
  • 5 large eggs
  • 3 cups flour
  • 1 teaspoon baking powder
  • 1/2 teaspoon salt
  • 2/3 cup sour cream
  • 1 tablespoon vanilla
  • 1/2 cup dark rum

For the glaze:

  • 1/4 cup unsalted butter
  • 1/4 cup water
  • 1/2 cup sugar
  • 1 tablespoon freshly squeezed lemon juice
  • 1/4 cup dark rum
  1. Heat the oven to 350 degrees and grease a 10-12 cup bundt pan.
  2. Spread the pecans out on a baking sheet and bake them for 5-7 minutes.
  3. Take 1/4 of the pecans and coarsely grind them in a food processor.  Keeping the rest of the pecans separate, roughly chop them and put them aside.  Use the 1/4 cup of coarsely ground pecans to dust the inside of the greased pan.  Shake the pan around so that it’s evenly coated in pecans.
  4. In a large mixing bowl, beat the butter for 1 minute.  Add the sugar and beat for 2 additional minutes, scraping the sides of the bowl down with a spatula.
  5. Add the eggs and beat for 2 minutes.  The batter should be light yellow and well incorporated at this point.
  6. In a separate medium bowl, combine the flour, salt and baking powder and mix together.
  7. Add approximately one third of the flour mixture to the butter-sugar mixture and beat on low until the flour is fully incorporated.  Add half the sour cream and mix.  Repeat with the next third of the flour, the rest of the sour cream, then the rest of the flour mixture.
  8. Finally, add the vanilla and rum, beating until thoroughly incorporated, then gently mix in the chopped pecans that were set aside.
  9. Pour the batter into the prepared pan and bake about 1 hour 20 minutes (although I wonder if that time is too much-keep checking yours and pull out as soon as the top seems done and slightly springs back when pressed).
  10. Let the cake cool 15 minutes then invert it onto a wire cooling rack and let it cool for an hour before serving.  In the meantime, make the glaze.
  11. In a small saucepan, melt the butter and add the water, sugar, lemon juice and rum.  Bring it to a boil for one minute before taking it off the heat.
  12. Poke the cake repeatedly all over with a toothpick or wooden skewer and then pour the glaze all over the cake.  The instructions say to pour all of the glaze over the cake, but there’s so much of it, that I poured only about 2/3 of it before I decided that it was just too much glaze.  You can use your best judgement over how much glaze you want to use.
  13. Rebecca suggests that the pound cake flavors will mellow overnight, so  try baking it a day or two before you plan to serve it.  Enjoy-but try not to get drunk off two slices!


Fat Tuesday King Cake

Tuesday, February 21, 2012

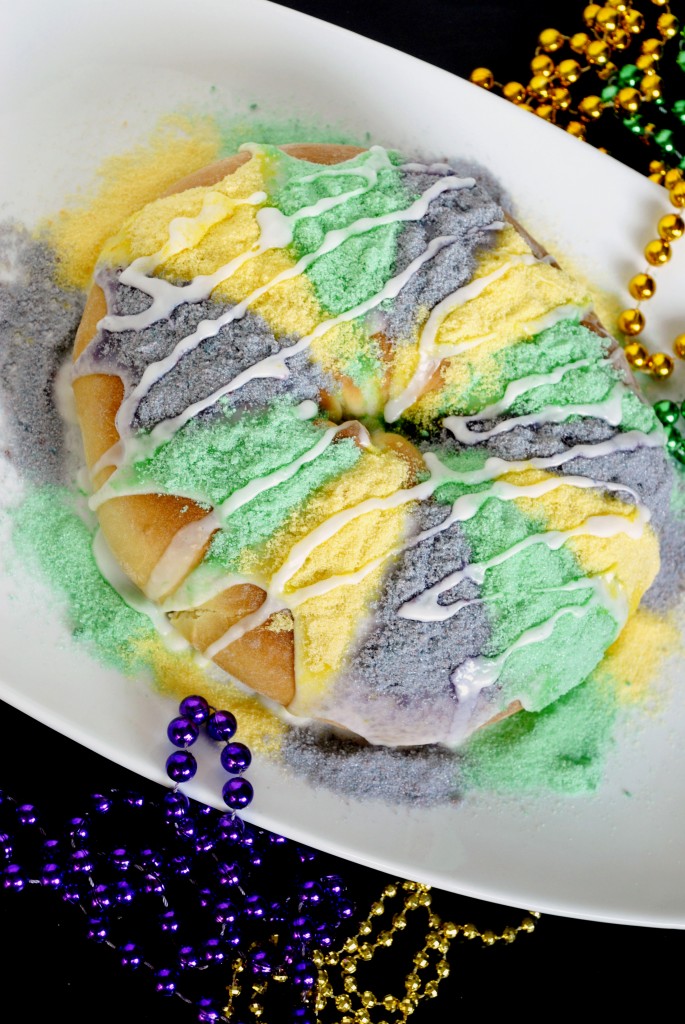
Happy Fat Tuesday, everyone!  Though I am not currently in New Orleans sipping on a hurricane, that doesn’t mean I’m not partaking in the traditional gluttony of the day, namely in the baked form known as King Cake.

I’ve always been hesitant to try making King Cake because it’s a brioche dough and goodness knows I have issues with yeast doughs.  It’s not the yeast that’s the problem, it’s “the dough is really sticky, do I add more flour?  Did I add too much flour and now it’s too dense and heavy?  Will the dough ever come out from under my fingernails?”  I was shocked at how easy this came together.  It’s a great beginners recipe for yeasty recipes!

While researching for this post, I read a lot of recipes over the last few days and found some great ones.  This is a pretty simple straightforward one, a sweet delicious brioche dough and a cinnamon cream cheese filling.  It’s so satisfying (especially with coffee) that I really wouldn’t mind if I used only this recipe for the rest of my life, but I can’t wait to make it again soon with additions to the dough like nutmeg and lemon zest.

Tradition states you hide a tiny plastic baby in the cake; the person who finds it gets good luck for the entire year but also has to bring the King Cake to next year’s party.  I didn’t have a tiny plastic baby on hand on such short notice.  If I had my wits about me, I would have hidden a pecan half in there somewhere since it’s an edible object, but I wasn’t thinking so I brought the cake to the office sans good luck charm.  The ruckus everyone made made it very clear that I made a huge mistake and so, without anything better, I resorted to pushing a nickel up from the bottom of the bread and just had to cross my fingers that no one broke a tooth or choked (we’re all safe, thankfully).

Eat up-the one I brought into the office went quickly-and enjoy this day of excess by having another slice!

King Cake
Adapted from Foodie Bride’s friend Erica

Dough

  • 1 cup warm water, about 105 degrees
  • 1/4 cup sugar (1 tablespoon measured out of that 1/4 cup and set aside)
  • 1 pkg yeast
  • 1 egg
  • 1 egg yolk
  • 4 tablespoons butter, melted
  • 3 cups flour, plus more for dusting work surface
  • 1 tsp salt
  • Oil or cooking spray, for coating bowl

Filling

  • 8 oz cream cheese, room temperature
  • 1/4 cup + 2 tablespoons sugar
  • 1 egg yolk
  • 1 teaspoon vanilla
  • 1/2 rounded tsp cinnamon
  • 2 tablespoons melted butter

Glaze

  • 1 cup powdered sugar
  • 1/2 teaspoon vanilla
  • 4 teaspoon water
  • green, purple & yellow decorating sugar OR 3/4 cups plain sugar, divided into three bowls, 1/4 cup sugar per bowl and green, red, blue, and yellow food coloring


  1. In a large mixing bowl, add the warm water, that one tablespoon of sugar you measured out, and the yeast.  Let it sit for 10 minutes.
  2. Add the melted butter, egg, egg yolk, what’s left of the 1/4 cup of sugar, 3 cups flour, and salt.  Stir with a large wooden spoon until the dough comes together (I added the flour in 3 portions, mixing thoroughly after each).  Have an extra 1/2 cup of flour on hand in case the dough is way too sticky, but I have to say that this is the first yeast dough I’ve ever done where I didn’t have to add any extra flour at all and it was just right.  It should be just a little sticky, and look a little lumpy.
  3. Lightly oil a large metal bowl and transfer the dough into the bowl.  Cover with a dish towel and let the dough rise in a warm spot until double in size, about an hour.
  4. In the meantime while the dough is rising, clean the kitchen (at least that’s what I did, because I didn’t want to torture my roommate any more), set the oven to heat to 375 degrees and then make the filling.
  5. Add cream cheese, sugar, egg yolk, vanilla and cinnamon (that’s everything BUT the melted butter) to a medium mixing bowl and, using an electric mixer, beat on medium until the filling is smooth and spreadable, which won’t take too long.
  6. When the dough is done rising, sprinkle a surface (I covered my dining room table with saran wrap) with flour and roll the dough out with a rolling pin until it is a rectangle approximately 12″ tall and 18″ wide.
  7. Using a pastry brush, brush the melted butter over the dough, leaving an inch or so of dough along the farthest wide edge dry.
  8. Spread the cinnamon cream cheese filling evenly over the dough (leaving that inch of dough dry again).
  9. Taking the wide edge of the dough closest to you, gently roll it up and away from you, forming a big giant cinnamon roll log.  Pinch the long seam closed as best you can, then arrange the rolled up dough in a ring shape on a baking sheet, pinching the two open ends together to close the ring.  I tried to stretch it out as best I could so that it would hold a little of its ring shape instead of just baking up into one big ball.  Emeril Lagasse suggests putting a well greased coffee can in the middle there so that the hole doesn’t close up.
  10. Bake for 25 minutes until nicely golden brown on top (I prefer my baked goods lighter rather than darker, but in this case I went for the whole 25 minutes to ensure the inside was baked properly and the top was only slightly darker golden than I normally go for).
  11. Let the bread cool on a wire rack before glazing.
  12. If you are coloring your own sugar, do that now-I highly recommend it because, though it took an extra 10 minutes or so of work, it was worth it because it was free (I already had sugar and food coloring in my cabinets) versus paying $6 for pre-colored sugars.  In the first bowl, I used 3 drops of yellow, in the second I used 3 drops of green, and in the third bowl I used 3 drops of blue and 3 drops of red.  The food coloring will basically just stick to a little clump of sugar, but if you take a spoon and keep jabbing at that little droplet, it will break up and color the rest of the sugar.  The Boyfriend and I (isn’t he sweet to help?) took about 5 minutes per bowl of stirring, tapping and jabbing, but I think the colors turned out nicely!
  13. To make the glaze, add all the ingredients in except for the colored sugars into a small mixing bowl and whisk until thoroughly combined and smooth.  The thickness of the glaze is up to you; I wanted one that was pourable but that wouldn’t just drip right over the sides and look messy.  You can add a little water (a little goes a looooong way here) or some powdered sugar to adjust the glaze to your desired thickness.  Save a little glaze to drizzle over the top of the sugar afterwards or just use this now and then later throw together a little sugar and water until it’s drizzling consistency.
  14. Let the glaze set for 5 minutes or so before decorating.  King Cakes are usually decorated in alternating stripes of the green-yellow-purple colors, but you can get creative if you want!  Just be sure to lay the sugar on thick, because I tried to go thin on my sugar layer and the white glaze underneath would start to show through (in some cases the sugar dissolved and in other cases the glaze would get heavy with the sugar and start to drip farther down the side of the cake, so there would be white stripes where the sugar had slid down.  Being heavy handed on the sugar solved both of these problems!).  Drizzle with some extra glaze.
  15. Serve with coffee and enjoy your Fat Tuesday!


Mexican Chocolate Cake

Monday, February 20, 2012

mexican chocolate cake

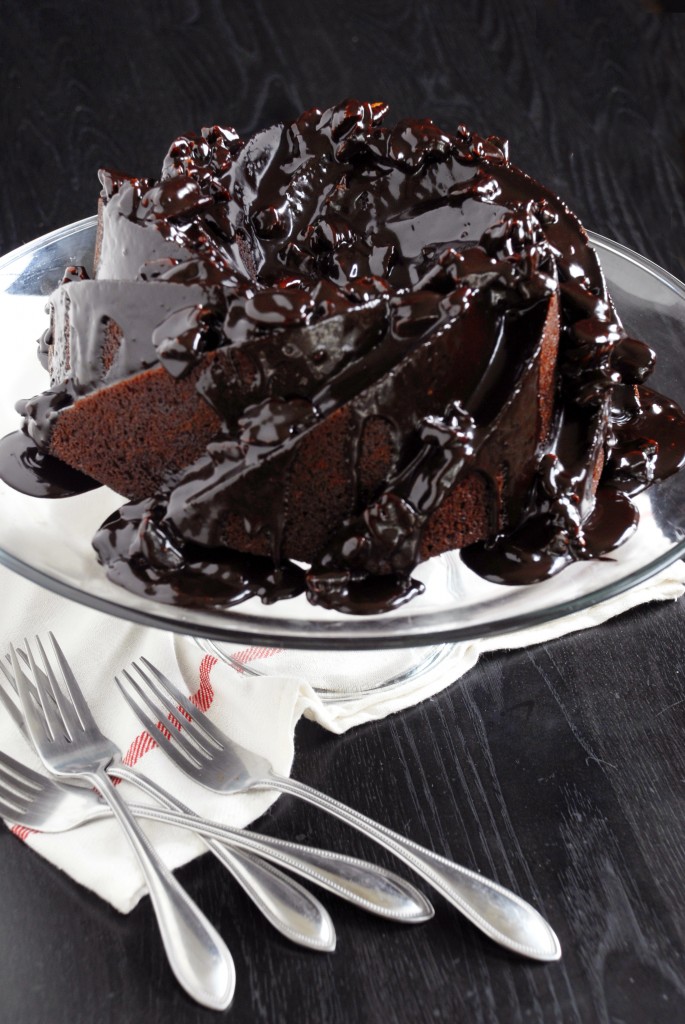
So every once in a special while my friend hosts Taco Night at a nearby bar.  They don’t normally allow outside food in, but Jake charms them and this Polish (yes, Polish) bar lets Jake bring in 100 tacos for his friends to feast on.  So in honor of Tacozawa night, I did this week’s Project Pastry Queen project a little early and was able to bring Mexican Chocolate Cake to go with the tacos.  In a testament to Rebecca’s recipe, the cake got more compliments than the tacos, which I’m pretty sure is a first!

The cake is light in texture but rich in flavor and the glaze is…well, it’s the icing on the cake.  Except for the little problem I had with the glaze seizing up on me (turning super gritty to the point of no return-it was my fault for having the heat on too high) and having to start over on it, this cake is super simple and took almost no work at all.  The cinnamon in the batter makes this a very fun and refreshing change from your normal chocolate cake and at Tacozawa I was even told from someone whose family is actually from Mexico that this cake tasted extremely authentic.  Bring it to your next gathering and it’ll be the talk of the party!

Note: I used E. Guittard Cocoa Rouge for the cocoa powder in this recipe and it was absolutely delicious.  I think it’s the reason my cake almost came out jet-black and so rich in chocolate flavor.  I highly recommend it!

Check out the other PPQers take on this recipe here and thanks, Jen, for a fantastic choice this week!

Mexican Chocolate Cake
From The Pastry Queen by Rebecca Rather

Cake

  • 1 cup unsalted butter
  • 1/2 cup unsweetened Dutch-process cocoa powder
  • 3/4 cup water
  • 2 cups sugar
  • 2 eggs
  • 1 cup buttermilk
  • 2 tablespoons vanilla extract
  • 2 cups all purpose flour
  • 1 tsp baking soda
  • 1 1/2 tsp ground cinnamon
  • 1/4 tsp salt

Glaze

  • 1 cup pecans
  • 1/2 cup unsalted butter
  • 1/4 cup milk
  • 1/2 cup high-quality cocoa powder
  • 2 cups sifted powdered sugar (sift first, then measure the 2 cups of sugar out)
  • 1 tablespoon vanilla extract
  • 1/4 tsp salt
  1. Heat the oven to 350 degrees and heavily grease a 9″ tube pan or a Bundt pan (this was my first foray into owning a Bundt pan and, as you can see, I went for the vintage shaped pan instead of the more traditional shape).  If you don’t have baking non-stick spray, use butter and then sprinkle the inside with flour, tapping the excess out of the pan.
  2. In a large saucepan, melt the butter over medium-low heat and whisk in the cocoa until smooth.  Add the water to the cocoa butter mixture and whisk until smooth, then turn the burner off.
  3. Add the sugar, eggs, buttermilk and vanilla to the cocoa mixture and whisk until ingredients are thoroughly incorporated.
  4. Add the flour, baking soda, cinnamon and salt all at once and whisk until everything is, again, fully incorporated (Rebecca warns it’s okay if there are some small lumps, but I didn’t encounter any).
  5. Pour the batter into the prepared pan and slide it in the oven to bake for 40-45 minutes, until firm yet springy to the touch and the edges start to pull slightly away from the pan.
  6. Take the pan out (leave the oven on) and let the cake cool for 20 minutes in the pan, then invert the cake on to a wire rack to finish cooling.
  7. Once you take the pan out of the oven, spread the pecans out on a baking sheet and toast them in the oven for 5-7 minutes.  Let them cool for a few minutes and then coarsely chop them.  I like lots of big pecan pieces so I didn’t chop them up too much.
  8. Melt the butter over low heat in a medium saucepan, then turn off the burner.
  9. Add the milk, cocoa and powdered  sugar and whisk until glossy.  (Warning:  My glaze seized and turned super gritty at this point so that it was completely unusable, and all of this happened super fast.  I think it was because I accidentally overheated it, which is why I had you turn off the heat in the last step.)
  10. Whisk the vanilla, salt and pecans into the glaze.
  11. Carefully move the cake onto your desired serving dish and pour the warm glaze over the top of the cake.  Enjoy-and be sure to have a glass of milk on hand!

Baked Hot Chocolate

Friday, February 17, 2012


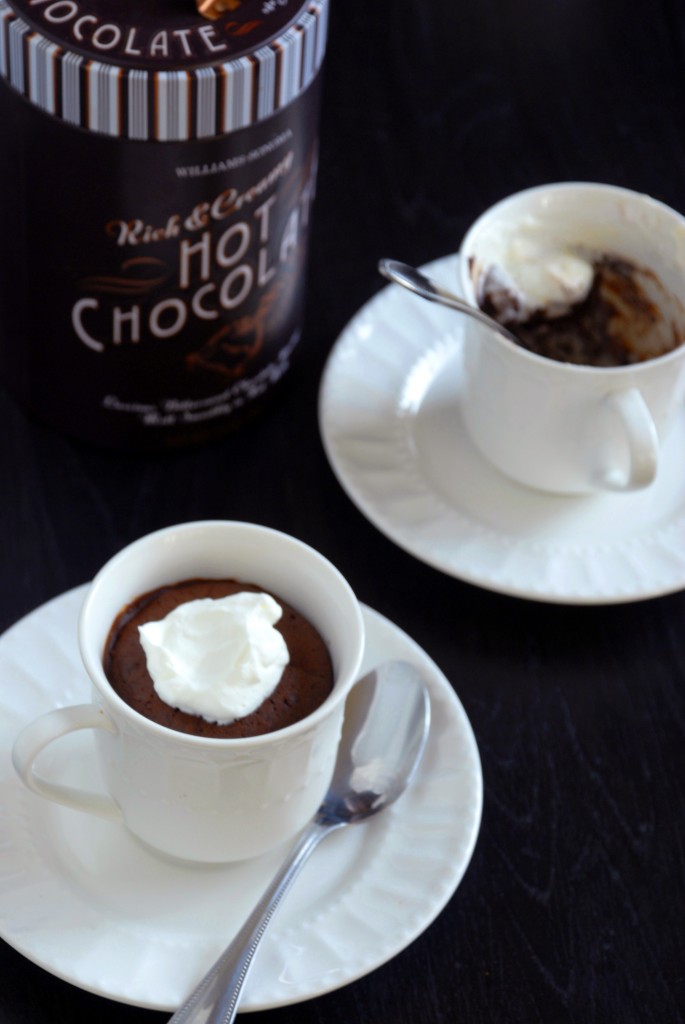
We’ve had a bit of a cold snap the last few days here in SoCal and I found myself craving hot chocolate-but not the wimpy hot chocolate that comes as packaged dust that you dump out of an envelope.  No, I wanted rich, thick, almost-could-eat-it-with-a-spoon hot chocolate.  Wouldn’t you know, that with just the right recipe you CAN eat hot chocolate with a spoon?

This dessert is baked just long enough so that it forms a bit of a cake-y crust on top, a layer of fudgy pudding like chocolate underneath that, and then at the bottom is molten hot chocolate just waiting to be spooned up out of the cup.  You can certainly toast a marshmallow and put it on top, but this dessert is so rich, you’re going to want a little bit of lightly sweetened whipped cream instead to cut that richness.

Enjoy in front of a fire and with a good book!

Baked Hot Chocolate
Adapted from The Wall Street Journal
Serves 4

  • 8oz high-quality semi-sweet chocolate, chopped
  • 6 tablespoons unsalted butter, cubed
  • 4 eggs
  • 1/4 cup granulated sugar
  • topping -whipped cream or marshmallows
  1. Heat oven to 350 degrees.
  2. Heat a large pot of water until simmering; place a large metal mixing bowl on top of the pot and dump in the chocolate and butter.  Stir every so often until the mixture is completely melted and smooth.  Set the bowl aside and leave pot of water simmering.
  3. In a medium metal mixing bowl, set it on top of the large large pot of water; add the eggs and sugar and mix until thoroughly combined.  Heat it over the simmering water until it’s warm to the touch (I literally just stuck my finger into the mixture and said, “yup, that’s warm” and called it good).  Remove the bowl from the pot of simmering water and turn the burner under the water off, since you won’t need it anymore.
  4. With an electric mixer, beat the egg mixture for 5 full minutes.  It should be very light in color and very frothy by the time you’re done.
  5. Fold the egg mixture into the chocolate.  It may take a little longer than normally folding in egg whites takes, but you’ll see the egg mixture start to tint brown with the chocolate and you’ll know you’re making progress.  Make sure you scrape the bottom of the bowl thoroughly so you don’t miss any of the chocolate-y goodness.
  6. When the eggs are fully incorporated into the chocolate, spoon the mixture evenly into 4 oven proof coffee cups.
  7. Arrange the coffee cups in a large roasting pan and fill the pan with water until it reaches 1/2 way up the sides of the coffee cups.
  8. Bake for 12-15 minute, until the tops are just baked into a cake like crust.  I know I overbaked mine (I did mine for 20 minutes) a bit, and I think in this case it’s better to err on the less time rather than more time in the oven.
  9. When done baking, remove the pan from the oven and place the cups on a wire cooling rack until you can pick the cups up with your hand and not burn yourself.
  10. Serve while the cake is still warm, with the topping of your choice.  Enjoy!

Creamy Chicken Taquitos

Wednesday, February 15, 2012

 baked creamy chicken taquitos

I don’t like to lie to you, my dear readers, so I will neither confirm, nor deny, that the only real experience I had with taquitos before making this recipe was from the 7-11 gas station in Georgia.

I will also put out there that I prefer baking to cooking (I’m sure that’s clear to most of you, by now, though) because too often you put the time, money and effort into making a nice dinner and then it’s…you know…good but would have been better if you’d just ordered it at a restaurant where they use 4 times as much butter and you wouldn’t have to clean up the grease splattered kitchen afterwards.

I can safely say that this dinner does not play out like the scene I just described.  No, these taquitos hit the spot in every way possible:  easy to make, easy to clean, filling, delicious, and absolutely satisfying in all manners of the word.  It’s even baked instead of fried like restaurant taquitos so you’ve kicked up the health factor a notch and it’s a great new fun alternative to the typical taco night (not that I would EVER turn down a taco).

Now the only question we were trying to figure out was…do you eat these with a knife and fork or pick them up with your fingers?

Creamy Chicken Taquitos
Makes 12-14, depending on how generous you are with the filling
Adapted from Annie’s Eats, originally from Our Best Bites

  • 3 oz. cream cheese, softened
  • ¼ cup salsa
  • 4 oz can of diced green chiles
  • freshly squeezed lime juice from 1/2 lime
  • 1 tsp. chili powder
  • ½ tsp. cumin
  • ½ tsp. onion powder
  • 3 cloves garlic, minced or garlic pressed
  • 3 tbsp. chopped cilantro
  • 2-3 green onions, chopped
  • 2 cups shredded cooked chicken (I just grabbed an already roasted chicken from the grocery deli and shredded it at home)
  • 1 cup shredded Mexican cheese
  • 10-14 flour tortillas - size 6″ (packages at my market came in either 10 or 16)
  • Cooking spray
  • Kosher salt
  1. Heat oven to 425 degrees and line a baking sheet with parchment paper
  2. Be sure to soften the cream cheese prior to starting the rest of the recipe-30 seconds or so in the microwave did the trick for me.
  3. In a large bowl, mix all of the ingredients, except for the tortillas, spray and salt, and stir until they’re all thoroughly combined.
  4. Heat the stack of tortillas you’re going to use for 30 seconds in the microwave so that they’re soft and pliable (if you find you’re one short and need to heat an extra tortilla, don’t do it by itself for a full 30 seconds!  I killed a tortilla that way, just do it for maybe 10 seconds).
  5. Lay the tortilla flat and spoon 2-3 tablespoons of filling in a straight line on the tortilla-most people say to do it down the center, but I did it a bit closer to the edge I was rolling up so that I could roll the tortilla very tightly.
  6. Once it’s rolled up, place the filled tortilla on the prepared baking sheet with the edge of the tortilla hidden on the bottom so that it doesn’t unroll.  Press gently to flatten it just enough so that it doesn’t roll around on the baking sheet.  You can arrange these pretty close together-I did mine about an inch apart so I could fit all of them on my oversized cookie sheet but still have enough room for air to circulate around them.
  7. Once all of the tortillas are rolled up and placed on the baking sheet, lightly spray them with cooking spray and sprinkle kosher salt over the tops of them.
  8. Bake for 15-20 minutes until golden brown on the edges.
  9. These are great for freezing for future meals!  Annie notes: “To freeze before baking, transfer the baking sheet to the freezer and chill the assembled taquitos 30-60 minutes.  Transfer to a freezer-safe container or plastic bag.  To bake from the freezer, simply add a few additional minutes to the original baking time, until the filling is warmed through.
  10. Serve hot from the oven with extra salsa, hot sauce, and sour cream.  Enjoy!

Lemon Spongette Cakes

Monday, February 13, 2012

With Valentine’s Day on Tuesday, the internet has been flooded with all things either Red Velvet or triple rich chocolate.  Allegedly, before kissing their loved one, people would like for their tongues to be stained red or brown.  Being a fan of neither red velvet OR triple rich chocolate (or having my tongue stained weird colors before planting a kiss on The Boyfriend for that matter), I’m posting what will hopefully be an easy yet elegant alternative to the traditional V-day desserts.

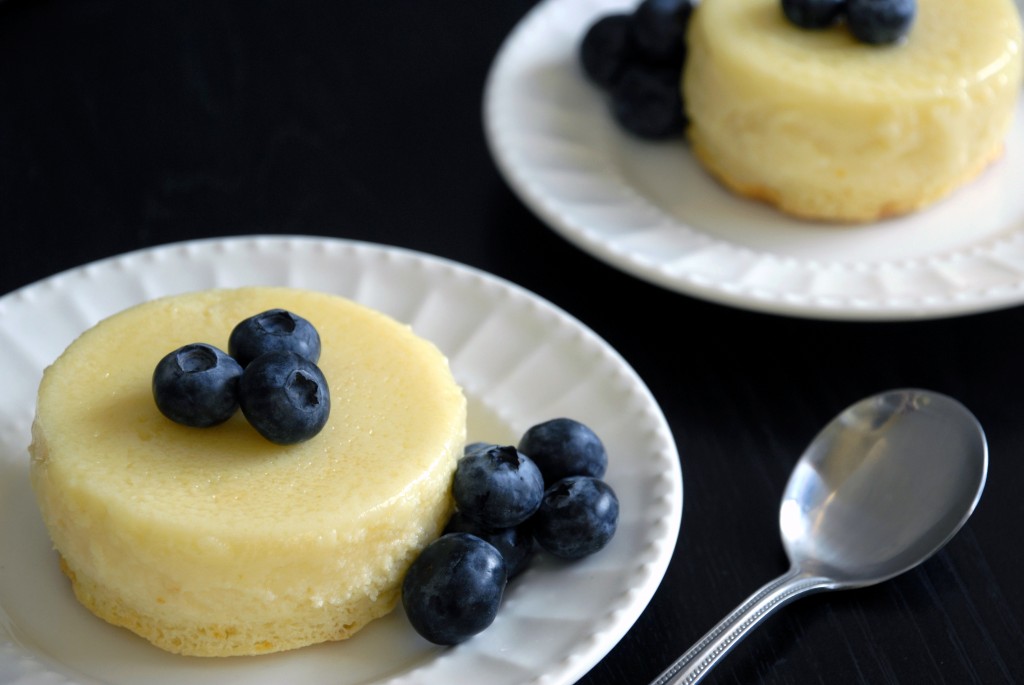
I truly love these little desserts: they’re light sponge cake and smooth custard all in one; they’re a delicious light lemon flavor and made with ingredients you likely already have at home except perhaps the lemon.  I want to say the only thing they don’t have going for them is that they have to chill for a few hours after you bake them so it’s not the fastest dessert, but truthfully that’s a good thing, because it means that, instead of rushing around to finish making dessert after your fancy dinner, you’ve got dessert already waiting in the fridge for you to enjoy.  You can calmly pull it out, plate it and present it, which really gives you points in the “I’m Martha Stewart in the kitchen” department.

Lemon Spongette Cakes
Makes 4 small cakes
Adapted from The Kitchn

  • 2 eggs, yolks and whites separated
  • 3/4 cup whole milk
  • 1 1/2 tablespoons unsalted butter, softened
  • 1/2 cup sugar
  • 2 tablespoons flour
  • juice of 1/2 of one lemon (about 1 1/4 tablespoons)
  • zest of 1/2 of one large lemon
  • pinch of salt
  1. Heat the oven to 350 degrees and spray 4 ramekins (approx 6 oz and/or 3″ wide) with non-stick spray.
  2. In a small metal bowl, beat the egg whites on low first for about a minute, then on high until stiff peaks form and set aside to use later.
  3. In another small bowl (or as I did, just straight in the big glass measuring cup the milk was in), add the egg yolks to the milk and beat with a fork until combined.
  4. In a large bowl, beat the butter and sugar together.  Normally these would turn into a creamy smooth mixture, but that won’t happen this time since there’s so little butter.  Beat for 2-3 minutes so that the mixture is good and combined.
  5. Add the flour, lemon zest, lemon juice and salt to the butter-sugar mixture and mix until thoroughly combined.
  6. Pour the milk-egg yolk mixture into the butter-sugar-lemon mixture and beat until well combined.
  7. Fold the egg whites into the lemon batter.  Normally I would say “gently” fold the egg whites in, but I had to be a little less than gentle this time since the egg whites didn’t really want to incorporate well.  Instead, they just sort of broke up into little pieces and floated on top of the very liquid batter.  Do the best you can, being a little rougher than normal folding them in until the bits floating on top are pea sized or smaller.
  8. Using a measuring cup, scoop the batter out of the bowl and pour it evenly divided into the 4 prepared ramekins (by dipping with a measuring cup instead of just pouring out of the bowl, it ensures you get an equal batter-floating egg whites ratio).
  9. Place the ramekins into a large roasting pan and fill the pan with water about 1/2 way up the sides of the ramekins.
  10. Put the roasting pan of water and ramekins into the oven and bake for 40-45 minutes.  Instead of turning an even golden brown, mine started to turn dark brown in spots after about 35 minutes so I laid a sheet of tin foil over the top so they wouldn’t burn for the last 5-10 minutes of baking.
  11. The tops should feel a little stiff when you poke them.  After the cakes are done, pull them out of the oven and take them out of the water bath, leaving them to cool on a wire rack for 10 minutes or so.
  12. Move the ramekins to the refrigerator for 1-2 hours.
  13. When ready to serve, run a knife along the inside edge of the ramekin and flip the ramekin over.  The cake won’t just fall out-with the ramekin still upside down, I gently twisted the cake around back and forth a few times and it released from the ramekin.
  14. Place the dessert, cake side down on the plate, pudding side up.  Garnish with fruit and powdered sugar and enjoy!

Baked Crispy Asparagus with Blue Cheese Dipping Sauce

Friday, February 10, 2012

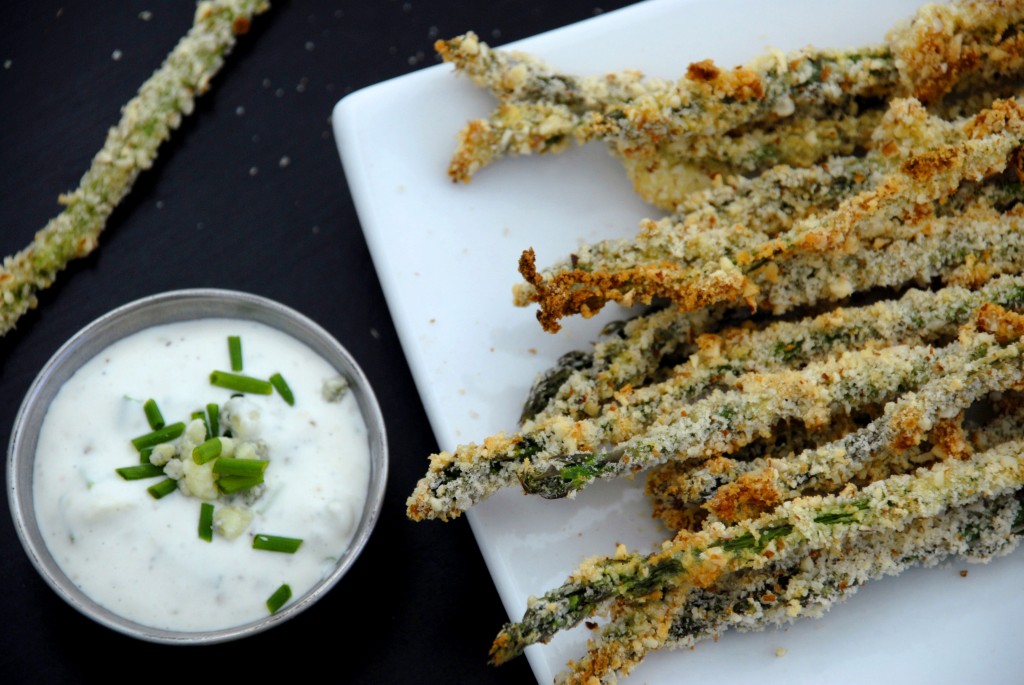
baked crispy asparagus fries

I’m a pretty picky eater.  And because of that, when I buy certain ingredients for recipes, I buy them in the smallest amount, knowing sadly that some of it will go to waste.  I try to encourage The Roommate and The Boyfriend to eat up, but to no avail.  So here I was with a partial container of sour cream, a partial carton of buttermilk, a partial package of chives, and a partial container of blue cheese crumbles in the fridge.  I also bought beautiful asparagus yesterday, spur of the moment, because whereas a pound is normally around $5, it was on sale for 99 cents!  (I had to explain to my East Coaster friends that it wasn’t discounted because it was gross, but that So Cal is having a lovely warm mild winter so asparagus is growing early like crazy and they’re trying to sell it as fast as they can.)

So here I am browsing Pinterest and I see a pin for crispy asparagus with dipping sauces.  Curious, I scan the recipe and I start thinking, “…buttermilk, I have that!…sour cream, I have that!…blue cheese, I have that!” and so all of that, paired with the fact that this beautiful asparagus needed to be eaten, I knew exactly what I was making when I got home.

and now I can say, this is a phenomenal recipe!  I have never had so much fun eating asparagus.  Roommate, Boyfriend, and I couldn’t stop eating them and I honestly can’t believe that ingredients I normally don’t like (mayo, sour cream, etc…notice a white gloppy pattern?) all come together to make such a delicious sauce.  Bonus: the asparagus is baked so it’s super healthy-and let’s just leave it at that and not think about whether the dipping sauce is healthy or not, shall we?


Baked Crispy Asparagus with Blue Cheese Dipping Sauce
Adapted from SpoonForkBacon
Makes 1 lb of asparagus and almost 1 cup of dipping sauce

Asparagus

  • 1 lb of thin asparagus spears, tough ends removed
  • 1 cup almonds
  • 2 cups panko bread crumbs
  • 2/3 cup flour
  • 4 eggs
  • cooking spray

Dipping Sauce

  • 1/4 cup light mayonnaise
  • 1/4 cup light sour cream
  • 1/4 cup crumbled blue cheese
  • 2 tablespoons milk
  • 1 1/2 tablespoons chives, chopped
  • 1 teaspoon fresh lemon juice
  • salt and pepper to taste
  1. Heat oven to 375 degrees and cover a baking sheet with parchment paper.
  2. In a food processor, process the almonds and panko bread crumbs until finely ground and combined (I used whole almonds because they were on sale, so I processed them up first for a few seconds before adding the panko crumbs.  If you buy pre-sliced almonds, just throw the panko and almonds all in at once).
  3. In three separate dishes, put the flour in one dish, put half the almond-panko mixture into another and 2 of the eggs, beat with a fork, into the third.  I started with just half the almond-panko mixture and half of the eggs in the pans because the panko gets a little clumpy when the egg drips in it and then the egg gets a little clumpy when the panko falls in it.  Basically, you need a half-time to rinse the pans out and start fresh.
  4. Roll the asparagus in the flour, dip it into the egg, then dip it into the almond-panko mixture and lay it in rows on the cookie sheet.
  5. Once all the asparagus is rolled, dipped and dipped again, lightly spray the asparagus on the cookie sheet with cooking spray and then put it in the oven to bake for about 15 minutes until golden brown.
  6. While the asparagus is baking, put all the ingredients for the dipping sauce into a small bowl and mix until thoroughly combined.
  7. Serve the asparagus hot and dipping sauce cold and enjoy!

Valentine’s Peanut Butter Kisses

Wednesday, February 8, 2012

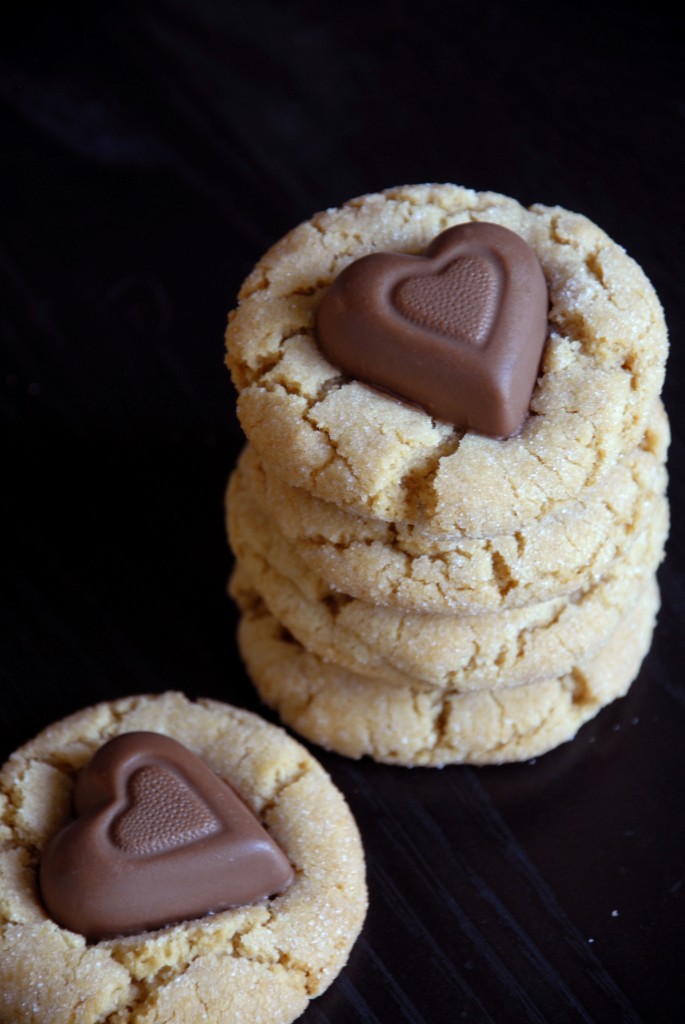
I came across this cute little twist on these classic peanut butter cookies on Pinterest and just could. not. resist.  I’ve never made these cookies, nor was it a recipe my mom really made at home as I was growing up; I only remember them from way back in elementary school as something that would show up on birthdays or bake sales, but when I saw these little hearts, I knew exactly what I had to make for Valentine’s Day this year.

They’re a super simple cookie to throw together and I can even confirm that I made a very minimal mess in the kitchen, a rarity for me.  If it’s not Valentine’s Day and you can’t find chocolate hearts, you can of course fall back on the traditional Hershey’s Kisses instead.

I know leaving cookies out for Santa is tradition…but maybe we should try leaving these out for Cupid for a little extra love this year?

Valentine’s Peanut Butter Kisses
Makes 4-5 dozen cookies
Adapted from chinchymork

  • 2 2/3 cups flour
  • 2 teaspoons baking soda
  • 1 teaspoon salt
  • 2/3 cup creamy peanut butter
  • 1 cup butter, room temperature
  • 1 cup sugar
  • 1 cup brown sugar, firmly packed
  • 2 eggs
  • 2 teaspoons vanilla extract
  • 5 dozen chocolate heart candies, unwrapped
  • additional sugar for rolling
  1. Preheat the oven to 375 degrees and make sure that butter is pulled out of the fridge to soften.
  2. In a large bowl, mix the flour, baking soda and salt.
  3. Add the butter and peanut butter to the flour mixture and, with an electric mixer, beat the mixture until it is a smooth, cohesive dough-start off slow so that the flour doesn’t fly everywhere, then gradually kick up the speed to medium.  If you’ve made icing with butter and powdered sugar, you know that it turns crumbly first and then very smooth very quickly; this dough doesn’t go as quickly and you definitely need to beat it for a good few minutes for it to turn smooth-I was actually getting worried it wouldn’t turn smooth, but I promise it does.
  4. Add the white and brown sugars and beat until thoroughly combined, about 1 minute.
  5. Add the eggs and vanilla extract, beating for a few minutes, again, until thoroughly combined.
  6. Put the extra sugar (about 1/2 cup) into a pie plate or other container.  Taking about a tablespoon of dough, roll the dough into approximately ping pong ball sized balls.  Roll the dough in the sugar so that it’s fully coated before placing it on an ungreased cookie sheet, about 2″ apart from each other.
  7. Bake the cookies for 8 minutes, then pull them out of oven and place a chocolate candy in the middle of each, pressing down so that the cookies flatten out a little bit, then return them to the oven for an additional 2 minutes.
  8. Take the cookies out and let them cool on the cookie sheet for a few minutes before carefully moving them to a cooling rack.  The chocolates will be softened on the outside, so be careful not to touch them.
  9. Let cool entirely and enjoy!

Blue Cheese & Red Potato Tart

Monday, February 6, 2012

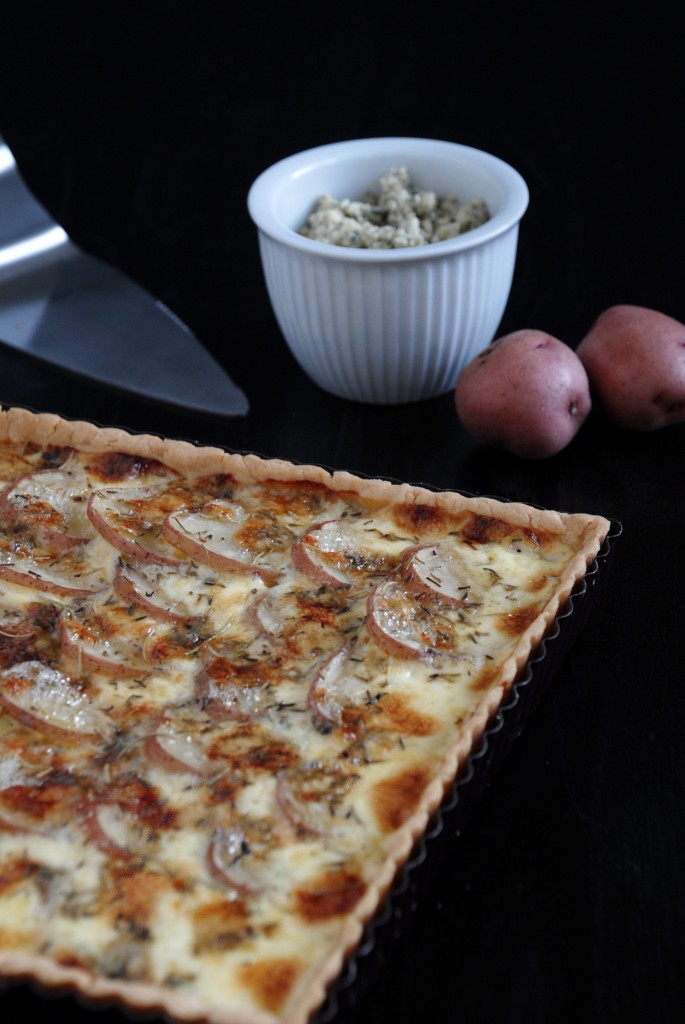
blue cheese red potato tart

I think one of the first blog recipes I saved away to cook someday was Lindsay of Love and Olive Oil’s Blue Cheese and Red Potato Tart.  It sounded so familiar yet exotic at the same time and I’m ashamed to admit that it sat in my virtual recipe box for a year and a half now.  But when some lovely red potatoes showed up in my CSA box last week I just felt it:  it was finally time to make this tart that I’ve been dreaming about for so long.

The crust turns out perfectly tender, the potatoes are creamy and the blue cheese gives just the right amount of tang.  The Boyfriend and I had this and a salad for dinner, but I bet it would be fantastic with some sausage crumbles on it and served for a brunch.

Blue Cheese & Red Potato Tart

Adapted from Love & Olive Oil (who adapted it from Smitten Kitchen who adapted it from Gourmet)

Crust:

  • 1 1/4 cups flour
  • 1 tablespoon plus 2 teaspoons cornstarch
  • 1/4 teaspoon salt
  • 6 tablespoons unsalted butter, cubed
  • 1 egg

Filling:

  • 1 lb small red potatoes, sliced into 1/4″ slices (but wait until the crust is in the fridge to slice the potatoes so they don’t turn brown!)
  • about 1/2 cup crumbled blue cheese
  • 1 cup heavy cream
  • 1 egg yolk
  • thyme & rosemary to your liking (about a teaspoon or two of both)
  • finishing sea salt for seasoning afterwards
  1. Combine the flour, cornstarch and salt in a food processor and pulse a few times to combine.
  2. Add the cubed butter to the food processor and pulse until the contents look like coarse cornmeal.
  3. Add the egg and run the processor for 1-2 minutes until the dough forms large (approx pea sized or larger) clumps.
  4. You can, at this point, either squish the dough together and roll it out with a rolling pin on a floured surface, but I just dumped the crumbs into the tart pan (a 9″ circle is best; I used a 9″ square pan) and pressed them evenly into the pan.
  5. Chill the tart pan in the refrigerator for 30 minutes.
  6. Preheat the oven to 350 and slice your potatoes into 1/4″ slices.
  7. Arrange the potato slices slightly overlapping in the crust and sprinkle the blue cheese evenly over the potatoes.
  8. In a small bowl (I did it directly into my glass liquid measuring cup) whisk the egg yolk into the heavy cream and pour it over the potatoes-since my square tart pan wasn’t as large as Lindsay’s round one was, I left about 1/2″ - 1″ of liquid in the measuring cup just to make sure it didn’t over flow.  I just made sure that the potatoes were barely covered by the cream.
  9. Sprinkle the thyme and rosemary evenly over the tart.
  10. Bake the tart until bubbling and browned, 40-50 minutes.
  11. Let the tart cool for a few minutes and enjoy!

Trailer Trash Queso

Friday, February 3, 2012

I will begin this blog post with a sincere apology to anyone I may be offending with the name that stuck to this recipe.  Namely, my Aunt Christy and Uncle John, who so lovingly shared this recipe with me years ago (actually, it was less ‘loving’ and more like “YOU’VE NEVER HAD QUESO!??!?!”) and who are certainly not trailer trash, as far as I know.

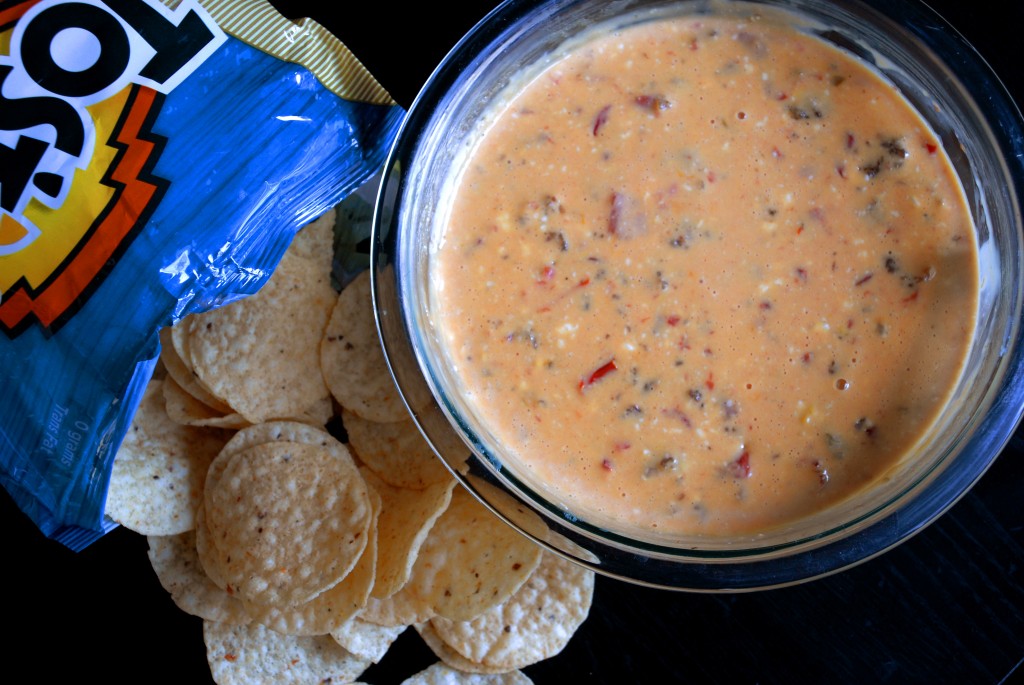
But really, this has Velveeta in it and that’s why it has become named as such- when my friends ask for my queso recipe, I have to ask in return “do you want the white queso or the trailer trash queso?”, because that was the only way I could figure to distinguish the two recipes clearly.  I have to admit: no one ever wants the white queso recipe.  This queso recipe is probably my most famous recipe of all time amongst my friends; if a friend mentions they’ve never had queso, the other friends give each other knowing looks and say “your life is about to be changed”.  I tried to get Ace to make white queso this year for the Super Bowl and her response was “…but this one has SAUSAGE“, as if I had just suggested she serve celery sticks and carrots instead.

Although I may be a traitor to the foodie blog world by sharing a recipe that has fake cheese in it and is made in the microwave, make this for your Super Bowl Party for a sure-fire hit, whether it’s a party of 20 or a party of 1 (but just know that if it’s for a party of 1, you’ll still finish the bowl because you won’t be able to stop).

Trailer Trash Queso

Makes a large bowl that will feed a good sized crowd, or a group of 4 gluttonous college girls watching Project Runway

Note: the queso will unappetizingly harden as it cools, so be ready to serve it immediately after you make it.  If you’re taking it to a friend’s house for a party, I fry the sausage at home and bring it in a tupperware so that I can easily assemble the rest of the recipe at the other location.

  • 1 tube of hot sausage
  • 2 lbs Velveeta (the large box), roughly cubed or if you’re lucky enough to find “Velveeta Mexican”, substitute that instead! (it comes only in the 1 lb boxes so you’ll need 2)
  • 1 package (8 oz) of cream cheese, roughly cubed
  • 1 can of Rotel or other brand of diced tomatoes and green chiles
  • tortilla chips
  1. Fry up the sausage, trying to chop it up into pieces as small as possible.  Once cooked through, transfer the sausage on to a thick stack of paper towels on a plate to drain (clearly the last thing you need is additional fat in this recipe).
  2. Add the Velveeta cubes, cream cheese cubes, Rotel, and sausage into a large microwave safe bowl (I try not to leave the cream cheese on top because it tends to pop).
  3. Microwave for 4 minutes, stir vigorously (yes, it will look DISGUSTING at this point), microwave for 4 more minutes and stir vigorously again.
  4. Serve with tortilla chips and be prepared to be grossed out at a) what you are putting into your body and b) how much of it you will willingly eat and crave again later.