Entries from March 30th, 2012

English Muffin Bread

Friday, March 30, 2012

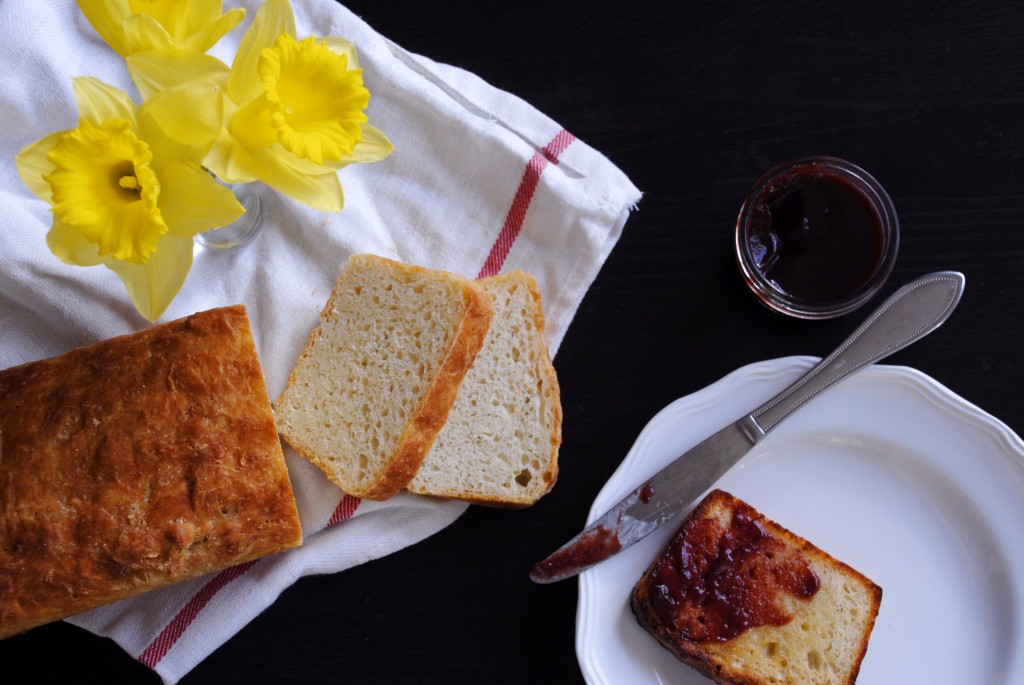
english muffin bread

A true testament to this recipe:  I made it two days ago and ever since have been desperately craving another slice.  I will admit right off, as I was wrapping up the bread after it cooled, I was thinking, “how on earth can this be good?  It just seems so dense and unappetizing…”  but the next day I sliced it and toasted it and spread it with butter and my plum jam and ohmigoodness.

It’s certainly not a light airy French bread, but what I thought was totally dense and unappealing (even after slicing it and dubiously putting it in the toaster), ended up being perfectly chewy and crispy and craggy in all the right places, just like an English muffin.  And like I said, I can’t stop craving it!  It comes together with minimal effort and barely any dirty dishes, so that’s always a plus in my book.  A nice toasted slice with fruit or honey on top would be perfect for a weekend spring morning, sitting in the sunshine and listening to the birds chatter (at least that’s how I envision a perfect morning…).

English Muffin Bread
Adapted from One Good Thing
Makes 2 loaves

  • coarse corn meal for dusting the pans
  • 2 3/4 cup warm water (105-110 degrees)
  • 1 1/2 packages rapid rise yeast
  • 1 Tablespoon salt
  • 1 1/2 Tablespoons sugar
  • 5 1/2 cups flour
  • 2 tablespoons melted butter to brush on loaves later
  1. Spray two loaf pans with non-stick baking spray and dust the insides with coarse cornmeal (just like a real English muffin!).  Shake the pan around until evenly coated as best you can get it, then dump the excess out.
  2. In a large bowl, combine all of the remaining ingredients except for the butter and mix just barely until all of the ingredients are combined.  (Jillee of One Good Thing showed a picture of her batter and it was very very sticky, much stickier than mine, so don’t worry if it’s sticky-don’t add extra flour)
  3. Divide the batter-dough between the loaf pans and use a spatula to smooth out the surface.
  4. Preheat your oven now to 350 degrees, or later depending on how long it takes for your oven to heat.  Place the loaf pans in a warmish spot in your kitchen, cover with a kitchen towel, and let the dough rise until it reaches the top of the loaf pans.  This took about an hour and 20 minutes for me.
  5. Bake the loaves for 35 minutes, brush the top of the loaves with the melted butter, and bake for another 5-10 minutes until the tops are perfectly golden brown.
  6. Take the loaves out of their pans and let them cool on a wire rack.  Resist the urge to slice and eat them now; allow them to cool 100% completely.
  7. When ready to eat, slice thickly and toast.  Top with butter, jam, honey, fruit, whatever sounds good to you, and enjoy!

Spicy Butter-Steamed Ginger Halibut

Wednesday, March 28, 2012

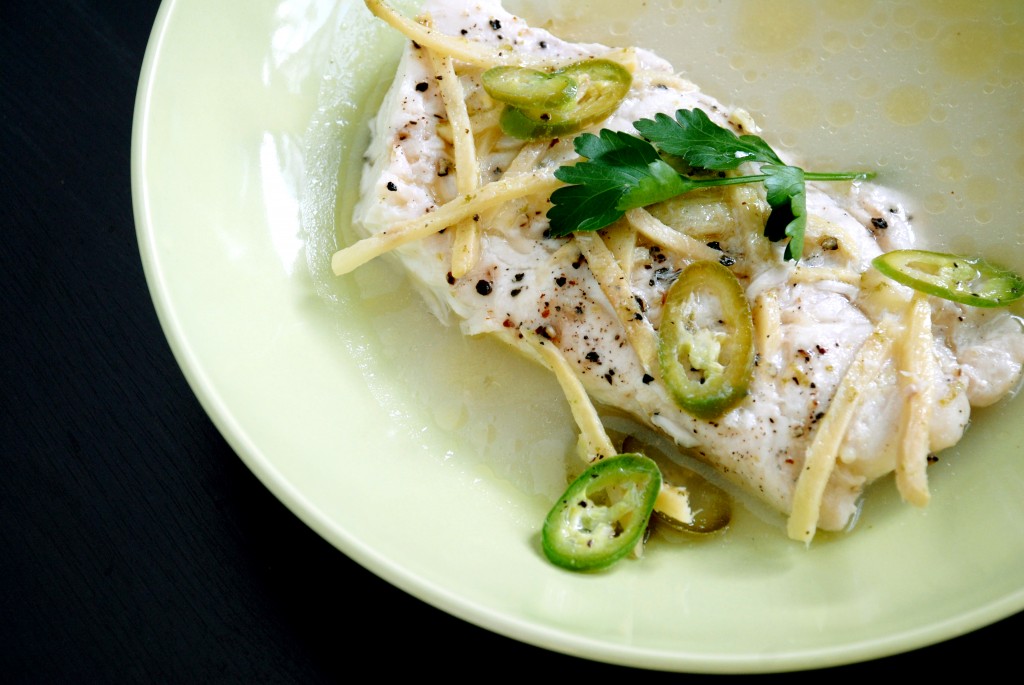
butter steamed ginger halibut

Clearly I’ve been on a bit of an Asian flavors inspired kick lately, but oh what a delicious kick it is-and this fish certainly doesn’t disappoint in the tasty department.  As soon as I saw this in Food & Wine, I knew I wanted to make it.  It has a myriad of different flavors and, with the exception of preparing the ingredients, it literally takes 5 minutes to cook the juiciest, moistest fish I’ve ever had at home.

The recipe did call for sea bass, but I couldn’t handle the $26.99 a pound for sea bass at my local fish market, so I went for halibut which is similar in flavor and texture.  You create a makeshift steamer for your fish with a pie plate so that you don’t lose the juices.  What results is tender fish with ginger and serrano chile notes in a buttery luscious broth that I’m looking forward to making again very soon!

Spicy Butter-Steamed Ginger Halibut
Adapted from Food & Wine

  • four 7 oz halibut fillets
  • 1 1/2″ piece of ginger, peeled and cut into matchsticks
  • 1 serrano chile, sliced thin
  • 1 garlic clove, minced
  • zest and juice of 1 lime
  • salt and pepper
  • 4 Tablespoons of butter, in small pieces
  1. Before starting, find a glass or ceramic pie plate that will fit inside a large, deep skillet (I suggest this now because I was scrambling to find this when I was half way done with the recipe).  2 pieces of halibut will fit per pie plate, so I used two pie plates and switched them out when the first was done cooking.  Make 3 smalls aluminum balls about the size of golf balls, flatten them slightly and put them in the skillet. Fill the skillet with an inch or two of water and turn the heat on so that it will boil while you’re preparing the fish.
  2. In a small bowl, mix the ginger sticks, chile slices, minced garlic, and lime zest together.
  3. Arrange the pieces of fish in the pie plates (skin side up, if there is skin) and cut 4 shallow slashes in the top of each piece of fish.
  4. Sprinkle the ginger mixture evenly over the top of the fish and season the fish with salt and pepper.
  5. Dot the surface of the fish with the butter and drizzle the lime juice evenly over the fish.
  6. Carefully place the pie plate in the skillet, balanced on the aluminum balls, and cover the skillet tightly with a lid.
  7. Let the fish steam for 5 minutes and then pull it out of the steamer.
  8. Serve immediately and be sure to pour the buttery broth over the fish (my favorite part) and enjoy!

Note: the chile is very spicy, so be careful when handling and also when eating.  Get rid of the seeds if you want to reduce the heat a bit.

Vanilla Honey Caramel Corn

Monday, March 26, 2012

honey vanilla bean caramel corn

Popcorn is, without a doubt, one of my favorite treats in all the world.  When we get within 100 feet of a movie theater, The Boyfriend has to take me by the arm and drag me in the opposite direction just so we can carry on with whatever it was we were doing before I smelled the popcorn.  If movie theater popcorn is my first love, then caramel popcorn is my secret mistress (clearly I just finished watching MadMen).  I usually go for the salty, buttery crunchy deliciousness of normal popcorn, but when I get that off craving for something sweet, caramel corn is one of the first things I turn to.

This recipe is special, though, because it’s not your typical coated-in-corn-syrup-just-so-you-get-a-sugar-fix caramel popcorn, but instead something much more sophisticated.  The flavors here are complex-honey, vanilla, and just enough burnt sugar to remind you there’s still caramel here.  In a word: phenomenal.  Making popcorn at home is much simpler than most people realize, so I encourage you to give it a shot; turning it into this deliciously coated popcorn is just a few extra steps.  I promise, you’ll think it’s worth it when you’re munching away and are surprised to find it all gone in minutes.

Vanilla Honey Caramel Popcorn
Adapted from Eat the Love’s amazing Wordless Recipe

  • 1 Tablespoon oil
  • 1/3 cup popcorn kernels
  • 1 teaspoon salt
  • 1/2 cup honey
  • 1 teaspoon vanilla bean paste (extract will do, as well, but it’s fun to see the beans on the popcorn!)
  • 1/4 cup heavy cream
  • 2 Tablespoons butter
  1. Heat the oven to 300 degrees.
  2. In a large pot, add the oil and 3-4 popcorn kernels.  Once those kernels pop, you know the oil is hot enough; dump the 1/3 cup of kernels into the pot and put the lid on the pot.
  3. Immediately pull the pot off the heat, count to 30 seconds, shaking the kernels around in the pot every once in a while, then return the pot to the heat.  The popcorn will begin to pop very shortly-make sure the lid is tilted ever so slightly so that steam can escape but not so much that popcorn flies out!
  4. Once most of the kernels are done popping, turn off the heat and dump the popped popcorn into a large mixing bowl.  Sprinkle with the salt, and set aside.
  5. In a medium saucepan, add the honey, vanilla, cream, and butter.  Using a candy thermometer, heat the mixture to 245-250 degrees (the Firm Ball stage if you’re a candy maker).  While it’s heating, line a baking sheet with parchment paper.
  6. Once it’s reached the right temperature, pour the mixture over the popcorn and toss until the popcorn is evenly coated.
  7. Spread the popcorn over the parchment covered baking sheet in an even layer and put it in the oven for 15 minutes.
  8. Take the popcorn out and let the baking sheet cool on a wire cooling rack.  You won’t be able to resist taking a nibble as soon as its out of the oven, and I can warn you now that it will be soft and not appealing at all.  As it cools it will harden into the crunchy deliciousness you expect.
  9. Once it cools, break the popcorn up, if it cooled into clumps, and serve.  Enjoy!

Note: I made this recipe two days ahead of time for a weekend get-away treat and, just my luck, we had a rainstorm and the humidity went through the roof.  I watched sadly as my popcorn got progressively soggier and soggier.  Luckily, all it took was a pop back in the oven for 15 minutes at 300 degrees and it crisped right back up again!

Tres Leches Cake

Friday, March 23, 2012

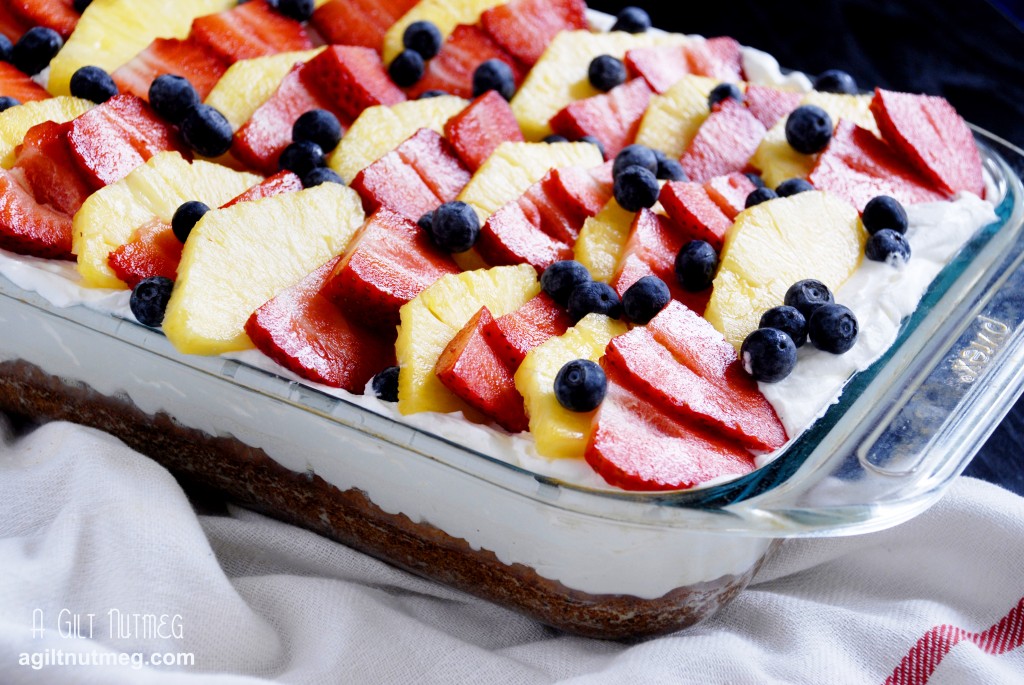
tres leches cake

When I asked my friend Anna what cake she wanted for her birthday last week, I didn’t know what to expect.  I think, at least, I had expected a request that I had experience in making, so when she immediately asked for a Tres Leches Cake, I knew two things: a) I had never made a Tres Leches Cake and b) you can’t let the Birthday Girl down on her birthday.  So off I went in the name of research.  A coworker mentioned she didn’t like Tres Leches Cake because it was too mushy; I made a mental note to make sure my cake was creamy, but not cake mush.  Anna had also requested fresh fruit on top, so I tried to do some research into what fruit is traditionally used.  The Pioneer Woman said maraschino cherry, but Anna (and Martha Stewart) said any sort of fresh fruit is the way to go, so I found fruit that would not only taste good together but also look nice with lots of vibrant colors-it was her birthday, after all, and she deserved a beautiful cake.

Wouldn’t you know, despite it being my first time making it, everyone loved it!  I’m so pleased that my first Tres Leches was a success and now I’m looking forward to trying other recipes for Tres Leches, just to see how they vary.  This one, courtesy of Martha Stewart, was an eggy sponge cake.  The milks it was soaked in added a creaminess that lingered on your tongue but that didn’t disintegrate the cake (so that you were definitely eating cake and not mush) and the whipped cream and fruit on top gave the cake a deceptively light, fresh feel.  One of the keys here was fresh, ripe pineapple, a flavor that went very well with the cake and had a beautiful golden yellow color.  I think a dash of cinnamon would be fun to add next time-Churro flavored Tres Leches Cake, anyone?

Tres Leches Cake
Recipe Adapted from Martha Stewart

  • 1/2 cup butter, melted and cooled, plus extra for baking dish
  • 1 1/2 cups flour
  • 1 teaspoon baking powder
  • 1/2 teaspoon coarse salt
  • 5 large eggs
  • 1 cup sugar
  • 1 teaspoon vanilla extract
  • 1 can (14 oz) sweetened condensed milk
  • 1 can (12 oz) evaporated milk
  • 1 cup heavy cream (for cake)
  • 2 cups heavy cream (for whipping later to top cake)
  • sliced fruit for topping; I used fresh pineapple, strawberries and blueberries
  1. Heat the oven to 350 degrees.  Butter a 9×13″ glass baking dish and set aside.
  2. In a medium bowl, mix together flour, baking powder and salt.
  3. In a large bowl, beat together the eggs and sugar for a total of 4 minutes; the mixture should be very light in color and very thick.  Add the vanilla and beat until incorporated.
  4. With the mixer on low so your flour doesn’t fly everywhere, add the flour in a little at a time and continue mixing just until the flour is incorporated.
  5. With a spatula, gently fold in the melted and cooled butter.
  6. Pour the batter into the prepared baking dish and bake it in the oven for 30-35 minutes, until evenly golden brown on top.  (Martha warns that if you are using a metal baking dish, the cake will be done in half the time, so keep an eye on it.)
  7. Immediately after taking the cake out of the oven, whisk together the condensed milk, evaporated milk, and 1 cup of heavy cream in a medium bowl.  Take a fork and stab the warm cake repeatedly all over the surface.  Slowly pour the milk mixture over the cake.  It will absorb some of it right away, but plenty will pool up around the edges of the baking dish- have patience!  It will all get soaked up into the cake.
  8. Let the cake finish cooling and in the meantime, whip the remaining 2 cups of heavy cream until stiff peaks form.  Spread the whipped cream over the cooled cake.
  9. Decorate with the sliced fruit and enjoy!  I normally avoid putting baked cakes in the fridge as it dries them out and effects flavor, but this one is in no danger of drying out, plus it’s soaked through with cream and milk, so be sure to keep it in the fridge until you’re ready to eat it.

Spicy Cold Sesame Noodles

Wednesday, March 21, 2012

spicy sesame noodles

Looking for something with a certain flair for dinner, I felt like every recipe I found that night was boring until I came across these noodles.  They’re exotic, easy, and there are a ton of leftovers!  You may have to go to a slightly different section of your supermarket to find sesame oil, but I promise it’s there.  The only problem is that you have to make it the night before because it needs to sit in the fridge overnight, but its worth the wait.

This recipe originally has peanuts in it, hence the Thai label on the A Small Snippet blog.  I find I don’t tend to like Thai dishes that have peanuts in them, which is why you don’t see them in the photo above.  They do add an extra crunch, however, so if you like peanuts then go for it.  The spice level is adjustable and I loved strange tingle the heat left on my lips in contrast to the cold noodles.  Using whole wheat pasta adds a great dimension of flavor and I secretly can’t deny anything with sesame seeds-that goes all the way back to being a little girl and getting excited when we went to Burger King instead of McDonalds because it meant that I could pick the sesame seeds off the Burger King bun and eat them one at a time.  I admit that eating these noodles cold sounded a little strange, but it’s definitely the way to go and I happily ate these for days after!

Spicy Cold Sesame Noodles

Adapted from A Small Snippet

  • 1 lb box of whole wheat spaghetti noodles
  • 1 - 2 Tablespoons red pepper flakes (I used 1 1/2 tablespoons and it was really pretty spicy.  Adjust to your tastes)
  • 1/4 cup canola oil
  • 1/2 cup sesame oil
  • 6 Tablespoons honey
  • 6 Tablespoons soy sauce
  • Green onions, green part sliced on the bias (approx one onion per serving)
  • Shredded carrot (mine are pre-shredded from Trader Joes)
  • Sesame seeds (I bought just enough for the recipe on the super cheap from the bulk aisle at my local co-op)
  • Peanuts
  • Cilantro
  1.  In a small saucepan, heat the canola oil, sesame oil and red pepper flakes.  Once the oil is heated, leave the oil and flakes on medium heat for about 5 minutes.  When I made it, the flakes looked (and smelled) slightly burned, but there was no burned flavor (I also had the heat a little high).
  2. In the meantime, start the pasta boiling.  You definitely want cook the pasta just until al dente (slightly hard in the middle still), because overcooked noodles will just turn mushy later.  Once the pasta is done, drain well.
  3. After the oil has simmered with the flakes for a little while, pour the oil through a sieve into a bowl to strain out the flakes.  Discard flakes and whisk the honey and soy sauce into the bowl of oil.
  4. Put the noodles into a large bowl (preferably one you can store them in the fridge in with a lid) and pour the oil mixture over the top of the noodles.  Toss until the noodles are well coated in the mixture.
  5. Put the noodles in the covered bowl in the fridge overnight so that the flavors have a chance to meld.
  6. When ready to serve, sprinkle the sliced green onions, sesame seeds, peanuts and cilantro over the top of the noodles and enjoy!

Tropical Carrot Cake with Coconut Cream Cheese Frosting

Monday, March 19, 2012

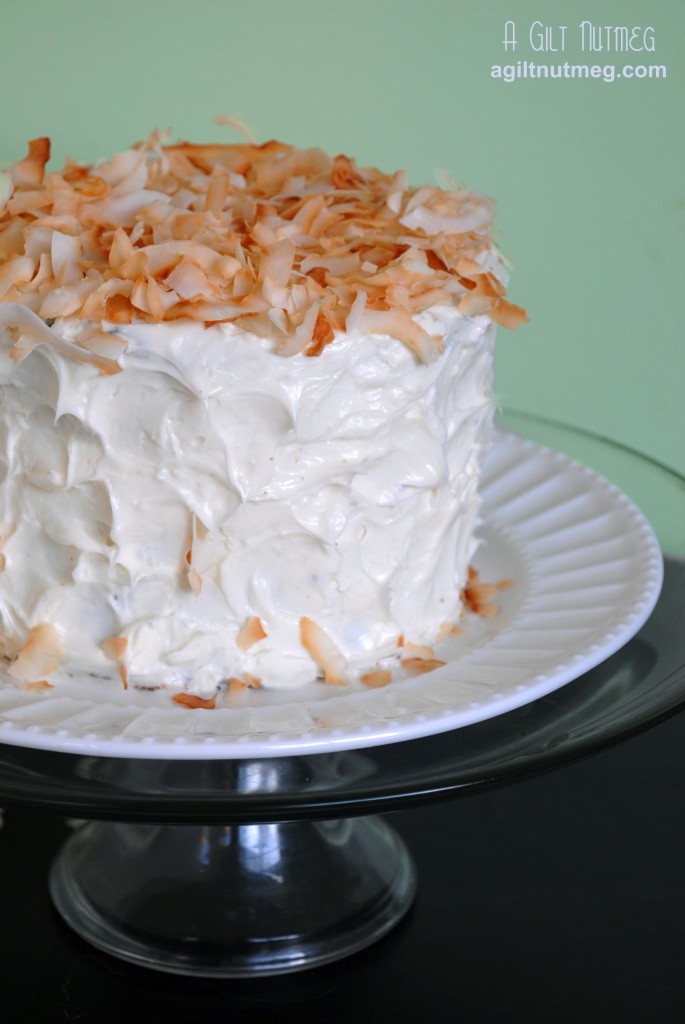
tropical carrot cake

In my house, carrot cake and I have a very notorious love/hate relationship and it’s exactly this love/hate relationship that made me choose this recipe for Project Pastry Queen this week.  Love because while I certainly enjoy carrot cake’s spicy, moistness, The Boyfriend LOVES carrot cake and things are always more fun to make when you know the person receiving it is going to love it.  Hate because I have never found a carrot cake that works out according to the recipe.  Long story short: no matter what carrot cake recipe I try (even Cooks Illustrated’s recipe!), the bake time for me is always almost double what the instructions call for.  Pastry Queen’s recipe is no different.  (I might add that this phenomenon only happens to me with carrot cake-my oven bakes everything else exactly according to the instructions!)  I let the carrot cake bake longer than the suggested time, took it out to cool when I thought it was done and cut into it, found it was still cake batter in the middle, and had to put it back in the oven.  I thought I had ruined the cake and went to bed very angry that night, but woke up the next morning, tasted the cake, and to my delight (maybe just relief) realized that it turned out just fine.

That all said, this is one outstanding cake.  Truly it is!  Instead of just a spice cake with flecks of orange in it, this is a cake packed with ingredients-pineapple, coconut flakes and macadamia nuts make this one incredible cake with a very tropical flair.  There’s even cream of coconut in the frosting.  Despite baking for so long, the cake didn’t dry out at all.  And to amp it up just a little more, I added some toasted shaved coconut to the top of the cake as well.  I think that, now that I’ve figured out to just leave the cake in the oven for as long as humanely possible, I’ve finally found a carrot cake recipe that I can stand behind!  Check out the other PPQer’s takes on the recipe here.

Notes: The cake above is a half recipe, baked in two 6″ cake pans, but was frosted with a full recipe of frosting.  If you make a full recipe of cake (which, in true Pastry Queen style, makes a BIG cake), I suggest doubling your frosting recipe.  I found the shaved coconut at my local co-op: they were selling a small package of it on the shelf next to the other coconut products for $3.95, but I found shaved coconut in their bulk aisle and filled a giant bag, twice as much as I needed, for 60 cents.  I’ve learned my lesson in creative shopping and deal hunting!

Tropical Carrot Cake with Coconut Cream Cheese Frosting
Adapted from The Pastry Queen by Rebecca Rather

Carrot Cake

  • 1 cup macadamia nuts
  • 3 cups flour
  • 3 cups sugar
  • 1 tablespoon baking soda
  • 1 teaspoon salt
  • 1 tablespoon cinnamon (I doubled this in my recipe)
  • 1/2 teaspoon nutmeg (I doubled this in my recipe)
  • 1 1/2 cups sweetened shredded coconut
  • 4 large eggs
  • 2 tablespoons vanilla
  • 1 1/2 cups canola oil
  • 1 1/2 cups shredded carrots (Pre-shredded carrots from Trader Joes are a time saver!)
  • 1 1/2 cups canned pineapple pieces (I roughly chopped them into smaller bits)
  • 1/2 cup sweetened cream of coconut, such as Coco Lopez (found in the alcohol section as a drink mix-in at my grocery store)

Coconut-Cream Cheese Frosting

  • 3 packages (8 oz) cream cheese, room temperature
  • 1 1/2 cups powdered sugar
  • 1/4 cup heavy whipping cream
  • 1/4 cup sweetened cream of coconut, such as Coco Lopez
  • 1/2 teaspoon of salt


  1. Heat the oven to 350 degrees.  Spread the macadamia nuts in a single layer on a baking sheet and toast them in the oven for 7 to 9 minutes.  Leave the oven on.
  2. Evenly space your oven racks so that one is 1/3 from the bottom of the oven and the other is 1/3 up from that.
  3. Line three 9″ cake pans with circles of parchment paper  and spray with non-stick baking spray.
  4. In a large bowl, whisk together the flour, sugar, baking soda, salt, cinnamon, nutmeg, coconut and macadamia nuts.
  5. In another large bowl, whisk together the eggs, vanilla, oil, carrots, pineapple and cream of coconut.
  6. Add the wet ingredients to the dry and mix until thoroughly combined.
  7. Evenly divide the batter amongst the three cake prepared cake pans and arrange the pans in the oven so that two pans are on one rack, the third is on the other rack, and that none of the pans are directly above or below the others.
  8. Bake for 30-35 minutes (or, in my case, closer to an hour-put some tin foil over the top if it starts to darken too much, but before taking it out, make sure that the center is fully set and that a cake tester comes out clean and not sticky whatsoever.)
  9. Cool the cakes on a wire rack for 5 minutes still in their pans, then invert them and cool completely before frosting them.
  10. Beat the cream cheese and powdered sugar together in a large bowl until combined and creamy.  Add the whipping cream, cream of coconut, and salt and beat until combined and smooth.
  11. Frost the cakes according to your desire- the cake layers did sink just a little bit so I added a bit of extra frosting to make them sit evenly on each other.
  12. To make the toasted shaved coconut, set your oven on broil, spread 1-2 cups of the coconut in a single layer on a baking sheet and toast for 2 minutes, stir the coconut so that it is redistributed for even browning, and toast for another 2 minutes until golden brown.  Let cool before sprinkling it over the top of the cake.  Enjoy!

Rebecca notes: “The cake can be covered with plastic wrap and refrigerated up to 4 days.  Let it cool in the refrigerator about 1 hour before covering to ensure the frosting has hardened and will not stick to the plastic wrap”.  I can add that I hate hate hate cake in the fridge because it dries out and doesn’t taste as good, but this cake is so moist and flavorful that it was great straight from the fridge even.  If serving a whole cake to friends, though, I’d let it warm up 30 minutes or so before serving.
Chocolate Baileys Irish Cream Cheesecake

Friday, March 16, 2012

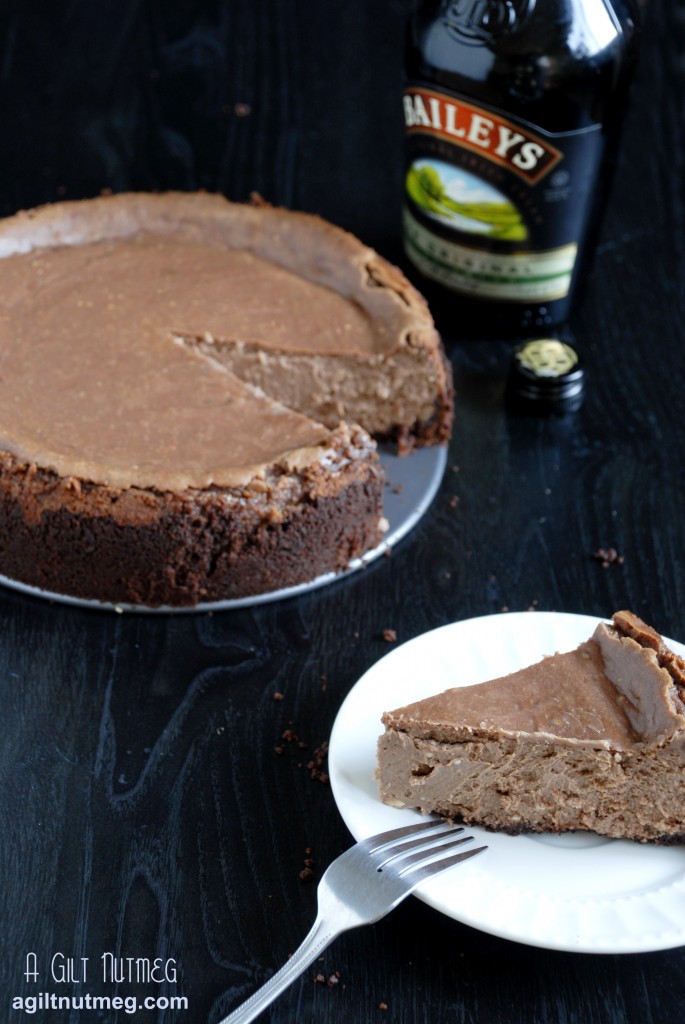
chocolate baileys irish cream cheesecake

Happy Day Before St. Patrick’s Day!  Continuing with our love for the various gifts of food and drink Ireland has shared with us over time, I give you Chocolate-Baileys Cheesecake.  Having made it, I’m pretty sure that this will not just be a St. Patrick’s Day tradition, but a year-round tradition because it’s just that good.  The chocolate and Irish Cream meld together perfectly for a dessert that will keep you sneaking forkfuls from the fridge when you think no one is looking (but since my roommate is out of town this weekend, the only one around to judge me sneaking to the fridge are the kitchen cabinets and, frankly, I don’t care what they think).

And just when you think the combination of Baileys and chocolate couldn’t get any better, there’s a touch of cinnamon thrown into the crust which just sends this dessert over the top.  The original recipe calls for chocolate wafer cookies and everyone in the comments on BHG insists that they’re easy to find, but I didn’t find a single plain chocolate cookie in my store but one: Teddy Grahams.  And I love Teddy Grahams, so I was happy to use them.  I used the 1 1/2 cups of crumbs the recipe called for, but I didn’t get the tall perfect crust like BHG does, so I suggest using the whole box of Teddy Grahams.

Happy St. Patrick’s Day, everyone!

Chocolate-Baileys Cheesecake
Adapted from Better Homes & Gardens

  • 1 box of chocolate Teddy Grahams, ground to fine crumbs
  • 7 tablespoons butter, melted
  • 1/2 teaspoon ground cinnamon
  • 3 packages (8 oz) cream cheese, softened
  • 1 container (8 oz) sour cream
  • 1 cup sugar
  • 8 oz semisweet chocolate, melted and cooled
  • 3 eggs
  • 1/2 cup Baileys Irish cream liqueur
  • 2 tablespoons heavy cream
  • 2 teaspoons vanilla
  1. Heat the oven to 325 degrees.
  2. Combine the cookie crumbs, melted butter and cinnamon in a small bowl until thoroughly combined, then press the crumbs into the bottom and up the sides of a 9″ springform pan.
  3. In a large bowl, beat the cream cheese, sour cream, sugar and chocolate together on medium speed until smooth.
  4. Add the eggs and beat on low-medium until just combined.
  5. Add the Baileys, cream and vanilla and stir in with a wooden spoon (I suspect this is because using an electric mixer here would splatter EVERYWHERE)
  6. Pour the filling into the springform pan and bake for 50-60 minutes until the center is just set.  It’s hard to describe exactly what that looks like, but I guess the only way to say it is that even though the top was baked, it jiggled around when I shook it as if the top were sitting on something slidey.
  7. Cool on a wire rack for 30 minutes, then slide a thin sharp knife around the edge to separate the crust.  Let it cool for another hour and then stick it in the fridge for at least 6 hours.  I made mine the night before so it was ready for the next day.  Enjoy!

Irish Coffee Cupcakes

Wednesday, March 14, 2012

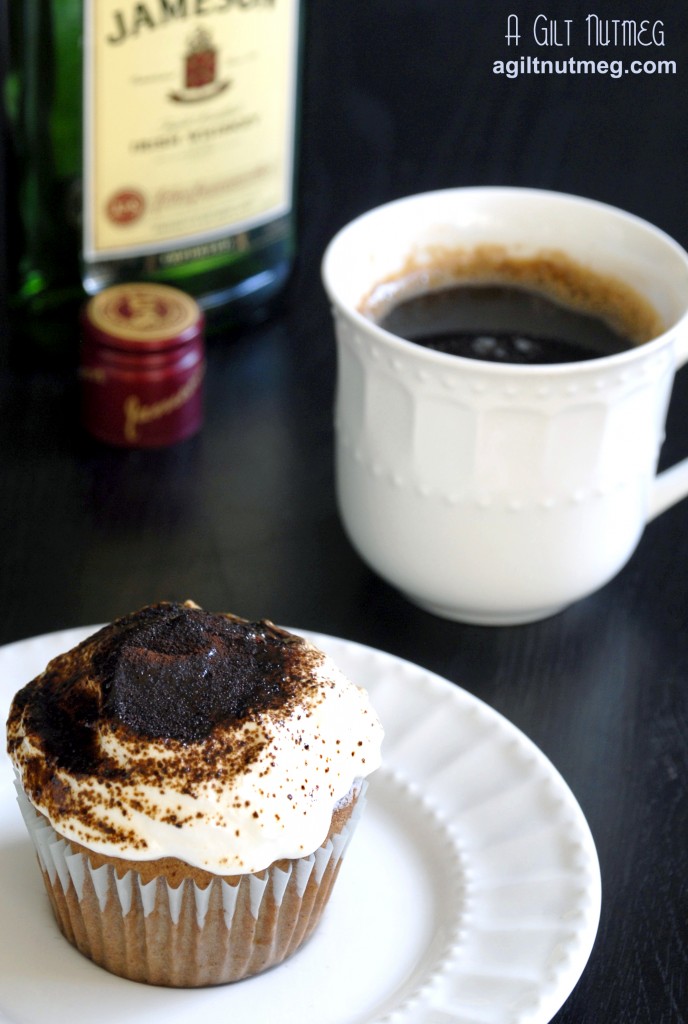
irish coffee cupcakes

St. Patrick’s Day is almost upon us!  and since the holiday is celebrated (at least here in America it is) by drinking as much alcohol as possible, let’s go with one of the classier options, Irish Coffee, and turn it into a cupcake.   Irish Coffee was first introduced in the U.S. by the Buena Vista, a bar in San Fransisco that I have had the pleasure of having breakfast at before.  It’s got a beautiful view from the windows, but the best view, in my opinion, is of the bar where tuxedoed bartenders expertly make Irish Coffee after Irish Coffee.  Strong brewed coffee, sugar, Irish whiskey and to top it off, whipped cream is ever so carefully floated on top.  You definitely have to be trained for years in order to make the perfect cup of Irish Coffee.

Martha Stewart created a fantastic cupcake version of this drink: a brown sugar coffee cupcake and an Irish whiskey spiked whipped cream topping.  The whipped cream on top creates an especially light yet flavorful finish to the cupcake and the espresso powder dusting adds just a touch of bitterness (I would go lighter than I did with the espresso powder-I had a slip of the hand).  The perfect way to celebrate the holiday!

 Irish Coffee Cupcakes
From Martha Stewart
Makes 15 cupcake

  • 2 cups all-purpose flour
  • 1 teaspoon baking powder
  • 1/4 teaspoon baking soda
  • 1/4 teaspoon salt
  • 1/2 cup boiling water
  • 2 tablespoons instant-espresso powder
  • 1/4 cup whole milk
  • 1 stick unsalted butter, room temperature
  • 1/2 cup granulated sugar
  • 1/2 cup packed light-brown sugar
  • 2 large eggs
  • 1 cup heavy cream
  • 1 tablespoon confectioners’ sugar
  • 1 tablespoon whiskey
  • Instant-espresso powder, for dusting
  1. Heat oven to 350 degrees.  Prepare muffin tins by putting 8 cupcake papers in one tin and 7 papers in another tin.
  2. Whisk together flour, baking powder, baking soda, and salt.
  3. Pour water over the espresso powder and let cool. Mix espresso in with milk.
  4. Beat butter and granulated and brown sugars with a mixer on medium speed until pale and fluffy, about 3 minutes.
  5. Add eggs, 1 at a time, beating well after each addition.
  6. Beat in flour mixture in 3 additions, alternating with espresso-milk mixture, beginning and ending with flour, until thoroughly combined.
  7. Evenly divide the batter among the 15 papers.  Bake until a toothpick inserted into the centers comes out clean, 20 to 22 minutes. Let cool for a few minutes, then take the cupcakes out of the tins and let them cool on a wire rack.  They must be totally cool before adding the whipped topping or else the topping will melt.
  8. To make the frosting, beat together the cream and confectioners’ sugar until medium peaks form. Add whiskey then beat until slightly stiff peaks form.
  9. Top each cupcake with 2 tablespoons frosting; dust with espresso powder.  Enjoy!

Rather Rich Corn Muffins

Monday, March 12, 2012

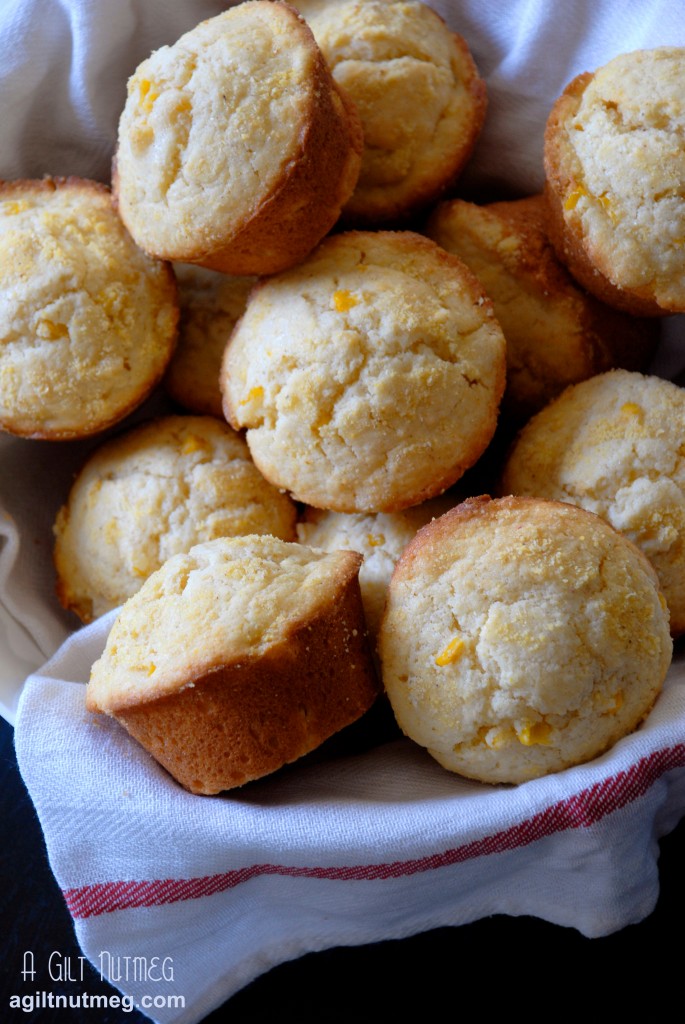
I don’t know if words can even begin to describe these corn muffins.  I mentioned in a previous post that a friend had a rating system for tiramisu all over the city of LA.  Well, The Boyfriend has a similar system in place for corn muffins and cornbread.  Currently, his favorite is at a restaurant called Bandera, and while I know that Bandera’s cornbread still has a stronghold on his heart, I think he was pretty impressed with these corn muffins.  I know I was at least:

This recipe makes some of the most delicious, tender, delicate corn muffins I have ever had the pleasure of eating!  I almost can’t believe that they came out of my kitchen.  The only change I made to the recipe was to use fine ground corn meal instead of coarse ground, mostly just because that was all I had on hand.  That said, I think the texture of the fine ground corn meal was what contributed to such a tender muffin while still giving it the occasional chewy grains that I love so much in corn muffins.  The recipe below is for a half batch-it makes about 12 muffins.

Pay no attention to the name, “Rather Rich”…just ignore it and savor them and forget about the health level of muffins made entirely with heavy cream.  Amanda, of Fake Ginger, hosted this recipe on Project Pastry Queen way back in February of 2010, but I sure am glad I came back to try them!  Many of the other members loaded the muffins up with cheese and jalapenos and such, so check out everyone’s versions here.

Rather Rich Corn Muffins
Adapted from The Pastry Queen
Makes 12 muffins

  • 6 tablespoons unsalted butter, melted and cool
  • 1 1/2 cups heavy cream
  • 2 eggs
  • 1 3/4 cups flour
  • 3/4 cup fine corn meal
  • 1/2 cup sugar
  • 1 tablespoon baking powder
  • 1/4 teaspoon salt
  • 1/2 cup canned corn kernels
  1. Heat the oven to 350 degrees and thoroughly spray a muffin tin with nonstick baking spray.
  2. Mix the melted butter, cream and eggs in a large mixing bowl.
  3. Stir in the flour, cornmeal, sugar, baking powder and salt until ingredients are combined.
  4. Stir the corn into the batter, then evenly divide the batter among the 12 muffin cups.  Sprinkle some additional cornmeal over the top of the batter.
  5. Bake for approximately 15 minutes until the muffins are light brown around the edges and firm when you press them on top.
  6. Let them cool in the muffin tin for 5-10 minutes, because they’ll be fragile at first, but be sure to take them out of the pan and let them cool on a wire rack so they don’t get soggy.
  7. They’ll be best served warm; but it seems Rebecca too has discovered my favorite way to eat a corn muffin: cut in half, toasted, smeared with butter!

Lemon Raspberry Florentine Cookies

Friday, March 9, 2012

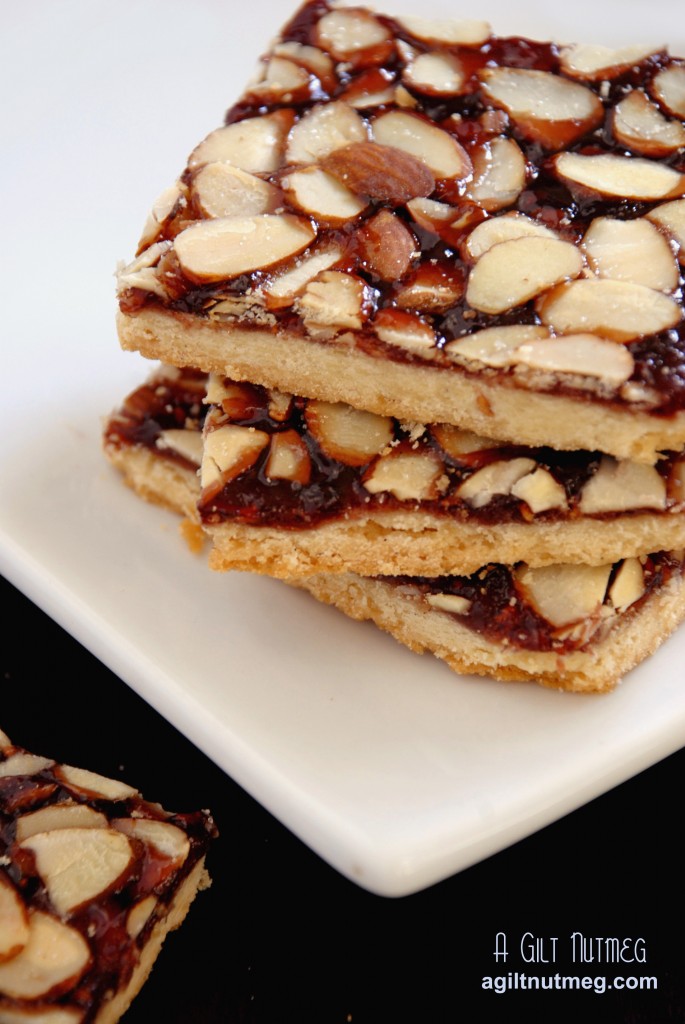
lemon raspberry florentine cookies

So because they’ve heard about nothing else lately, certain friends (ahem, Ace of The Toasted Sprinkle) are going to roll their eyes at me starting out this post with “ohmigoodness I’m so sorry I deserted you, my precious readers; I had a horrible stomach flu and, even though it was just a 24 hour bug, for 2 weeks my appetite has been really weird and I just couldn’t bring myself to actually cook anything”.  But I’m back!

I wanted to start back in the kitchen with something super simple and I had some lemon vanilla sugar cookie dough hanging out in the fridge.  Now, this was either lucky or unlucky-unlucky because I had intended this dough to be made into beautiful hand decorated sugar cookies for Valentines Day, which clearly never happened; lucky because it meant that I had to put forth very minimal effort to put these cookies together last night.

Overall, I loved the chewy raspberry layer between the crunchy cookie and almond topping and I was really pleased that the dough wasn’t just plain sugar cookie dough, because the lemon really complimented the raspberry flavor.  And, of course, fast to pull together always wins points for a recipe in my book, so make the dough ahead of time and toss it in the fridge for later when you’re ready to make these!

Lemon Raspberry Florentine Cookies

Adapted from Chef Lothar Neumaier
Cookie Recipe from Annie’s Eats

  • 2 sticks unsalted butter, at room temperature
  • 1 cup confectioners’ sugar
  • 1 large egg
  • 2½ tsp. vanilla extract
  • 1 vanilla bean, split lengthwise
  • Zest of one whole lemon
  • 2½ cups all-purpose flour
  • 1 tsp. salt
  • 2 cups raspberry jam
  • 1 cup sliced almonds
  • 1-2 tablespoons granulated sugar
  1. In a large mixing bowl, beat together the butter and confectioners’ sugar for 2 minutes, until mixture is smooth.
  2. Add in egg, vanilla extract, seeds scraped from the vanilla bean, and lemon zest and beat until fully incorporated.
  3. On low speed, mix in the flour and salt just until the white streaks are gone.
  4. Wrap the dough up in plastic wrap and stick it in the fridge for an hour.
  5. After an hour set the oven to heat to 375 degrees and pull the dough out of the refrigerator.
  6. In order to fit on a cookie sheet, you’ll need to divide the dough into two parts.  Spread a piece of parchment paper on your counter and roll out one piece of the dough on the parchment paper;  you’ll want to roll the dough to about 1/8″ thick.
  7. Transfer the parchment paper with the dough on top to your cookie sheet.
  8. Spread half the raspberry jam over the dough.  Sprinkle half of the almonds over the jam and then half the granulated sugar.
  9. Repeat the process with the other half of the dough on a second cookie sheet.
  10. Bake the two cookie sheets for 15-18 minutes, until the edges of the dough are a deep golden brown.
  11. Leaving the cookies on the sheets, move the cookie sheets to wire cooling racks and let them cool completely.
  12. Once fully cooled, cut the cookies into squares.  Store them in an airtight container, with parchment paper in between so the cookies don’t stick together.  Enjoy!