Entries from June 27th, 2012

Coffee Cake

Wednesday, June 27, 2012

coffee cake

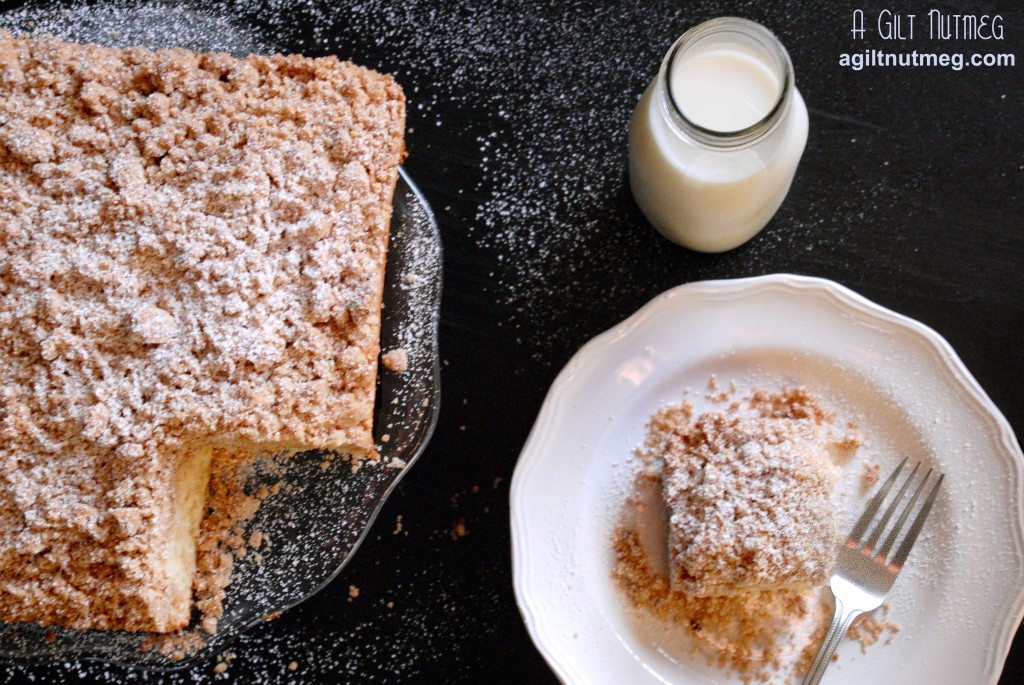
This recipe is not lying when it uses the term “cake”.  Cooks Illustrated modified their yellow cake recipe into New York Style Coffee Cake; it literally is cake for breakfast, so tread carefully.  That said, this cake is delicate and light as a feather and I was quite impressed with its soft texture.  I was short on a few ingredients so I had to make some changes (adding lemon juice to milk to sub in for buttermilk), while at the same time I was rushing around the kitchen, trying to get back into the groove of baking and therefore did not read the instructions carefully enough.  I mixed the crumb topping ingredients in the wrong order, resulting in a very different texture than what Cooks was calling for.  I also didn’t have enough cake flour, so I made sure to use the cake flour I had left for the cake itself (since the light-fluffy texture the cake flour would contribute to was so important there) and sub in some all-purpose flour for the topping.  Between the mixing incorrectly and the AP flour, I think the topping didn’t turn out for the best (it was super super crunchy), but any shortcomings here were my own fault, not the recipe, and I’m looking forward to trying it again.  I’ve included the recipe as it reads from Cooks below, so you don’t have to make the same mistakes I did.  (Or, if you do want that crunchy topping, use AP flour—for the topping only—and mix all the dry topping ingredients together before adding the butter instead of waiting to add the flour last after the butter.)


New York Style Crumb Cake
Cooks Illustrated, May 2007

Crumb Topping

  • 1/3 cup sugar
  • 1/3 cup dark brown sugar
  • ¾ teaspoon ground cinnamon
  • 1/8 teaspoon table salt
  • 8 tablespoons unsalted butter (1 stick), melted and still warm
  • 1 ¾ cups cake flour

Cake

  • 1 ¼ cups cake flour
  • ½ cup sugar
  • ¼ teaspoon baking soda
  • ¼ teaspoon table salt
  • 6 tablespoons unsalted butter (3/4 stick), cut into 6 pieces, softened but still cool
  • 1 large egg
  • 1 large egg yolk
  • 1 teaspoon vanilla extract
  • 1/3 cup buttermilk
  • Confectioners’ sugar for dusting
  1. Pull out a piece of aluminum foil about 16” long and fold it in half, lengthwise, so you have a long skinny strip.  Place it in the bottom of an 8×8” baking pan; this will act as a sling to help you pull the cake out after baking.  Spray the pan and foil with non-stick baking spray and set aside.
  2. In a medium bowl, mix the sugar, brown sugar, cinnamon and salt until combined.
  3. Using a wooden spoon or spatula, stir the butter in until combined, then stir the flour in, forming a dough.  Set aside.
  4. In a large bowl or a standing mixer bowl, mix together on low speed the flour, sugar, baking soda and salt.
  5. Still on low speed, drop in the pieces of butter, one at a time, until there are no large pieces of butter left and the mixture looks like crumbles, 2 minutes or so.  I stepped away for just a moment when this was going on and I came back not a few seconds later and it had already passed the crumble stage and amassed into one large piece of dough, so it will happen quickly.
  6. Add the egg, egg yolk, vanilla and buttermilk to the butter-sugar mixture and beat on medium high speed for at least one minute until the batter turns light yellow and uniform.
  7. Pour the batter into the prepared pan and smooth out the top with a spatula.
  8. Using your fingers, break up the crumble topping into pea sized pieces and sprinkle over the top of the cake.  I remember from Home Ec class back in 6th grade, that when making crumb cake you should always start your crumbles in the corners and then work towards the middle (and Cooks backs this up, too).
  9. Bake for 35-45 minutes until a tester comes out clean and the topping is golden brown.
  10. Let cool on a wire rack for half an hour before digging in with a glass of milk or a cup of coffee.  Enjoy!

Food Legacy

Monday, June 25, 2012

Now that June is over, I will (hopefully) have time to get back to blogging more regularly—I’ve missed it!  In the meantime, I’ll leave you with a final memory from my recent trip down Family History Lane.

As we were meandering through the Sugar Creek Historical Museum in Independence, MO, the walls were covered with photographs and memorabilia that had meaning in one way or another to my family; there were pictures of the community pool that my dad and his brothers and sister swam in when they were young, the oil refinery where my grandmother and grandfather met, great uncles in their navy uniforms and so on and so forth.

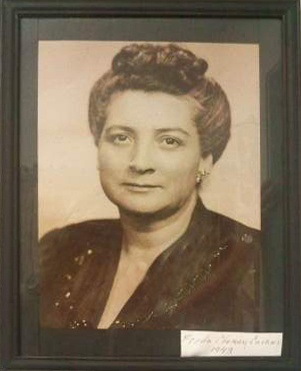
And there was this portrait:

Freda Chaney Cairns 1943

Freda Chaney Cairns 1943

As we passed by the wall this picture was hanging on, my grandmother airily remarked, “Oh!  And this is Freda Cairns!  She introduced me to Philadelphia Cream Cheese!” and continued walking on down the hall.

I was left behind to stifle my giggles at the simple, yet apparently profound mark this woman left on my family history.  Isn’t that an adorable legacy to leave behind?  Thank you, Freda, for the cream cheese!

Chocolate & Strawberry Pie

Wednesday, June 20, 2012

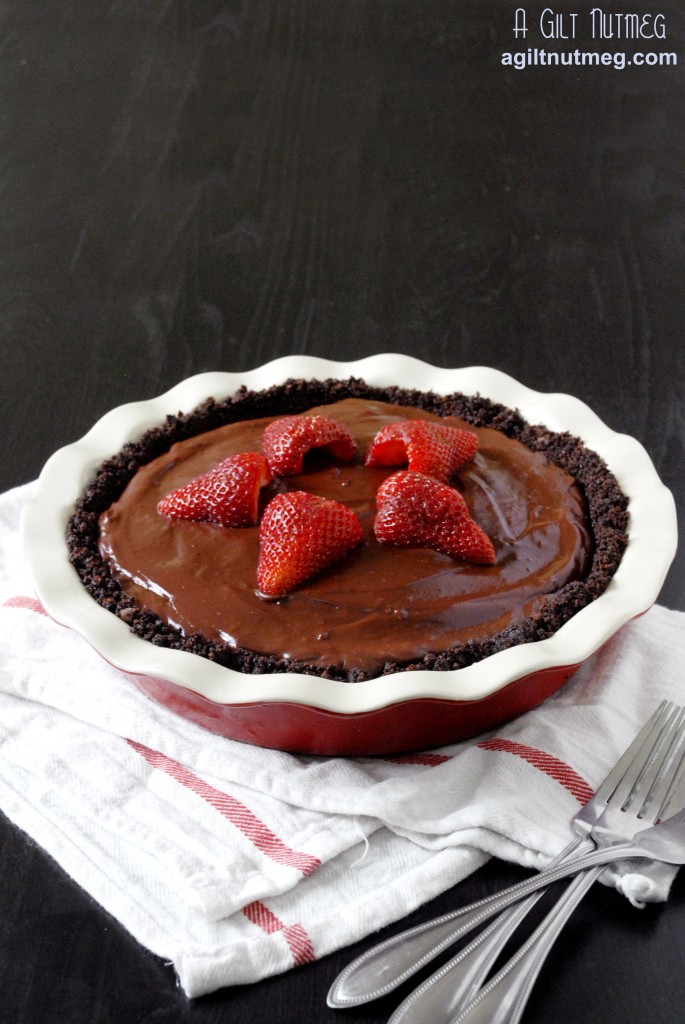
chocolate strawberry pie

I have been waiting to make this pie for almost 2 months.  I bought the strawberries and the cookies for the crust…then too much time would pass, I’d have to eat the strawberries that were about to go bad and go buy more while the cookies sat patiently unopened on the counter.  Repeat this scenario three or four times.  Last night, though, the stars aligned and I finally was able to make this perfect combination of chocolate and strawberries.  Because it’s a chilled pie, it’s great for the hot summer nights coming up and Lindsay, of Love and Olive Oil, who created the recipe, included some unusual flavors in the rich chocolate.  It has a touch of ginger and nutmeg that plays on your tongue in that first bite and as the pie warmed on the counter between rounds of slicing, we noticed the bourbon flavor became more pronounced.  And my favorite part, of course, were the strawberries.  You can’t see it in the photo, but there’s a whole layer of fresh, peak-of-ripeness strawberry halves lining the crust below that chocolate filling.  Expect to find me crying when strawberry season is over again in the fall.

Chocolate & Strawberry Pie
Adapted from Love & Olive Oil

For Crust:

  • 6 tablespoons unsalted butter
  • 1 ounce bittersweet chocolate, chopped
  • 7 ounces chocolate wafer cookies, about 30 cookies (I used 1/2 Oreos left over from a previous recipe and 1/2 Trader Joe’s Chocolatey Cookies.  Next time I’ll use all Oreos for their deeper chocolate flavor and crunchier texture)

For Filling:

  • 2/3 cup sugar
  • 1/4 cup cornstarch
  • 2 tablespoons unsweetened cocoa powder
  • 1/4 teaspoon ground ginger
  • 1/8 teaspoon ground nutmeg
  • Pinch of salt
  • 6 large egg yolks
  • 2 1/2 cups whole milk (I used 2 cups half and half and 1/2 cup of milk for a richer filling)
  • 6 ounces bittersweet chocolate, chopped
  • 1/2 tablespoon bourbon
  • 1 teaspoon vanilla extract
  • 1 pint strawberries, hulled and halved (or you can wait to cut them until just before you need them)
  1. Spray a pie plate with non-stick baking spray and set aside.
  2. Melt the butter in the microwave in a small, microwave safe bowl.  While the butter is still hot, add the chopped chocolate, let sit for a moment, then stir vigorously until the chocolate and butter are fully combined and the mixture looks like smooth chocolate.
  3. Process the cookies in a food processor until all pieces of cookie are turned into crumbs; transfer to a medium mixing bowl.
  4. Pour the melted butter-chocolate mixture over the crumbs and stir until the crumbs are evenly coated and moistened.
  5. Press the crumbs into the pie plate and move the plate into the freezer for 30 minutes while you make the filling.
  6. In a medium saucepan, whisk together the sugar, cornstarch, cocoa powder, ginger, nutmeg, and salt.
  7. Add the egg yolks and whisk until the yolks are fully incorporated.
  8. One half cup at a time, add the milk to the saucepan, mixing thoroughly each time before adding more.
  9. Turn the heat on under the saucepan to medium and heat the mixture, whisking frequently, until thickened and boiling.  It will take a little time for it to heat up-10-15 minutes, but you’ll find that once it hits temperature, it will all of a sudden and without warning, turn the consistency of pudding.  Once it reaches this stage, keep whisking as it is boiling for one full minute (be careful of your hands!  It splattered on me a little and boy did it hurt).
  10. Turn off the heat and add the chocolate.  Wait for a minute, then whisk until the chocolate is fully melted and smooth.
  11. Whisk in the bourbon and vanilla until fully incorporated.  Let the mixture sit for 5 minutes while you slice the strawberries, whisking occasionally.
  12. Take the crust out of the freezer and line it with a layer of strawberry halves, arranged so you can fit in as many strawberries as possible.
  13. Pour the filling over the strawberries and crust, smooth the top with the back of a spoon, add some strawberry decoration on top if you wish, and refrigerate for two hours before serving.  Enjoy!

Virtual Baby Shower for Baby Ruf Love!

Monday, June 18, 2012

Emily Ruf, of Ruf Love, is having a baby!!  While we would all love to show our support for her in person, the truth of the matter is that us members of Project Pastry Queen are scattered all over the country.  Thus, the Virtual Baby Shower was a way to show we care by doing what we do best: blog!  Members of Project Pastry Queen submitted items they would like to “bring” to the shower and I’ve shared them below.  Click on the photos below to be taken to the website for each recipe.  Emily, feast your eyes…


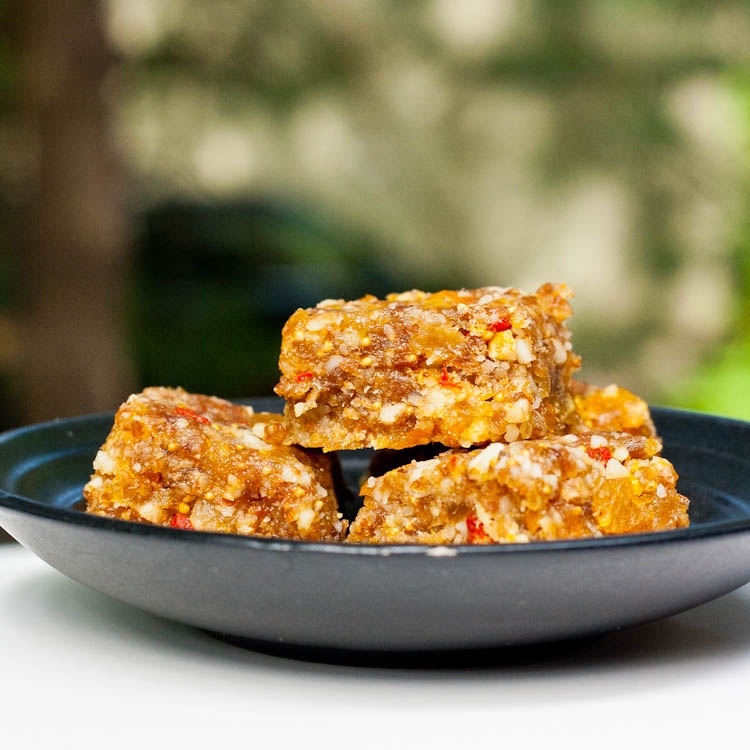
Vicky, of Avocado Pesto, made these Dried Fruit and Nut Bars.  Gotta keep Baby Ruf healthy!


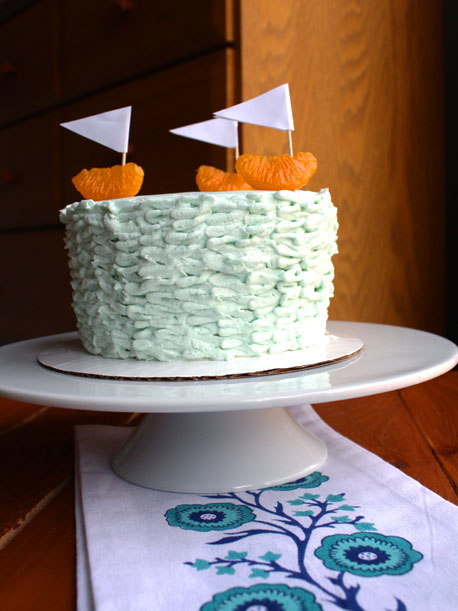
Emily (yes, there are three of us Emilys in PPQ!), of She Makes and Bakes, made this beautiful Lemon Blueberry Cake that matches Baby Ruf’s nautical themed nursery!


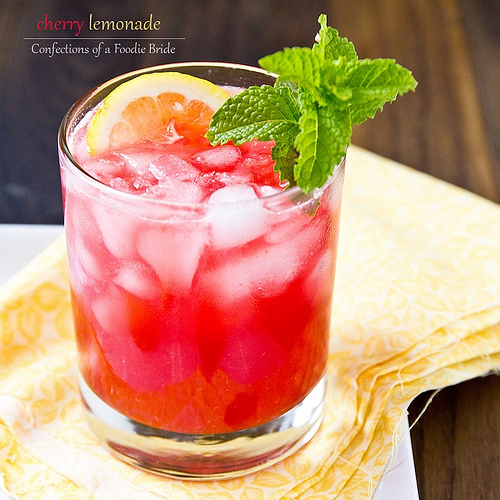
Shawnda, of Confections of a Foodie Bride, made this thirst-quenching Cherry Lemonade- looks delicious!


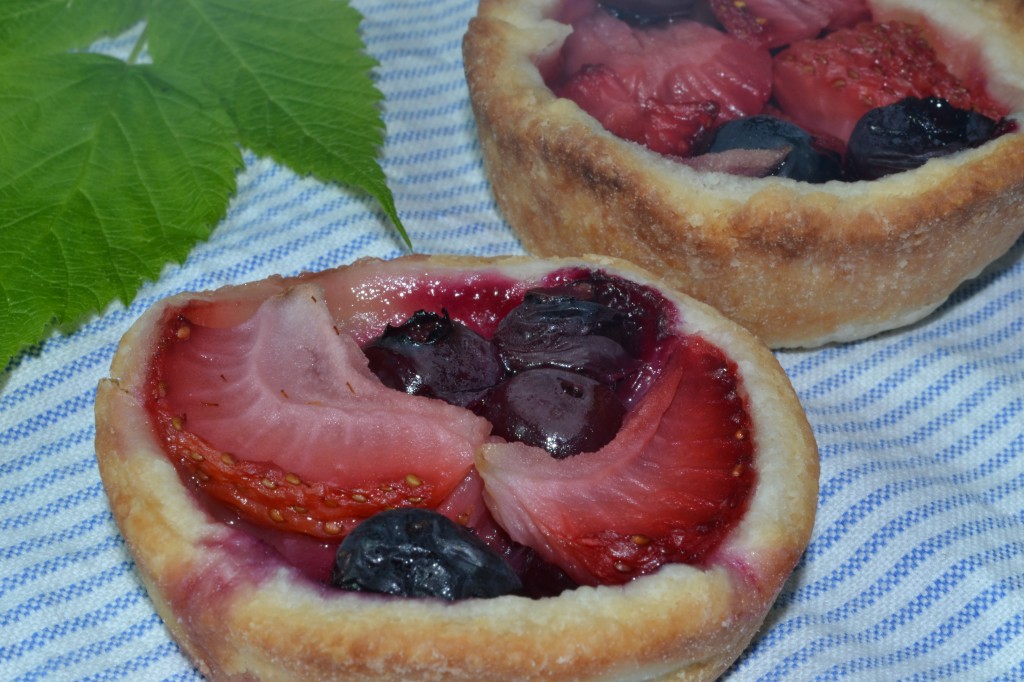
Jennifer, of Sweet Morris, made these Fruit Crostadas from the PPQ cookbook. Nothing beats fresh fruit in the summer!


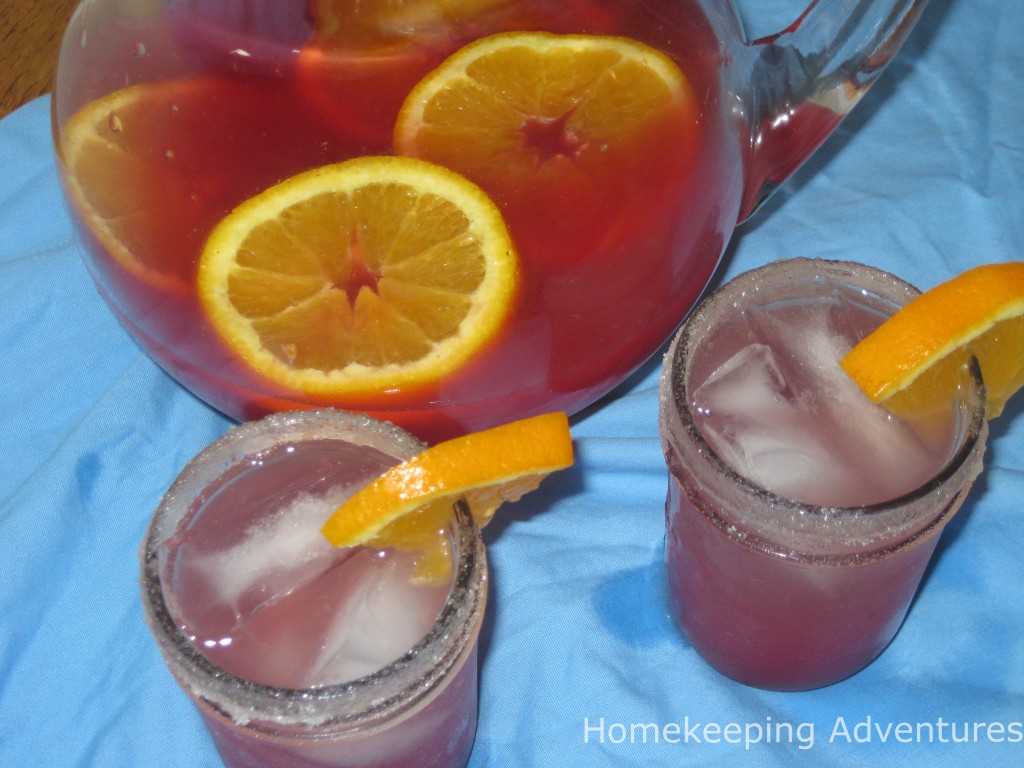
Amanda, of Homekeeping Adventures, made Orange-Cran Sparklers-I love drinks that tickle your nose!


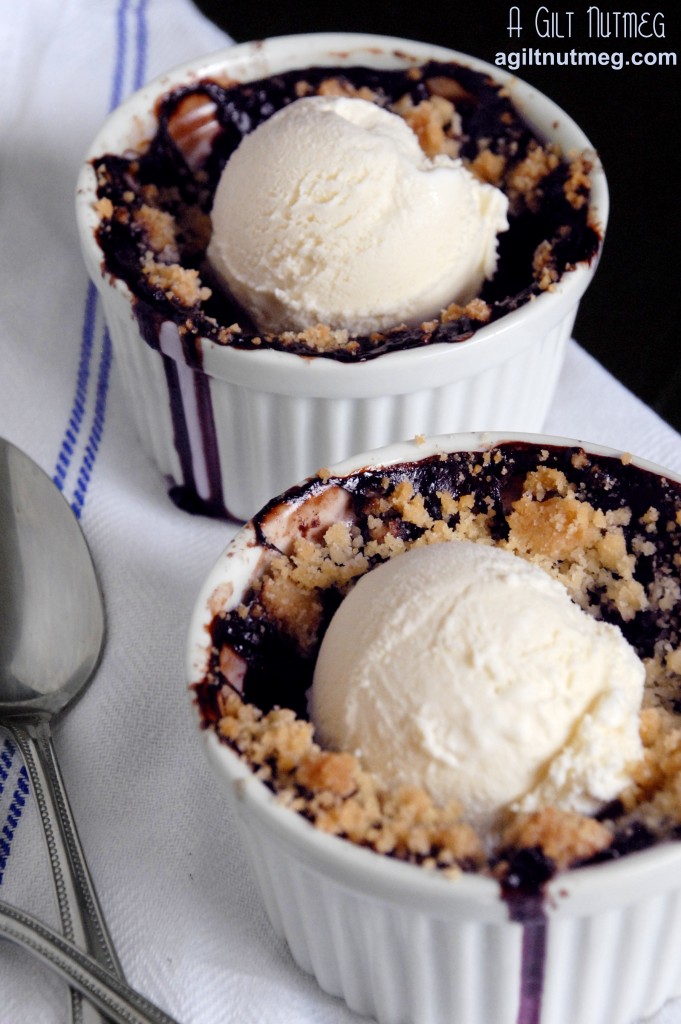
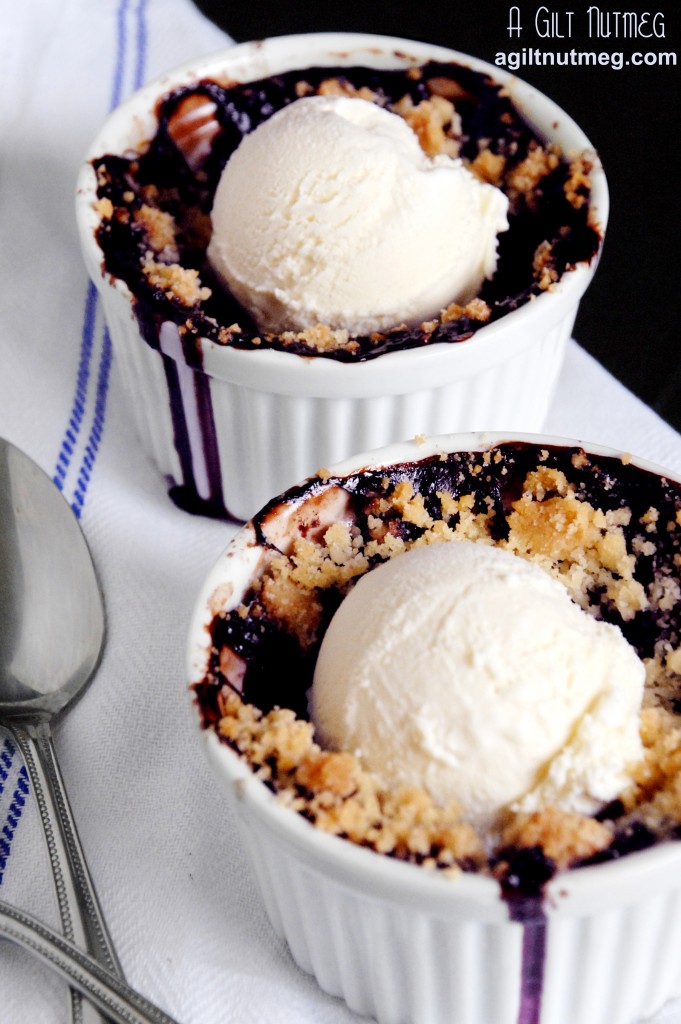
blueberry crisp ice cream
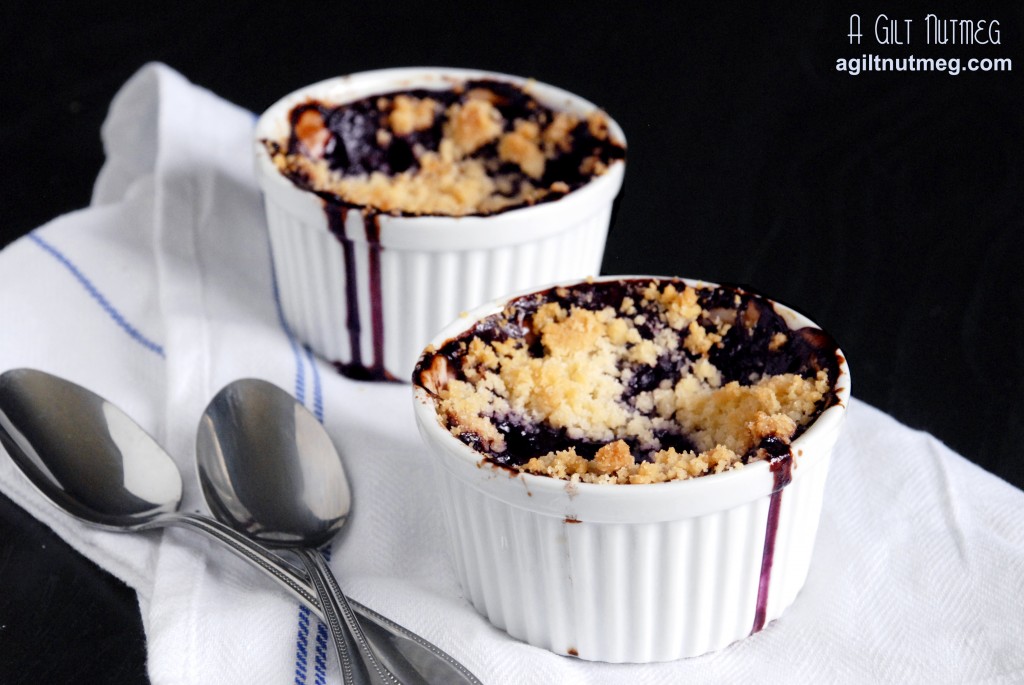
and finally, I made individual Blueberry Crisps for Emily and Baby Ruf

Aren’t you just dying to dig into all of that food??  Thank you to all of the PPQ members who contributed.  Emily, we all sincerely wish nothing but health and happiness coming your way in the next few months!


Blueberry Supreme

Monday, June 18, 2012

This blog story has two parts.  First, my fellow Project Pastry Queen-er, Emily Ruf of the blog “Ruf Love”, is having a baby boy in July!  I immediately jumped on the chance to host a virtual baby shower for her.  What could be a more blogger-appropriate way to show Emily our support in what is surely going to be one of the most wonderful and important parts of her life?  Because Emily & husband are welcoming a baby boy into their lives, I wanted do something with a blue theme and this recipe seemed perfect for the event.  I made it into individual servings, which would be perfect if we had been having a real baby shower, and topped them with some vanilla ice cream to cool off during these hot summer days.  I only wish that I could share these with the PPQ ladies in person!

blueberry crisp

The second part of the story is where this recipe actually came from.  I was on a trip last weekend to Missouri, Kansas & Oklahoma on what ended up being one long tour of my family history.  We started with the Sugar Creek Slavic Festival, to celebrate my Great-Grandmother and her family immigrating from Slovakia; traveled to Tonganoxie, Kansas to see where my Grandfather’s family settled after leaving England; and ended up in Oklahoma where my Grandmother and Great-Aunt currently live.  The last night we were in town, my Great Aunt Doris, who never fails to pull out an amazing recipe out of her stacks of cookbooks whenever we’re around, ended the dinner with this “Blueberry Supreme” from the Junior League of Tulsa’s “Cook’s Collage”, 1978.  Sharing recipes like this is just as important to the family history as it was to go hunting for photos of Great-Great-Great Uncles hanging in tiny town museums on the prairie.  Its ingredients are so simple, but something about this recipe made it the best blueberry dessert I’d ever tasted.  There isn’t even any sugar in the filling, just plump delicious blueberries.  The original recipe calls for making one large dish of the dessert, but I split it into 6 ramekins; you can choose whichever suits you.  Because the recipe is from the 70s, it’s not necessarily the most exact.  I’ll give approximate measurements where I can, but I warn you, when it just said “sprinkle generously”, that’s all I did.  Enjoy it warm with some of that ice cream!

Blueberry Supreme
Adapted from “Cook’s Collage” by The Junior League of Tulsa, 1978
Serves 6

  • 20-30 oz of blueberries, fresh or frozen
  • juice from 1/2 a lemon
  • cinnamon (approx 1/2 Tablespoon)
  • nutmeg (approx 1 teaspoon)
  • 1 cup flour
  • 1 cup sugar
  • 1/2 cup butter
  1. Heat oven to 375 degrees.
  2. Rinse blueberries and pick them over for little stems and old dry wrinkly berries; put them in a medium bowl.
  3. Drizzle lemon juice over the berries and stir gently until evenly coated in the juice.  Sprinkle cinnamon and nutmeg generously over the blueberries and again gently stir until berries are evenly coated.
  4. Pour the berries and juice into an 8×8″ glass baking dish or split evenly among six ramekins.
  5. Sift the flour and sugar together, then in a food processor, pulse the flour-sugar mixture together with the butter until the mixture resembles cornmeal.  Pulsing just a few more times will get you bigger crumbles.
  6. Sprinkle the crumbles over the blueberries until you have a thick covering-I only used about half of the mixture.  Also, some of it sinks down into the berries while baking, so be generous with it.  What you see in the photos above is actually twice baked-I baked it once with what I thought was a generous crumb topping, but 50% or more of it sunk into the berries, so I added a second layer of topping and baked again for a little while.
  7. If you are using ramekins, cover a baking sheet with aluminum foil and set the ramekins on the baking sheet before moving it into the oven.  Otherwise, just place the baking dish into the oven (its sides will be high enough to contain the juices).
  8. Bake approximately 40 minutes, until the berries are bubbling and the topping is turning golden brown.
  9. Let cool about 30 minutes, then top with vanilla ice cream and enjoy!


Bleu Cheese, Sausage & Crimini Mushroom Pizza

Wednesday, June 13, 2012

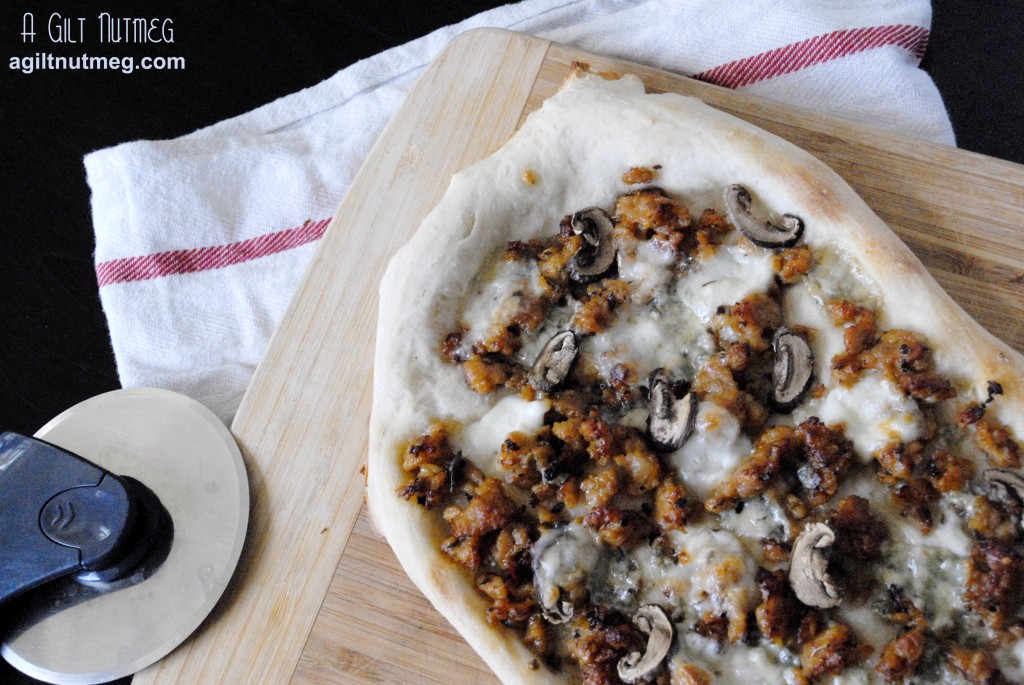
Last month I had the great pleasure and honor of making dinner for a number of friends from college who had come to visit from the East Coast.  I wanted something to serve that would be fun and that would cater to everyone’s different tastes, but that would also be fast and enable me to wander back and forth from the kitchen to chat.  I decided on pizza night, which definitely meant fast, wouldn’t break the bank, and allowed me to get creative.   We ended up with 4 different types of pizza:  Traditional Margarita, Rosemary & Red Potato, Roasted Veggie and Hummus (recipe to come!), and Bleu Cheese, Sausage & Crimini Mushroom.  All four were a hit!

This pizza was definitely the most hearty of the four.  The flavors are all strong, but work together instead of competing on your taste buds.  Pizza is one of those great recipes that you can whip up in no time and get on the table within minutes of starting, and this recipe is definitely going into normal rotation for pizza night.

Bleu Cheese, Sausage & Crimini Mushroom Pizza
Makes 2 small-medium pizzas

  • 1 package of Trader Joe’s refrigerated pizza dough
  • 2 chicken sausages, casings removed (I chose Trader Joe’s Sweet Italian Chicken Sausage)
  • 1 teaspoon dried oregano (optional)
  • Garlic infused olive oil (optional)
  • 1/2 cup Crimini mushrooms, sliced
  • 1/2 cup bleu cheese crumbles
  • 1 container Bocconcini (small mozzarella balls in water), sliced or 1 large ball of fresh Mozzarella, sliced (just don’t get the shredded bagged kind)
  1. Place an unrimmed cookie sheet in your oven or place a rimmed baking sheet upside down on the rack in your oven.  Heat the oven to 500 degrees with the sheet inside.
  2. While the oven is heating, remove the casings from the sausage and fry it up in a pan, breaking up the sausage into small pieces.  At this point, I added about 1 teaspoon of dried oregano to the sausage in the pan, because I felt it could do with a little more flavor, but this is entirely up to you and the sausage you chose.  When fully cooked through, move the sausage to a plate covered in a thick stack of paper towels so that the grease can drain.
  3. After the oven is good and hot (about 30 minutes), remove the cookie sheet and put it on a heat-safe counter, but leave the oven on.
  4. Break the pizza dough into two even pieces and stretch the first piece out gently with your hands, letting gravity do most of the work.  I always prefer this to rolling it out with a rolling pin, but you will absolutely end up with an oddly shaped pizza this way-I think it gives it character.
  5. Gently lay the stretched pizza dough onto the hot baking sheet (the goal here is to get the bottom of the crust baking first while you top the pizza, so that the dough cooks more evenly.  If you have some of that garlic infused olive oil, brush about a tablespoon or two over the crust.
  6. Sprinkle on about half of your sausage, half of your mushrooms, half of your bleu cheese and half of your mozzarella on top of all of that (adding the mozzarella last will help the toppings stick to your pizza better).  Of course, adjust to your tastes.  I like a little less of the bleu cheese, as it’s a super strong flavor.
  7. Return the baking sheet with the pizza now assembled on top to the oven and let it bake for 10-15 minutes, until the crust is starting to turn golden brown and the mozzarella is bubbly and also just starting to brown.
  8. Let cool for 5 minutes before cutting with a pizza cutter and enjoy!

Pineapple Jam

Friday, June 8, 2012

Two Decembers ago, The Boyfriend came home to Georgia with me for his first Southern Christmas and, in a very thoughtful gesture, my Dad made a Pineapple Pie our first night home—fitting, considering pineapples are the universal sign for “welcome”.  I remember Dad remarking on how much he loved pineapple pie and it stuck with me, mostly because I don’t remember us ever really making it before that Christmas.

Usually resigned to seeing my family only once a year, I have the rare pleasure of seeing my family this weekend—and it’s not even a holiday!  Since Father’s Day is only a week away, I decided to take the opportunity to make Dad a little gift.  Remembering the Pineapple Pie, I was pleased as punch when I came up with an idea to make Pineapple Jam, a fitting summer twist on the pie.  I haven’t told him yet, so no one ruin the surprise until tonight, okay?

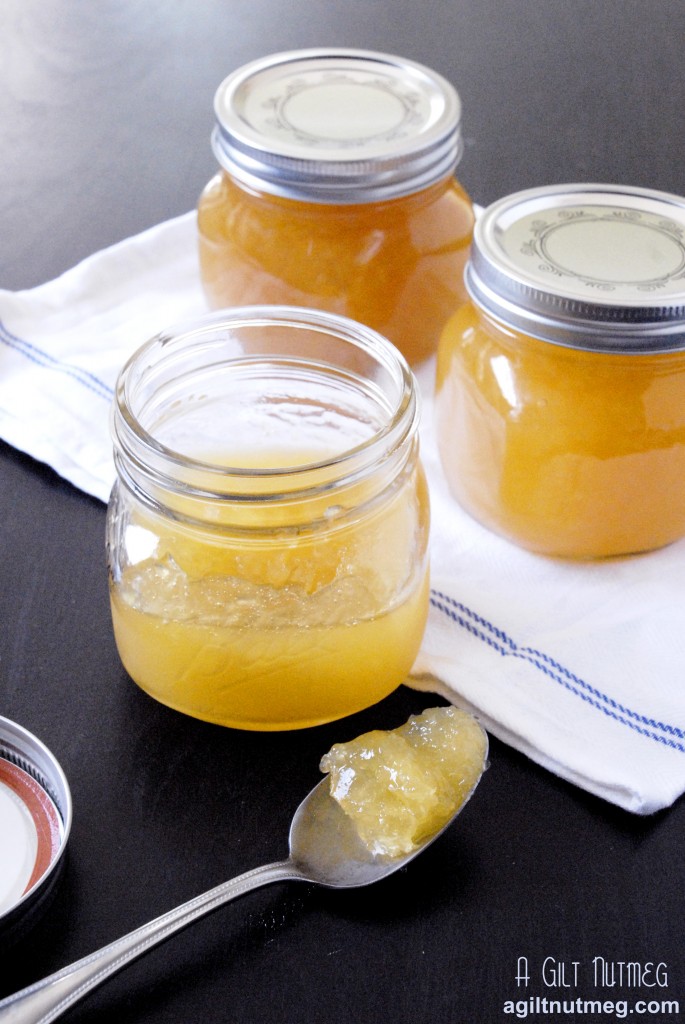
For those of you nervous about jam-making, this makes a very small batch and one that is relatively quick as well.  It’s a great starter into the world of jam and canning!  That said, I do wonder if what I made is more like Pineapple jelly rather than jam, but either way it’s a delightfully sweet and acidic flavor that you wouldn’t normally find at the grocery store.  Even better, if you’re not a breakfast person, you can use it as a glaze for ham or chicken instead.

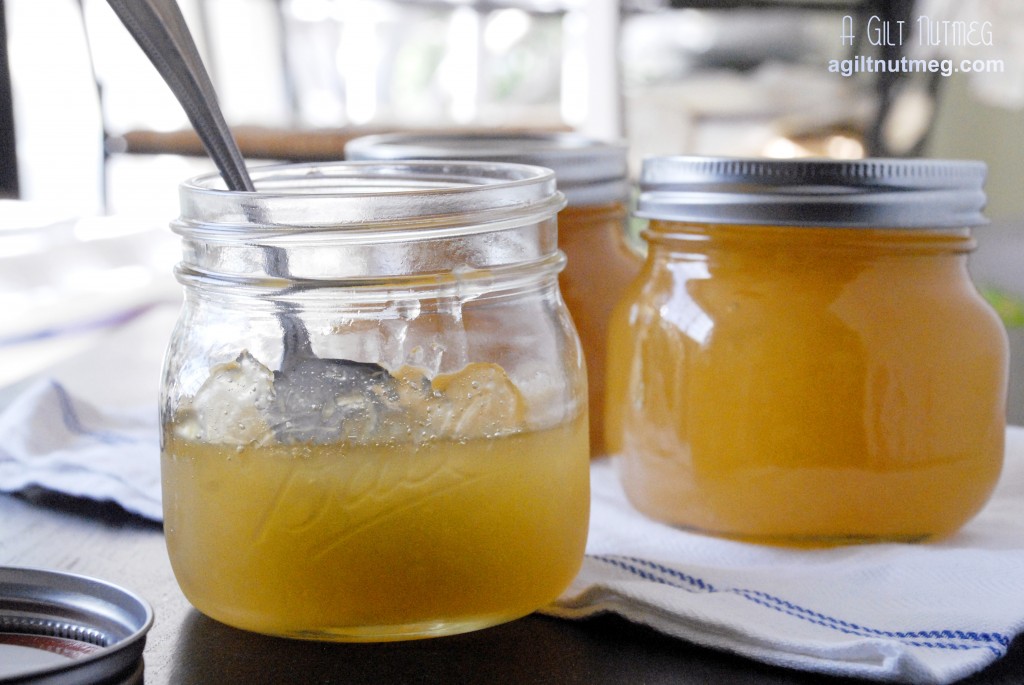
Finally, you’ll notice in the photo that one jar is darker than the other.  I made one jar of plain Pineapple Jam (to showcase the clean sweetness I love about pineapple) and, to make things interesting, I stirred a little bit of vanilla bean paste and some powdered ginger into the other jar while the jam was still hot.  Since the jars have been through the canning process so they were airtight for my parents to be able to travel back home with, I admit I haven’t been able to taste it, but I promise I will report back here with Dad’s thoughts—fingers crossed he loves it.  I’ve listed the ingredients for the variation at the bottom if you don’t want to wait for our word on it.

Note:  For canning, you’ll need two ½ pint jars, plus an extra little Tupperware or jar for whatever doesn’t fit into the first two jars—you’ll throw this extra in the fridge to eat in the next week or so without having to worry about the canning process since there will be too much air in that last jar to go through canning.

Pineapple Jam
Adapted From Coleen’s Recipes
Makes 2-3 cups

  • One can (20 oz) crushed pineapple
  • 1 ¼ cups pineapple juice
  • 1 ¾ oz fruit pectin powder
  • 3 cups sugar
  1. Start a large pot of water boiling and in the meantime, wash your jars and lids with hot soapy water.  Set the jars and lids into the pot of water and let them boil for ten minutes (about the time it takes to measure out the ingredients and make the jam).  Doing this keeps the jars hot so that they don’t crack and break, which would happen if you put hot jam into cold jars.
  2. In a large saucepan, combine the pineapple, juice and pectin and stir continuously until boiling.  Make sure the pectin is completely dissolved and no blobs of powder remain.  If you want a smoother jam, you can use a stick blender to blend the pineapple a little bit (later I wondered if this is why mine came out more jelly like in texture.  I won’t blend it next time).
  3. After it’s boiling, add the sugar, stirring until dissolved, and bring it back to a rolling boil.  Coleen says to bring it “a boil you can’t stir down”, which was an excellent way to put it, and let it boil for 1 minute.
  4. Spread a clean towel on your kitchen counter and (I just use normal kitchen tongs) carefully pull the jars and lids out of the hot water and wipe them down with another clean towel (be careful, they’re hot!).  Keep the pot boiling in the meantime.
  5. Skim the foam off the top of the boiling jam and discard.
  6. Ladle the jam into the waiting jars, filling the jars to within ¼” of the top rim.  Wipe off any jam that you dripped on them, and quickly screw the lids on (they don’t need to be super tight, just tight enough that you’ll be able to unscrew them without issue later).
  7. Carefully lower the lidded jars into the boiling water and let them boil for 10 minutes.  Putting a towel in the bottom of the pot will reduce some of the racket of the jars rattling around.
  8. After ten minutes is up, take the jars out and set them on another clean towel on your counter.  Press the lids—they should be tight and not pop up and down.  If they pop up and down when you press, put them back in the water for another 5 minutes.  I will admit that the last time I made a large batch, some of the lids popped up and down slightly and I was just too tired at that point to put them back in the water, so I left them on the counter and when I came back in the morning, tada!  They were tight in the morning and didn’t pop.  But then, I’ve always been a little lax when it comes to rules like that and I’ve never gotten food poisoning, so I’ll leave that call up to you.
  9. The jars that have been through the canning process can be left out until ready to give as gifts or to use yourself, but once you open them, put them in the fridge.  The leftovers that didn’t fill up a whole jar should go straight into the fridge.  Enjoy on toast or as a glaze to spice up whatever meat you’re cooking that night!


Variation: Ginger-Vanilla Bean Pineapple Jam

If you want your whole batch to be flavored, stir in a ½ teaspoon of ground ginger and 2/3 teaspoon of vanilla bean paste (or seeds of ½ a scraped vanilla bean, plus a splash of extract).  If you want one jar flavored and one plain, ladle the jam into the jars and then stir ¼ teaspoon of ground ginger and 1/3 teaspoon of vanilla bean paste directly into one of the jars before canning.

Strawberry Cake

Monday, June 4, 2012

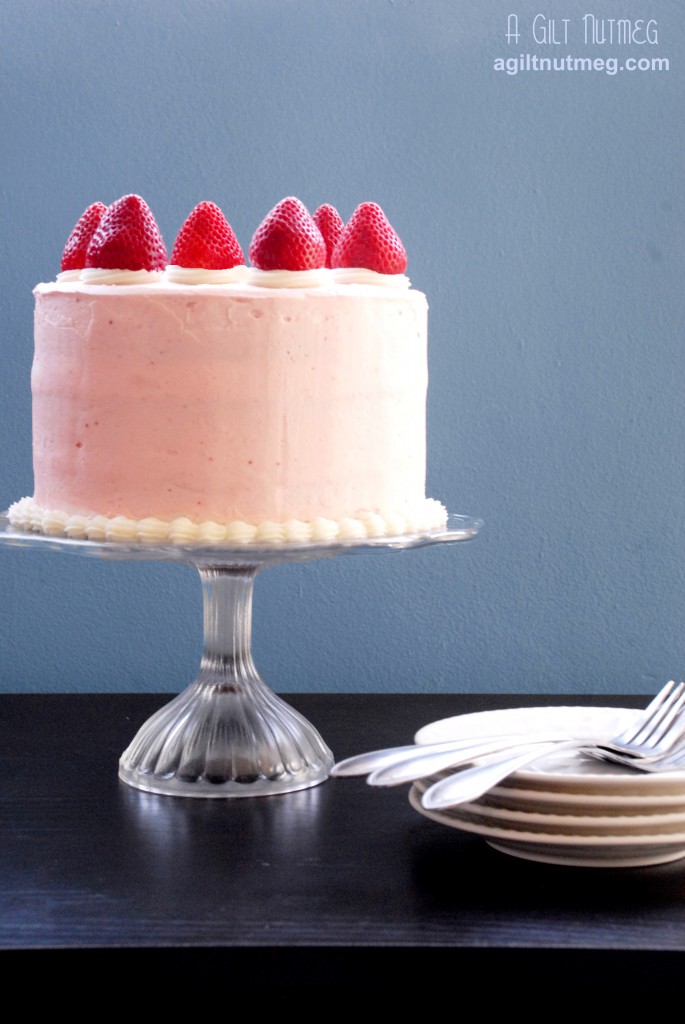
Mission: a birthday cake for a little girl.  Obstacle:  it must be bright pink.  Naturally, my mind immediately turned to the rows and rows of boxes full of ripe strawberries at the market.  What could be more perfect for a little girl’s spring princess birthday party than a strawberry cake?  Sweetapolita had just the recipe I was looking for, which included some strawberry jell-o to the batter to up the color from a gentle soft pink hue to bright hot pink.  Although I don’t have pictures of the inside, you’ll have to take my word for it-this was a seriously pink cake!  The jell-o also gave an otherwise light and fluffy cake a bit of a firmer, dense texture, but in a good, rich-tasting way, not in a “I accidentally used too much flour” way.

strawberry cake - close up

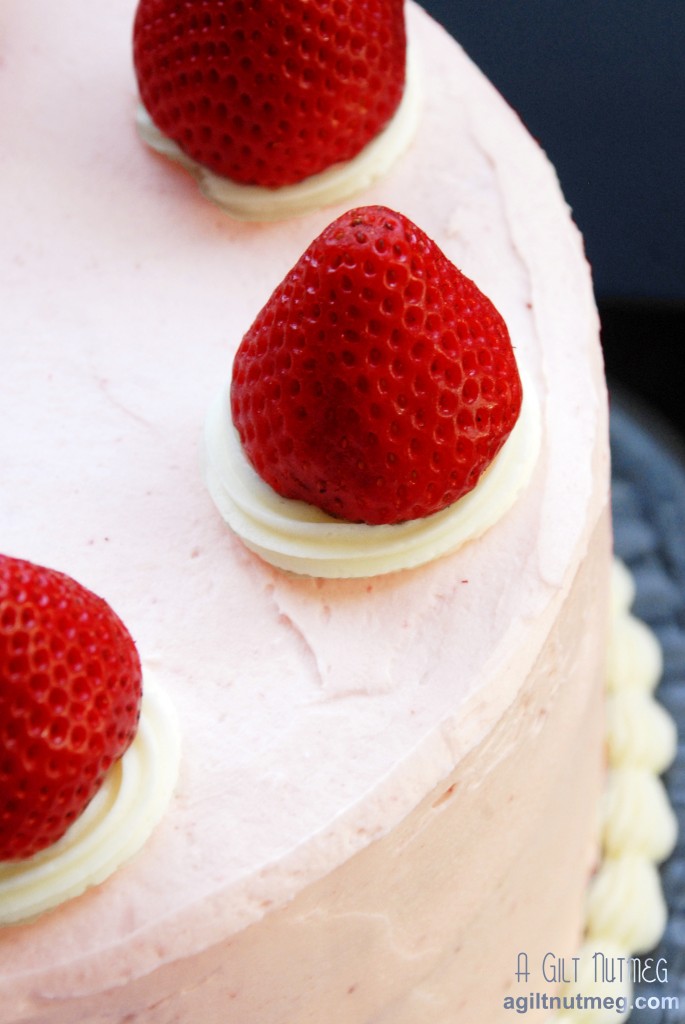
Then I strained some strawberry puree for the buttercream frosting and covered that pink cake in more pink.  To top it off, I picked the brightest, most perfect strawberries from the bunch to place on top of the cake.  If you squint, it’s almost like a crown or a castle, perfect for the pink princess theme!  As if you need any more encouraging, just as Sweetapolita promises, this cake tastes exactly like strawberry ice cream…so why are you still reading?  Go bake!

Notes: This recipe makes three layers, 8″ across, so you’ll need 3 specific 8″ pans for this cake.  Many bloggers have discussed how a three layer 8″ cakes have the most pleasing ratio of width to height, and I must say that I’m on board with them.  Also, going forward, I would make 1 1/2 recipes of the frosting, as it was a bit thin on the sides-you can just barely make out the layers through the frosting in the photo above.  That said, it would be strictly for aesthetic purposes; I don’t love tons of frosting, and many people said it was just the right ratio of cake-to-frosting so you can go based on your own preferences.

Strawberry Cake
Adapted from Sweetapolita

  • 1 lb box of strawberries
  • 1 cup milk
  • 1 Tablespoon vanilla extract
  • 3 cups cake flour
  • 1 Tablespoon baking powder
  • 3/4 teaspoon salt
  • 1 3/4 cups sugar
  • 1 box (3 oz) strawberry jell-o
  • 1 cup butter, room temperature
  • 4 eggs

Frosting

  • 3 sticks + 2 Tablespoons unsalted butter, softened
  • 4 cups powdered sugar, sifted
  • 1 Tablespoon milk
  • 1 1/2 teaspoons vanilla extract
  • pinch of salt
  • 3 Tablespoons of strained strawberry puree (you don’t want seeds in your frosting!)
  1. Heat oven to 350 degrees; line your three cake pans (8″ width) with parchment paper rounds and spray with nonstick baking spray (and pull out your butter to soften, if you haven’t already)
  2. Pick out the 6 prettiest strawberries and set aside for the top of the cake; hull and puree a handful of the remaining strawberries to get 1/4 cup of puree plus 3-5 tablespoons of puree for the frosting later (I love my hand held stick blender and the “smoothie cup” it comes with for this purpose).
  3. In a small mixing bowl, whisk together the milk, vanilla, and 1/4 cup strawberry puree; set aside.
  4. In a medium mixing bowl, sift together the flour, baking powder, and salt; set aside.
  5. In a large bowl, beat the butter, sugar and jell-o with an electric mixer on high speed for 5 minutes.
  6. Add the eggs to the butter-sugar mixture, one at a time, letting each egg fully incorporate before adding the next (and scrape down the sides of the bowl as necessary).
  7. Add approx 1/3 of the dry ingredients to the eggs/butter/sugar batter, 1/2 of the liquid ingredients, the second 1/3 of the dry ingredients, the last of the liquid ingredients and then the last of the dry ingredients.  Stop mixing as soon as that last streak of white flour disappears.
  8. Divide the batter equally among the three prepared cake pans and bake for about 30 minutes.  A toothpick or cake tester should come out clean when poked into the cake.  The cake won’t brown too much on top at all.
  9. Let the cakes cool on wire cooling racks for 10 minutes before taking them out of the pans and letting them sit on the racks until fully cooled.
  10. To make the frosting, whip the butter in an electric mixer for 8 minutes on medium speed; the butter should be super super soft and fluffy.
  11. Add the powdered sugar, milk, vanilla, and salt, and beat until fully incorporated and the frosting is creamy.
  12. If you plan on doing some white frosting decorations on your cake, take out about 3/4 cup of frosting and set it aside now.
  13. Add the strawberry puree and beat until frosting is smooth and creamy.
  14. To assemble the cake, spread a 1/2″ layer of frosting on the first cake layer, top with the second cake layer and spread another 1/2″ layer of frosting.  Add the last cake layer on top.
  15. Spread a very thin layer of frosting over the top and sides of the cake, then refrigerate for 30 minutes.  (I know this “crumb layer” step seems like a waste of time, but I promise, this is the first time I gave it a try and I fully understand now why it is necessary.)
  16. Spread the rest of the frosting over the cake in an even layer, refrigerate for 30 minutes and then decorate with your white frosting.  I did a piped border around the bottom of the cake, then piped little circles at intervals around the top edge of the cake and nestled the hulled strawberries on each of the rings.  Enjoy!