Entries Tagged as 'Bread'

Bell Pepper-Sausage Kolache & Apricot-Nectarine Kolache

Monday, August 20, 2012

kolache

Being a part of a family that very proudly celebrates our Slovak heritage, I was fascinated to hear about Texas’ love affair with kolache, a Czech pastry.  Even better, kolache is a strongly featured recipe in The Pastry Queen—I’m so glad that I was able to circle back around and make it before Project Pastry Queen was officially over.  My biggest problem, it turns out, was just figuring out how to say the darn thing!  The world wide webiverse told me it was “ko-losh” or “ko-losh-ee”.  Enlisting the help of a Czech coworker, she said it was “ko-lotch-ee”.  I guess, in the end, it doesn’t matter, because—even though I’m still uneasy with all bread-making activities—these were mostly successful.  I’ve never eaten one made by someone else, so I don’t have anything to compare them to, but I can say that the dough is sweet and tastes very close to my favorite Cantonese Dim Sum BBQ Pork Filled Buns, albeit a little bit denser.  I know it’s a strange comparison, but in the end, it’s a small world, after all.

bell pepper sausage kolache

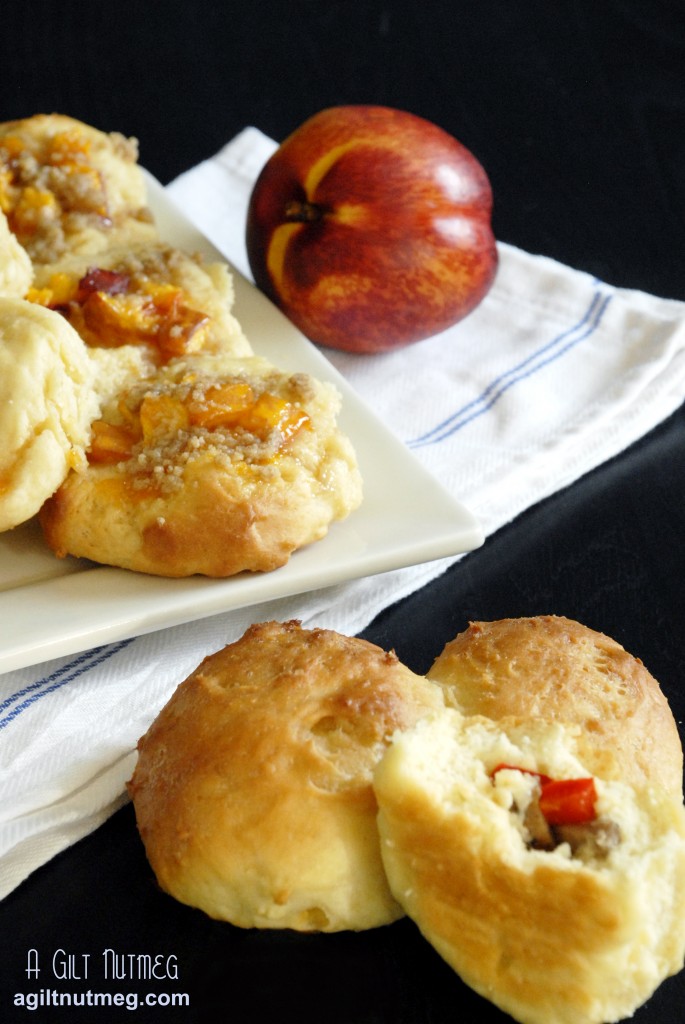
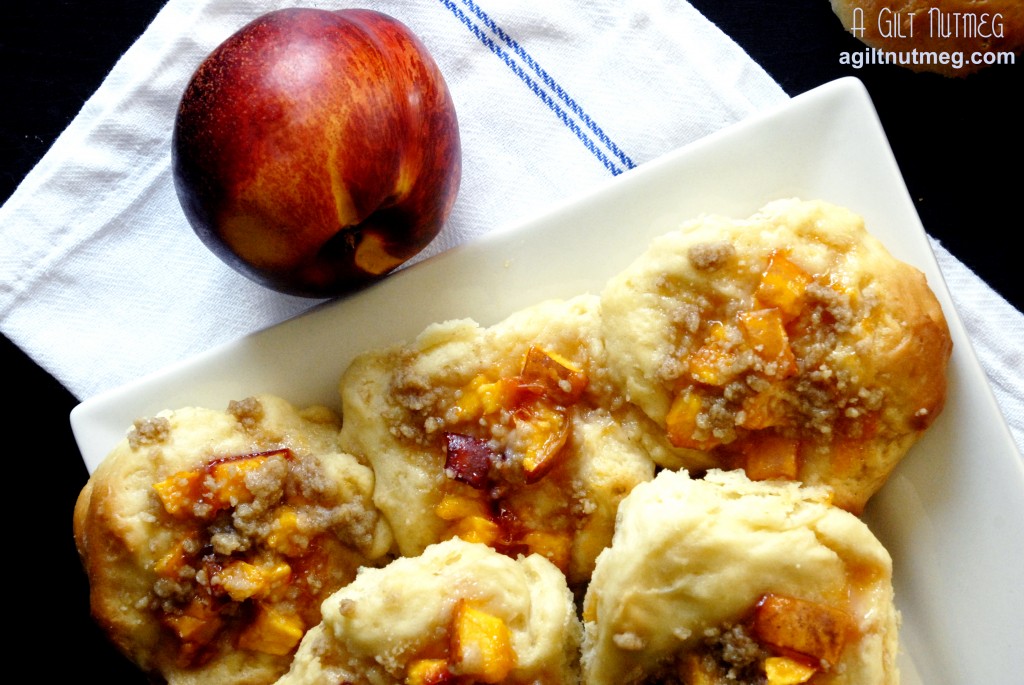
I split the recipe into half and made one half open-faced with nectarines, apricot jam, and brown sugar streusel.  The other half had the dough wrapped around a red bell pepper and sausage filling so that the filling was hidden inside.  I will say that I definitely have to work on my technique—as we all know here, bread dough and I don’t get along, so the nectarine kolache weren’t so much perfect little deep wells of fruit, but instead the fruit kind of hovered on top.  I also would add more of the savory filling next time because you can, obviously, never have enough sausage.  Overall, though, they were great!  The dough didn’t require any kneading, so, even though mine weren’t perfectly beautiful, I still recommend this recipe to anyone wanting to try yeast breads.  You literally just mix the dough, then stick in the fridge till morning and voila!
apricot nectarine kolache

Kolache
Makes 16-18 kolache
Dough adaptation directly from The Foodie Bride

Fillings inspired by The Pastry Queen

Dough (for a full recipe - 16-18 kolache)

  • 1 package (2 1/4 tsp) active dry yeast
  • 1/4 cup water, warmed to 110-115F
  • 1 cup milk, warmed to 110-115F
  • 4 Tbsp butter, melted and cooled to warm
  • 2 large eggs
  • 5/8 cup sugar + 1 teaspoon sugar
  • 1 tsp salt
  • 4 1/4 cups flour

Red Bell Pepper & Sausage Filling (for a half recipe - 8-9 kolache)

  • 1 cup cooked sausage, chopped (I used a chicken sausage)
  • 1 cup red bell pepper, chopped

Nectarine-Apricot Filling & Streusel (for a half recipe - 8-9 kolache)

  • 1 large nectarine, chopped
  • 1/4 cup apricot jam/jelly, melted
  • 2 tablespoons flour
  • 2 tablespoons brown sugar
  • 2 tablespoons chilled butter
  1. Add your warm water to your mixing bowl (or bowl of stand mixer) and stir in 1 teaspoon sugar..  Sprinkle yeast over the sugar water mixture and let stand 5 minutes until foamy.
  2. Add milk, butter, eggs, sugar and salt to bowl and mix on low until ingredients are thoroughly incorporated.
  3. Also on low, mix in half of the flour, wait until its incorporated, then mix in the second half of the flour, mixing just until incorporated.  My dough was pretty lumpy looking and, truthfully, I’m not sure if that’s how it’s supposed to look or not.
  4. Let the dough rest 1-2 hours, until doubled in size.  Punch the dough down (deflate it) and then cover it with plastic wrap and stick it in the fridge overnight.  If you’re in a rush, 4 hours is enough, but who doesn’t want the ease of just throwing something in the fridge and not worrying about it until morning?
  5. When ready to start, heat the oven to 375, line a baking sheet with parchment paper (or use non-stick spray) and divide the dough into balls.  They’ll be a bigger than golf balls, about 2 1/2″ wide.  Shawnda helpfully points out that the balls should weigh about 2.5 oz each.
  6. Let the dough rest for 15 minutes while you prepare the filling ingredients- make sure the bell pepper and sausage is chopped; combine the warmed apricot jam in a bowl with the chopped nectarine and stir to coat the nectarine.  You could easily make the streusel topping in a food processor, but it’s such a small amount that I just tossed the flour, brown sugar and butter into a mixing bowl and mushed it around with a fork and a butter knife until it was well combined and crumbly.
  7. If making sausage kolache, flatten out the balls of dough, press about a tablespoon of filling into each round of dough and then wrap the dough over the filling, pinching it shut.  Arrange the balls of dough with the seam side down on the baking sheet and arrange so that the balls are just an inch or so apart.
  8. If making open faced nectarine kolache, slightly flatten the balls and then poke a little well into the dough.  Fill the well with a tablespoon or so of fruit filling, then sprinkle the streusel topping over each one.  Arrange on the baking sheet so that the edges are just touching.
  9. Let the prepared kolache rest for 20 minutes or so and then bake for 20-25 minutes until golden brown on top.  I brushed some melted butter over the tops of the kolache warm from the oven, but that’s up to you.
  10. Serve warm and enjoy!

Bacon and Cheddar Scones

Wednesday, July 18, 2012

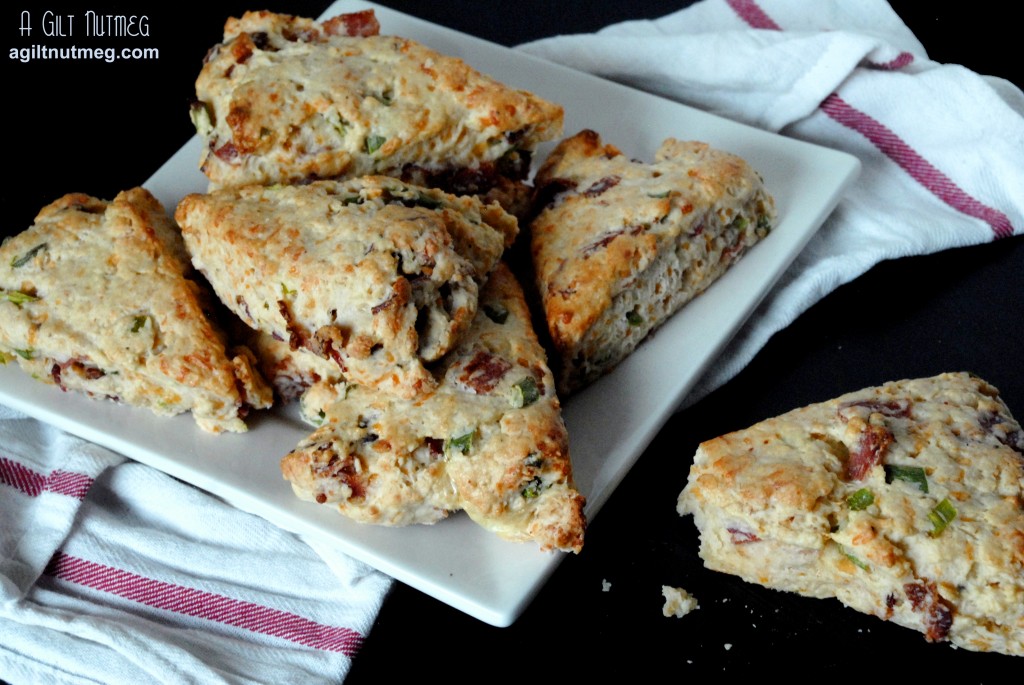
bacon cheddar scones

I’m so glad I went back and made sure to try this recipe for Project Pastry Queen, because these are really fantastic scones!  I’d never made a savory scone before, so I was curious about how these would turn out.  In the end, they’re a meal in themselves-hearty, filling, and satisfying.  There’s sharp cheddar cheese, smoky bacon, fresh green onions, and piquant black pepper.  All that’s missing for breakfast are the eggs, but those aren’t hard to scramble up.  Everyone who ate these gave them rave reviews, so I’m definitely adding them to my regular breakfast/brunch menu for when something a little special is in order!

Be sure to check out Emily’s Ruf Love blog, who chose this recipe, as well as the rest of the PPQer’s take on the recipe.

Bacon and Cheddar Scones
Adapted from The Pastry Queen by Rebecca Rather

  •  3 cups flour
  • 1 tablespoon baking powder
  • 1 teaspoon salt
  • 2 teaspoons freshly ground black pepper
  • 1/2 cup chilled butter, cut into cubes
  • 1 1/2 cups grated Cheddar cheese
  • 4 green onions, thinly sliced
  • 10 slices of bacon, cooked and chopped into 1″ pieces
  • 3/4 to 1 1/2 cups buttermilk
  • 1 egg
  • 2 tablespoons water
  1. Heat the oven to 400 degrees.  Cook the bacon and chop it, if you haven’t already done so.
  2. In a large bowl on low speed, combine the flour, baking powder, salt and pepper.
  3. With the mixer still on low speed, add the cubes of butter one at a time, until the mixture is crumbly.  You want pieces no bigger than peas.
  4. Add the cheese to the bowl and turn off the mixer as soon as the cheese is incorporated into the mixture.
  5. Put the electric mixer away and, with a wooden spoon or sturdy spatula, mix in the green onions, bacon, and 3/4 cup of the buttermilk until combined.  You want to do as little stirring as possible or else your scones will be tougher than a boot.  If there are still crumbles that sit in the bottom of the bowl, add a teensy bit of buttermilk at a time until the dough sticks all together and can be squished into a ball.
  6. Lightly flour a cutting board and turn the dough ball out onto the board.  Pat the dough into a round shape and, with a floured rolling pin, roll the dough out until it’s a circle 8″ wide.
  7. Using a large knife, cut the round into 8 wedges.
  8. In a small bowl, whisk together the egg and water and brush the mixture over the tops of the scones.
  9. Move the scones to an ungreased baking sheet and bake for approximately 18 minutes until golden brown on top.
  10. Definitely warm them up again in a 350 degree oven for 10-15 minutes if you’re going to serve them later.  Enjoy with a tall glass of milk!

Honey Muffins

Monday, April 30, 2012

honey muffins

There’s nothing better than waking up to the smell of fresh baked muffins.  While most muffins have that wonderful warm, bready-cakey scent, these particular muffins are even more wonderful because the scent of sweet honey will linger throughout your house as well.

They’re a snap to whip up for a quick breakfast and make for a great muffin to grab on the way out the door.  I left them in a bowl on the kitchen table and every day would come home to find one or two missing, as The Boyfriend and The Roommate kept snatching them to eat on the way to work!

Honey Muffins
Yields 12 muffins
From Taste of Home

  • 2 cups all-purpose flour
  • 1/2 cup sugar
  • 3 teaspoons baking powder
  • 1/2 teaspoon salt
  • 1 egg
  • 1 cup milk
  • 1/4 cup butter, melted
  • 1/4 cup honey
  1. Heat oven to 400 degrees.  Grease a muffin pan or line it with cupcake papers.
  2. In a large bowl, stir together the flour, sugar, baking powder and salt until thoroughly combined.
  3. In a separate bowl, stir together the egg, milk, butter and honey until thoroughly combined.
  4. Add the wet ingredients into the dry ingredients and stir just until you don’t see any streaks of dry ingredients anymore.
  5. Divide the batter evenly amongst the 12 muffin cups in the prepared pan and bake for about 15 minutes, until an inserted toothpick comes out clean.
  6. Serve warm with butter and enjoy!

Hot Cross Buns

Wednesday, April 4, 2012

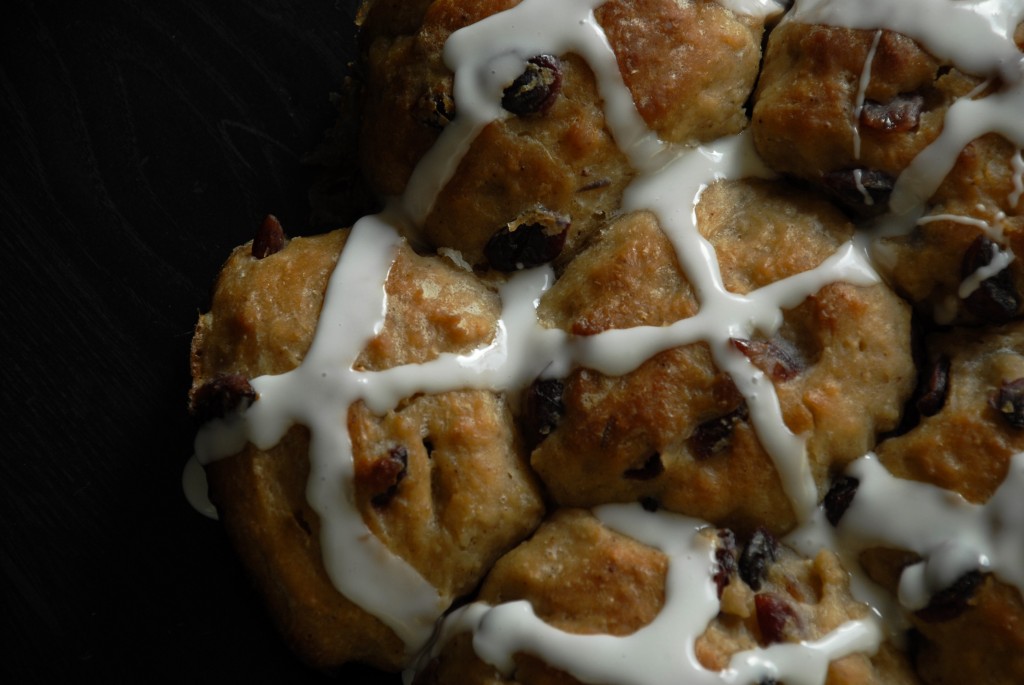
So I have to admit something to you: these hot cross buns for Good Friday this week didn’t turn out the way I had hoped.  And since this blog is supposed to be inspirational, I want you to know that it’s okay to mess up in the kitchen as long as it’s in the spirit of trying something new.  For some reason, my cooking nemesis is yeasted bread and rolls (and meringue, but we’re slowly, cautiously becoming friends) and I will not give up until I get it right.  I don’t know what the problem is, be it too much flour or not enough flour or rising temperature or sub-par kneading skills, but my bread almost always turns out heavy and dense.  The only yeasty bread item I’ve ever made to satisfactory standards (and delicious standards) was my Fat Tuesday King Cake.  Once I save up a few pennies, I think I’m going to take a class on yeast breads just to make sure I understand the proper technique .

At least with these buns, I know what a big part of the problem was-I was softening butter in the microwave and completely forgot to take it out and add it to the dough.  Oops.  Oh well.  I also don’t have a stand mixer or bread machine so I may not have kneaded long enough.

I’ve posted the original recipe from King Arthur Flour below for you to try yourself.  I will say that, though the texture wasn’t right (again, my fault), the flavor is delicious.  Instead of raisins, currants, and all the extra dried fruit, I stuck to just a 1/2 cup (I made a half-recipe) of rum-soaked dried cranberries; it went beautifully with the spices in the buns and the whole house smelled like my favorite tiki bar- the scent of spiced rum was hanging in the air in an exotic way.  The boyfriend admitted these buns weren’t my best effort, but then he ate three of them, so I clearly got SOMEthing right and I think it was those flavors.

Hot Cross Buns

Adapted from King Arthur Flour

Makes 12-14 buns

  • 1/4 cup dark rum (or apple juice)
  • 1/2 - 3/4 cup dried cranberries
  • 1 1/4 cups milk, room temperature
  • 3 large eggs, 1 separated
  • 6 tablespoons butter, room temperature
  • 2 teaspoons instant yeast
  • 1/4 cup light brown sugar, firmly packed
  • 1 teaspoon ground cinnamon
  • 1/4 teaspoon ground cloves
  • 1/4 teaspoon ground nutmeg
  • 1 3/4 teaspoons salt
  • 1 Tablespoon baking powder
  • 4 1/2 cups flour

Glaze

  • 1 tablespoon of milk + the egg white from the egg separated above

Icing

  • 1 cup + 2 Tablespoons confectioners’ sugar
  • pinch of salt
  • 4 teaspoons milk, or “enough to make a thick, pipeable icing”
  1. Lightly grease a  9 x 13″ pan.
  2. Put the rum and cranberries in a bowl and let them soak for about a half hour.  If you don’t have the time to wait, put them in the microwave for about a minute and then let them cool before adding them to the dough.
  3. Mix together the rest of the bread ingredients except for the fruit and knead in a stand mixer or bread machine until soft and elastic.
  4. Add the cranberries and any rum that wasn’t soaked up to the dough and mix until incorporated.
  5. Let the dough rise for an hour.  KAF warns, “It should become puffy, though may not double in bulk.”
  6. Divide the dough into 12-14 billiard ball sized pieces and arrange in the prepared pan.
  7. Let them rise for another hour, until the balls are touching.  Preheat the oven to 375 degrees in the meantime.
  8. Whisk together the tablespoon of milk and the egg white and brush over the buns before baking.  Bake for 20 minutes until golden brown; let cool on a wire rack.
  9. Whisk together the icing ingredients and pipe them into crosses over each bun.  Enjoy!
Pin It

English Muffin Bread

Friday, March 30, 2012

english muffin bread

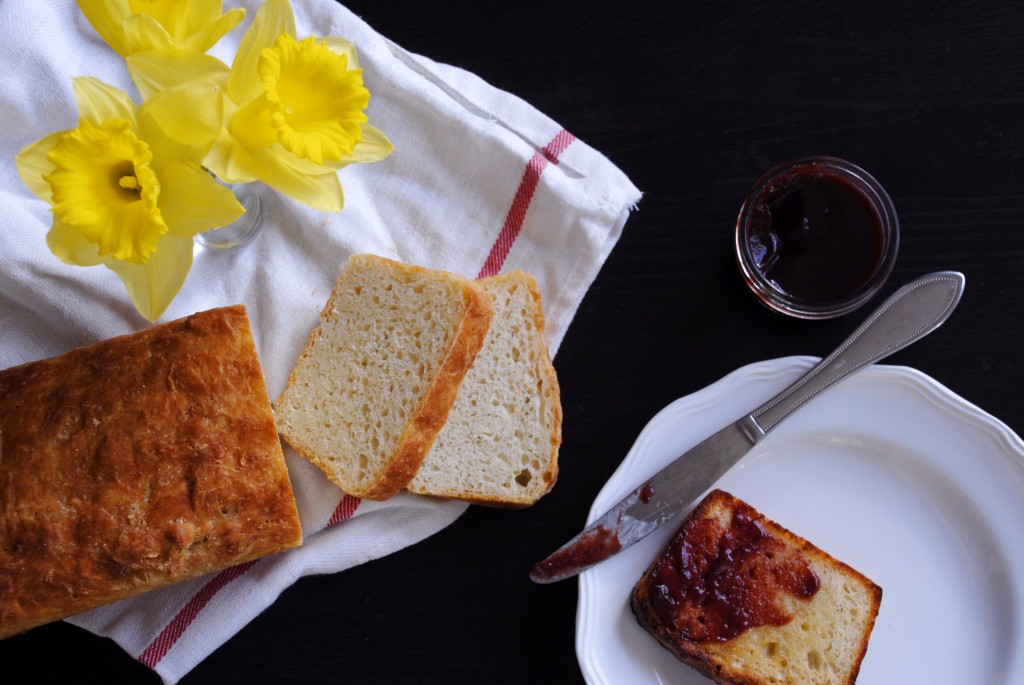
A true testament to this recipe:  I made it two days ago and ever since have been desperately craving another slice.  I will admit right off, as I was wrapping up the bread after it cooled, I was thinking, “how on earth can this be good?  It just seems so dense and unappetizing…”  but the next day I sliced it and toasted it and spread it with butter and my plum jam and ohmigoodness.

It’s certainly not a light airy French bread, but what I thought was totally dense and unappealing (even after slicing it and dubiously putting it in the toaster), ended up being perfectly chewy and crispy and craggy in all the right places, just like an English muffin.  And like I said, I can’t stop craving it!  It comes together with minimal effort and barely any dirty dishes, so that’s always a plus in my book.  A nice toasted slice with fruit or honey on top would be perfect for a weekend spring morning, sitting in the sunshine and listening to the birds chatter (at least that’s how I envision a perfect morning…).

English Muffin Bread
Adapted from One Good Thing
Makes 2 loaves

  • coarse corn meal for dusting the pans
  • 2 3/4 cup warm water (105-110 degrees)
  • 1 1/2 packages rapid rise yeast
  • 1 Tablespoon salt
  • 1 1/2 Tablespoons sugar
  • 5 1/2 cups flour
  • 2 tablespoons melted butter to brush on loaves later
  1. Spray two loaf pans with non-stick baking spray and dust the insides with coarse cornmeal (just like a real English muffin!).  Shake the pan around until evenly coated as best you can get it, then dump the excess out.
  2. In a large bowl, combine all of the remaining ingredients except for the butter and mix just barely until all of the ingredients are combined.  (Jillee of One Good Thing showed a picture of her batter and it was very very sticky, much stickier than mine, so don’t worry if it’s sticky-don’t add extra flour)
  3. Divide the batter-dough between the loaf pans and use a spatula to smooth out the surface.
  4. Preheat your oven now to 350 degrees, or later depending on how long it takes for your oven to heat.  Place the loaf pans in a warmish spot in your kitchen, cover with a kitchen towel, and let the dough rise until it reaches the top of the loaf pans.  This took about an hour and 20 minutes for me.
  5. Bake the loaves for 35 minutes, brush the top of the loaves with the melted butter, and bake for another 5-10 minutes until the tops are perfectly golden brown.
  6. Take the loaves out of their pans and let them cool on a wire rack.  Resist the urge to slice and eat them now; allow them to cool 100% completely.
  7. When ready to eat, slice thickly and toast.  Top with butter, jam, honey, fruit, whatever sounds good to you, and enjoy!

Rather Rich Corn Muffins

Monday, March 12, 2012

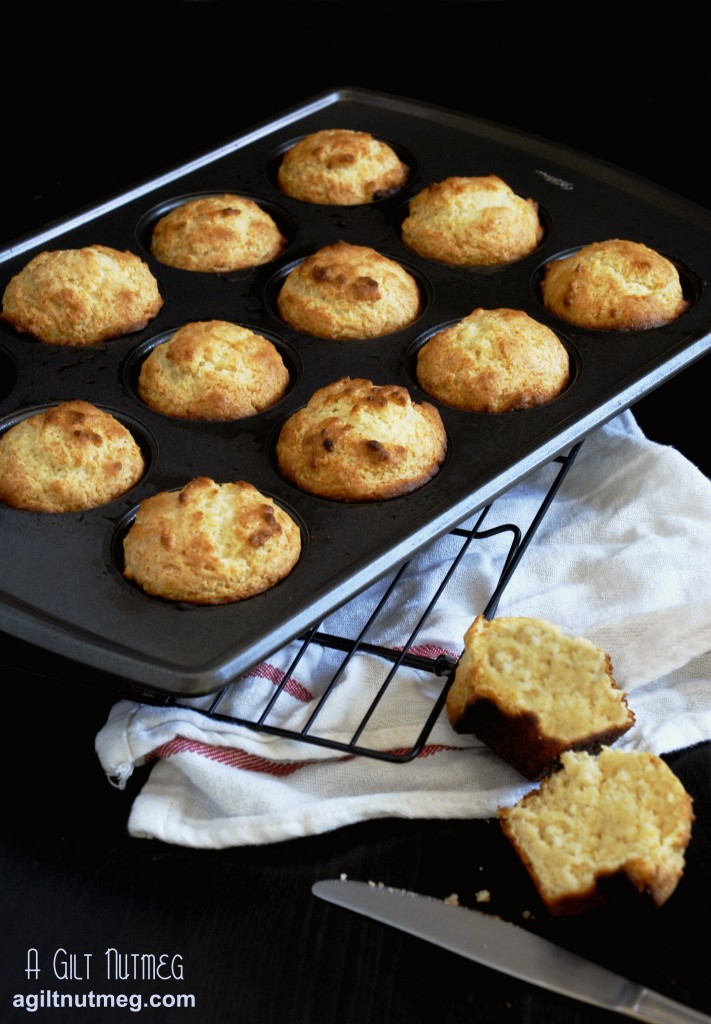
I don’t know if words can even begin to describe these corn muffins.  I mentioned in a previous post that a friend had a rating system for tiramisu all over the city of LA.  Well, The Boyfriend has a similar system in place for corn muffins and cornbread.  Currently, his favorite is at a restaurant called Bandera, and while I know that Bandera’s cornbread still has a stronghold on his heart, I think he was pretty impressed with these corn muffins.  I know I was at least:

This recipe makes some of the most delicious, tender, delicate corn muffins I have ever had the pleasure of eating!  I almost can’t believe that they came out of my kitchen.  The only change I made to the recipe was to use fine ground corn meal instead of coarse ground, mostly just because that was all I had on hand.  That said, I think the texture of the fine ground corn meal was what contributed to such a tender muffin while still giving it the occasional chewy grains that I love so much in corn muffins.  The recipe below is for a half batch-it makes about 12 muffins.

Pay no attention to the name, “Rather Rich”…just ignore it and savor them and forget about the health level of muffins made entirely with heavy cream.  Amanda, of Fake Ginger, hosted this recipe on Project Pastry Queen way back in February of 2010, but I sure am glad I came back to try them!  Many of the other members loaded the muffins up with cheese and jalapenos and such, so check out everyone’s versions here.

Rather Rich Corn Muffins
Adapted from The Pastry Queen
Makes 12 muffins

  • 6 tablespoons unsalted butter, melted and cool
  • 1 1/2 cups heavy cream
  • 2 eggs
  • 1 3/4 cups flour
  • 3/4 cup fine corn meal
  • 1/2 cup sugar
  • 1 tablespoon baking powder
  • 1/4 teaspoon salt
  • 1/2 cup canned corn kernels
  1. Heat the oven to 350 degrees and thoroughly spray a muffin tin with nonstick baking spray.
  2. Mix the melted butter, cream and eggs in a large mixing bowl.
  3. Stir in the flour, cornmeal, sugar, baking powder and salt until ingredients are combined.
  4. Stir the corn into the batter, then evenly divide the batter among the 12 muffin cups.  Sprinkle some additional cornmeal over the top of the batter.
  5. Bake for approximately 15 minutes until the muffins are light brown around the edges and firm when you press them on top.
  6. Let them cool in the muffin tin for 5-10 minutes, because they’ll be fragile at first, but be sure to take them out of the pan and let them cool on a wire rack so they don’t get soggy.
  7. They’ll be best served warm; but it seems Rebecca too has discovered my favorite way to eat a corn muffin: cut in half, toasted, smeared with butter!

Fat Tuesday King Cake

Tuesday, February 21, 2012

Happy Fat Tuesday, everyone!  Though I am not currently in New Orleans sipping on a hurricane, that doesn’t mean I’m not partaking in the traditional gluttony of the day, namely in the baked form known as King Cake.

I’ve always been hesitant to try making King Cake because it’s a brioche dough and goodness knows I have issues with yeast doughs.  It’s not the yeast that’s the problem, it’s “the dough is really sticky, do I add more flour?  Did I add too much flour and now it’s too dense and heavy?  Will the dough ever come out from under my fingernails?”  I was shocked at how easy this came together.  It’s a great beginners recipe for yeasty recipes!

While researching for this post, I read a lot of recipes over the last few days and found some great ones.  This is a pretty simple straightforward one, a sweet delicious brioche dough and a cinnamon cream cheese filling.  It’s so satisfying (especially with coffee) that I really wouldn’t mind if I used only this recipe for the rest of my life, but I can’t wait to make it again soon with additions to the dough like nutmeg and lemon zest.

Tradition states you hide a tiny plastic baby in the cake; the person who finds it gets good luck for the entire year but also has to bring the King Cake to next year’s party.  I didn’t have a tiny plastic baby on hand on such short notice.  If I had my wits about me, I would have hidden a pecan half in there somewhere since it’s an edible object, but I wasn’t thinking so I brought the cake to the office sans good luck charm.  The ruckus everyone made made it very clear that I made a huge mistake and so, without anything better, I resorted to pushing a nickel up from the bottom of the bread and just had to cross my fingers that no one broke a tooth or choked (we’re all safe, thankfully).

Eat up-the one I brought into the office went quickly-and enjoy this day of excess by having another slice!

King Cake
Adapted from Foodie Bride’s friend Erica

Dough

  • 1 cup warm water, about 105 degrees
  • 1/4 cup sugar (1 tablespoon measured out of that 1/4 cup and set aside)
  • 1 pkg yeast
  • 1 egg
  • 1 egg yolk
  • 4 tablespoons butter, melted
  • 3 cups flour, plus more for dusting work surface
  • 1 tsp salt
  • Oil or cooking spray, for coating bowl

Filling

  • 8 oz cream cheese, room temperature
  • 1/4 cup + 2 tablespoons sugar
  • 1 egg yolk
  • 1 teaspoon vanilla
  • 1/2 rounded tsp cinnamon
  • 2 tablespoons melted butter

Glaze

  • 1 cup powdered sugar
  • 1/2 teaspoon vanilla
  • 4 teaspoon water
  • green, purple & yellow decorating sugar OR 3/4 cups plain sugar, divided into three bowls, 1/4 cup sugar per bowl and green, red, blue, and yellow food coloring


  1. In a large mixing bowl, add the warm water, that one tablespoon of sugar you measured out, and the yeast.  Let it sit for 10 minutes.
  2. Add the melted butter, egg, egg yolk, what’s left of the 1/4 cup of sugar, 3 cups flour, and salt.  Stir with a large wooden spoon until the dough comes together (I added the flour in 3 portions, mixing thoroughly after each).  Have an extra 1/2 cup of flour on hand in case the dough is way too sticky, but I have to say that this is the first yeast dough I’ve ever done where I didn’t have to add any extra flour at all and it was just right.  It should be just a little sticky, and look a little lumpy.
  3. Lightly oil a large metal bowl and transfer the dough into the bowl.  Cover with a dish towel and let the dough rise in a warm spot until double in size, about an hour.
  4. In the meantime while the dough is rising, clean the kitchen (at least that’s what I did, because I didn’t want to torture my roommate any more), set the oven to heat to 375 degrees and then make the filling.
  5. Add cream cheese, sugar, egg yolk, vanilla and cinnamon (that’s everything BUT the melted butter) to a medium mixing bowl and, using an electric mixer, beat on medium until the filling is smooth and spreadable, which won’t take too long.
  6. When the dough is done rising, sprinkle a surface (I covered my dining room table with saran wrap) with flour and roll the dough out with a rolling pin until it is a rectangle approximately 12″ tall and 18″ wide.
  7. Using a pastry brush, brush the melted butter over the dough, leaving an inch or so of dough along the farthest wide edge dry.
  8. Spread the cinnamon cream cheese filling evenly over the dough (leaving that inch of dough dry again).
  9. Taking the wide edge of the dough closest to you, gently roll it up and away from you, forming a big giant cinnamon roll log.  Pinch the long seam closed as best you can, then arrange the rolled up dough in a ring shape on a baking sheet, pinching the two open ends together to close the ring.  I tried to stretch it out as best I could so that it would hold a little of its ring shape instead of just baking up into one big ball.  Emeril Lagasse suggests putting a well greased coffee can in the middle there so that the hole doesn’t close up.
  10. Bake for 25 minutes until nicely golden brown on top (I prefer my baked goods lighter rather than darker, but in this case I went for the whole 25 minutes to ensure the inside was baked properly and the top was only slightly darker golden than I normally go for).
  11. Let the bread cool on a wire rack before glazing.
  12. If you are coloring your own sugar, do that now-I highly recommend it because, though it took an extra 10 minutes or so of work, it was worth it because it was free (I already had sugar and food coloring in my cabinets) versus paying $6 for pre-colored sugars.  In the first bowl, I used 3 drops of yellow, in the second I used 3 drops of green, and in the third bowl I used 3 drops of blue and 3 drops of red.  The food coloring will basically just stick to a little clump of sugar, but if you take a spoon and keep jabbing at that little droplet, it will break up and color the rest of the sugar.  The Boyfriend and I (isn’t he sweet to help?) took about 5 minutes per bowl of stirring, tapping and jabbing, but I think the colors turned out nicely!
  13. To make the glaze, add all the ingredients in except for the colored sugars into a small mixing bowl and whisk until thoroughly combined and smooth.  The thickness of the glaze is up to you; I wanted one that was pourable but that wouldn’t just drip right over the sides and look messy.  You can add a little water (a little goes a looooong way here) or some powdered sugar to adjust the glaze to your desired thickness.  Save a little glaze to drizzle over the top of the sugar afterwards or just use this now and then later throw together a little sugar and water until it’s drizzling consistency.
  14. Let the glaze set for 5 minutes or so before decorating.  King Cakes are usually decorated in alternating stripes of the green-yellow-purple colors, but you can get creative if you want!  Just be sure to lay the sugar on thick, because I tried to go thin on my sugar layer and the white glaze underneath would start to show through (in some cases the sugar dissolved and in other cases the glaze would get heavy with the sugar and start to drip farther down the side of the cake, so there would be white stripes where the sugar had slid down.  Being heavy handed on the sugar solved both of these problems!).  Drizzle with some extra glaze.
  15. Serve with coffee and enjoy your Fat Tuesday!


Beer Bread

Monday, December 19, 2011

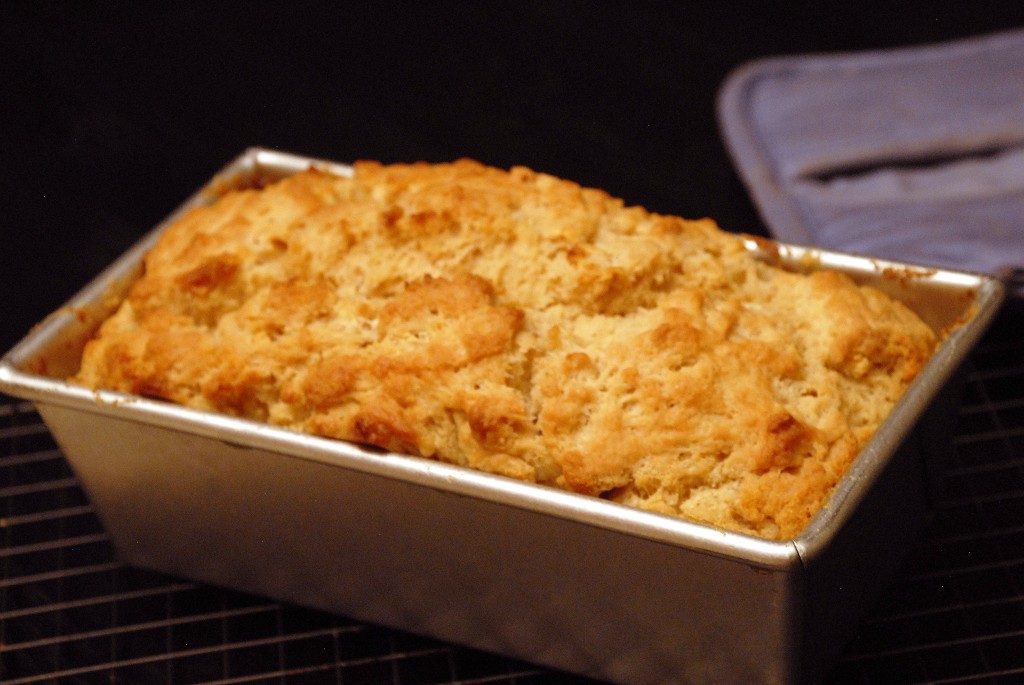
Man, I’m not sure how I lived without this bread.  I have never had a more butter-soaked, chewy crusted bread in my life and I swear that it took no more than 5 minutes to throw together and stick in the oven.  Even easier: last year my sister and I discovered Sam Adams’ Winter Variety Pack and loved it- you get 5 different winter spiced flavors (my favorite is the Old Fezziwig Ale) so I already had some beer on hand!

Thanks to Amanda of Homekeeping Adventures for this great Project Pastry Queen choice; it’ll be perfect to go with a big pot of chili for all the family gathered for the holidays.

Beer Bread
Recipe from Rebecca Rather’s The Pastry Queen

  • 3 cups all purpose flour
  • 1 tablespoon baking powder
  • 1 teaspoon salt
  • 3 tablespoons sugar
  • 1 bottle (12 0z) good quality beer or ale
  • 1 stick (1/2 cup) melted butter
  1. Preheat oven to 350 degrees; grease a 9×5″ loaf pan with butter.
  2. In a large bowl, whisk together flour, baking powder, salt, and sugar.
  3. Pour the beer into the flour mixture and stir until just combined (I used the same whisk at this point, but the dough is super heavy and sticky, so that proved to be a bit of a challenge.  A wooden spoon might have been a better idea.)
  4. Pour half of the melted butter into the bottom of the prepared loaf pan, spoon the batter into the pan and pour the rest of the butter over the top.
  5. Before putting the pan in the oven, put a piece of tin foil underneath it, because some of that delicious butter will spill over and you’ll be washing dishes and turn around to see a room full of smoke from the dripped butter all over the floor of your oven.
  6. Bake for about 50 minutes until golden brown on top.
  7. Let cool for 5-10 minutes, flip loaf out of the pan and serve warm, using a serrated knife to cut through the bread.

Rebecca suggests eating it all immediately (like I need a stick of butter for dinner!), but I can attest that it is absolutely delicious for breakfast toasted-it’s already buttered enough for you!

Fresh Bread in 30 Minutes

Friday, December 2, 2011

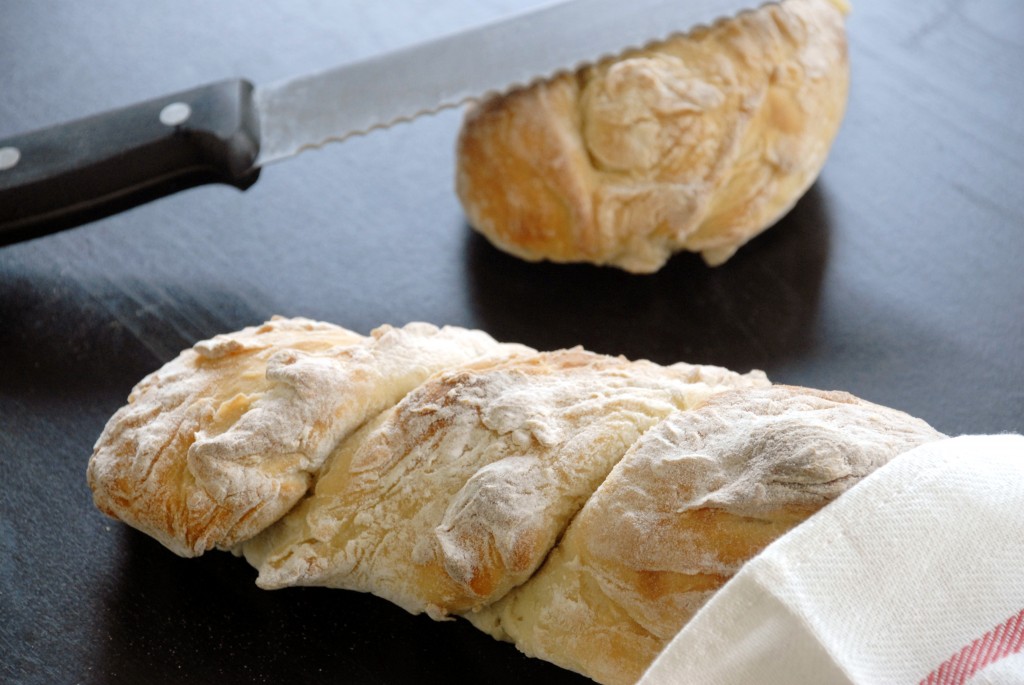
I will be the first to admit that this isn’t a special fancy recipe.  You don’t create a sponge or set up a sourdough starter days ahead to develop great yeasty flavor.  You don’t lovingly shape the loaves into perfect braids.  You don’t even have to use bread flour.  No, this is slacker bread.  This is a practice bread to dip your toes into the (scary) bread-making world and it’s a recipe for when you don’t have time but you just really could go for a hot piece of bread fresh from the oven to go with that soup.

I will also be the first to admit (as I often do on this blog), making this recipe didn’t turn out as planned-apparently Southern California likes to play tricks on me and while the humidity is currently 33% (my throat is dry as a desert as I’m writing this), some evenings it’ll sneak up to 95% when I’m not paying attention and then when I’m trying to make bread, I have to use waaaaay more flour than the recipe calls for to even make the bread kneadable.  This recipe also uses a trick to create steam in the oven (a requirement for traditional French baguettes) by tossing ice cubes in the bottom of your hot oven and quickly closing the oven door to trap it (the moisture keeps the outside from forming a crust too quickly so that the inside has time to bake up nice and fluffy first before the crust traps it).  This resulted in me turning around after a few minutes to see a giant puddle of water leaking out from underneath my oven.  But that’s why it’s nice to have this recipe: to understand the basics of how bread making works so that I (we) can be successful with more advanced recipes later.

Fresh Bread in 30 Minutes
Makes 2 baguettes (even though they’re not technically baguettes)
Adapted from The Family Kitchen

  • 2 cups water, between 105-115 degrees
  • 1 packet of rapid-rise yeast
  • 2 tablespoons sugar
  • 1 1/2 teaspoons salt
  • 3-4 cups flour (plus maybe some extra if your humidity is playing tricks on you)
  • 2-3 cups of ice cubes
  1. Heat oven to 425 degrees and place a large, rimmed metal baking sheet in the very bottom of your oven.  A glass pan will take longer to heat so we want metal to ensure those ice cubes sizzle and steam when they hit the sheet-also make sure it’s rimmed so you don’t also have a lake forming in front of your oven like I did.
  2. In a large bowl, mix the water and sugar and sprinkle the yeast over the surface, let sit for 10 minutes.
  3. Stir in the salt and add the flour to the mixture, a half a cup at a time, mixing with a wooden spoon (it’ll get too thick for a whisk).  You’re aiming for dough that you can knead without it sticking to your fingers or the board.  If you get through all 4 cups of flour and your dough is still too sticky, try kneading it (on a surface dusted with flour) for a few minutes and then adding more flour, a quarter of a cup at a time until the dough is workable without you having to pull it off your fingers every other minute.
  4. Once it’s workable, knead the dough for 10 minutes.  Kneading basics: take a handful of dough from the edge of the dough ball farthest from you, stretch it out a little, then pull it up and over into the center of the dough ball, pushing it in with your fist.  Turn dough ball a quarter turn (90 degrees) and repeat.
  5. Let the dough rest for a few minutes while you’re covering a baking sheet with parchment paper, then cut the dough into 4 equal pieces.
  6. Roll (or stretch) the dough into 4 long ropes, then place them on the papered baking sheet.  Twist two ropes together to form one long loaf and tuck the ends under, shaping them into nice rounded ends.  Repeat with the other two ropes so that you have two loaves.  At this point, let the bread rise with a towel covering it, sitting near your warm oven for 15 minutes.  Or you can just put it in the oven now.
  7. Put baking sheet into oven (close door in meantime) then grab your ice cube, open the oven door, throw them onto the rimmed baking sheet in the bottom of the oven, and quickly shut the oven door again to trap in the steam.
  8. Bake for 15 minutes and check on your loaves.  Mine still had plenty of time to go -I think mine baked for 25 minutes at least before it was ready-but your oven may be faster than mine.  You want the loaves to be golden brown all over and to sound hollow when you tap it.
  9. Let cool at least for a little while so you don’t burn yourself cutting it, but be sure to grab some while it’s it still warm for you to enjoy!