Entries Tagged as 'Fancy Desserts'

Coconut Chocolate Pie

Monday, April 9, 2012

 coconut chocolate pie

It’s still Passover so I’m not too too late with this holiday approved dessert, I think.  Between all of the coconut macaroons and flourless chocolate cakes that come out this time of the year, this combo seemed like an obvious (and delicious) choice-and contrary to many holiday desserts, this one is so incredibly easy I could hardly believe it!  It only has 4 ingredients and takes practically no time to complete the steps, which was a major relief because those Hot Cross Buns put a temporary curse on my kitchen.  Nothing was working and after I ruined the lime creme I was making to fill coconut macaroon tart shells, I was sure I was going to have to go back to the grocery store at 10pm (typical me scenario) to get ingredients so that I could produce something (anything) for today’s post.  Then the kitchen fairies came out and, knowing I needed 8 oz of bittersweet chocolate for this recipe (which I already had the coconut for), I found a 4 oz bar of bittersweet chocolate and exactly 4 oz of bittersweet chocolate chips leftover from a previous recipe.

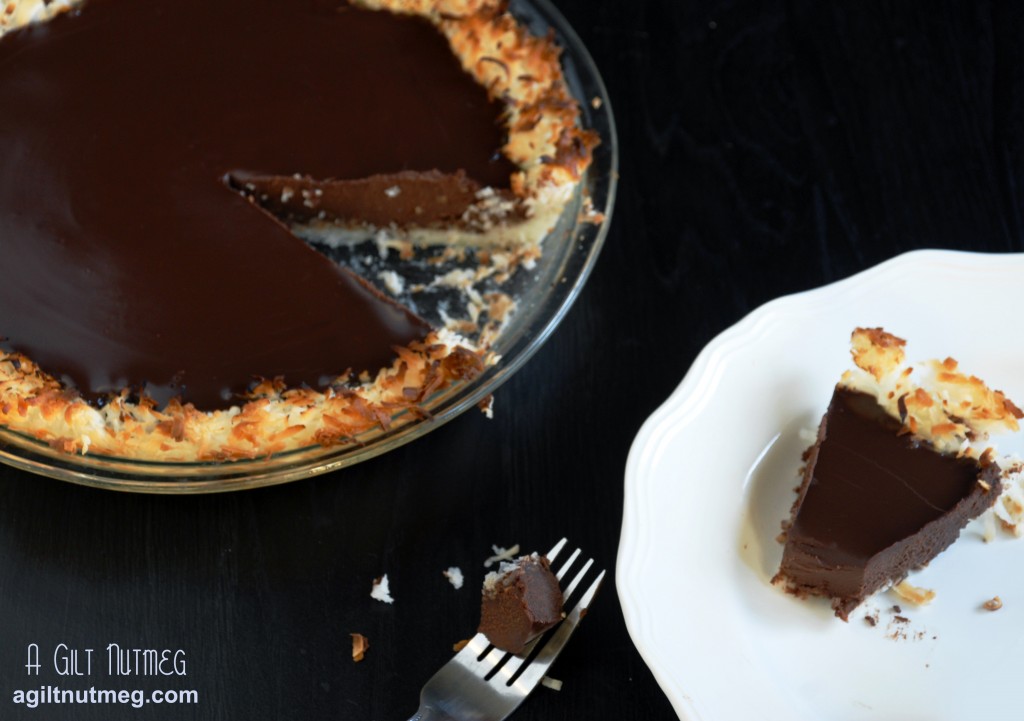
This recipe produces a crisp coconut macaroon “crust” and a creamy dense chocolate filling that will be perfect with a little bit of whipped cream to lighten it up.  While it is appropriate for Passover, since it is has no flour in it and is unleavened, I think this pie will be welcome at anyone’s spring table.  Chag Sameach!

Coconut Chocolate Pie
Adapted from Martha Stewart’s New Pies and Tarts

For the crust

  • 4 tablespoons unsalted butter, softened
  • 1 bag (about 14 oz) of shredded coconut

For the filling

  • 1 cup heavy cream
  • 8 ounces bittersweet chocolate, finely chopped
  1. Heat oven to 350 degrees.
  2. In a food processor, pulse about 1/3 of the coconut and butter together until well combined, 1-2 minutes.
  3. In a medium bowl, combine the coconut-butter mixture with the rest of the coconut and stir well until mixture is cohesive.
  4. Press the coconut into a 9″ pie plate so that it forms a crust and bake for 10-15 minutes.  If the edges start to brown too much, cover them with some tin foil.
  5. Once golden brown, move the crust to a wire cooling rack and let it cool completely before filling with the chocolate (this will allow the crust to crisp up first).
  6. While the crust is cooling, bring the heavy cream to boil in a small saucepan.
  7. Put the chopped chocolate into a medium bowl and pour the boiling cream over it.  Let it sit for a few minutes then whisk until it is smooth and no streaks of cream remain.
  8. Pour the chocolate into the tart shell and let it cool before moving it to the refrigerator to set completely for another hour or so.  Enjoy!


Baked Hot Chocolate

Friday, February 17, 2012


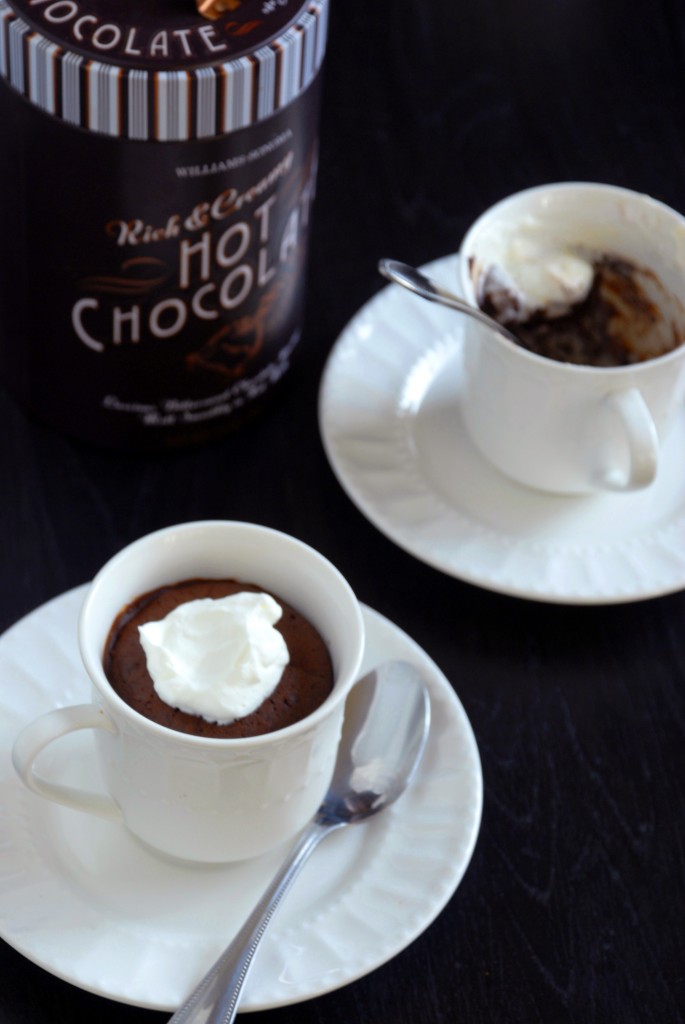
We’ve had a bit of a cold snap the last few days here in SoCal and I found myself craving hot chocolate-but not the wimpy hot chocolate that comes as packaged dust that you dump out of an envelope.  No, I wanted rich, thick, almost-could-eat-it-with-a-spoon hot chocolate.  Wouldn’t you know, that with just the right recipe you CAN eat hot chocolate with a spoon?

This dessert is baked just long enough so that it forms a bit of a cake-y crust on top, a layer of fudgy pudding like chocolate underneath that, and then at the bottom is molten hot chocolate just waiting to be spooned up out of the cup.  You can certainly toast a marshmallow and put it on top, but this dessert is so rich, you’re going to want a little bit of lightly sweetened whipped cream instead to cut that richness.

Enjoy in front of a fire and with a good book!

Baked Hot Chocolate
Adapted from The Wall Street Journal
Serves 4

  • 8oz high-quality semi-sweet chocolate, chopped
  • 6 tablespoons unsalted butter, cubed
  • 4 eggs
  • 1/4 cup granulated sugar
  • topping -whipped cream or marshmallows
  1. Heat oven to 350 degrees.
  2. Heat a large pot of water until simmering; place a large metal mixing bowl on top of the pot and dump in the chocolate and butter.  Stir every so often until the mixture is completely melted and smooth.  Set the bowl aside and leave pot of water simmering.
  3. In a medium metal mixing bowl, set it on top of the large large pot of water; add the eggs and sugar and mix until thoroughly combined.  Heat it over the simmering water until it’s warm to the touch (I literally just stuck my finger into the mixture and said, “yup, that’s warm” and called it good).  Remove the bowl from the pot of simmering water and turn the burner under the water off, since you won’t need it anymore.
  4. With an electric mixer, beat the egg mixture for 5 full minutes.  It should be very light in color and very frothy by the time you’re done.
  5. Fold the egg mixture into the chocolate.  It may take a little longer than normally folding in egg whites takes, but you’ll see the egg mixture start to tint brown with the chocolate and you’ll know you’re making progress.  Make sure you scrape the bottom of the bowl thoroughly so you don’t miss any of the chocolate-y goodness.
  6. When the eggs are fully incorporated into the chocolate, spoon the mixture evenly into 4 oven proof coffee cups.
  7. Arrange the coffee cups in a large roasting pan and fill the pan with water until it reaches 1/2 way up the sides of the coffee cups.
  8. Bake for 12-15 minute, until the tops are just baked into a cake like crust.  I know I overbaked mine (I did mine for 20 minutes) a bit, and I think in this case it’s better to err on the less time rather than more time in the oven.
  9. When done baking, remove the pan from the oven and place the cups on a wire cooling rack until you can pick the cups up with your hand and not burn yourself.
  10. Serve while the cake is still warm, with the topping of your choice.  Enjoy!

Lemon Spongette Cakes

Monday, February 13, 2012

With Valentine’s Day on Tuesday, the internet has been flooded with all things either Red Velvet or triple rich chocolate.  Allegedly, before kissing their loved one, people would like for their tongues to be stained red or brown.  Being a fan of neither red velvet OR triple rich chocolate (or having my tongue stained weird colors before planting a kiss on The Boyfriend for that matter), I’m posting what will hopefully be an easy yet elegant alternative to the traditional V-day desserts.

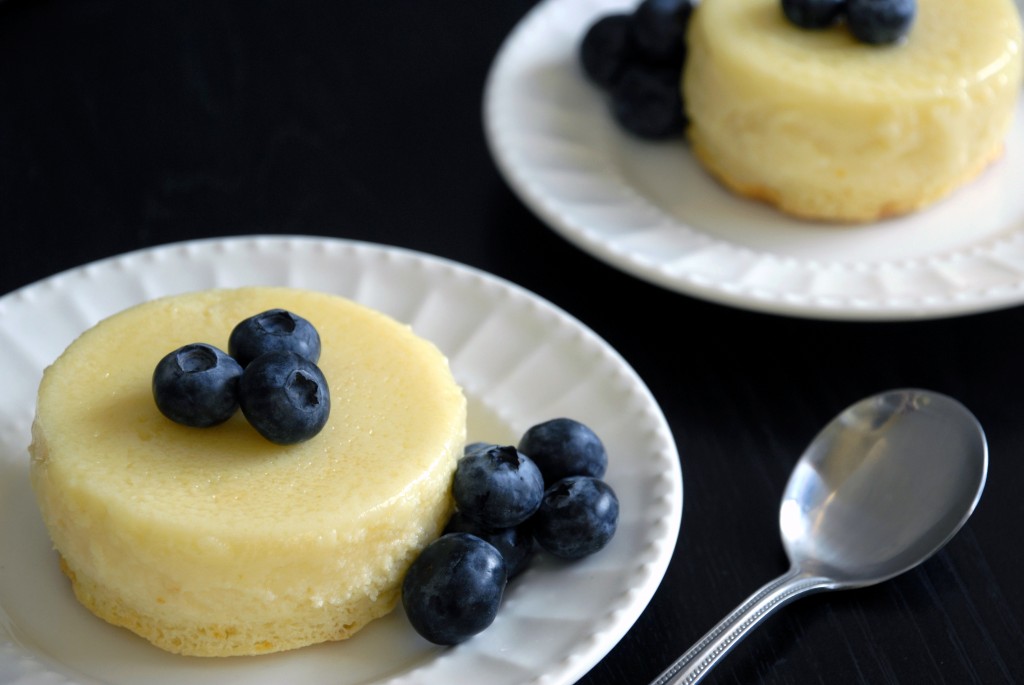
I truly love these little desserts: they’re light sponge cake and smooth custard all in one; they’re a delicious light lemon flavor and made with ingredients you likely already have at home except perhaps the lemon.  I want to say the only thing they don’t have going for them is that they have to chill for a few hours after you bake them so it’s not the fastest dessert, but truthfully that’s a good thing, because it means that, instead of rushing around to finish making dessert after your fancy dinner, you’ve got dessert already waiting in the fridge for you to enjoy.  You can calmly pull it out, plate it and present it, which really gives you points in the “I’m Martha Stewart in the kitchen” department.

Lemon Spongette Cakes
Makes 4 small cakes
Adapted from The Kitchn

  • 2 eggs, yolks and whites separated
  • 3/4 cup whole milk
  • 1 1/2 tablespoons unsalted butter, softened
  • 1/2 cup sugar
  • 2 tablespoons flour
  • juice of 1/2 of one lemon (about 1 1/4 tablespoons)
  • zest of 1/2 of one large lemon
  • pinch of salt
  1. Heat the oven to 350 degrees and spray 4 ramekins (approx 6 oz and/or 3″ wide) with non-stick spray.
  2. In a small metal bowl, beat the egg whites on low first for about a minute, then on high until stiff peaks form and set aside to use later.
  3. In another small bowl (or as I did, just straight in the big glass measuring cup the milk was in), add the egg yolks to the milk and beat with a fork until combined.
  4. In a large bowl, beat the butter and sugar together.  Normally these would turn into a creamy smooth mixture, but that won’t happen this time since there’s so little butter.  Beat for 2-3 minutes so that the mixture is good and combined.
  5. Add the flour, lemon zest, lemon juice and salt to the butter-sugar mixture and mix until thoroughly combined.
  6. Pour the milk-egg yolk mixture into the butter-sugar-lemon mixture and beat until well combined.
  7. Fold the egg whites into the lemon batter.  Normally I would say “gently” fold the egg whites in, but I had to be a little less than gentle this time since the egg whites didn’t really want to incorporate well.  Instead, they just sort of broke up into little pieces and floated on top of the very liquid batter.  Do the best you can, being a little rougher than normal folding them in until the bits floating on top are pea sized or smaller.
  8. Using a measuring cup, scoop the batter out of the bowl and pour it evenly divided into the 4 prepared ramekins (by dipping with a measuring cup instead of just pouring out of the bowl, it ensures you get an equal batter-floating egg whites ratio).
  9. Place the ramekins into a large roasting pan and fill the pan with water about 1/2 way up the sides of the ramekins.
  10. Put the roasting pan of water and ramekins into the oven and bake for 40-45 minutes.  Instead of turning an even golden brown, mine started to turn dark brown in spots after about 35 minutes so I laid a sheet of tin foil over the top so they wouldn’t burn for the last 5-10 minutes of baking.
  11. The tops should feel a little stiff when you poke them.  After the cakes are done, pull them out of the oven and take them out of the water bath, leaving them to cool on a wire rack for 10 minutes or so.
  12. Move the ramekins to the refrigerator for 1-2 hours.
  13. When ready to serve, run a knife along the inside edge of the ramekin and flip the ramekin over.  The cake won’t just fall out-with the ramekin still upside down, I gently twisted the cake around back and forth a few times and it released from the ramekin.
  14. Place the dessert, cake side down on the plate, pudding side up.  Garnish with fruit and powdered sugar and enjoy!

Petite Pavlovas with Lemon Cream and Fresh Fruit

Monday, January 23, 2012

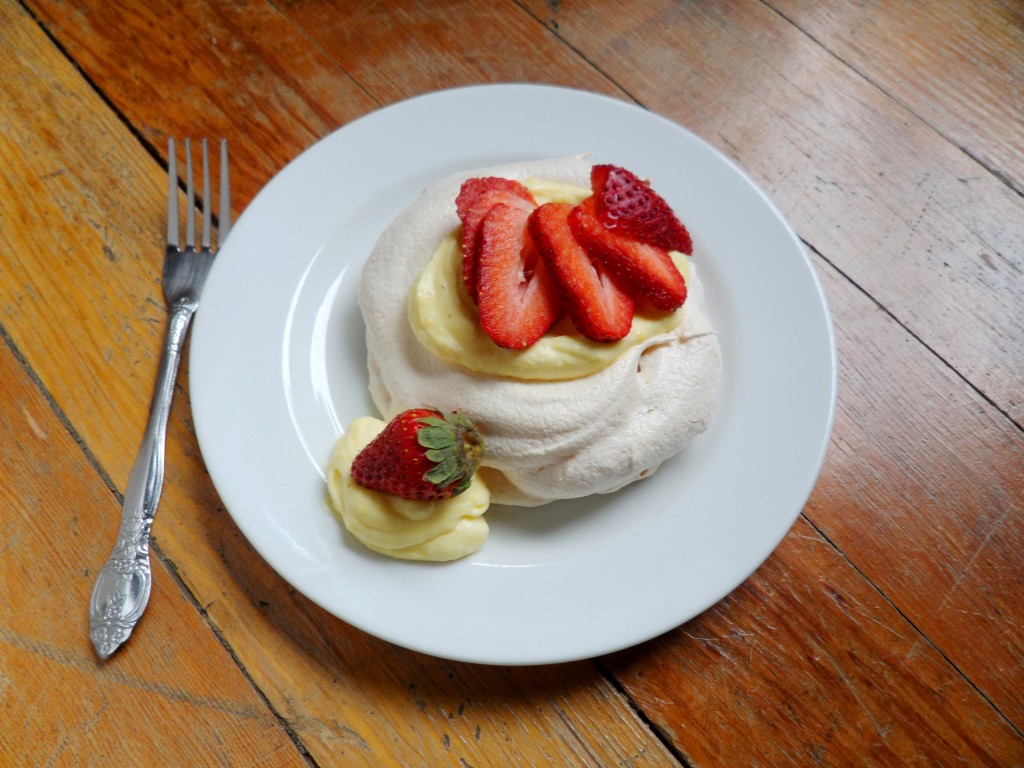
petite pavlova with lemon cream and fresh fruit

First of all, I apologize for my photo; I’ve been in a mountain cabin all weekend and left my fancy-schmancy camera at home.  Now…

This is a story of a girl and her meringue.  Growing up in Georgia in the summer, you KNEW when there was humidity.  It was the suffocating, sticky kind that made temperatures even in the 80s insufferable.  Here in Southern California, no such thing exists.  Where I work in “The Valley”, it gets to be 110 degrees there, but with very low humidity so I barely notice the heat sometimes.  At home in Beachtown, we get foggy nights and mornings here and there, sure, but I never feel any humidity there either.  So imagine my frustration the last time I tried to make something with meringue (PPQ’s Divinity project) only to utterly fail.  Oh that was not a good night in the kitchen, let me tell you, and The Boyfriend has never seen me so upset that I had to leave the kitchen for the evening.  I scoffed at suggestions that it might be the humidity only to begrudgingly check the weather-you should have seen my jaw drop when I read that humidity had been 95% that night.  No WONDER I failed so spectacularly!  I will never again question whether humidity has an effect on a recipe-but I do wonder why I don’t feel almost 100% humidity in California…why isn’t it so suffocating as it is in Georgia?  If you’re a meteorologist, please, explain this to me.

When I got word that it was my turn to host Project Pastry Queen, I scanned the list of recipes left to choose from; we’re starting to slim down the list considerably, so eliminating the elaborate cakes that I don’t need sitting in my kitchen and the savory options that are just a teensy bit less fun to make, I didn’t have many choices.  The pavlovas caught my eye, though…given my big fat meringue failure last time, I was hesitant.  But, since I fancy myself a plucky adventurer, I officially submitted pavlovas as my recipe for the week and started checking the humidity nightly.  I knew I was going on a business trip the week I was to host and on a mini-vacation that weekend, so all this meant was that I had to make the recipe ahead of time so I could be ready to post even if I wasn’t in the kitchen.  So back to me checking the humidity nightly…the days started to tick down…I thought I still had some time…then three days…then two…and then the last night before I left for vacation the humidity was 89% and I packed my handheld mixer and my spatula in the hopes that maybe, just maybe, I could make the pavlovas at the cabin I was meeting my friends at for the weekend.  And then at the cabin it rained all Friday night and Saturday morning.  I was pretty sure at this point that I was cursed and I despaired that I was going to have to post the recipe for PPQ without having actually made it.  I kept obsessively checking the weather, however, and when at the last minute on Saturday night the humidity miraculously went from somewhere in the 70s down to 22% I scrambled into action and hustled to the kitchen.  I was suspiciously eyeing my progress the entire time and was surprised to find myself with beautifully whipped up egg whites at the end.  Still wary and prepared for failure, I traced the circles onto the parchment paper, spooned the meringue onto the sheets, put them in the oven and crossed my fingers.  After an hour, you’re supposed to turn off the oven and leave the pavlovas in the oven for another hour or overnight without ever opening the oven door.  This morning I cautiously approached the oven…opened the door…I couldn’t believe my eyes at these beautiful little puffs of meringue sitting in the oven!

So this is a tale of failure (boo) and success (yay!); I hope the story doesn’t scare you, because really, if you just pay attention to the humidity in the first place, you won’t have any problem whatsoever.  It truly is a beautiful, elegant little dessert that should not inspire fear whatsoever (especially because it was named after a ballerina, which isn’t scary at all).  I do admit that I forgot my camera at home, so please excuse the less than stellar photograph, as it’s pretty hard to put together a make-shift photo studio at a cabin in the woods.

Please check PPQ for the other members’ pavlovas; I’m sure they’re all going to be gorgeous!


Petite Pavlovas with Lemon Cream and Fresh Fruit
from The Pastry Queen by Rebecca Rather
Serves 4

Meringue

  • 4 large egg whites (save 3 of the yolks for the lemon cream)
  • 1/2 teaspoon cream of tarter
  • pinch of salt
  • 1 1/4 cups sugar (superfine sugar is best)

Filling

  • 3 egg yolks, plus 2 whole eggs
  • 1/3 cup sugar
  • 1/4 cup freshly squeezed lemon juice
  • 1/4 cup champagne or brut sparkling wine
  • 3 tablespoons chilled unsalted butter, cut into 4 pieces
  • 1/2 cup chilled heavy whipping cream
  • 2 tablespoons powdered sugar
  • 1 cup fresh fruit, sliced

Meringue

  1. Heat oven to 300 degrees.  Line 2 baking sheets with parchment paper.  Trace 4 evenly spaced 4″ diameter circles on each piece of parchment paper (I used a small bowl to trace).
  2. Using an electric mixer (fitted with a whisk attachment, if you have more than one choice), beat the egg whites, cream of tarter, and salt on high speed about 2 minutes until soft peaks form (which means that when you pull the beaters out of the egg whites, they’ll make soft little curls off the tips of the beaters that flop over).
  3. Add the sugar, very patiently, 2 tablespoons at a time, and continue beating the egg whites on high speed until stiff peaks form (when you pull the beaters out of the egg whites, the curls won’t flop over, they’ll stand up pointy).
  4. Spoon the meringue onto the baking sheets using the traced circles as a guide.  Use the back of a spoon to build up a 1″ rim on each meringue round.
  5. Bake the meringues for 1 hour.  Turn off the oven and leave them inside the closed oven for another hour, or you can just leave them in the closed oven overnight if you want.  (Rebecca says if you wrap them well, they’ll keep for 2 days at room temp or 3 weeks if they’re frozen).

Filling

  1. Whisk the egg yolks, eggs, sugar, lemon juice and champagne in a large bowl set over a saucepan filled with 2″ of simmering water.  Cook about 15 minutes, whisking occasionally, until the mixture thickens.
  2. Whisk the butter into the lemon mixture, one piece at a time.
  3. Cook about 10 minutes longer, whisking occasionally.  The lemon filling will be thick and pudding-like.
  4. Cover the filling with plastic wrap, pressing the wrap into the surface of the curd, sealing it and leaving no air between the wrap and the filling.  Refrigerate it for at least 1 hour or up to 3 days.
  5. Using an electric mixer (again with a whisk attachment if you have the option), beat the cream in a large bowl on high speed until soft peaks form.  Add the powdered sugar and beat until thoroughly combined.  Fold the whipped cream into the cooled lemon filling.
  6. Spoon the lemon filling into the meringue shells and top with the fruit.  Serve immediately and enjoy!

Espresso Crème Brûlée

Monday, January 16, 2012

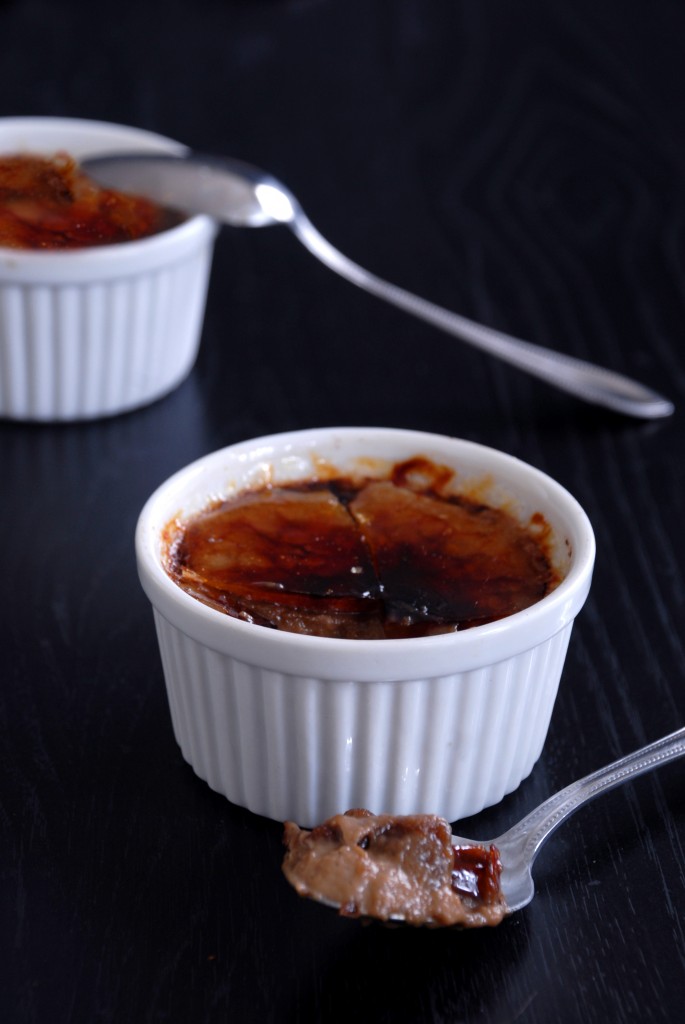
espresso creme brulee

I have to admit that I always thought creme brulee was a very hard, very fancy dessert, which is why you only really saw it in restaurants.  Now that I’ve made it, I realize it’s incredibly easy and that’s probably why you always see it in restaurants-because it takes practically no effort for the kitchen staff to make, yet it looks spectacularly difficult and fancy.  Truly, it’s almost embarrassing how easy this recipe is and I feel like I’ve exposed some sort of great restaurant chef secret.

This recipe from our dear Pastry Queen is espresso flavored and if you like coffee, this is definitely the dessert for you.  So rich and full of flavor (that espresso powder is impressive!), I could only eat half the ramekin before having to call it quits.  If you’ve been reading my blog for any sort of time, you’ll know my outright obsession with vanilla and, while this recipe was very good, I can’t wait to make creme brulee without the addition of the espresso powder next time, especially because I now know it takes next to no effort.

The one thing I know stopping most of you is lack of a kitchen torch in your cabinet.  When I made that chocolate meringue tart a few months ago, I was in the kitchen whining to myself about how terrible my lack of broiler element in my oven was and how a kitchen torch would make everything better.  Little did I know that The Boyfriend sitting in the living room actually heard me whining from the kitchen in between his episodes of Star Trek and, lo and behold, guess what I got for my birthday in December!  This was the grand exciting first use and I couldn’t be happier with it.  If you don’t have a kitchen torch, you can use the broiler element in your oven, which I don’t have, so I would have been S.O.L. if it weren’t for such a generous partner-in-crime.

Check out Sarah’s beautiful chocolate covered espresso bean garnish here (she even has video!) and the rest of the PPQ members here.

Warning: as is typical with many desserts, this needs to sit in the fridge for 3 hours after baking to cool, so if you’re making it for company, make it the night before or the morning of.


Espresso Crème Brûlée

Serves 6

From the Pastry Queen by Rebecca Rather

  • 1/4 cup whole milk
  • 2 3/4 cups heavy cream
  • 1 tablespoon espresso powder (I got King Arthur brand espresso powder at Sur la Table)
  • 1 vanilla bean (or 1 tablespoon vanilla bean paste + if you’re Emily, an extra splash of plain vanilla extract)
  • 7 large egg yolks
  • 2/3 cup plus about 1/2 cup sugar for the crust later
  1. Heat the oven to 300 degrees and lightly butter your ramekin dishes.  Rebecca suggests using six 6oz ramekins but I have a ragtag collection of two 5oz, two 6oz, and two 7oz.  It all evens out and my point is that you should just use whatever works that is close-ish in size and not stress over finding 6oz ramekins.
  2. In a non-reactive saucepan (which means not aluminum or copper), combine milk, cream, espresso powder and vanilla (if you’re using a bean, scrape the seeds off the pod and add both seeds and empty pod to the cream) and heat until boiling.  As soon as it boils, turn off the heat.
  3. In a large mixing bowl, whisk the egg yolks with the 2/3 cup sugar until thoroughly combined, then, slowly pour the hot cream mixture into the egg yolks, whisking the whole time until fully mixed in.
  4. Strain the mixture through a sieve into another bowl to catch the vanilla bean pod and any little bits of egg that may have cooked.
  5. Place the prepared ramekins into a baking dish that is taller than the ramekins and fill the ramekins almost to the tippy top with the cream mixture (my ramekins have a rim about a 1/4″ from the top that I used as my stopping point.  Rebecca suggests filling them to the absolute top-to accomplish this, she puts the pan of ramekins in the oven before filling them to the brim, so they don’t spill during transport).
  6. Put the baking dish with ramekins in it into the oven and, using a measuring cup or whatever you have on hand (I used a gravy boat that was surprisingly perfect for the task), pour water into the pan until it reaches about 2/3 of the way up the the outside of the ramekins.  (A “water bath” like this was one of those cooking things I was always scared to do but…really, I’m just lame.  All it is is pouring water in a pan.  What on earth was I scared about?)
  7. Bake the custard for 1 hour, checking every so often on them.  If they bubble or if they start to brown on top, reduce the oven temp to 250.  Mine were fine, and I usually find that my oven runs a little hot.  Bake them until they’re slightly jiggly but not liquid.  They’re going to look an ugly dull grey for now, but they’ll be prettier with the sugar crust later.
  8. Remove the ramekins from the water bath pan and let them cool on a wire rack for 30 minutes, then transfer the fridge for 3 hours.
  9. When you’re ready to eat, sprinkle a layer of sugar on top of the custard-just barely enough so that you can’t see the custard underneath.  When you torch it, you want it to be easily cracked with a spoon.  You may notice in my photo that I put waaay too much sugar on top and ended up with a thick slab of sugar candy on top.  It looked like a layer of glass after it cooled.  You want it to be more thin, crispy, and bubbly, like Sarah’s.  If you over sugar, no worries!  It’ll still taste fantastic, you may just have a piece of candy to slam through with your spoon instead of a more delicate topping you gently tap.  Hold the torch a few inches away from the dish and keep it moving over the surface until the sugar melts and turns bubbly and brown.  Let cool for a minute or two to harden and then serve immediately.  Enjoy!

Tiramisu

Friday, December 9, 2011

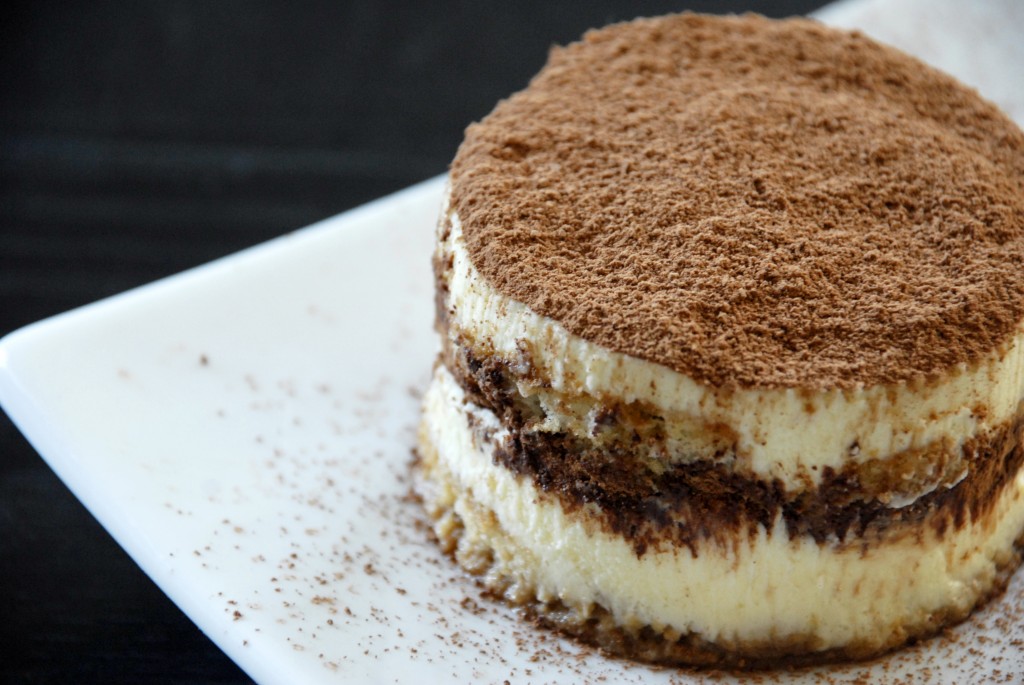
Some of you may know that I bake treats for the office each month to celebrate the office birthdays for that coming month.  This month, December, is actually MY birthday month!  I had to go all out, of course, and when I asked my fellow December birthday-ers what they might want to request, the idea for tiramisu was immediately put on the table.  What was scary: the person who suggested tiramisu actually has a ranking of tiramisu in restaurants all over LA and I’d never made it before.  I was hoping for at least a 6 or 7, especially after the typically comical “Emily goes to the grocery store and comes home with all the wrong stuff” routine and the “Emily doesn’t pay attention while cooking and has to figure out a way to salvage her dessert” routine (seriously, sometimes I feel like me going to the grocery store and cooking would make a hilarious black and white silent film).

While at the big grocery store a few blocks from my house, I got the ingredients I needed for the tart, but they did not have ANY of the key ingredients I needed for tiramisu (marscapone and lady finger cookies).  Cut to me racing to Trader Joe’s, hoping they hadn’t closed yet.  Though they’re farther away, let me tell you, I really just need to quit shopping anywhere else.  Not only did they have marscapone cheese, but lady fingers are actually featured in their current “Fearless Flyer” so there were boxes of them EVERYWHERE.  That said, I stood in the Trader Joes in front of the lady fingers for a good 20 minutes debating:  there are two types of lady fingers, “soft” and “hard” and the Cooks Illustrated recipe I read specifically specified in multiple places in the recipes to use the “hard” lady fingers.  TJ’s only had “soft”.  Oh well!  I figured you can’t have tiramisu without lady fingers even if they do get mushy.

So I went home with what I could find and found a trick to make those soft lady fingers a little more sturdy (bake in the oven for a little while at a low temp), but in my hurry later I forgot to add HALF of the rum to the recipe.  I must have also been in la-la land when I was layering the dessert, because it’s supposed to go lady fingers - marscapone - cocoa powder - repeat.  I somehow missed the “repeat” step and went straight back to marscapone after the cocoa powder.  Sigh.  So I scraped the marscapone layer off, pulling lots of cocoa powder with it (I re-mixed the marscapone to hide the cocoa powder streaks, although it was a slightly brownish color now instead of a creamy pale yellow) and started that layer over again.

Well, you know how the birthday tart turned out, since I posted about it on Monday-everyone loved it-but the clear winner to me was the tiramisu.  Turns out those soft lady fingers were just the ticket, despite what Cooks Illustrated said.  Everyone kept mentioning that they were the perfect texture.  And, I never would have guessed it, but leaving the extra rum out was also a good thing!  Instead of overwhelming rummy taste, there was just a nice hint of it-enough so that you could taste it, but not enough that my boss might have wondered if I was trying to get everyone drunk.

And that friend with the ranking system?  It got an 11 out of 10.

Tiramisu
Makes a 9 x 13 glass dish
Adapted from Cooks Illustrated

Note: You may have a little extra left over, since I had enough to make the full pan plus the medium-sized dessert you see pictured above.  You don’t have to go all fancy with the extra-just layer it in a bowl and stick it in your fridge for a special treat for yourself later.

  • 2 1/2 cups strong black coffee, room temperature (I just used Folgers instant coffee since I don’t drink coffee at home)
  • 1 1/2 tablespoons instant espresso powder
  • 5 tablespoons dark rum
  • 6 large egg yolks
  • 2/3 cup sugar
  • 1/4 teaspoon table salt
  • 1 1/2 pounds mascarpone cheese
  • 3/4 cup heavy cream (cold)
  • approximately 50 soft ladyfingers (one Trader Joe’s box has 25 cookies in it)
  • 3 1/2 tablespoons cocoa
  1. Heat your oven to 250 degrees.  Arrange your lady fingers on a cookie sheet and bake for 5 minutes, flip all of the cookies, and bake for another 5 minutes.  They’ll toughen up just enough here so they’re not mush in the dessert later and instead will be light, fluffy and sponge cake-y.
  2. While those are baking, mix the coffee, espresso, and rum in a bowl; set aside for later.
  3. In a large bowl, beat egg yolks until combined, add sugar and beat until light yellow and fluffy, about 2 minutes.  (This is where I forgot the extra rum.  You can add 4 tablespoons of rum here and beat until combined if you want, but I think the it was perfect without it.)
  4. Add the marscapone to the sugar-egg mixture and beat about 45 seconds until there are no lumps left; set aside.
  5. In a separate bowl, beat the heavy cream on medium speed until frothy (1 - 1 1/2 minutes) and then kick it up to high speed for another 1 - 1 1/2 minutes) until the cream is whipped and holds stiff peaks.
  6. Gently fold 1/3 of the whipped cream into the marscapone mixture, then fold in the rest of the whipped cream until no white streaks remain.
  7. Alright, now you should have all the components ready: 1) reinforced lady fingers 2) coffee-rum mixture 3) sweetened marscapone mixture and 4) cocoa powder.  Line them all up so you don’t have to go running around for them later.  You’ll also need a spatula (I used an offset spatula normally for frosting cakes, but any spatula will do), a sieve for sifting the cocoa powder, and a 9 x 13 glass pan.
  8. Part of the trick here is how you handle the dipping of the lady fingers in the coffee-rum.  If you just dunk them, even a super fast dunk, they will turn to mush, because all the air is quickly forced out and replaced entirely with liquid.  What you need to do is drop the lady finger into the bowl so that it floats on the surface, quickly flip it over so both sides get coated, and then take it out and put it in the glass pan.  This should take less than a second per lady finger.  I know that sounds crazy, but you’ll understand as soon as you give it a try and realize it’s not THAT fast, you just have to be nimble (Just to experiment, I tried dunking a lady finger - mush.  I also tried letting it sit for just a second longer - mush.)
  9. Line the lady fingers up in the pan-mine made two perfect rows-as you dunk them.  Cover them with a layer of 1/2 the marscapone mixture.  Dust with 1 1/2 tablespoons of cocoa powder.  Repeat: another layer of lady fingers, then marscapone, then cocoa powder.
  10. Cover tightly with saran wrap and then find a nice spot in your fridge for it to rest for 24 hours (if you’re short on time, 6 hours should be plenty).  I’m sure you can eat it right then even, but every person who has ever written about making tiramisu says to let it “cure” overnight in the fridge so that all the flavors meld.
  11. ENJOY!  For the fancy presentation you see in the photo, I used a lightly greased (baking sprayed) metal pastry ring and used it as a makeshift cookie cutter on the two layers of soaked lady fingers, set them aside, then layered everything inside the pastry ring as above, using a spoon to sort of smooth everything out.  I then put it in the freezer overnight and then used a cake tester wire to loosen around the edges.  It came out of the ring surprisingly easy (I was expecting a giant battle) and was defrosted in 15 minutes for eating!  It’s definitely a lot more work and, frankly, this tiramisu is so good you and your guests aren’t going to care one whit about the presentation.  Just serve it out of the glass pan and enjoy it!

Chocolate Meringue Tart with Frangelico Crust

Monday, December 5, 2011

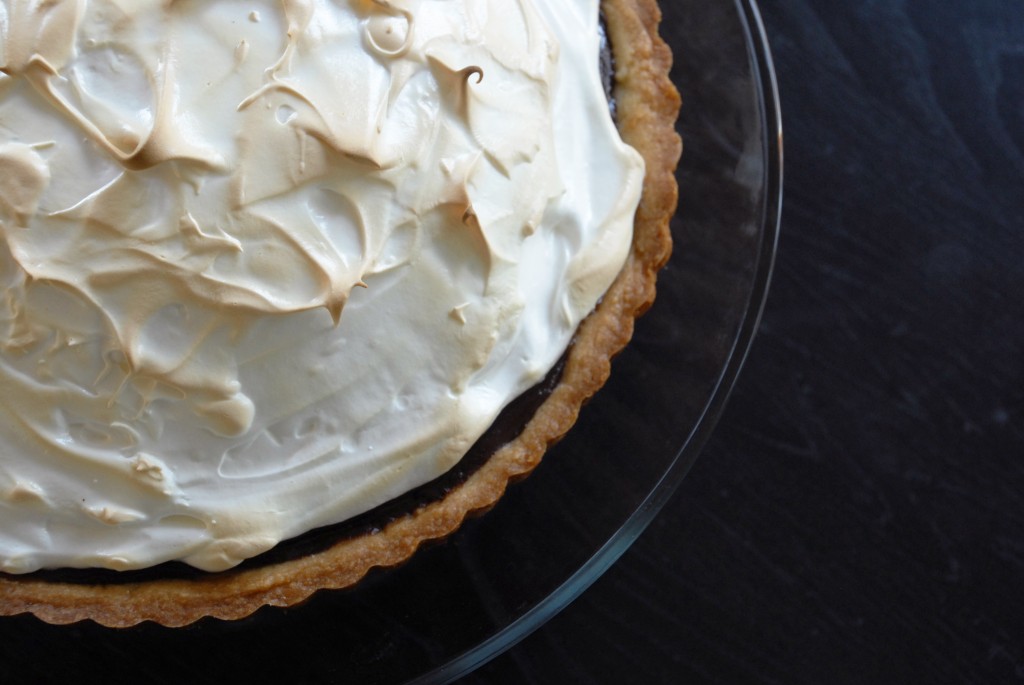
Today’s recipe is another one of those “you shoulda been there” events.  I wished I had a sign on my car that said “I’M NOT A BAD DRIVER I’M JUST HOLDING A MELTED TART ON A HEAVY CAKE STAND IN MY LAP”.  The story behind this is that my oven doesn’t have a broiler element on top and instead it just heats it up really hot so instead of browning the meringue directly, it heated up the whole tart which meant that the chocolate ganache filling, which was already chilled and set, promptly melted and I had a liquid tart to bring to work.  Fortunately, I took pictures for you before leaving for work, but my coworkers will see what you see above, except with chocolate spilled all over the crust (there are a lot of turns and hills on the way to work).

That all said, the tart gave me some dubious moments (the crust dough is super soft, it was my first meringue and it took twice as long to whip than the recipe because I have a handheld mixer instead of a stand mixer, etc) but over all it came together pretty easily and I was only late to work by about 30 minutes (and, of course, no one gets mad at you for being late when you walk into the office carrying a chocolate meringue tart and a big batch of tiramisu).

This was a “Wildcard Week” entry for Project Pastry Queen, so head to this page to see everyone’s different versions of this tart.  It was Joelen‘s choice all the way back in August of 2010, just after PPQ was started, so maybe it’ll bring back fond memories to all of the other participants.  I’m going to need some sort of video tutorial for you ladies for making the meringue “big hair” style.  All I ended up with were a lot of finger-holes in the meringue, so maybe my meringue wasn’t quite stiff enough yet?  It turned out nice, regardless, so I won’t complain!

In terms of switching up the recipe (aside from the single big tart vs smaller tarts) I had what I thought were hazelnuts in my kitchen but it turned out to be a package of chestnuts (I’ve never cooked with either) so I had to just rely on the Frangelico for the hazelnut flavor, but I loved Joelen’s idea of adding some to decorate the top of the ganache for some extra crunch.  Also, I found out that I don’t actually like cooking with vanilla beans.  Maybe it’s because I’m still of the mindset that every eensy little seed is priceless and I felt like I lost too many of the seeds.  I also threw in a splash of vanilla extract to pump up the vanilla flavor that I felt was lacking (because if you’ve been following this blog for any amount of time, you know that I can never have enough vanilla flavor!).  I think I’m going to stick with vanilla bean paste from here on out…

Chocolate Meringue Tart with Frangelico Crust
From Project Pastry Queen by Rebecca Rather

Note: The original recipe calls for making 4 small tarts.  I made one large tart and it turned out beautifully, but I did double the crust recipe so that there was enough to cover the pan-and it just barely was enough.  I’ve included the doubled recipe below, but if you’re going to make 4 smaller tarts, you likely won’t need as much crust.  Also, as mentioned above, a hand mixer will double the time it takes to whip up the meringue, so do some weight training before hand.

Update: I just checked on my tart in the office fridge-the meringue shrunk!  I’d read about this happening but didn’t really think about it this morning.  Clearly I should have.  One tip I’ve read is that you should “seal” the pie, so that the meringue touches or overlaps the crust.  I guess this gives it something to hang on to.  As you can see by my picture, I definitely did not do that.  Ah well, that’s what this blog is all about-me figuring out fool proof methods for you through trial and error in my own kitchen so you don’t have to!

Crust:

  • 2 sticks unsalted butter at room temperature
  • 1 cup powdered sugar
  • 4 teaspoons Frangelico liqueur
  • 1/2 teaspoons salt
  • 1 1/2 cups all purpose flour

Ganache:

  • 1 cup heavy whipping cream
  • 1 tablespoon unsalted butter
  • 1/8 teaspoon salt
  • 1 vanilla bean, halved lengthwise + 1 teaspoon vanilla extract (or alternatively to the bean and extract, use 1 tablespoon of vanilla bean paste)
  • 7 ounces semisweet chocolate, finely chopped


Meringue:

  • 4 large egg whites, at room temperature
  • 3/4 cup sugar
  1. Preheat oven to 350 degrees; butter or cooking spray your tart pan
  2. Cream the butter and sugar in a bowl for 3 minutes, until smooth.  Add in the Frangelico and salt, mix thoroughly.  Add the flour, 1/4 cup at a time, mixing until ingredients are just incorporated.
  3. Divide the dough into two balls and tightly wrap them in saran wrap.  Let chill in the fridge for 30 minutes (Don’t start your ganache just yet!  You want it still warm to pour in the tart shell, so wait until the shell has cooled from the oven.)
  4. Remove the crust from the fridge and press it into an even layer in your tart pan, making sure it comes all the way to the top of the edges.  I used the bottom of a measuring cup to level off the top of the crust so it was nice and smooth, but you can even just use a knife to cut it along the edge.
  5. Now here’s where I have to tell you something different from what I actually did.  I put the shell in the oven and walked away, but when I checked on it, it was super puffy, so I went back and put a piece of tin foil with some pie weights in it to weigh it down a little bit.  Next time I would put the weights in from the start.  You can use a piece of tin foil and dried rice or beans in place of weights.
  6. Bake the tart for 10 minutes and then remove the tin foil so it can brown for another 5 minutes or so.  Make sure the edges are golden brown before removing it from the oven.
  7. When it’s done, let it cool for 30 minutes (now you can start the ganache filling).
  8. In a sauce pan, combine the heavy cream, butter, salt, and vanilla (in whatever form you’re using) and bring to a gentle boil for 5 minutes or so.
  9. If you are using a vanilla bean, take it out and scrape the seeds out with the tip of your knife and add back into the cream mixture.
  10. Put the chopped chocolate into a bowl and pour the hot cream mixture over it.  Let it stand for a minute or so and whisk until you have smooth creamy chocolate.
  11. Pour it into the cooled tart shell and put it in the fridge to set up for 30 minutes.
  12. Set a large pot of water to simmer and clean out a large metal bowl with dish soap.  You want any tiny trace of oil (even from your fingers) gone from the bowl.  Set the bowl over the pot of simmering water (you’ve just made a home-made double boiler) and add the sugar and egg whites.  Whisk constantly until the sugar is completely dissolved.
  13. Remove the bowl from the double boiler and use your stand mixer on low for 5 minutes before hiking it up to high speed for another 5 minutes.  I have a hand held mixer and did it on low for 5 minutes and high for 10 minutes (clearly I didn’t realize it was going to take twice as long or else I would have done the low speed for longer as well).  You want the egg whites to be opaque white, stiff peaks and glossy.
  14. Turn your broiler on to high.  Top the tart with the meringue, smoothing it to the edges with a spatula.  I used the back of my spatula to make the little peaks in the meringue, repeatedly touching the spatula to the meringue and quickly jerking the spatula up.
  15. Set the tart in the oven and carefully watch it brown.  If you have an oven like mine, your broiler element does not exist, hence my wrenching morning detailed above.  I’m also sure that my meringue could be more browned, but I was terrified of burning it and would rather have a less-browned than over-browned meringue!
  16. Serve the same day that you assemble the tart and enjoy!
Spiced Pumpkin Mousse

Friday, October 28, 2011

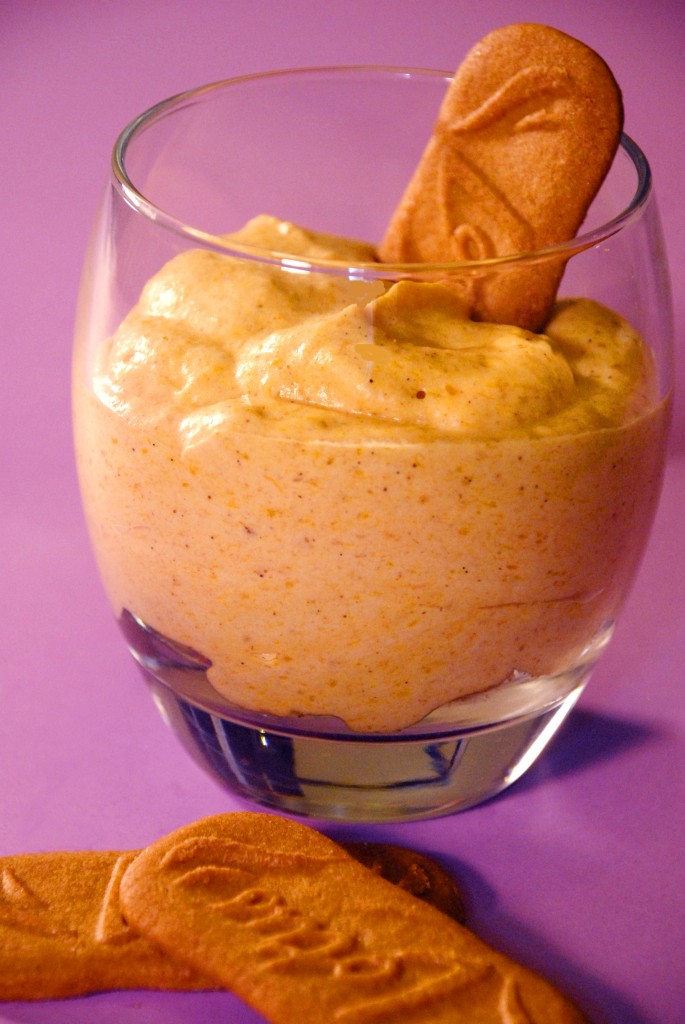
My first time making mousse and I’m hooked!  I don’t know about you, but I’m the kind of girl who just smothers her slices of pumpkin pie with whipped cream.  This mousse takes all the work out of baking a pie because it is essentially the pie filling combined with a lot of whipped cream - pure heaven in my book!  Supremely simple and very impressive, you just have to have a little foresight to make this ahead of time (it needs an hour to chill, then a little more work) before guests arrive.

You can use ginger snaps to accompany the mousse, but my favorite spice cookies are Biscoff cookies, which are cinnamon cookies rather than ginger.  You may recognize them as “airplane” cookies, because lots of airlines hand them out a snack, and I love them so much that many a flight attendant has snuck me handfuls of extra cookies over the years; when they started selling Biscoffs at most grocery stories, I practically didn’t know what to do with myself.  The flavor is hard to describe but their flavor is a deep, cinnamon and caramelized sugar and, although I could come up with any excuse to use them in a recipe, I think they go perfectly with the mousse!


Spiced Pumpkin Mousse
Adapted from Taste of Home
Serves 6

  • 1 1/2 teaspoons unflavored gelatin (Knox brand, next to the Jell-O)
  • 4 1/2 teaspoons cold water
  • 3 egg yolks
  • 3/4 cups sugar
  • 1 can, 15 oz, pumpkin puree
  • 3/4 teaspoon ground cinnamon
  • 1/4 teaspoon ground ginger
  • 1/8 teaspoon ground cloves
  • 1/8 teaspoon ground nutmeg
  • 1 1/2 cups heavy whipping cream
  • 2 teaspoons vanilla extract (or 1 tsp extract + 1 tsp vanilla bean paste)
  • 18 Biscoff cookies or ginger snap cookies
  1. In a small-medium saucepan, sprinkle gelatin over water; let stand for 1 minute.
  2. Whisk in egg yolks and sugar.  The next instructions will be confusing because the sugar-egg-gelatin mixture will be a paste, but then it all relaxes somehow into a more fluid liquid form in just a minute or two.
  3. Turn the heat on medium-low and cook, stirring constantly, until an instant thermometer reads 160 degrees and mixture has thickened, about 5 minutes-don’t turn your back on this!  All I did was pick up my phone to return a text and by the time I was done with my text message, the temperature was 190 degrees and the mixture had burned on the bottom of the pan!  It goes super fast.
  4. Transfer mixture to a small bowl and beat it until cool and thickened, about 3 minutes; mix in pumpkin and spices.
  5. Refrigerate for about 1 hour or until set.
  6. Once set, in a separate bowl, beat cream and vanilla until stiff peaks form.  Fold into pumpkin mixture.
  7. Crumble 2 cookies per serving container into the bottom of the container and spoon or pipe mousse on top.  Refrigerate for another hour until set.
  8. Garnish with remaining cookies and enjoy!

Tuxedo Cake

Monday, October 3, 2011

What luck that Shawnda picked such a great cake recipe for the first week of the month for Project Pastry Queen-I’ve started baking treats for the monthly birthday celebration for the office and this was perfect!  My only hope is that I get it to the office without issue, which involves driving up and over a mountain range.  In fact, as you’re reading this, probably right this moment, my office is either enjoying lovely slices of Tuxedo Cake or eating Cake Mush.

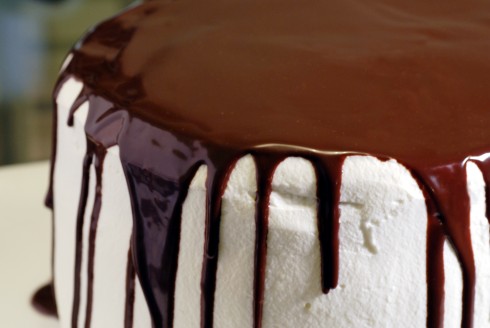
The cake was pretty basic to put together: just a normal chocolate cake, whipped cream, and more or less just melted chocolate.  But what a presentation!  It just looks so fantastic, with its stark black and white contrast, that I would have sworn it took a lot more manpower and hours than it really did.  My only two notes are that I’m always afraid of over-whipping the cream so I started off with whipped cream that was too soft (although it did make a nice “crumb coat”, a thin layer of frosting that seals in all the crumbs so you can add another perfectly crumb-less layer of frosting).  The whipped cream is the right consistency when you slap a dollop on the side of the cake and it doesn’t drip right off.  Also, Rebecca (and Shawnda) used Lyle’s Golden Syrup.  I admit again that I substituted what I already had in my cabinet and readily available.  I’m not sure if it was because of this substitution, but my chocolate dripped over the sides perfectly, despite Rebecca’s warning that it might be too thick if you let it cool for too long.

Check out all of the other Project Pastry Queen participants’ takes on the recipe here!

Tuxedo Cake
From Rebecca Rathers’ Pastry Queen

For the cake

  • 1 cup (2 sticks) butter
  • 2 cups water
  • 1 cup canola oil
  • 4 cups sugar
  • 1 cup unsweetened cocoa powder
  • 4 cups all-purpose flour
  • 4 large eggs
  • 1 cup buttermilk
  • 1 Tbsp baking soda
  • 1/2 tsp salt
  • 1 Tbsp vanilla

For the frosting

  • 4 cups chilled heavy whipping cream, well-chilled
  • 1 1/4 cup powdered sugar

For the glaze

  • 4 oz bittersweet chocolate, chopped fine
  • 1/2 cup heavy whipping cream
  • 1/4 cup light corn syrup
  • 2 tsp vanilla

Cake

  1. Preheat the oven to 350 degrees.  Line the bottom of three 9″ cake pans or two 10″ cake pans with parchment paper rounds and butter and flour the pan or spray with non-stick baking spray.
  2. Combine the butter, water, and canola oil in a medium saucepan set over medium heat and let butter melt.
  3. In a large bowl, stir together sugar, cocoa and flour.  Pour the butter mixture into the sugar mixture and whisk until smooth.
  4. Whisk in the eggs, one at a time, then whisk in the buttermilk.  Whisk in the baking soda, salt and vanilla all at once.
  5. Transfer the batter to the prepared pans.  For a 3 layer cake, stagger the cake layers on the oven racks so that no layer is directly over another.  Set two layers on one rack and the third on the other.  Bake 35-40 minutes or until a toothpick inserted in the middle of each layer comes out clean.
  6. Remove the cakes from the oven and cool on racks for about 15 minutes before inverting onto baking racks.  Cool the cakes completely, at least 2 hours, before frosting.

Frosting

  1. Whip the cream in a large bowl on high speed until soft peaks form (when you lift the beaters out and turn them upside down, there should be little peaks on the end of the beaters whose tips fall over quickly).
  2. Add the powdered sugar and whip until stiff peaks form (the peaks will stand tall and not fall over).
  3. Place first layer of cake onto serving plate and top with a layer of frosting.  Add second layer of cake and frosting and last layer of cake and frosting before frosting the sides of the cake with a thick layer of whipped cream.
  4. Put cake in fridge and let frosting set for 1 hour.

Glaze

  1. Place the chopped chocolate in a small bowl.  Heat the cream in a small saucepan until steaming and pour it over the chocolate.  Whisk until chocolate is fully melted.
  2. Stir in the corn syrup and vanilla until fully incorporated and set bowl aside to cool for 10 minutes.
  3. Drizzle the glaze along the top edge of the cake and cover the whole top of the cake with glaze.
  4. Many people finish with strawberries, often covered in chocolate, but strawberry season is just closing here so I decided to forgo them this time-but the next time I make this I will definitely be including them!

Bananas Foster Shortcakes

Monday, September 19, 2011

First, I want to remind all you faithful readers to follow me on Facebook or Twitter for status updates from me and alerts for new recipe posts!

Now before I dive into this week’s PPQ recipe, I have to bow down and say that Bananas Foster is not mine to lay claim on within my family.  My father and little sister (my only sibling) staked that claim loooong ago.  Dad makes Bananas Foster, often to introduce guests to fine Southern cuisine and, I suspect, to show off a little bit since the process involves flambeing.  My sister started making it soon thereafter, probably also to show off a little bit, but I think mostly just because it’s a delicious recipe that’s really not too hard to do.  So now it’s my turn.  I have to admit that I have been on pins and needles waiting for the chance to choose a recipe for Project Pastry Queen and when it was finally my turn, there really was no other option than to choose this.

After years of other family members flambeing bananas, I had to, once and for all, make Bananas Foster.  Reading this recipe over and over again, one major thing stood out to me-Rebecca doesn’t flambe the bananas.  This is a key component as it caramelizes and deepens the flavors by raising the temperature to a high degree that wouldn’t be attainable by just a pan over a stove burner.  Now that said, I tried and tried and I could not for the life of me get the pan to ignite.  It was still delicious regardless and I didn’t set my hair on fire.

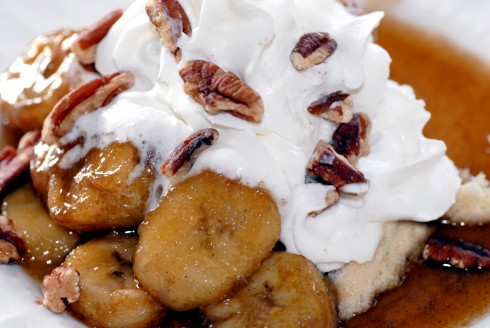
I admit, I made a number of other changes to the recipe as well.  Usually when I am served this dessert, it is served over ice cream (as Rebecca suggests as well) and since you know that it is a requirement of my cooking to forget an ingredient, it wasn’t until making it tonight when I forgot the ice cream, that I realized ice cream is just too sweet for this recipe and my lack of serious sweet tooth.  I used whipped cream instead and I thought it was perfect-finally a Bananas Foster that didn’t give me a sore throat from all the sugar!  I also forgot the banana liqueur, but I kind of didn’t want to pay for a bottle of it anyway, and I think the recipe benefited from the subtle banana flavor instead of in your face banana flavor.  Finally, Rebecca suggests adding pecans to the processor while making the biscuits.  It’s optional, so I opted out, but it got me thinking of another New Orleans classic treat…instead of adding to the biscuits, I roughly chopped the pecans and sprinkled them on top, which added some fantastic crunch and when mixed in with the sauce made it like a praline!

All the other Pastry Queens-In-Training versions of this recipe can be found here, be sure to check them out.

Bananas Foster Shortcakes
The Pastry Queen by Rebecca Rather (with help from Brennan’s)
Serves 8

Biscuits

  • 2 cups flour
  • 2 teaspoons baking powder
  • 1/2 teaspoon salt
  • 1/3 cup granulated sugar
  • 1/2 cup (1 stick) chilled unsalted butter
  • 1 teaspoon vanilla extract
  • 3/4 cup heavy whipping cream
  • sugar for sprinkling

Bananas & Syrup

  • 1 cup (2 sticks) unsalted butter
  • 1 1/2 cups firmly packed brown sugar
  • 1/2 teaspoon ground cinnamon
  • 1/4 cup dark rum
  • 8 barely ripe bananas, sliced into 1/4 inch rounds (a mandolin slicer makes quick work of this)
  • whipped cream
  • 1/3 cup pecans
  1. Turn the oven to 425 degrees.
  2. Combine the flour, baking powder, salt and granulated sugar in a food processor fitted with a metal blade.  Process about 30 seconds.  Cut the butter into 16 pieces and add to the flour mixture.  Pulse about 15 times, until the mixture is crumbly.  Turn on the processor and pour the cream in through the feed tube in a thin, steady stream, until the mixture begins to form a ball.
  3. Remove the dough and place on a flat surface that has been sprinkled with flour.  Gently form the dough into a 1/2 inch thick disk.  Use a 4 inch biscuit cutter, round cookie cutter, or a glass to cut the dough into rounds.  Roll the biscuits in the coarse sugar and set on a piece of parchment paper on a cookie sheet (Rebecca instructs you to use an ungreased cookie sheet, but my shortcakes stuck hard and fast to the sheet.  I was not a happy camper).
  4. Bake for 8-10 minutes until the shortcakes begin to turn golden brown around the edges.  Cool for 5 minutes on the baking sheet, then use a spatula to transfer the biscuits to individual serving plates (or on a cooling rack if you’re not serving them immediately).
  5. While the shortcakes are in the oven, Melt the butter, brown sugar and cinnamon in a large saute pan set over medium-high heat, about 3 minutes.  The mixture should not be heated beyond a simmer; if it begins to boil over, decrease the heat.
  6. Add the rum and sliced bananas to the syrup and simmer for about 5 minutes.
  7. Rebecca suggests splitting the shortcakes but mine did not rise enough to actually split, so I used them as a base instead, and poured spoonfuls of the bananas and syrup over the cakes, topped with whipped cream and chopped pecans.