Entries Tagged as 'Cookies'

The Best Oatmeal Raisin Cookies You’ll Ever Bake

Friday, March 15, 2013

Best Oatmeal Raisin Cookies Ever - www.agiltnutmeg.com

I love Oatmeal Raisin cookies.  “Love” may even be an understatement.  While other more flashy cookies may temporarily steal my attention, I will always come back home to Oatmeal Raisin.  Soft yet chewy, full of oats, raisins and spices…you really just can’t beat a good one of these.  When it came time to start baking my own Oatmeal Raisin cookies, I consulted the two sources I trust most: Cooks Illustrated and the back of the Quaker Oats Oatmeal canister.  Surprisingly enough, Cooks tells you immediately that the recipe Quaker Oats provides is pretty near spot on, with only minor tweaks-high praise from CI!  My only hesitation was that CI proceeded to take out most of the spices that I love, so I went back to Quaker’s recipe for help and remedied that.  The resulting cookie is incredible:  big, fluffy, chewy and I love being able to pick out the little specks of spice on the top of the cookie- dark brown nutmeg, light brown cinnamon and black vanilla beans.  Interestingly, I found these taste best after they “rest” for a day or even two days after baking; I don’t know the theory behind this, but just trust me.  These are outrageously simple to make and my sister and I both agree that they qualify as breakfast food (oats…raisins…yes).  So with that, I share with you my favorite cookie recipe of all time…
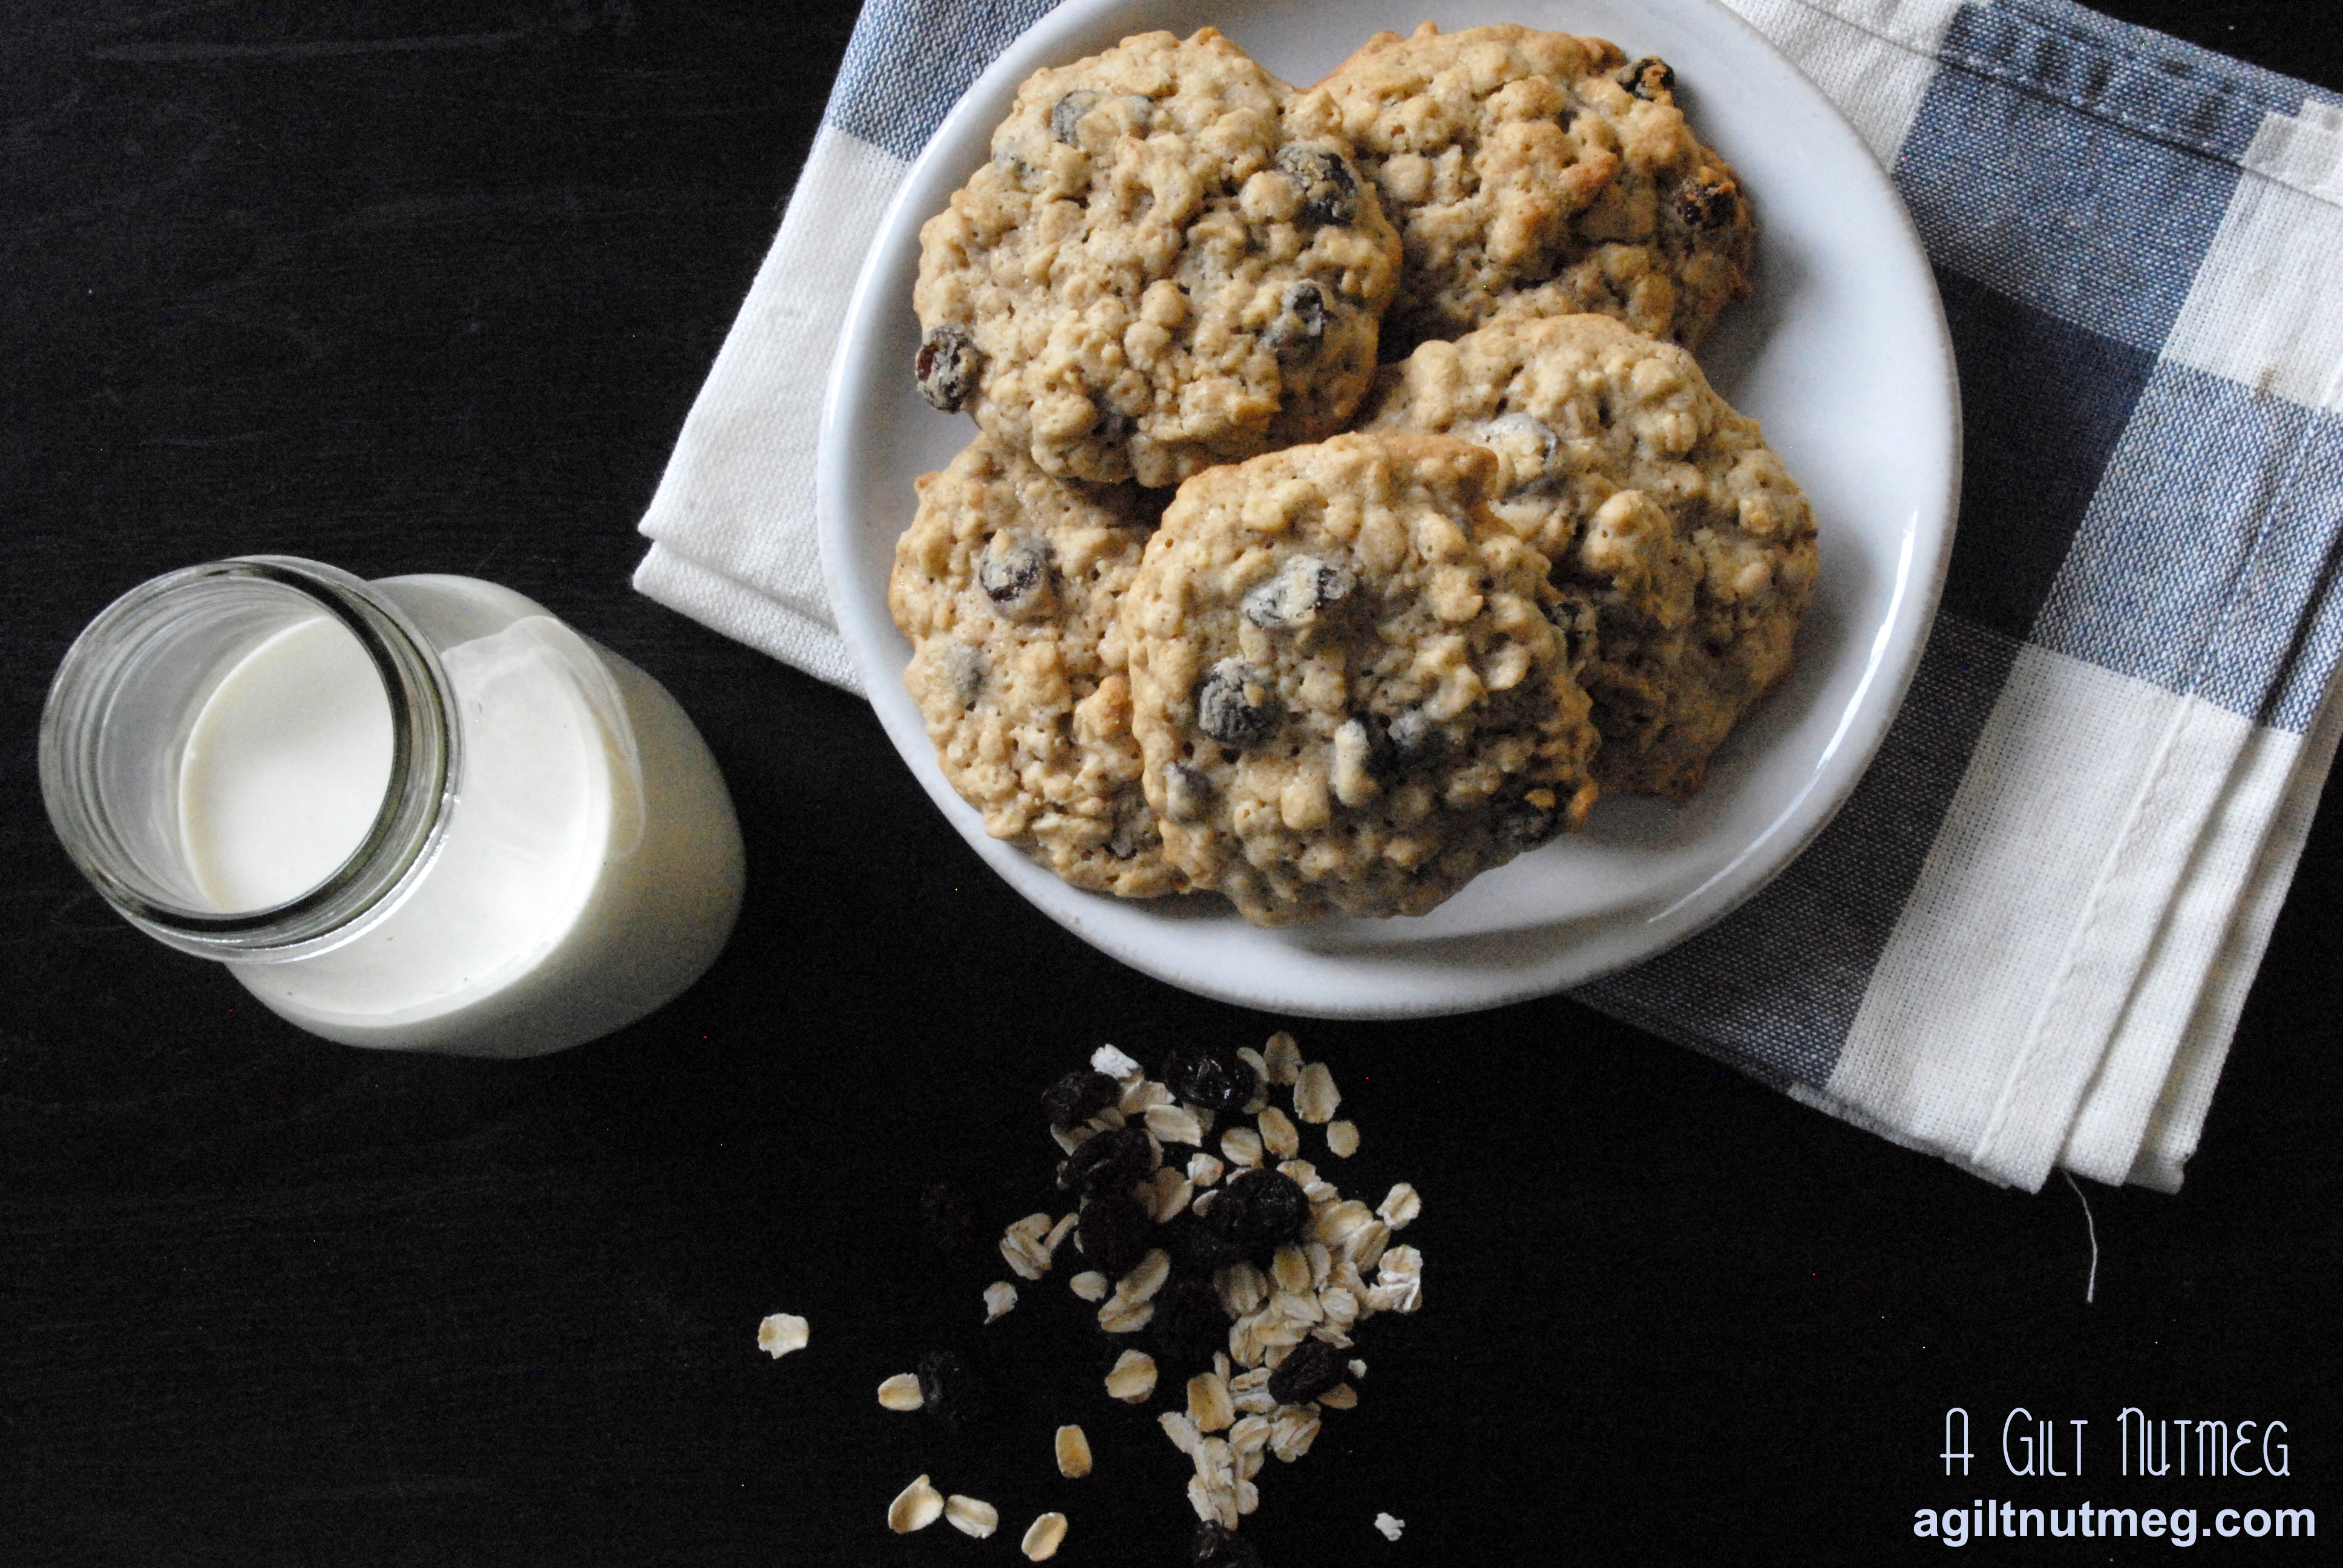
Best Oatmeal Raisin Cookies Ever - www.agiltnutmeg.com

Oatmeal Raisin Cookies
Adapted from Cooks Illustrated and Quaker Oats
Makes approximately 20 large cookies

  • 2 sticks unsalted butter (1/2 pound), softened but still firm
  • 1 cup light brown sugar
  • 1 cup granulated sugar
  • 2 eggs
  • 1 teaspoon vanilla bean paste (or substitute extract)
  • 1 1/2 cups unbleached all-purpose flour
  • 1 cup raisins (or if you really love raisins, go up to 1 1/2 cups)
  • 1/2 teaspoon table salt
  • 1/2 teaspoon baking powder
  • 1/2 teaspoon fresh ground nutmeg
  • 1 teaspoon cinnamon
  • 3 cups rolled oats
  1. Heat oven to 350 degrees.
  2. Using an electric mixer, beat the butter until completely softened, 2-3 minutes.
  3. Add brown and white sugar and beat an additional 3 minutes, until fluffy.
  4. Add in vanilla and the eggs, one at a time, making sure they are fully incorporated after each one.
  5. In a separate medium bowl, whisk together the flour, salt, baking powder, nutmeg and cinnamon.
  6. Using a wooden spoon, stir the dry mixture into the butter-sugar mixture until fully combined.
  7. Add in the oats and raisins to the batter and stir with the wooden spoon until both are incorporated evenly into the dough.
  8. Line baking sheets with parchment paper and form about twenty 2″ balls on the baking sheets.
  9. Bake until the very edges of the cookies turn golden brown but no longer, about 20-22 minutes.  The cookies will look too light on top, but trust me.
  10. Let the cookies cool for 5 minutes on the baking sheet before transferring cookies to a cooling rack.

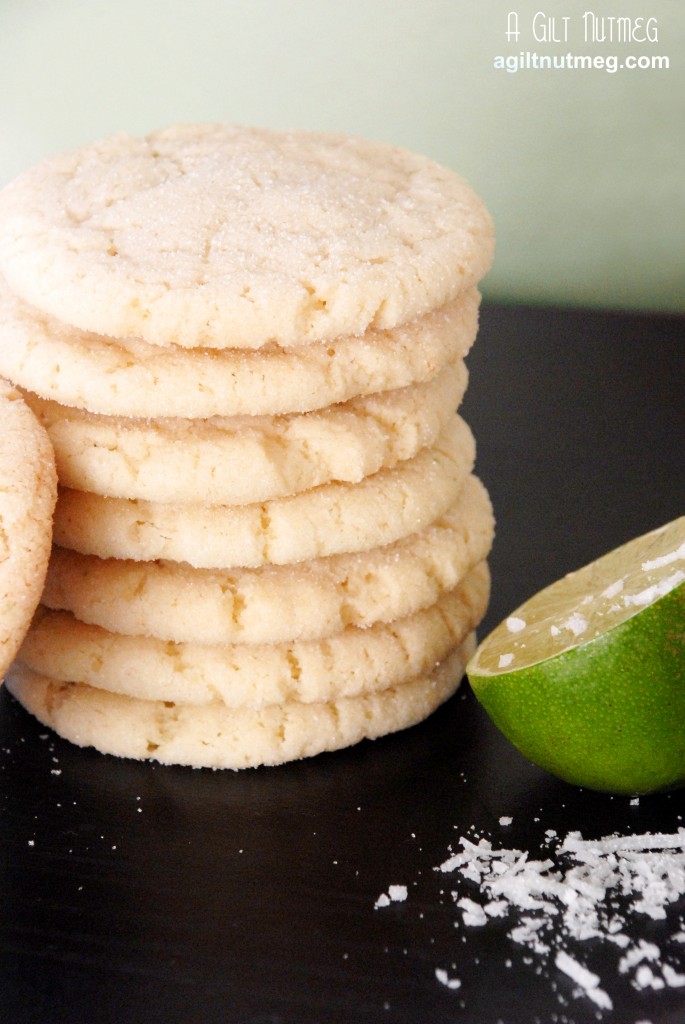
Chewy Coconut-Lime Sugar Cookies

Monday, July 30, 2012

chewy coconut lime sugar cookies

The more us bloggers explore new recipes, its more likely than not that we’ll find a new basic recipe that dethrones our favorite.  Whether it’s chocolate cake or a standard frosting recipe, we love finding those little tweaks that someone discovered to make those every day recipes something outstanding.  This is not one of those cases.  Cooks Illustrated hands down has the best sugar cookie recipe I have ever found and no one has ever come close in comparison.  Luckily, Cooks has a ton of great variations on the flavor, so I’m never tired of them.

You may remember the Chai-Spiced Sugar Cookies, one of my early blog posts.  While those can’t be beat on a cold winter’s night, I think I may be also reaching for these for that instant taste of summer.  They’ve got a great subtle tropical flavor—you’re definitely not hit over the head with the taste of sunscreen, yet somehow they still seem to transport you to a beach and a fruity drink with an umbrella in it.

Chewy Coconut-Lime Sugar Cookies
Barely adapted from Cooks Illustrated
Makes approximately 3 dozen

  • 2 1/4 cups unbleached all-purpose flour
  • 1/2 tsp baking soda
  • 1 tsp baking powder
  • 1/2 tsp table salt
  • 1 1/2 cups sugar, plus 1/3 cup for rolling
  • 2 ounces cream cheese, cut into 8 pieces
  • 1/2 cup sweetened shredded coconut, chopped fine
  • 1 tsp finely grated lime zest
  • 6 Tbs (3/4 stick) unsalted butter, melted and still warm
  • 1/3 cup vegetable oil
  • 1 large egg
  • 1 Tbs milk
  • 1 Tbs lime juice
  1. Heat oven to 350 degrees and line 2 cookies sheets with parchment paper.
  2. In a medium bowl, whisk together the flour, baking powder, baking soda, coconut and salt and set aside.
  3. In a large bowl, add the 1 ½ cups of sugar, cream cheese and lime zest.  Pour the warm butter over the mixture and whisk together until more or less smooth.
  4. Whisk in oil until fully incorporated, then whisk in the egg, milk and lime juice also until fully incorporated.
  5. Add the flour mixture to the large bowl and mix thoroughly.
  6. Put the last 1/3 cup of sugar into a cereal bowl and set up your little station on a large table—sugar bowl, a drinking glass, the cookie dough and the prepared baking sheets.  Scooping up golf ball sized balls of dough, lightly roll them into a ball shape, roll them in the sugar until fully coated, then place on sheets 2” apart.  When you have a full sheet, take the drinking glass and lightly press the balls until they’re 2” wide.  They’ll still be at least a half inch thick.  Sprinkle additional sugar over each flattened dough ball.
  7. Bake one sheet at a time for 13-15 minutes until the edges are just starting to brown (the cookies will look very pale overall).  Cool them on the baking sheets at least 5 minutes, then move them to a wire cooling rack.
  8. Enjoy with milk or your favorite fruity tropical drink!

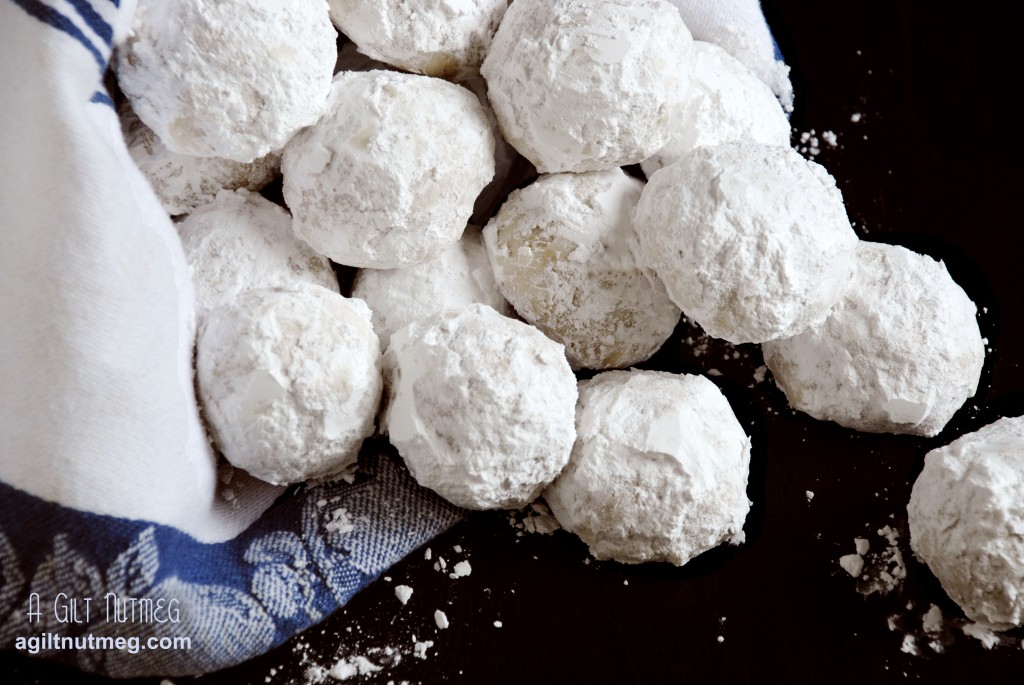
Mexican Wedding Cookies

Wednesday, May 9, 2012

 mexican wedding cookies

At the office, since Cinco de Mayo fell on a Saturday, we had a little Ocho de Mayo celebration yesterday instead.  In trying to decide what to bring, the idea of Mexican Wedding Cookies floated into my head and then that idea stuck and wouldn’t let go and then there was just no turning back because I love these cookies and couldn’t bear not to make them at this point!  And then last night, after our celebration, I had to tell The Boyfriend that there was good news and there was bad news:  The good news is that I saved a cookie for him.  The bad news was that I ate ALL THE REST of the leftover cookies.    Oops.

These cookies are satisfyingly crunchy and surprisingly flavorful, but you do have to eat them over the sink unless you’re okay with powdered sugar going EVERYWHERE.  It’s worth it, in my opinion.  They’re some of my favorites!

Mexican Wedding Cookies
Adapted from Williams-Sonoma
Makes between 2-3 dozen

  • 16 Tbs (2 sticks) unsalted butter, at room temperature
  • 1/4 cup confectioners’ sugar + 1 cup confectioner’s sugar for dusting later
  • 1 1/2 tsps vanilla extract
  • 1/4 tsp salt
  • 1 3/4 cups all-purpose flour
  • 1 tsp ground cinnamon
  • 1 1/2 cups blanched almonds, ground in a food processor until it looks like coarse cornmeal
  1. On high speed, beat the butter in a mixer until it is very light yellow and very fluffy, about 3-4 minutes.
  2. Reduce speed to medium and add the confectioners sugar to the butter, mixing until thoroughly incorporated, then switch the speed to low and add the vanilla and salt, again mixing until incorporated.
  3. With a fine sieve, sift the flour and cinnamon into the butter mixture, then mix in to batter on low speed (or else it’ll pouf all over your kitchen!).
  4. Add the almonds to the mixture and beat on low speed until those are mixed in.
  5. Cover the bowl with plastic wrap and put it in the refrigerator for 15-20 minutes.  The goal is to chill the dough so that it is firm and no longer sticky, but not yet hard.
  6. Heat the oven to 350 degrees while the dough is chilling.
  7. Line a cookie sheet with parchment paper and scoop up chilled dough in balls approximately 1″ or 1 1/2″ wide and roll them in your palms to make the balls smooth.  The bigger the cookie, the fewer you’ll have and vice versa.  My cookies were about 1 1/2″ wide and I ended up with about 30 cookies.
  8. Place the cookies in rows, about 1-2″ apart and bake for 12-15 minutes.  The cookies will not look done on top (they’ll stay white), but you can roll one or two over to look at the bottoms-they should be starting to turn golden brown.  The cookies will also be almost firm if you poke one, but I find that the brown color underneath is the best indicator of doneness.
  9. Let the cookies cool on a wire rack for 15 minutes and in the meantime add that extra 1 cup of confectioner’s sugar to a bowl.
  10. When the cookies have cooled for a little while, roll them in the powdered sugar and put them back on the racks.  The powdered sugar on the cookies will get a little sticky, but let the cookies cool some more and roll them again.  Set them back on the racks and wait a few hours before giving the cookies their final roll in the sugar.  You want them good and coated!
  11. Store in an airtight container and enjoy!  (over a plate or the sink or a napkin, that is)

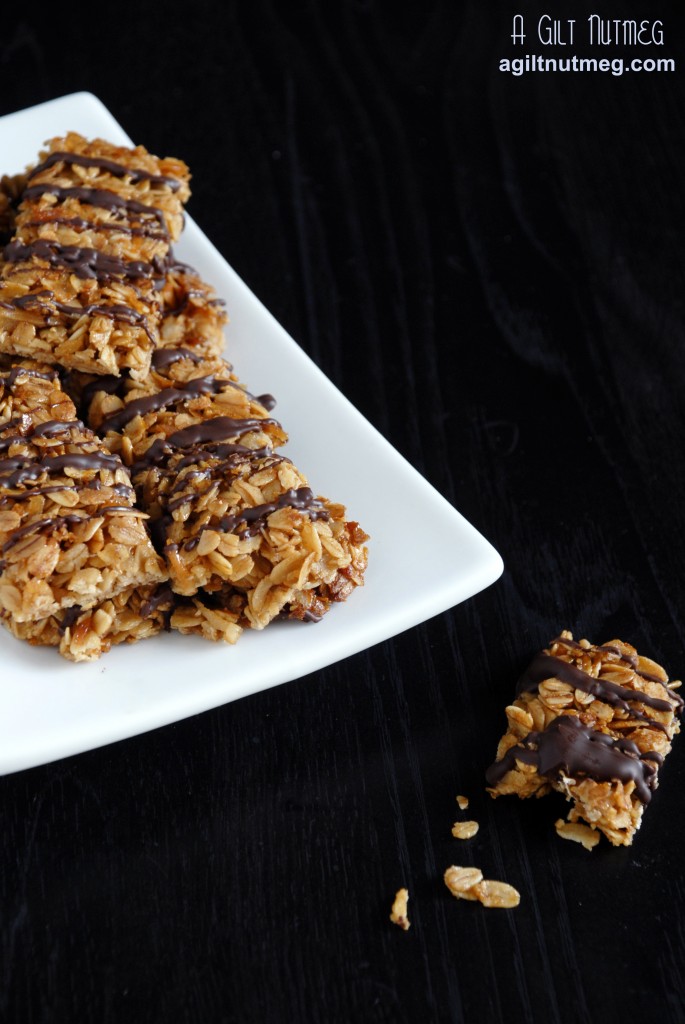
Oatmeal Crisps

Monday, April 23, 2012

oatmeal crisps

Considering Oatmeal Raisin Cookies are one of my favorite cookies of all time, I had a suspicion that these crisps from The Pastry Queen might be particularly up my alley-and I was right!  These are deliciously oaty and brown sugary and (thanks to the incorrect assumption that I had corn syrup at home) full of honey flavor.  These remind me of my favorite crunchy granola bars and, truthfully, I don’t think these even need chocolate on top, which is why I just drizzled it on instead of making one thick layer of it-and when I make them again I won’t even add the chocolate.  I can’t wait to make another batch just to crumble over yogurt or ice cream!

Thanks to Missy for choosing this week’s recipe and check out the other PPQ members versions here!

Oatmeal Crisps
Yields one 9×13″ pan
Adapted from The Pastry Queen

  •  1/2 cup unsalted butter
  • 1/2 cup firmly packed dark brown sugar
  • 1 Tablespoon honey
  • 2 cups old-fashioned rolled oats
  • 1 teaspoon baking powder
  • 1/4 teaspoon salt
  • 1/3 cup sweetened shredded coconut
  • 1/2 cup bittersweet chocolate chips (optional)
  1. Heat the oven to 350 degrees and grease a 9×13″ glass baking dish.
  2. In a small saucepan, melt the butter and stir in the brown sugar and honey until the mixture is smooth, about 2 minutes and turn off the heat.
  3. With a wooden spoon in a large bowl, stir together the oats, baking powder, salt and coconut; stir in the butter mixture until the dry ingredients are fully coated in the liquid ingredients.
  4. Pour the mixture into the prepared dish and, with the back of the wooden spoon, pat the mixture into a flat, even layer in the dish.
  5. Bake for 20-25 minutes and take the dish out to cool on a wire rack for 20 minutes.  When you pull the dish out, the mixture will still be liquid, but it will harden and crisp as it cools.
  6. After cooling for 2o minutes, line a cutting board with wax paper or parchment paper.  Lay the cutting board over the top of your glass dish (papered side facing the cooled oatmeal mixture), then flip the pan over so that the oatmeal mixture lays flat on the papered cutting board.  With a sharp knife or pizza cutter, gently cut the oatmeal slab into bars.  The bars will be fragile and will stretch a little bit; just push them back into shape with your fingers.  If you are planning on drizzling chocolate over the bars, leave them on the parchment paper while you melt the chocolate.
  7. If you choose to drizzle chocolate over the bars, set a large pot of water simmering and in a metal bowl placed over the pot of simmering water, melt the chocolate chips.  Once the chocolate is melted, drizzle it in a thin stream back and forth over the bars.  Let the chocolate cool and harden completely.
  8. My only warning is that humidity will turn these bars soft, but they will still be delicious.  Store them in an air-tight container until you’re ready to eat.  Enjoy!


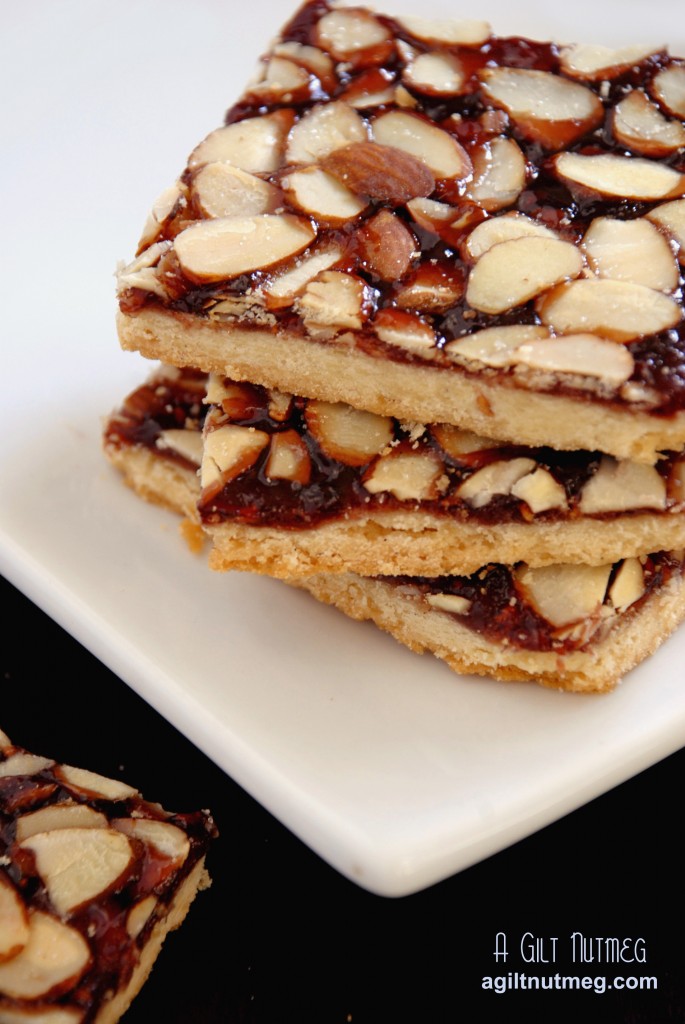
Lemon Raspberry Florentine Cookies

Friday, March 9, 2012

lemon raspberry florentine cookies

So because they’ve heard about nothing else lately, certain friends (ahem, Ace of The Toasted Sprinkle) are going to roll their eyes at me starting out this post with “ohmigoodness I’m so sorry I deserted you, my precious readers; I had a horrible stomach flu and, even though it was just a 24 hour bug, for 2 weeks my appetite has been really weird and I just couldn’t bring myself to actually cook anything”.  But I’m back!

I wanted to start back in the kitchen with something super simple and I had some lemon vanilla sugar cookie dough hanging out in the fridge.  Now, this was either lucky or unlucky-unlucky because I had intended this dough to be made into beautiful hand decorated sugar cookies for Valentines Day, which clearly never happened; lucky because it meant that I had to put forth very minimal effort to put these cookies together last night.

Overall, I loved the chewy raspberry layer between the crunchy cookie and almond topping and I was really pleased that the dough wasn’t just plain sugar cookie dough, because the lemon really complimented the raspberry flavor.  And, of course, fast to pull together always wins points for a recipe in my book, so make the dough ahead of time and toss it in the fridge for later when you’re ready to make these!

Lemon Raspberry Florentine Cookies

Adapted from Chef Lothar Neumaier
Cookie Recipe from Annie’s Eats

  • 2 sticks unsalted butter, at room temperature
  • 1 cup confectioners’ sugar
  • 1 large egg
  • 2½ tsp. vanilla extract
  • 1 vanilla bean, split lengthwise
  • Zest of one whole lemon
  • 2½ cups all-purpose flour
  • 1 tsp. salt
  • 2 cups raspberry jam
  • 1 cup sliced almonds
  • 1-2 tablespoons granulated sugar
  1. In a large mixing bowl, beat together the butter and confectioners’ sugar for 2 minutes, until mixture is smooth.
  2. Add in egg, vanilla extract, seeds scraped from the vanilla bean, and lemon zest and beat until fully incorporated.
  3. On low speed, mix in the flour and salt just until the white streaks are gone.
  4. Wrap the dough up in plastic wrap and stick it in the fridge for an hour.
  5. After an hour set the oven to heat to 375 degrees and pull the dough out of the refrigerator.
  6. In order to fit on a cookie sheet, you’ll need to divide the dough into two parts.  Spread a piece of parchment paper on your counter and roll out one piece of the dough on the parchment paper;  you’ll want to roll the dough to about 1/8″ thick.
  7. Transfer the parchment paper with the dough on top to your cookie sheet.
  8. Spread half the raspberry jam over the dough.  Sprinkle half of the almonds over the jam and then half the granulated sugar.
  9. Repeat the process with the other half of the dough on a second cookie sheet.
  10. Bake the two cookie sheets for 15-18 minutes, until the edges of the dough are a deep golden brown.
  11. Leaving the cookies on the sheets, move the cookie sheets to wire cooling racks and let them cool completely.
  12. Once fully cooled, cut the cookies into squares.  Store them in an airtight container, with parchment paper in between so the cookies don’t stick together.  Enjoy!

Valentine’s Peanut Butter Kisses

Wednesday, February 8, 2012

I came across this cute little twist on these classic peanut butter cookies on Pinterest and just could. not. resist.  I’ve never made these cookies, nor was it a recipe my mom really made at home as I was growing up; I only remember them from way back in elementary school as something that would show up on birthdays or bake sales, but when I saw these little hearts, I knew exactly what I had to make for Valentine’s Day this year.

They’re a super simple cookie to throw together and I can even confirm that I made a very minimal mess in the kitchen, a rarity for me.  If it’s not Valentine’s Day and you can’t find chocolate hearts, you can of course fall back on the traditional Hershey’s Kisses instead.

I know leaving cookies out for Santa is tradition…but maybe we should try leaving these out for Cupid for a little extra love this year?

Valentine’s Peanut Butter Kisses
Makes 4-5 dozen cookies
Adapted from chinchymork

  • 2 2/3 cups flour
  • 2 teaspoons baking soda
  • 1 teaspoon salt
  • 2/3 cup creamy peanut butter
  • 1 cup butter, room temperature
  • 1 cup sugar
  • 1 cup brown sugar, firmly packed
  • 2 eggs
  • 2 teaspoons vanilla extract
  • 5 dozen chocolate heart candies, unwrapped
  • additional sugar for rolling
  1. Preheat the oven to 375 degrees and make sure that butter is pulled out of the fridge to soften.
  2. In a large bowl, mix the flour, baking soda and salt.
  3. Add the butter and peanut butter to the flour mixture and, with an electric mixer, beat the mixture until it is a smooth, cohesive dough-start off slow so that the flour doesn’t fly everywhere, then gradually kick up the speed to medium.  If you’ve made icing with butter and powdered sugar, you know that it turns crumbly first and then very smooth very quickly; this dough doesn’t go as quickly and you definitely need to beat it for a good few minutes for it to turn smooth-I was actually getting worried it wouldn’t turn smooth, but I promise it does.
  4. Add the white and brown sugars and beat until thoroughly combined, about 1 minute.
  5. Add the eggs and vanilla extract, beating for a few minutes, again, until thoroughly combined.
  6. Put the extra sugar (about 1/2 cup) into a pie plate or other container.  Taking about a tablespoon of dough, roll the dough into approximately ping pong ball sized balls.  Roll the dough in the sugar so that it’s fully coated before placing it on an ungreased cookie sheet, about 2″ apart from each other.
  7. Bake the cookies for 8 minutes, then pull them out of oven and place a chocolate candy in the middle of each, pressing down so that the cookies flatten out a little bit, then return them to the oven for an additional 2 minutes.
  8. Take the cookies out and let them cool on the cookie sheet for a few minutes before carefully moving them to a cooling rack.  The chocolates will be softened on the outside, so be careful not to touch them.
  9. Let cool entirely and enjoy!

Peanut Butter Chocolate Pretzel Cookies

Friday, January 13, 2012

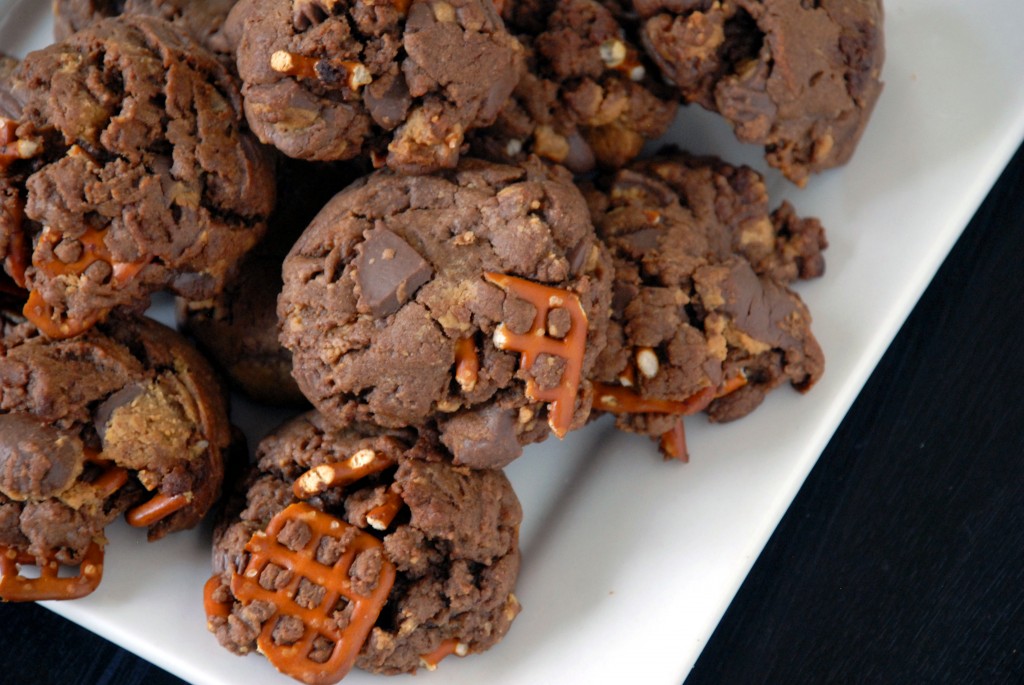
peanut butter reeses pretzel cookies

I make sure to keep a light heart on this blog and, since the topic is food, it’s not hard to do.  But I want to say that 2011 was a tough year for many people close to me and the hardest year of all was likely for my dear friend Erin and her family.  Her father was simultaneously diagnosed with stomach cancer and prostate cancer and the strength this tight-knit family has shown in spite of it all is awe-inspiring.

The hardest part about stomach cancer is that eating is of much less interest than it was before.  I can’t imagine such an important part of my life as food or eating suddenly being unpleasant and difficult to accomplish and it’s this very reason that stomach cancer is one of the most trying types of cancers to deal with.

In a bid to spread some holiday cheer and good will to a family that so much deserves it, I wanted to bake cookies but feared Erin’s dad wouldn’t be able to enjoy them.  I was assured that he does get cravings so I set about making cookies that would satisfy any craving that might pop up-sweet, salty, soft, crunchy.  The resulting cookies won’t win any beauty contests, but boy do they sure hit the spot.  They have chocolate, peanut butter, Reese’s peanut butter cups and buttery pretzels all rolled into one.

I hear tell the whole family enjoyed them, including Erin’s dad-which is exactly what I had hoped for.

Peanut Butter Chocolate Pretzel Cookies

Adapted from Annie’s Eats

  • 1½ cups plus 2 tbsp. all-purpose flour
  • 6 tbsp. Dutch-process cocoa
  • ½ tsp. baking soda
  • ½ tsp. coarse salt
  • ¾ stick (6 tbsp.) unsalted butter, at room temperature
  • ¼ cup plus 2 tbsp. creamy peanut butter
  • ½ cup sugar
  • ½ cup brown sugar
  • 1 large egg
  • 1 tsp. vanilla extract
  • 2 tbsp. milk
  • 1 bag of coarsely chopped mini peanut butter cups **see first step before chopping
  • 1 cup of pretzels (I used “Butter Snaps”), broken
  1. Start by throwing the bag of peanut butter cups into the freezer.  Annie, being the kitchen genius that she is, figured out that this makes unwrapping and chopping much much easier.  Heat the oven to 350 degrees and line cookie sheets with parchment paper.
  2. In an extra bowl, mix the flour, cocoa powder, baking powder and salt.
  3. In a separate bowl, use an electric mixer to beat the butter, sugar and peanut butter for 1-2 minutes.  Add in the egg, vanilla extract, and milk and beat until incorporated.
  4. On low speed, add the mixed dry ingredients to the wet mixture until fully incorporated.
  5. Add the pretzel pieces and fold in with a spatula.  If you’re short on time, just dump in all the chopped peanut butter cups and fold them in as well with a spatula.  If you want to make the cookies a little prettier, divide the cups in half, fold the first half into the batter and save the other half to press into the tops of the cookies later before baking.
  6. Drop large spoonfuls of the dough (Annie suggests about 3 tablespoons worth; I used my 2″ ice cream/cookie dough scoop) on to the prepared baking sheets.  My dough was a bit crumbly, no doubt due to the massive amount of “add-ins” to the dough.  Just press the dough mounds back together if they’re falling apart.  If you saved any peanut butter cups, press those gently into the tops of each cookie now.
  7. Bake for 12-14 minutes and take out, even if they look a little underdone.  Let cool on the baking sheet for 10 minutes and then transfer to a wire cooling rack.


Like I said, 2011 was a bit of a tough year, but here’s hoping that 2012 brings health and happiness to Erin’s family.

Stomach Cancer Purple Awareness Ribbon

Cookies & Cream Cookies

Monday, December 12, 2011


Whew, what a trip The Great Food Blogger Holiday Cookie Swap 2011 has been!  Organized by Love and Olive Oil and The Little Kitchen, cookies were flying all over the country as they were shipped from one food blogger to another- 22,000 cookies were in transit worldwide last week!

I spent quite a while trying to decide what cookies I wanted to send-something that would be sturdy enough for travel, that would stay fresh, and was fun to make and receive.  I was in one of those situations where you have a lot of recipes that sound okay, but nothing really strikes you until that one special recipe comes seemingly out of no where and there’s no question that that’s your recipe.

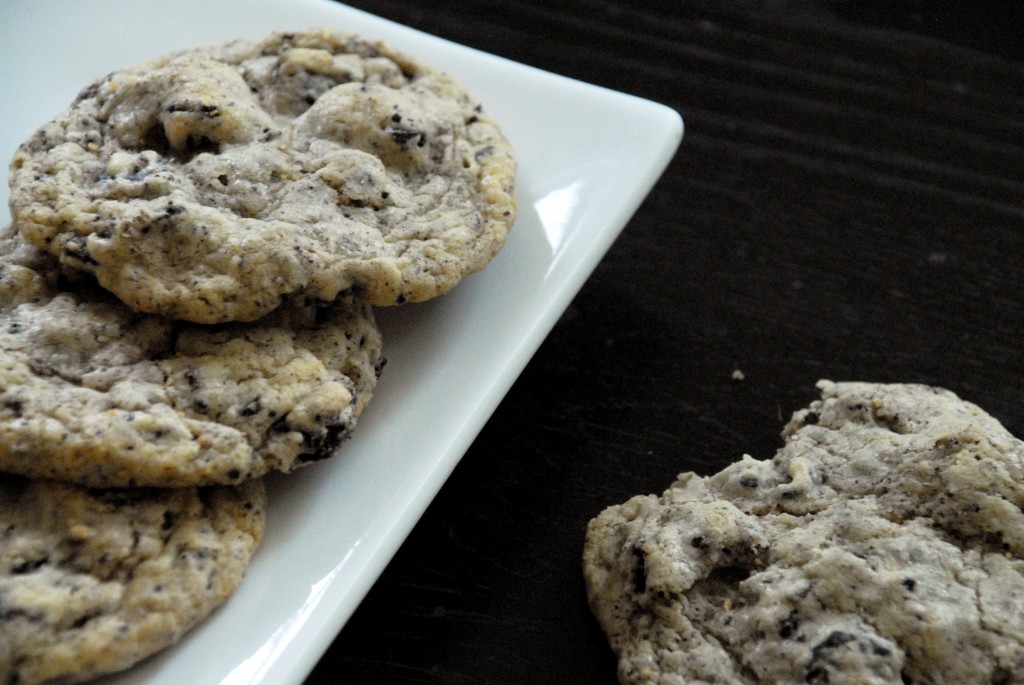
I’ve always liked cookies & cream ice cream and when I saw this recipe my first thought was “that sounds AWESOME” and then my second thought was “that sounds awfully redundant, to put cookies in cookies” but my first thought quickly came back and my cookie swap cookie was decided: Cookies & Cream Cookies it is!  I hope that Brooke of Baking with Basil (North Carolina), Jessica of My Cooking Adventures (North Dakota), and Sofie of The German Foodie (Ohio) have enjoyed these fun cookies-it tastes just like eating cookies & cream ice cream!  They’ll be perfect for a Christmas party (for kids and adults alike) or to put out for Santa with a glass of milk!


Cookies and Cream Cookies
I used about a 2″ ice cream scoop for these cookies;
a double batch yielded about 40 cookies
  • 1/2 cup butter, at room temperature
  • 6 tbsp sugar
  • 6 tbsp brown sugar
  • 1 egg
  • 1 tsp vanilla
  • 1 1/4 cup flour
  • 1/2 tsp baking soda
  • 1/2 tsp salt
  • 12 Oreos, broken up into small pieces (I put mine in a large ziploc bag with the air squeezed out and beat them with a rolling pin on the floor-I’m sure my neighbors in the apartment below me weren’t too pleased with this)
  1. Preheat oven to 350 degrees.
  2. Cream together the butter and both sugar about 3 minutes, until fluffy.
  3. Add egg and vanilla to butter and sugar, beat until combined.
  4. In a separate bowl, whisk together the flour, baking soda and salt.
  5. With your mixer on low, add the dry ingredients to the wet ingredients in 4 parts, beating just until combined.
  6. With a spatula, gently fold in the Oreo pieces until fully incorporated in the batter.
  7. Using about a 2″ wide ice cream/cookie dough scoop, scoop the batter on to an ungreased cookie sheet, leaving 2″ between scoops on the sheet.
  8. Bake until just barely beginning to brown on the edges-if you bake them for too long, they lose that “cookies & cream ice cream” look because they won’t just be black and white, they’ll be black, white, and brown.
  9. Let the cookies cool on the baking sheet for 10 minutes.  If you don’t, they will stick the the sheet and bunch up in front of your spatula as you try to work it underneath the cookies.  Then transfer the cookies to a wire cooling rack to finish cooling all the way.

As I said before, these are great to bake ahead of time and leave out for Santa with some milk.  I actually baked mine last Sunday (over a week ago), shipped the cookies off on Monday and threw 4 of them into a tupperware container to take photos of for the blog.  I got busy and had to go out of town so I thought well, they’ll be stale when I get back but at least they’ll still look good for the photos.  Can you believe that over a week later these cookies still were perfectly crunchy-soft just like they were fresh off the cooling rack?  What a great recipe!

I have to send out a big thank you to the bloggers who sent ME delicious cookies!  I got delicious Pumpkin Chocolate Chip cookies from Nicki at Nick-Stirs and some fantastic Cranberry Orange Pecan cookies from Kimberly at Rhubarb and Honey, both of which disappeared quickly between me, The Boyfriend, and my roommate.  And somewhere, out there in California, Stephanie’s Gingersnaps with Chai Icing and Crystalized Ginger (from Life Tastes Like Food) are floating around lost in mail-limbo.  They haven’t hit my mailbox yet, but considering chai is one of my favorite flavors of all time, I’m pretty sure that these won’t even make it upstairs and that the next day, our post-lady is going to wonder why there are crumbs underneath the mailboxes.

A shout-out to Ace of The Toasted Sprinkle, who turned into one giant stress-ball over the Cookie Swap and bombarded me with panicked text messages for weeks, but turned out absolutely delicious sounding cookies in the end (See?  It all worked out!  You need some relaxing lavender bath salts for Christmas…)

And finally, a huge thank you to Lindsay of Love and Olive Oil and Julie of The Little Kitchen for all the hard work they put into organizing the whole swap-it was such a fun way to start off the holiday baking!  If you’re interested in participating in next year’s cookie swap, click this link here.


Pretty-in-Purple Shortbread Hippos

Friday, November 11, 2011

…aaaand I’m back!  This recipe for Project Pastry Queen is admittedly almost a week late, but this was a very good one for me to get back into the kitchen with-minimal ingredients, quick to throw together, nothing fancy and no surprises.  And delicious!  I love the frosting on these cookies; it’s definitely one of those flavors from childhood that you just don’t forget.

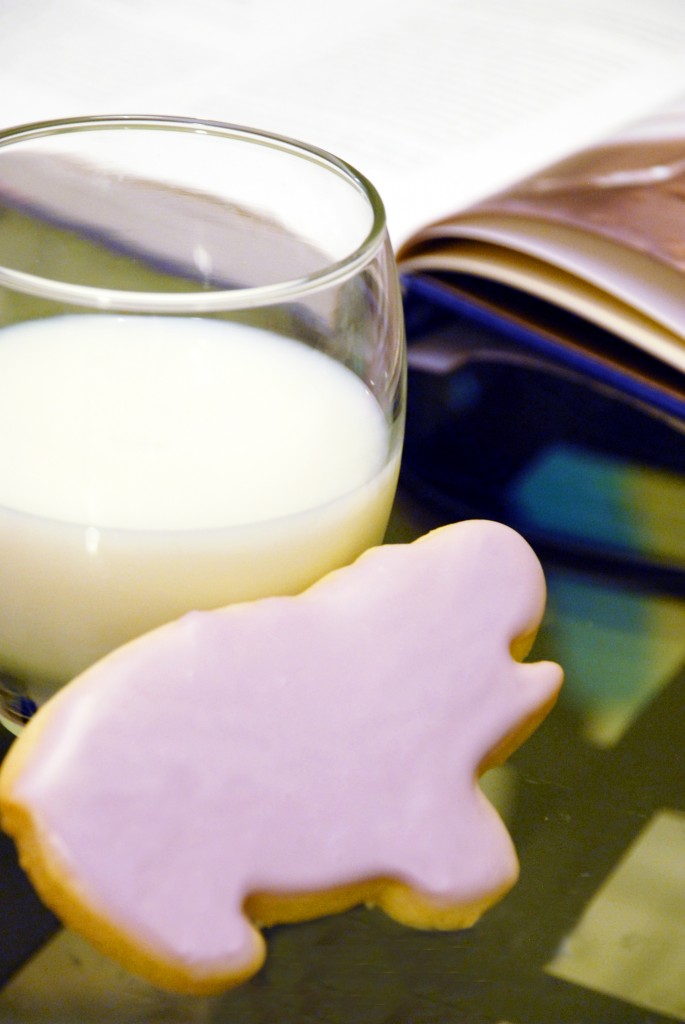
Rebecca’s cookies in The Pastry Queen are “Pretty-in-Pink Shortbread Pigs”, but I knew I wanted a chance to sort through the big bins of cookie cutters at Sur la Table before settling on a pig and, let me tell you, that was a fantastic idea because you should have heard the squeals I made in the middle of the store when I found a hippo cookie cutter!  Hippos are my favorite animal and my parents even “adopted” a hippo in my name through the World Wildlife Fund last year for my birthday, so I grabbed the hippo and excitedly took my prize to the register and then home to make some cookies.

Sturdy cookies (despite being shortbread) and easy icing (all you do is dip them) make this a wonderful cookie to bake with kids-or if you want a quick treat for yourself one evening!  Click on over to Project Pastry Queen to see everyone’s takes on Danmy‘s choice for the week.  There may or may not be a recipe for bacon-chocolate frosted pig cookies over there and I just thought you should know.

Pretty-in-Purple Shortbread Hippos
Makes 20 cookies
The Pastry Queen

Cookies

  • 2 cups (4 sticks) unsalted butter, at room temperature
  • 1 1/2 cups powdered sugar
  • 2 tablespoons vanilla extract
  • 4 cups all purpose flour
  • 2 teaspoons baking powder

Icing

  • 2 cups powdered sugar, sifted
  • 1/4 cup milk
  • 1 teaspoon vanilla extract
  • food coloring of your choice

To make the cookies

  1. Preheat the oven to 350 degrees.  Line baking sheets with parchment paper (or grease generously with butter).
  2. Beat the butter and sugar until fluffy clumps form, add the vanilla and beat until it’s a smooth batter.
  3. Sprinkle the baking powder over the batter and, on low speed, blend it into the batter, then slowly add the flour, keeping the mixer on low speed until fully combined.  Rebecca warns against over-beating, so be careful of that.
  4. Form the dough into a ball, wrap in plastic wrap, and refrigerate for 30 minutes.
  5. After the 30 minutes are up, flour a smooth flat surface and gently roll the dough out to 1/4″ thick with a rolling pin.  Cut the cookies out with your desired cutters and place on the baking sheet 1/2″ apart.  Squish the remaining dough scraps back together, roll out the dough again, and cut more cookies out until scraps are all used up.
  6. Bake the cookies for 10-12 minutes, until the edges start to turn light brown.
  7. Cool the cookies on the baking sheet for 10 minutes before moving to a wire cooling rack for another 5 minutes at least.

To make the icing

  1. Whisk together the powdered sugar, milk, and vanilla extract until fully combined with no lumps.  Whisk in your color of choice (Only 1 drop each of red and blue was needed for that great pastel purple color in the photo).
  2. When the cookies are cool, dip them face down in the icing, let it drain off the cookie a bit and flip the cookie back up-right, tilting the cookie back and forth to get the icing to reach the edges.
  3. Let the frosting dry overnight before packing them up in an airtight container, but be aware that my cookies still stuck together a bit-a sheet of parchment paper between layers would have been helpful.  Enjoy!


Christmas Date Cookies

Friday, November 4, 2011

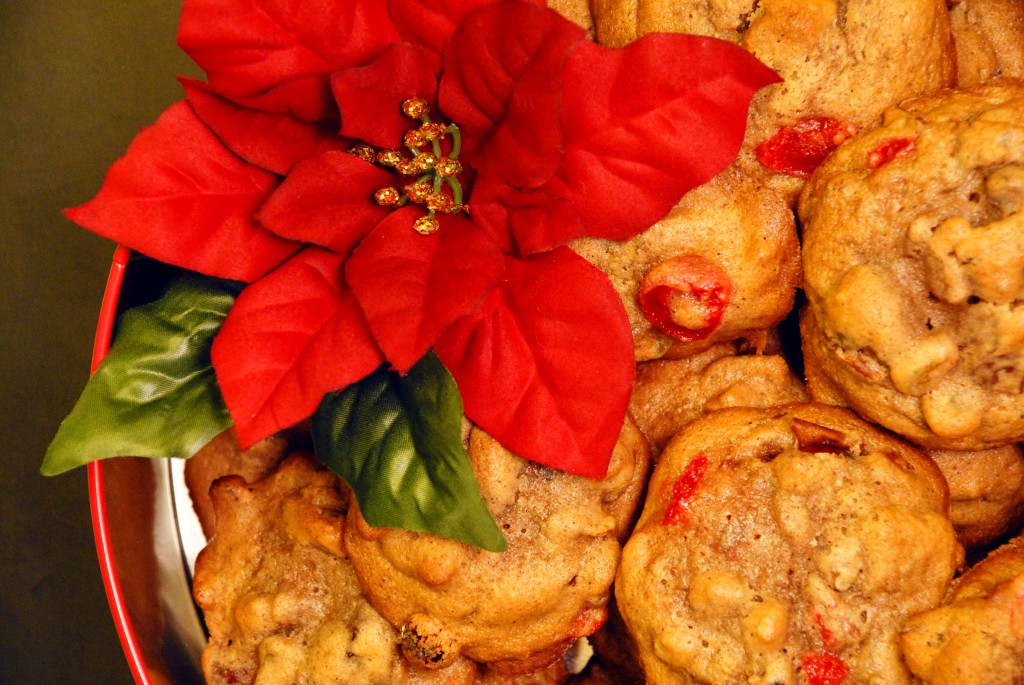
 I know I know I know, it’s not even Thanksgiving yet, but there’s a reason I have these posted today!  Not so long ago, the president of the company I work for passed by my desk, spotted the cupcake tins half-hiding behind my desk (I had used them to transport cupcakes to the office for coworkers that day) and asked if I could help him find a cookie recipe that his mother used to make during the holidays.  After a few Google searches for “date cookies”, “maraschino cookies” and so on and so forth, we finally stumbled across the right recipe.  He said they would be fun to have around the office during the holidays and I promised to save the recipe until then.

Cut to the next morning and he immediately comes to my desk and says, “so…those cookies…I was thinking about them all night and I was wondering if you could maybe just make them…now.” — I say “Holidays-Shmolidays” because cookies should be enjoyed whenever you want them and I set off gathering the ingredients that night!

So this is my first official Christmas recipe for the blog this year, but don’t worry, because you’re going to have tons of Thanksgiving recipes still headed your way in the coming weeks.  Thanksgiving is one of my all-time favorite holidays and THE BEST for cooking, so I will be happy to do any recipe requests or mini-tutorials (turkey stock for perfect gravy?) if anyone has any specific Thanksgiving questions…lay ‘em on me!


Christmas Date Cookies
Adapted from Culinarily Curious Cajun
Approx 2 Dozen Cookies

  • 1/2 tsp baking soda
  • 1 tsp warm water
  • 1/4 cup butter
  • 1/4 cup shortening
  • 1 cup brown sugar
  • 2 eggs
  • 1/2 tsp salt
  • 1/2 tsp nutmeg
  • 1 tsp allspice
  • 1 tsp cinnamon
  • 1 cup pecans, chopped
  • 1/2 lb dates, pitted and chopped
  • 1/4 cup raisins
  • half of a 10 oz jar of maraschino cherries, drained and chopped
  • 1/4 cup flour and 1 1/2 cups flour
  1. Preheat oven to 350 degrees.
  2. Dissolve soda in warm water in a small bowl, set aside.
  3. Melt butter and shortening in a saucepan over low heat, cool slightly and then stir in brown sugar and transfer to mixing bowl.
  4. Add eggs, one at a time, beating well after each one.
  5. Add soda mixture, salt and spices, mixing well.
  6. In a separate small bowl, combine pecans, chopped dates, raisins and cherries.  Sprinkle 1/4 cup flour into the bowl and mix until the pecans, dates, etc are all coated evenly with flour.
  7. Add the small bowl’s contents to the large bowl’s butter-sugar-egg mixture and mix well.  Add the 1 1/2 cups flour and mix until fully combined.
  8. Drop dough by rounded teaspoon-full onto a greased cookie sheet.  Bake for 12-15 minutes until golden brown.
  9. Cool on sheet for 5-10 minutes, then transfer cookies to wire racks to finish cooling so that their bottoms don’t get soggy.