Entries Tagged as 'Dessert'

Southern Caramel Cake

Thursday, April 4, 2013

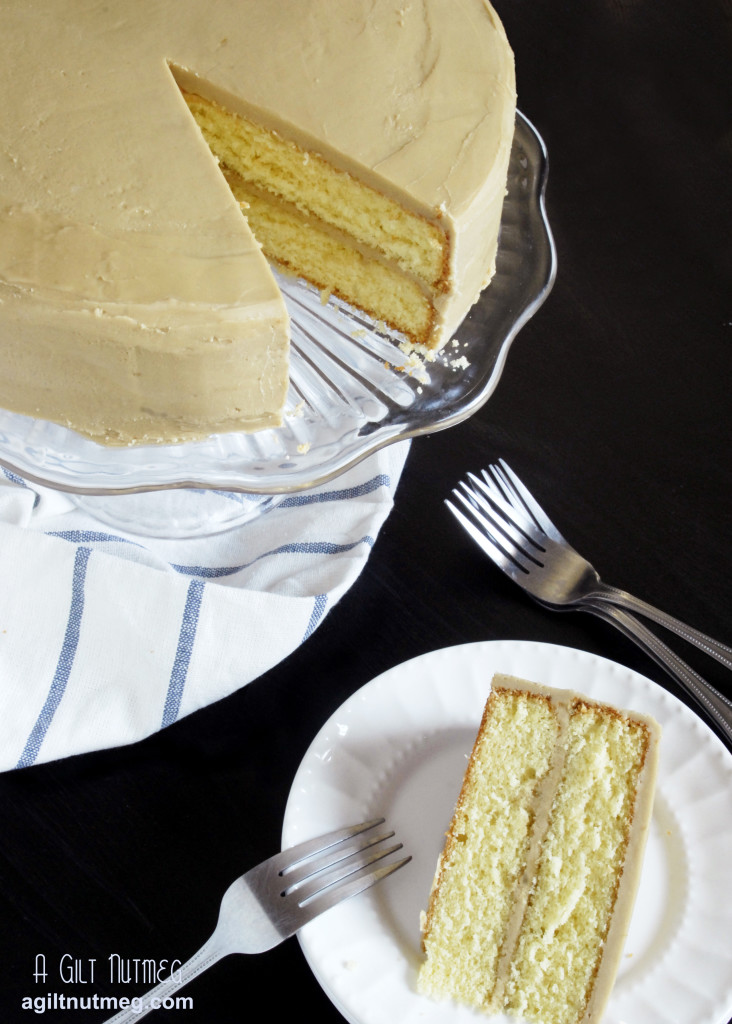
Southern Caramel Cake from agiltnutmeg.com

My Aunt Fannie Mae is famous in my family for her Red Velvet cake.  As such, Red Velvet was the traditional Southern layer cake that I remember growing up with (well, that and the Coconut Cake we always had at Christmas, but that wasn’t homemade).  It wasn’t until recently that I started learning about other Southern layer cakes long steeped in tradition- Hummingbird Cake, German Chocolate Cake, and now Caramel Cake.  Out of those three I just listed, Caramel Cake “takes the cake” by far in my opinion (pun intended).  I mean, really:  it’s got fantastically fluffy yellow cake layered with frosting that tastes exactly like a Werther’s Original candy.  It was irresistible!  Granted, I don’t have an overly sweet-tooth, so only one slice was plenty for me, but that one slice was outstanding.  The one tricky aspect was the frosting-as it cools, a crystallized sugar crust forms on the frosting (delish!) instead of whipped soft creaminess of buttercream frosting, so you have to frost quickly and not aim for too smooth a finish.
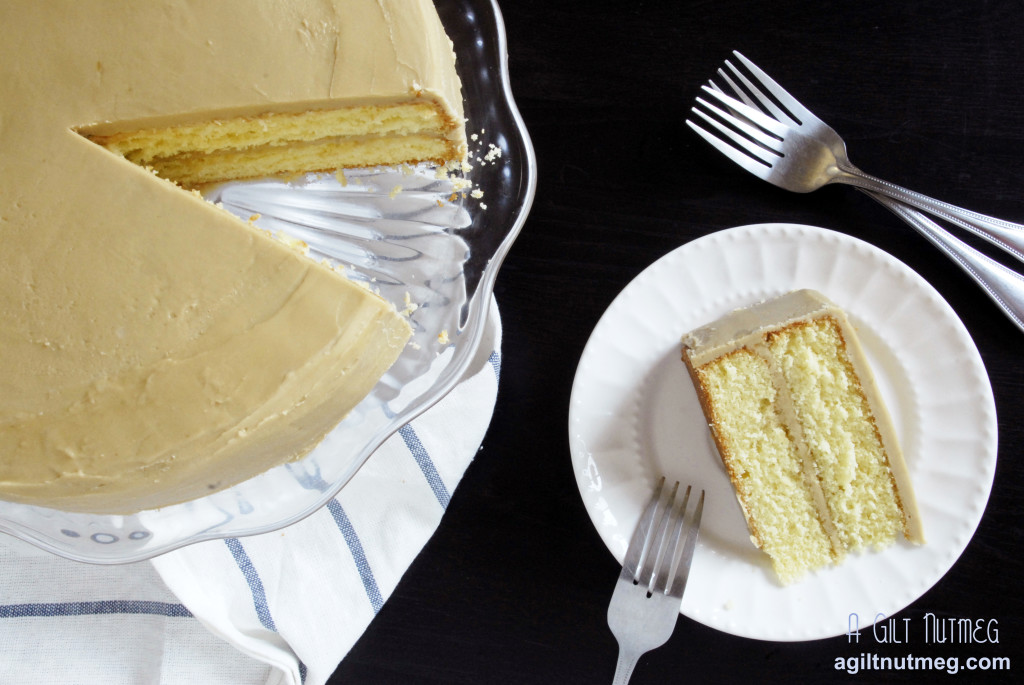
Southern Caramel Cake from agiltnutmeg.com

Southern Caramel Cake
from America’s Test Kitchen Season 12

  • 1/2 cup buttermilk, room temperature
  • 4 large eggs, room temperature
  • 2 tsp vanilla extract
  • 2 1/4 cups all-purpose flour
  • 1 1/2 cups granulated sugar
  • 1 1/2 tsp baking powder
  • 1/2 tsp baking soda
  • 3/4 tsp salt
  • 2 sticks (16 Tbs) unsalted butter, cut into pieces and softened
  • 1 1/2 sticks (12 Tbs) unsalted butter, cut into pieces and softened, divided into 8 Tbs and 4 Tbs
  • 2 cups packed brown sugar
  • 1/2 tsp salt
  • 1/2 cup heavy cream
  • 1 tsp vanilla extract
  • 2 1/2 cups confectioners’ sugar, sifted
  1. Heat the oven to 350 degrees and spray two 9″ round cake pans with baking spray.
  2. In a large measuring cup, whisk together the buttermilk, eggs and vanilla.
  3. In a large bowl, combine flour, granulated sugar, baking powder, baking soda and salt at low speed with an electric mixer.
  4. Add the butter, one piece at a time, until the chunks are no bigger than pea-sized.
  5. Add half of the buttermilk mixture to the butter-dry ingredients mixture and beat for one minute on medium speed until fluffy.  Slowly pour in the rest of the buttermilk and continue to beat on medium speed until just incorporated.
  6. Divide the batter evenly between the two pans and bake 20-25 minutes until golden brown.  While the cakes are baking, if you have just one bowl for your stand mixer and it is now dirty, take the time to wash it because you’ll need it for the frosting.
  7. Cool cakes in pans for 10 minutes before removing them from pans and letting them finish cooling on wire racks before frosting.  If your cakes rose a bit too much in the middle, let them cool and then level off the tops with a serrated knife before frosting.  I’ve also seen caramel cake with 4 very thin layers of cake instead of 2 thick layers.  To do this, equally cut the 2 individual cakes horizontally so that you end up with 4 thinner cake layers and frost a thin layer between each layer of cake.
  8. In a large saucepan, melt together the first 8 tablespoons of butter, brown sugar and salt.  When small bubbles appear around the edge of the pot after 5 or so minutes, whisk in the heavy cream and heat until the bubbles appear again a minute later. Remove from heat and whisk in vanilla extract.
  9. Pour the sugar mixture into a large mixing bowl and turn the electric mixer on to low.  Slowly add in the confectioners’ sugar until fully incorporated.
  10. Bump the speed up to medium and beat the frosting mixture for 5 minutes, until it is pale brown and no longer hot (but still warm).
  11. Drop the 4 Tbs of butter in, one piece at a time, and beat for another 2 minutes until butter is fully incorporated.
  12. To frost, place one cake on your cake plate, dollop about 1 cup of frosting on top of the cake and spread it evenly over the cake.  Add the second layer on top and frost the top and side of the cakes with the remaining frosting.  As I mentioned above, frost quickly!  Test Kitchen says you can microwave the frosting for 10 seconds or so to soften it back up, if necessary.
  13. Since it tastes like a rich Werther’s Original candy, be sure to have a glass of milk on hand when you cut a slice.  Enjoy!

The Best Oatmeal Raisin Cookies You’ll Ever Bake

Friday, March 15, 2013

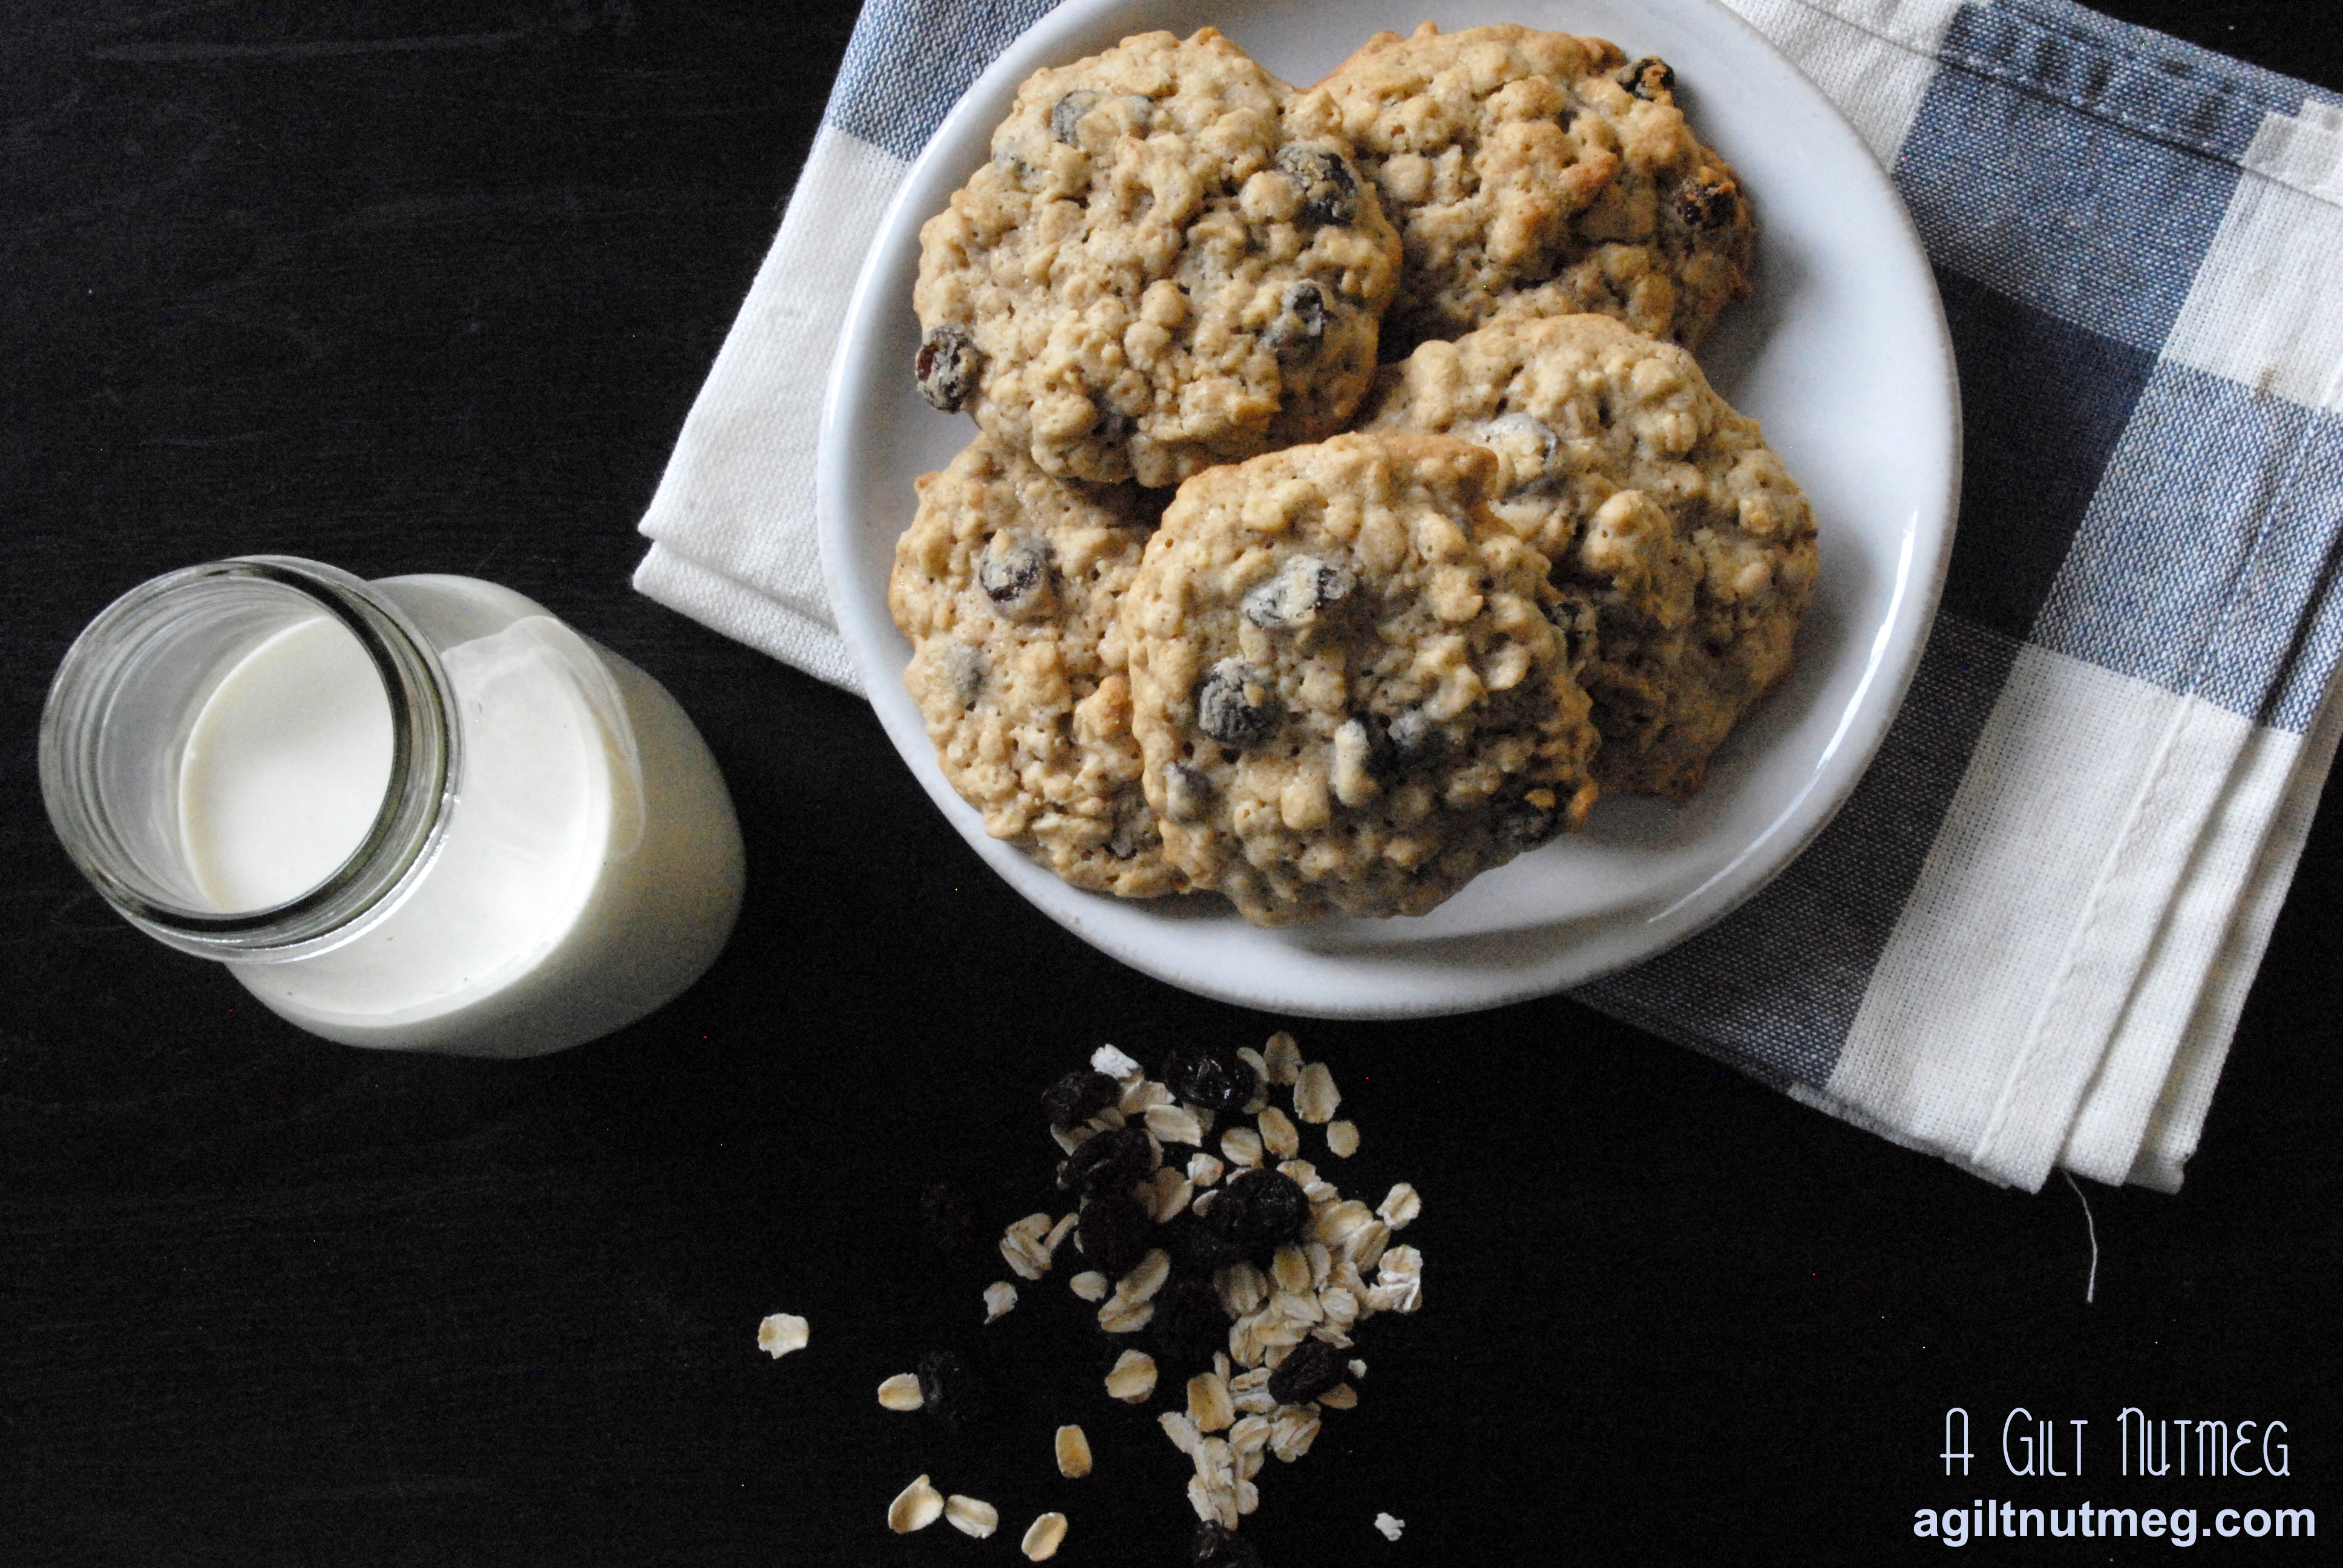
Best Oatmeal Raisin Cookies Ever - www.agiltnutmeg.com

I love Oatmeal Raisin cookies.  “Love” may even be an understatement.  While other more flashy cookies may temporarily steal my attention, I will always come back home to Oatmeal Raisin.  Soft yet chewy, full of oats, raisins and spices…you really just can’t beat a good one of these.  When it came time to start baking my own Oatmeal Raisin cookies, I consulted the two sources I trust most: Cooks Illustrated and the back of the Quaker Oats Oatmeal canister.  Surprisingly enough, Cooks tells you immediately that the recipe Quaker Oats provides is pretty near spot on, with only minor tweaks-high praise from CI!  My only hesitation was that CI proceeded to take out most of the spices that I love, so I went back to Quaker’s recipe for help and remedied that.  The resulting cookie is incredible:  big, fluffy, chewy and I love being able to pick out the little specks of spice on the top of the cookie- dark brown nutmeg, light brown cinnamon and black vanilla beans.  Interestingly, I found these taste best after they “rest” for a day or even two days after baking; I don’t know the theory behind this, but just trust me.  These are outrageously simple to make and my sister and I both agree that they qualify as breakfast food (oats…raisins…yes).  So with that, I share with you my favorite cookie recipe of all time…

Best Oatmeal Raisin Cookies Ever - www.agiltnutmeg.com

Oatmeal Raisin Cookies
Adapted from Cooks Illustrated and Quaker Oats
Makes approximately 20 large cookies

  • 2 sticks unsalted butter (1/2 pound), softened but still firm
  • 1 cup light brown sugar
  • 1 cup granulated sugar
  • 2 eggs
  • 1 teaspoon vanilla bean paste (or substitute extract)
  • 1 1/2 cups unbleached all-purpose flour
  • 1 cup raisins (or if you really love raisins, go up to 1 1/2 cups)
  • 1/2 teaspoon table salt
  • 1/2 teaspoon baking powder
  • 1/2 teaspoon fresh ground nutmeg
  • 1 teaspoon cinnamon
  • 3 cups rolled oats
  1. Heat oven to 350 degrees.
  2. Using an electric mixer, beat the butter until completely softened, 2-3 minutes.
  3. Add brown and white sugar and beat an additional 3 minutes, until fluffy.
  4. Add in vanilla and the eggs, one at a time, making sure they are fully incorporated after each one.
  5. In a separate medium bowl, whisk together the flour, salt, baking powder, nutmeg and cinnamon.
  6. Using a wooden spoon, stir the dry mixture into the butter-sugar mixture until fully combined.
  7. Add in the oats and raisins to the batter and stir with the wooden spoon until both are incorporated evenly into the dough.
  8. Line baking sheets with parchment paper and form about twenty 2″ balls on the baking sheets.
  9. Bake until the very edges of the cookies turn golden brown but no longer, about 20-22 minutes.  The cookies will look too light on top, but trust me.
  10. Let the cookies cool for 5 minutes on the baking sheet before transferring cookies to a cooling rack.

Pi Day Redux

Thursday, March 14, 2013

3.14 = pi = PIE = THE MOST DELICIOUS DAY OF THE YEAR!  In celebration of 2013′s Pi/Pie Day, here’s a look back at my favorite pies over the course of A Gilt Nutmeg…


Black and White Banana Cream Pies

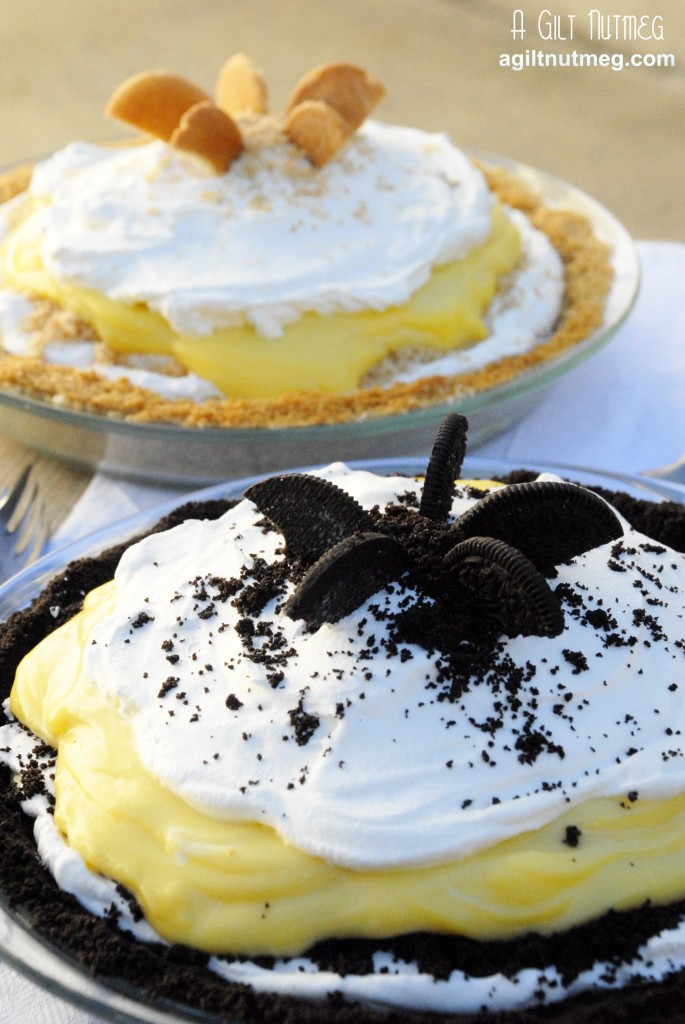
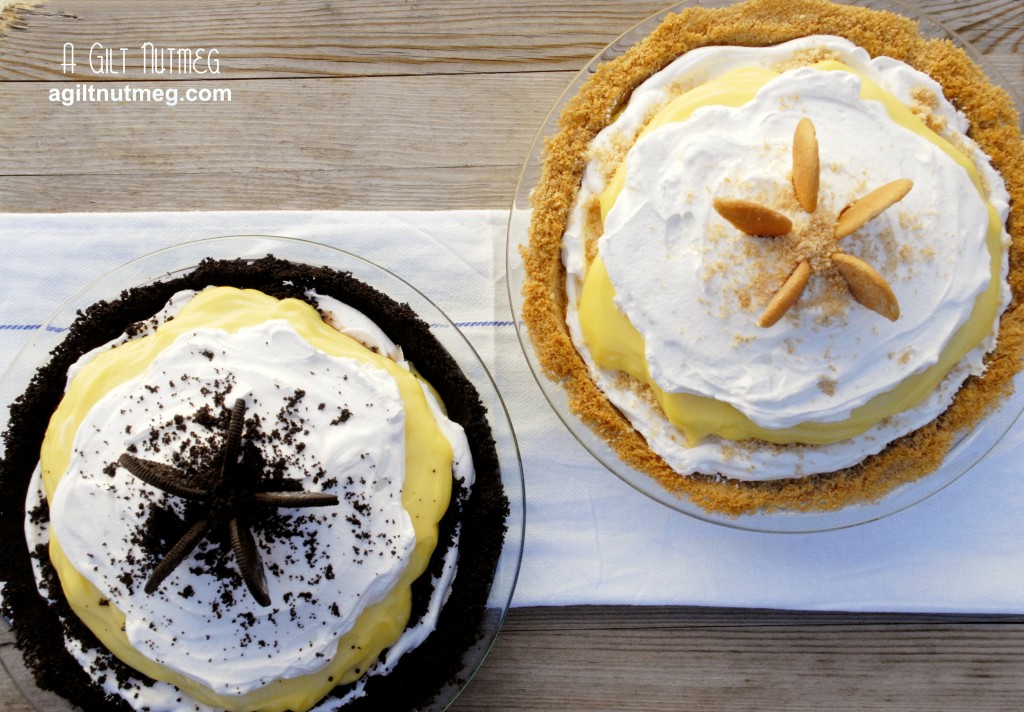
Black and White Banana Cream Pies - agiltnutmeg.com

Black and White Banana Cream Pies - agiltnutmeg.com

One of my favorites of all time, I themed these Banana Cream Pies for a friend’s party.  You really can’t go wrong with traditional “Nana Pudding” Nilla Wafers OR Oreos for a chocolate-covered banana twist.  In fact, why on earth would you choose?  Just make both!


Chocolate Coconut Pie for Passover

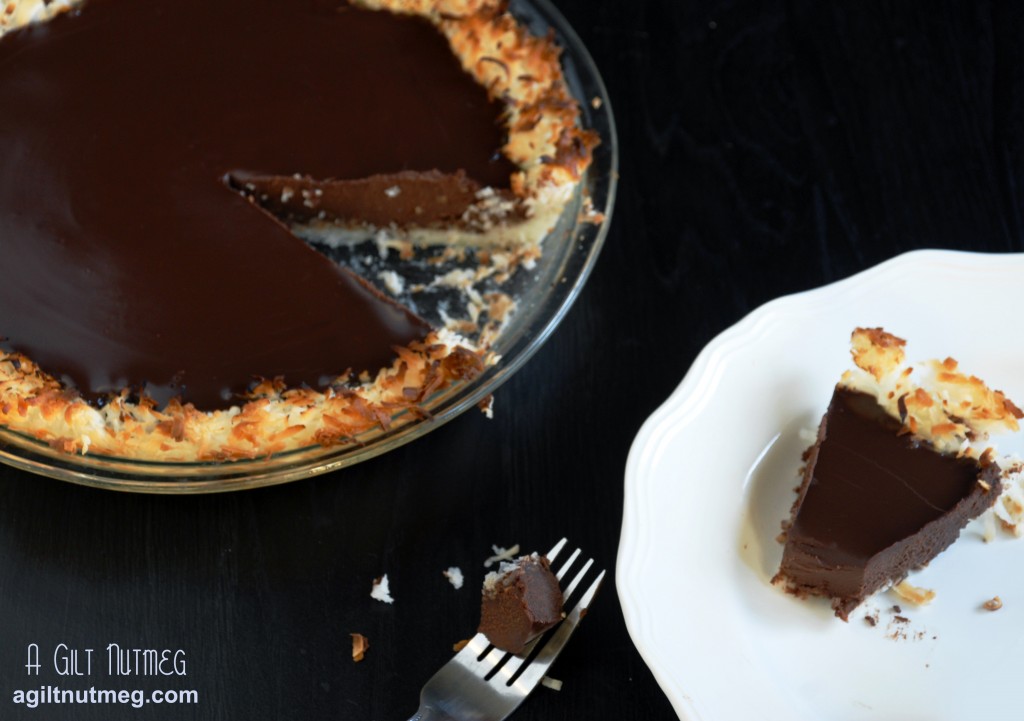
Coconut Chocolate Pie from agiltnutmeg.com

This Chocolate Coconut Pie was created with just 4 ingredients and is perfect for those people celebrating Passover but who can’t stand one more coconut macaroon.  With Passover in just a few weeks, this is definitely a recipe to tuck away for later.


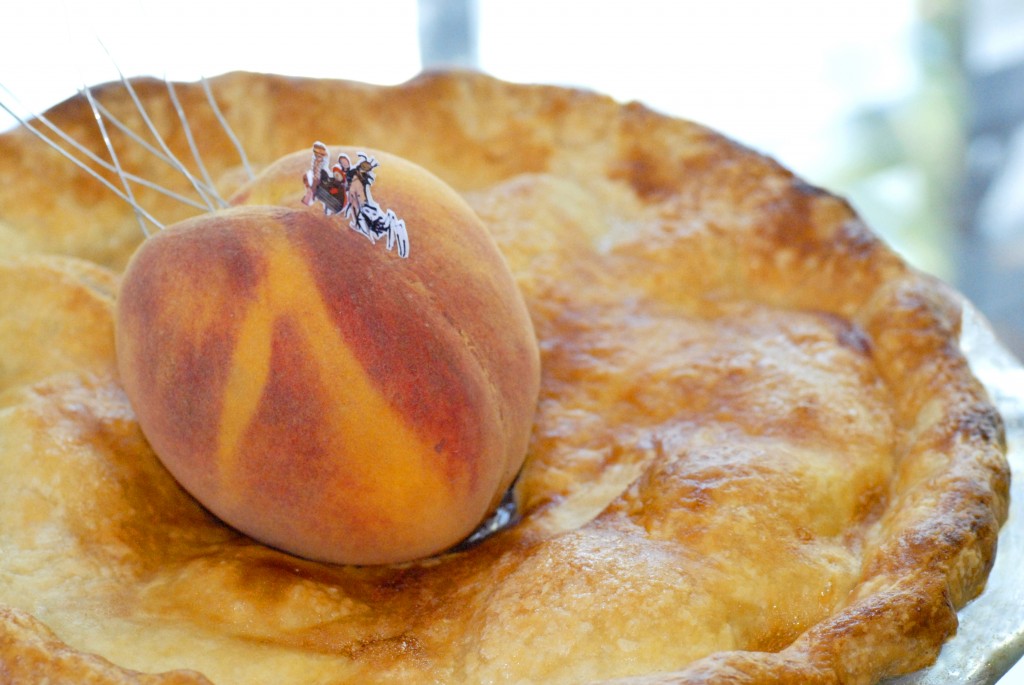
Bourbon Honey Peach Pie

Bourbon Honey Peach Pie - agiltnutmeg.com

For those who haven’t been reading the blog as long, you may have missed my very proudest moment, when I won a blue ribbon at the Annual KCRW Good Eats Pie Contest for my Bourbon Honey Peach Pie.  It was entered in the Tim Burton-Inspired Category, hence the “James and the Giant Peach” decorations on top.  You don’t have to decorate yours with bugs, but this pie is truly one of the most outstanding recipes I’ve ever worked on.


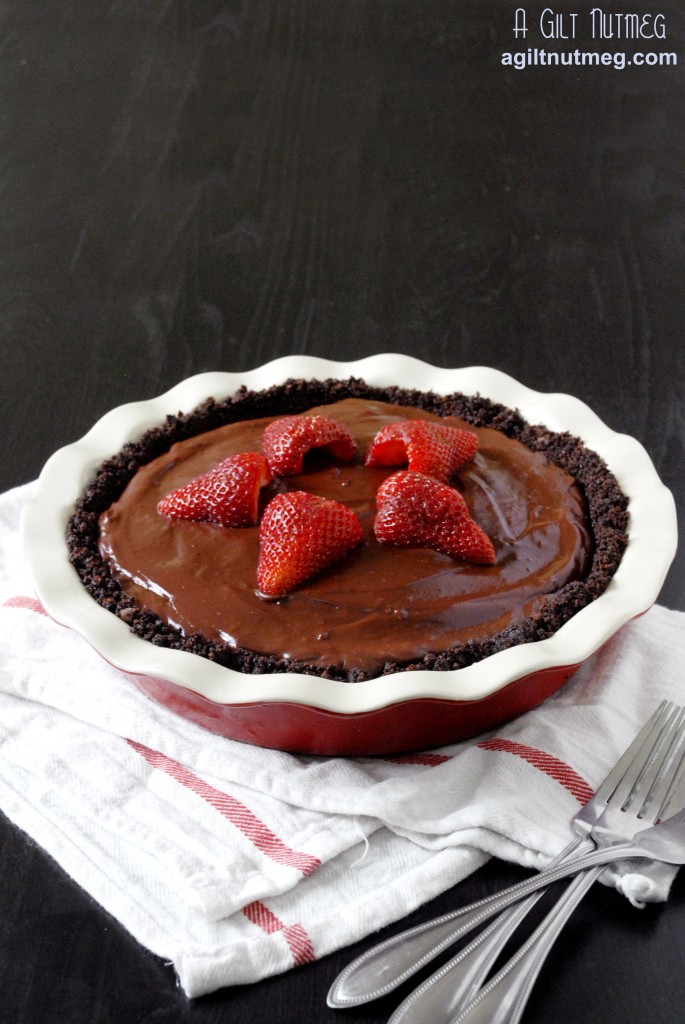
Chocolate & Strawberry Pie

Coconut Strawberry Pie from agiltnutmeg.com

You can’t go wrong with a chocolate-strawberry combination, and this Chocolate & Strawberry Pie is ridiculously easy to throw together.  There’s a touch of alcohol and spice in the chocolate pudding-like filling, which elevates it to an entirely new level of decadence.


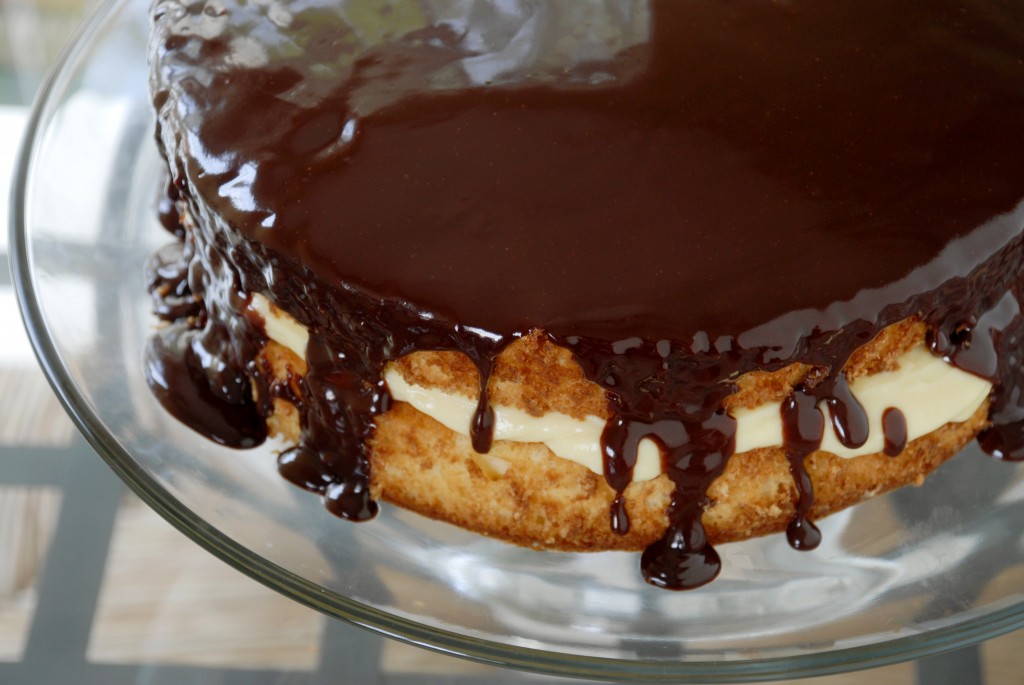
Boston Cream Pie

Boston Cream Pie

Okay, okay, you got me.  Boston Cream Pie is not a true pie, but darn if it doesn’t say “pie” in the name.  Besides, this is the recipe that taught me all about pastry cream and I happily jumped on that train and have never looked back.  I could eat pastry cream forever.  Seriously.

Almond Bread Pudding & Salted Caramel Sauce

Monday, January 28, 2013

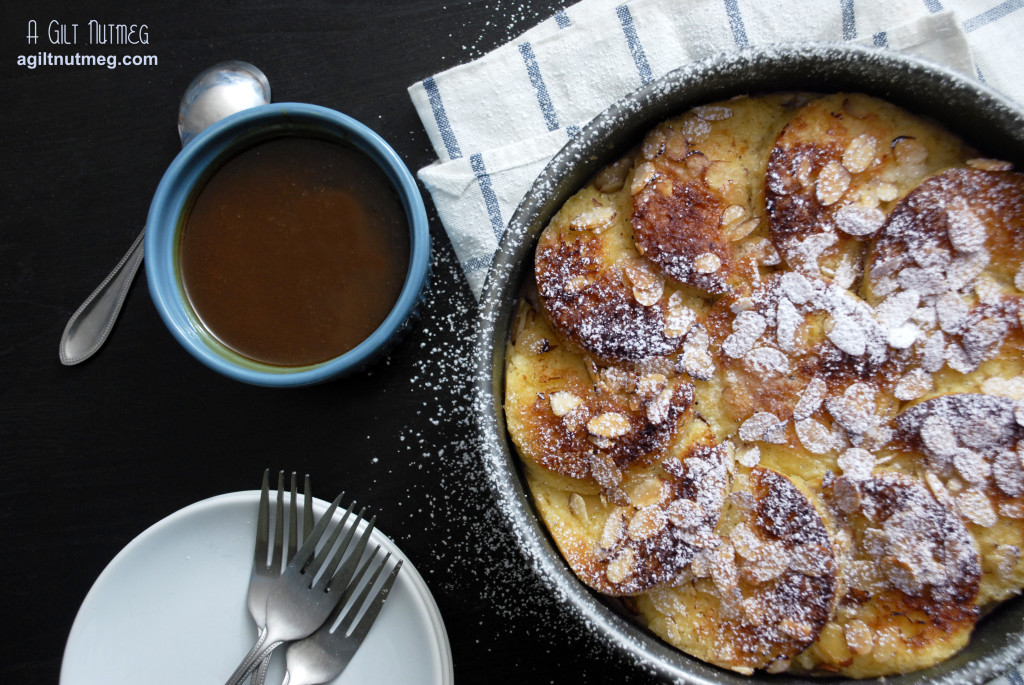
Almond Bread Pudding with Salted Caramel Sauce

My boyfriend loves bread pudding.  With this knowledge in hand, I was pretty sure fate was on my side when Bon Appetit’s January issue came out featuring an Almond Bread Pudding with Salted Caramel Sauce just days before it was time to celebrate said boyfriend’s birthday.  To be sure, this was not the standard cinnamon-y raisin flecked bread pudding.  This bread pudding had a focus on almonds and custard, and, even though I was worried it wouldn’t be as well received, the fact that it was practically inhaled by the four of us having birthday dinner and Apples-to-Apples battles was a pretty good indicator that this recipe was a winner.

I thought that the slightly tedious circular bread cut outs were just to look fancy, but, given that each round has a slather of almond butter on the underneath side, it worked surprisingly well at having that almond flavor perfectly marbled throughout the entire dish.  It worked so well, in fact, that I want to make another one soon, maybe with some cream cheese and cinnamon, knowing that there will be just the right amount of spice in every bite.

Note: you can make the caramel sauce well in advance, to save some time.  Always important when planning special desserts!


Almond Bread Pudding with Salted Caramel Sauce
Recipe slightly adapted from Bon Appetit, Jan ’13
Serves 8-10

Pudding

  • 1 1/4 cups half-and-half
  • 1 1/4 cups heavy cream
  • 1 vanilla bean
  • 4 egg yolks
  • 3 eggs
  • 3/4 cup sugar
  • 1/4 tsp kosher salt
  • 1 loaf (1 lb) brioche or challah
  • 1/2 cup almond butter (with no added sugar)
  • 3 tablespoons sliced almonds
  • 2 tablespoons raw or white sugar
  • powdered sugar
  • butter

Caramel Sauce

  • 1 cup sugar
  • 1/8 tsp cream of tartar
  • 1/4 cup unsalted butter
  • 1/2 cup heavy cream
  • 1 tsp kosher salt
  1. In a medium saucepan, whisk together the half-and-half, cream, and seeds scraped from vanilla bean.  Add the bean to the pot as well and bring to a simmer, then turn off the heat.
  2. In a medium bowl, whisk together egg yolks, eggs, sugar and salt.
  3. Pouring in just small amounts at a time, add the hot cream mixture into the egg mixture, whisking thoroughly each time before pouring in a little more.  Continue until fully combined.
  4. Cover the bowl with plastic wrap and let it rest for 30 minutes.  After 30 minutes, strain in a fine mesh sieve to remove any bits of cooked egg and the vanilla bean.
  5. While the custard is resting, heat the oven to 350 degrees.  Butter a round cake pan, 8″ wide with 2″ high sides.  Using something close enough will be fine, just don’t use a springform pan, like I did.  I was only worried about getting a pan as close in size as possible and in the process forgot that the custard would leak out!
  6. Still in that 30 minute time frame, slice the bread into 3/4″ slices (you’ll need 10-12 slices).  Cut the crusts off each slice, then, using a 3″ wide round biscuit cutter, cut a circle out of the middle of each bread slice.  Save the scraps- you’ll need them!
  7. Arrange the bread scraps into the bottom of the buttered pan, fitting them in tightly like a puzzle.  Press gently with your fist to squish them down slightly.
  8. Spread one side of each round piece of bread with almond butter, then place slices, almond side down, into the pan, arranged in an overlapping circle, as seen in the picture above.  Save one slice to place in the center of the circle.
  9. Pour the custard over the arranged bread, making sure to do so evenly.
  10. Sprinkle the almonds and 2 tablespoons of sugar over the top of the bread.
  11. Place the cake pan in the center of a large roasting pan and fill the roasting pan with water that reaches about half way up the sides of the cake pan.  Cover the roasting pan with tin foil.
  12. Bake for 25-30 minutes before removing the foil and raising the temperature of the oven to 375 degrees for another 25 minutes.
  13. Move the cake pan to a cooling rack for a few minutes before dusting with powdered sugar and serving with the salted caramel sauce.
  14. To make caramel sauce: In a medium sauce pan, whisk together sugar, cream of tarter and 3 tablespoons of water.
  15. Bring mixture to a boil, stirring to make sure the sugar dissolves.  Once the sugar is boiling, do not stir until the mixture begins to darken in color, then stir to ensure the sugar cooks evenly.
  16. Watch the mixture carefully as it will darken extremely quickly.  Once it reaches the color of honey, turn the heat down to low and continue until almost an amber color before turning the heat off.  The mixture will continue to darken for another minute or so after you turn the heat off.
  17. Carefully stir in the butter (caramel will bubble!).  Once that is melted, stir in the cream and salt.
  18. Let cool slightly before serving and enjoy!


Peach Pound Cake

Tuesday, September 11, 2012

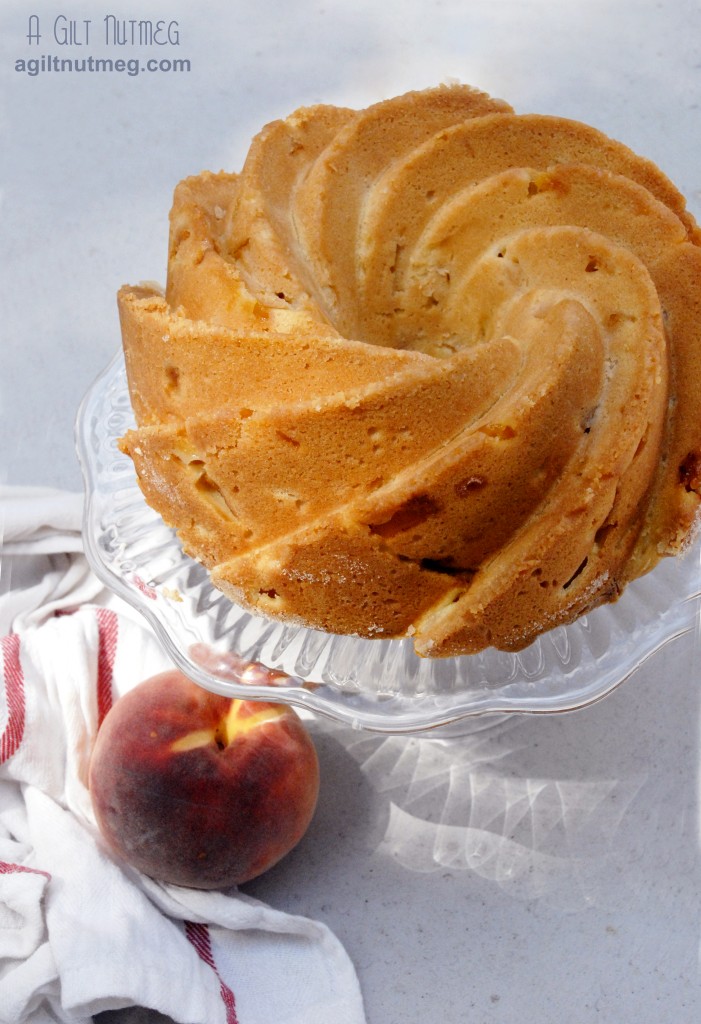
peach pound cake

Okay, okay, I’ve been AWOL.  The truth is…summer finally got to me!  Summer in LA is a very slow starter and it doesn’t even get legitimately warm enough for beach weather until August.  Of course that means that my apartment in Beachtown, which doesn’t need air conditioning 11 out of the 12 months of the year, is all of a sudden sweltering.  Standing in the hot kitchen was, truthfully, the last thing I want to do, especially when I could hop on my beach cruiser and head down the breezy coast instead.  But I’m back and I want to share one last grab at Summer’s bounty with this Peach Pound Cake!

I hope that you’ve still got a handful of peaches hanging around at the grocery store, even if Fall apples are breathing down their necks, ready to take their spot in the produce section.  This cake is a cinch to throw together, has a tasty sugar crust and features my favorite summer fruit, so get on it while you still can!

Peach Pound Cake
Adapted from The Fresh Market, via Annie’s Eats

  • 1 cup butter
  • 2 1/4 cups sugar plus 1/4 cup sugar set aside
  • 4 eggs
  • 1 teaspoon vanilla extract
  • 2 3/4 cups all-purpose flour plus 1/4 cup flour set aside
  • 1 teaspoon baking powder
  • ½ teaspoon salt
  • 3 large fresh peaches, peeled, pitted and chopped
  • 1/4 teaspoon nutmeg
  • 1/2 teaspoon cinnamon

  1. Heat oven to 350 degrees.  Spray a bundt pan with baking spray and sprinkle generously with the 1/4 cup of sugar that was set aside.  Make sure to evenly cover the whole pan with sugar, shaking and tilting the pan to cover every inch.  Gently dump out the extra, without knocking too much of what’s already stuck to the pan.
  2. In a large mixing bowl, cream together the remaining sugar and butter, beating for 5 minutes.  While that’s beating, in a separate medium bowl, whisk together the 2 3/4 cups flour, baking powder, and salt.
  3. Add the eggs, one at a time, then add the vanilla and beat until well combined.
  4. Add the flour mixture, a little at a time, stopping after the streaks of flour have disappeared.
  5. In a small bowl, mix the 1/4 cup of flour, nutmeg and cinnamon, then toss with the peaches until the peaches are evenly coated in the flour-spice mixture.
  6. Fold the peaches into the batter (it will be quite a thick batter, so it’ll take a little bit of elbow grease) and transfer the batter to the prepared bundt pan, spreading so that it’s evenly distributed in the pan.
  7. Bake for 1 hour and 10 minutes, until the top is golden brown.
  8. Let it cool on a wire cooling rack before slicing.  Enjoy!

White Peach Cream Cheese Tart

Monday, August 6, 2012

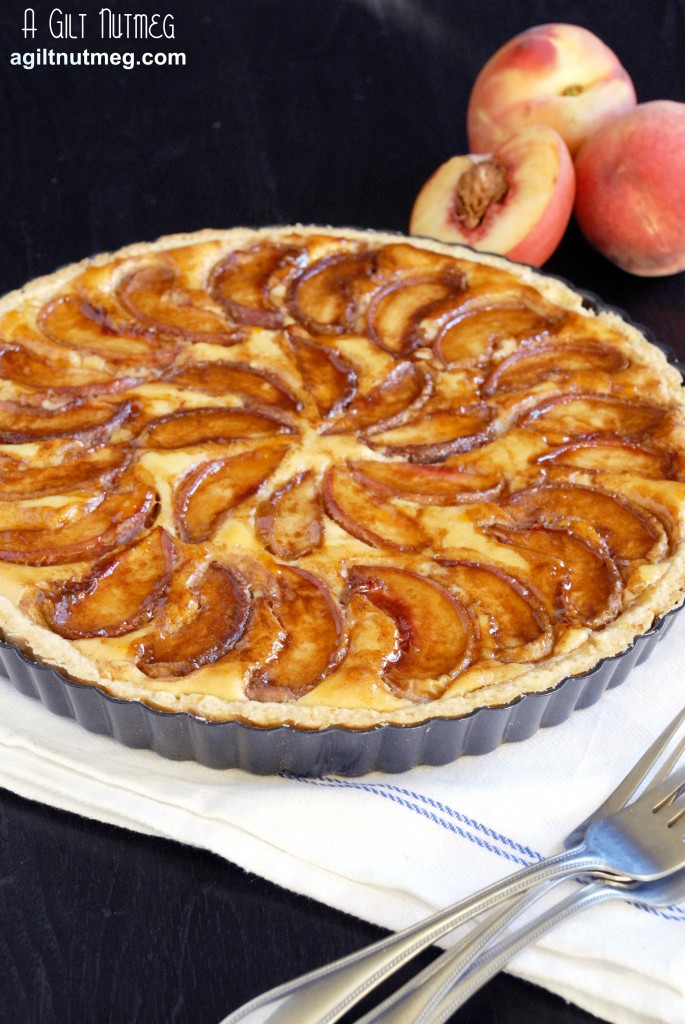
 white peach cream cheese tart

I turned the Way-Back Machine on for Project Pastry Queen this week, everybody!  The truth is, we’re nearing the end of the book and the final handful of remaining recipes aren’t the most interesting to most people.  As such, we’re going back to pick some recipes that were completed before most of us joined the group.  I’ve had this tart on my list of things to make for quite some time, but had to wait until peach season hit full stride, of course.

The truth with this tart is that I had it in the oven for approximately 1 and a half minutes before I realized that I had miscalculated my time and we had to leave for a performance at the Hollywood Bowl right that moment and not in the hour that I originally thought.  Cut to me hurriedly swiping the tart out of the hot oven, throwing it in the fridge and running out the door hoping to goodness I didn’t have flour hand prints all over my dark jeans.  I came back home and found that the peaches dipped in cinnamon and sugar macerated while sitting on the tart in the fridge, so there was peach juice all over the surface of the cream cheese filling. Oh well!  In to the oven it goes.

When I pulled it out, there was no sign of the juice anywhere-success!  But because I used white peaches (they were all that were ripe at the store), the cinnamon’s brown color was more dominant than the cheery yellow color of everyone else’s tarts.  Also, I a) forgot to peel them, but that’s no big deal and b) chose not to use halves of peaches as Rebecca suggests, instead going with a more elegant circular pattern that still covers the top of the cream cheese filling just fine.

White Peach Cream Cheese Tart
Makes one 10″ tart
Adapted from The Pastry Queen by Rebecca Rather

Lemon Zest Tart Crust

  • 2 cups flour
  • 1/2 teaspoon salt
  • 1/3 cup sugar
  • zest of one lemon
  • 11 Tbsp chilled butter, cut into Tbsp sized chunks
  • 1 egg
  • 1/4 cup heavy whipping cream

Filling

  • 8 oz cream cheese (1 package)
  • 1/2 cup sugar
  • 1/2 cup mascarpone cheese
  • 1 Tbsp vanilla extract
  • 2 eggs
  • 1/2 cup flour
  • 1/4 tsp salt

Topping

  • 2 teaspoons ground cinnamon
  • 1/2 cup sugar
  • 3-4 large peaches

Glaze

  • 1/4 cup apricot jam
  • 1 1/2 tsp brandy
  • 1 1/2 tsp water
  1. Combine the flour, salt, sugar and lemon zest in the bowl of an electric mixer and combine ingredients at low speed.
  2. Add the butter chunks one at a time to the flour mixture and continue beating until the mixture is crumbly and no large chunks of butter remain (the largest size should be pea-sized).
  3. Whisk together the egg and cream and pour into the flour mixture, beating on low until just incorporated.  Watching as the mixer beats on low speed, the dough should form a ball within seconds.  If it’s too dry, you can add a tablespoon of cream more.
  4. Spread a piece of plastic wrap on the counter, turn the dough out onto the saran wrap and form the dough into a round disk.  Wrap it with the plastic wrap and refrigerate for an hour.
  5. After an hour, generously flour a flat surface (and rub some flour onto your rolling pin) and roll the dough out to about 1/8″ thick.
  6. Once the right thickness, gently roll it up on your rolling pin and transfer it to your tart pan, pressing it into place and trimming off the edges that stick out over the top of the tart pan sides.
  7. At this point, you can heat the oven to 375 degrees and you might want to clean out your mixer’s bowl, too.
  8. In your mixer’s bowl, beat the cream cheese and sugar about 2 minutes, until well combined.
  9. Add the mascarpone and vanilla and beat until, again, well combined (you’ll probably need to use a spatula to scrape the sides of the bowl in the middle of this).
  10. Add the eggs and beat for about one minute until smooth, then add the flour and salt, beating just until combined.
  11. Pour the cream cheese mixture into the unbaked tart shell and set aside while you slice the peaches.
  12. Stir together the sugar and cinnamon in a medium bowl.
  13. Slice the peaches in half and then again into 6 slices per half.  Drop the slices into the cinnamon-sugar mixture and toss until the peaches are evenly coated.  Arrange the slices on top of the cream cheese filling, making sure to cover as much of the filling as possible.
  14. Bake for 50-57 minutes until the center is set and the edges are turning golden brown.
  15. In the final minutes before the tart comes out of the oven, heat the jam, brandy and water in a small saucepan over medium heat.  Bring to a boil for a minute or two, then let cool for five minutes.
  16. Once the tart comes out of the oven, brush the glaze over the tart and leave it to cool before serving.  Enjoy!

Black & White Banana Cream Pies

Friday, August 3, 2012

banana cream pies - angle

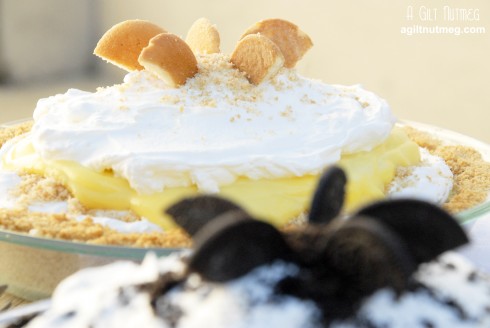
One of my all time favorite desserts- ALL TIME, I tell you- is Banana Cream Pie.  I suppose purists might object to my using Jell-O pudding as a base, though, so maybe we want to call it Banana Pudding Pie?  The jumping off point for this is, of course, the infamous Banana Pudding of the south-loads of fluffy Cool Whip, mounds of vanilla pudding, banana slices and lots of Nilla Wafer cookies lining the pan, softened from sitting in the pudding.  Personally, one of my favorite secret tricks is to use half vanilla pudding and half banana-flavored pudding, to up the flavor notch just a little bit, but plenty of people prefer using just the traditional vanilla.

banana cream pies - overhead

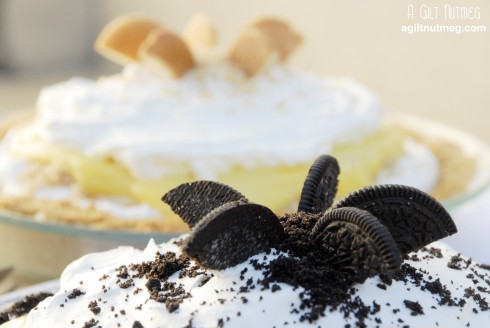
When my friend told me she was throwing a surprise party for her boyfriend with a game theme and that his favorite dessert was Banana Cream Pie, the wheels started turning immediately.  We needed two pies, but how about we theme them to the evening and make “Black and White” Banana Cream Pies, to match the dice and dominoes?  All I would need to do is switch out the Nilla Wafers for some Oreos for a fun chocolate-covered banana twist!  Turning Banana Pudding into pies is extraordinarily simple, and just takes the extra step of crushing the cookies and baking them into a crust.  You really can’t make a simpler pie-plus, whatever doesn’t fit in the pie plate goes into a spare bowl to hide in the fridge and voila, Banana Pudding for yourself for later!

banana cream pies - oreo focus

banana cream pies - nilla wafer focus

Sure, you could make a traditional homemade pudding or use homemade cookies or easily whip up your own whipped cream, but I wouldn’t dream of using anything other than Jell-O instant pudding, Cool Whip and Nilla Wafers.  They all magically combine to form an impossibly light fluffy cloud of banana-vanilla-y sweetness on your tongue that is unmatchable.

Notes: The recipe below is for two pies, plus a small bowl of leftovers.  If you want to make just one pie, choose only one of the cookies to make into crust and buy two of the smaller boxes of pudding (around 3.5 oz) instead of the large boxes (around 5 oz).  You may have extra leftover pudding but, really, is that ever a bad thing?

Black and White Banana Cream Pies

Makes two 9″ pies

  • 1 large box (about 5oz) Jell-O Vanilla Flavor Instant Pudding
  • 1 large box (about 5oz) Jell-O Banana Flavor Instant Pudding
  • 1 box of Nilla Wafers
  • 1 tray of Oreo Cookies
  • 8 Tablespoons butter, divided into two bowls (4 Tablespoons each), and melted
  • 6 ripe bananas, sliced into 1/4″ thick slices
  • 1 large container (16 oz) regular Cool Whip
  1. Set your oven to heat to 375 degrees.
  2. In a large bowl, whisk together the milk and both packets of instant pudding.  Whisk for 2 minutes total until all of the lumps are gone.  Set the bowl in the fridge to set.
  3. Set aside 6 Nilla Wafers and 6 Oreos for decoration later.  In a food processor, process the Nilla Wafers until fine crumbs.  Drizzle the melted butter over the crumbs and process for a few more pulses until the crumbs are evenly coated.  Transfer the crumbs to a small bowl.  Wipe out the food processor bowl and repeat with the Oreos.
  4. In a 9″ glass pie plate, press about 2/3 of the Nilla Wafer crumbs evenly into the bottom and up on the edges of the plate, about 1/4″ thick.  Bake in the oven for 10-12 minutes and set on a wire cooling rack.  Repeat the process with the Oreo crumbs in another pie plate.
  5. To assemble the pies: Once the crusts are cool and your pudding is set thick, arrange an even layer of banana slices in the bottom of each crust.  Gently spread a layer of pudding, about 1 cup, over the bananas and to the edge of the crust, being careful not to push the banana slices around.  Spread about 1 cup of Cool Whip over the pudding in an even layer all the way to the edges of the crust.  Sprinkle a generous handful of cookie crumbs over each pie (matching the Oreo crumbs with the Oreo crust and so on, obviously).   If you have a deep dish pie plate, repeat the process, spreading the layers all the way to the crust, but if you have a normal, more shallow pie plate, like I used above, pile the layers a little higher in the middle and don’t spread them all the way to the edge.  This way you get some height, and still get all the pudding, but it doesn’t drip over the edges and make a mess.
  6. Verrrrrrrry carefully use a sharp knife to cut the Nilla Wafers in half.  Arrange them on top of the pie and sprinkle the top with a small handful of crumbs.  Repeat with the Oreos, but separate the layers and discard the cream before cutting.
  7. Refrigerate until chilled, at least an hour, but I prefer overnight so that the flavors have a chance to meld with each other.
  8. Settle down with a large slice and enjoy on a hot Southern Summer evening!


Chewy Coconut-Lime Sugar Cookies

Monday, July 30, 2012

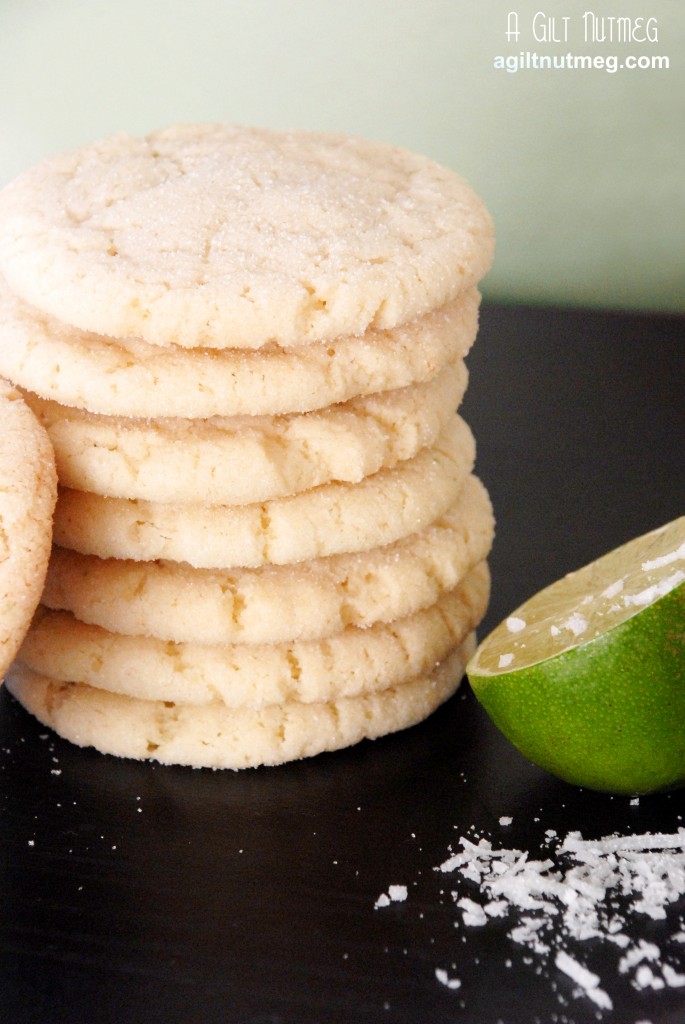
chewy coconut lime sugar cookies

The more us bloggers explore new recipes, its more likely than not that we’ll find a new basic recipe that dethrones our favorite.  Whether it’s chocolate cake or a standard frosting recipe, we love finding those little tweaks that someone discovered to make those every day recipes something outstanding.  This is not one of those cases.  Cooks Illustrated hands down has the best sugar cookie recipe I have ever found and no one has ever come close in comparison.  Luckily, Cooks has a ton of great variations on the flavor, so I’m never tired of them.

You may remember the Chai-Spiced Sugar Cookies, one of my early blog posts.  While those can’t be beat on a cold winter’s night, I think I may be also reaching for these for that instant taste of summer.  They’ve got a great subtle tropical flavor—you’re definitely not hit over the head with the taste of sunscreen, yet somehow they still seem to transport you to a beach and a fruity drink with an umbrella in it.

Chewy Coconut-Lime Sugar Cookies
Barely adapted from Cooks Illustrated
Makes approximately 3 dozen

  • 2 1/4 cups unbleached all-purpose flour
  • 1/2 tsp baking soda
  • 1 tsp baking powder
  • 1/2 tsp table salt
  • 1 1/2 cups sugar, plus 1/3 cup for rolling
  • 2 ounces cream cheese, cut into 8 pieces
  • 1/2 cup sweetened shredded coconut, chopped fine
  • 1 tsp finely grated lime zest
  • 6 Tbs (3/4 stick) unsalted butter, melted and still warm
  • 1/3 cup vegetable oil
  • 1 large egg
  • 1 Tbs milk
  • 1 Tbs lime juice
  1. Heat oven to 350 degrees and line 2 cookies sheets with parchment paper.
  2. In a medium bowl, whisk together the flour, baking powder, baking soda, coconut and salt and set aside.
  3. In a large bowl, add the 1 ½ cups of sugar, cream cheese and lime zest.  Pour the warm butter over the mixture and whisk together until more or less smooth.
  4. Whisk in oil until fully incorporated, then whisk in the egg, milk and lime juice also until fully incorporated.
  5. Add the flour mixture to the large bowl and mix thoroughly.
  6. Put the last 1/3 cup of sugar into a cereal bowl and set up your little station on a large table—sugar bowl, a drinking glass, the cookie dough and the prepared baking sheets.  Scooping up golf ball sized balls of dough, lightly roll them into a ball shape, roll them in the sugar until fully coated, then place on sheets 2” apart.  When you have a full sheet, take the drinking glass and lightly press the balls until they’re 2” wide.  They’ll still be at least a half inch thick.  Sprinkle additional sugar over each flattened dough ball.
  7. Bake one sheet at a time for 13-15 minutes until the edges are just starting to brown (the cookies will look very pale overall).  Cool them on the baking sheets at least 5 minutes, then move them to a wire cooling rack.
  8. Enjoy with milk or your favorite fruity tropical drink!

Plum Blueberry Upside Down Cake

Wednesday, July 25, 2012

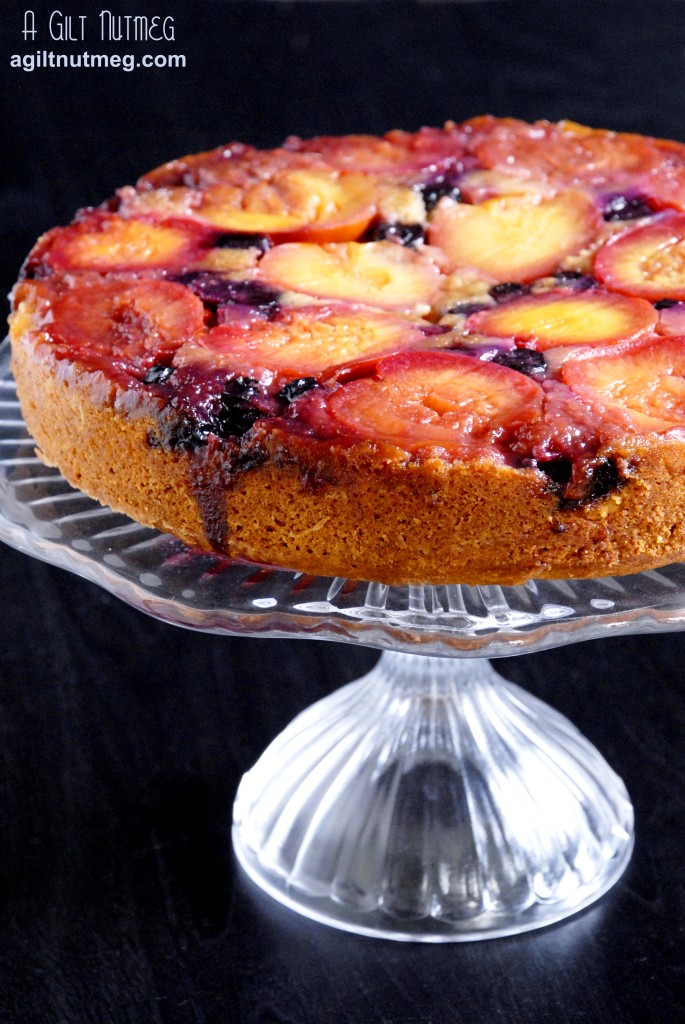
plum blueberry upside down cake

My CSA box came this week with a bag of plums.  I do like plums but they’re not my favorite to eat by themselves, so I started trying to figure out ways to utilize them.  I made Plum Butter last summer, but wanted to try something new.  The box also had some blueberries, so when I found a recipe for spiced plum and raspberry cake, my mind immediately turned to those blueberries.

The cake was such a hit at the office that I didn’t even get a chance to try it, but I’ll take that as a sign that it was great!

Plum Blueberry Upside Down Cake
Adapted from Martha Stewart Living, Sept 2001

  • 10 Tbsps unsalted butter, room temperature, divided into 2 Tbsp and 8 Tbsp
  • 1/3 cup packed light-brown sugar
  • 6-8 medium red plums, halved and pitted
  • 1/4 cup blueberries
  • 1 1/2 cups all-purpose flour
  • 1 tsp ground cinnamon
  • 3/4 tsp baking powder
  • 1/4 tsp baking soda
  • 1/4 tsp salt
  • 1/4 tsp grated nutmeg
  • 3/4 cup granulated sugar
  • 1 tsp pure vanilla extract
  • 3 large egg yolks
  • 1/2 cup sour cream
  1. Heat oven to 375 degrees.  Spray a 9″ springform pan with non-stick baking spray and line the bottom with a round of parchment paper.
  2. In a small saucepan, melt and whisk the brown sugar and 2 Tbsp of butter together over low heat until melted and thoroughly mixed.  Pour the mixture into the springform pan and use a spoon or spatula to spread the mixture relatively evenly over the bottom of the pan (don’t worry about being too neat or covering every inch of the pan).
  3. Place the plums, cut flat side down facing the bottom of the pan, evenly spaced within the pan and fill in the spaces between the plums with the blueberries.
  4. In a medium bowl, whisk together the flour, cinnamon, baking powder & soda, salt and nutmeg and set aside.
  5. With an electric mixer, beat together the rest of the butter (8 Tbsp) with the granulated sugar for 5 minutes, until light and fluffy.
  6. Beat the vanilla extract in as well as the egg yolks, one at a time.
  7. Mix in half of the flour mixture, then mix in the sour cream, then the rest of the flour mixture until just incorporated.
  8. Gently spread the batter in the pan over the plums and blueberries, being careful not to move them around too much.
  9. Lay a square of tin foil onto a cookie sheet and place the springform pan on top of the foil, to catch drips.
  10. Bake for about 60 minutes, until golden brown on top and an inserted tester comes out clean.
  11. Let cool for one hour on a wire cooling rack, then invert onto a plate and remove the springform pan and parchment paper from the top of the cake.  Serve with ice cream or whipped cream and enjoy!

Strawberries with Honey-Vanilla Creme Anglaise

Monday, July 23, 2012

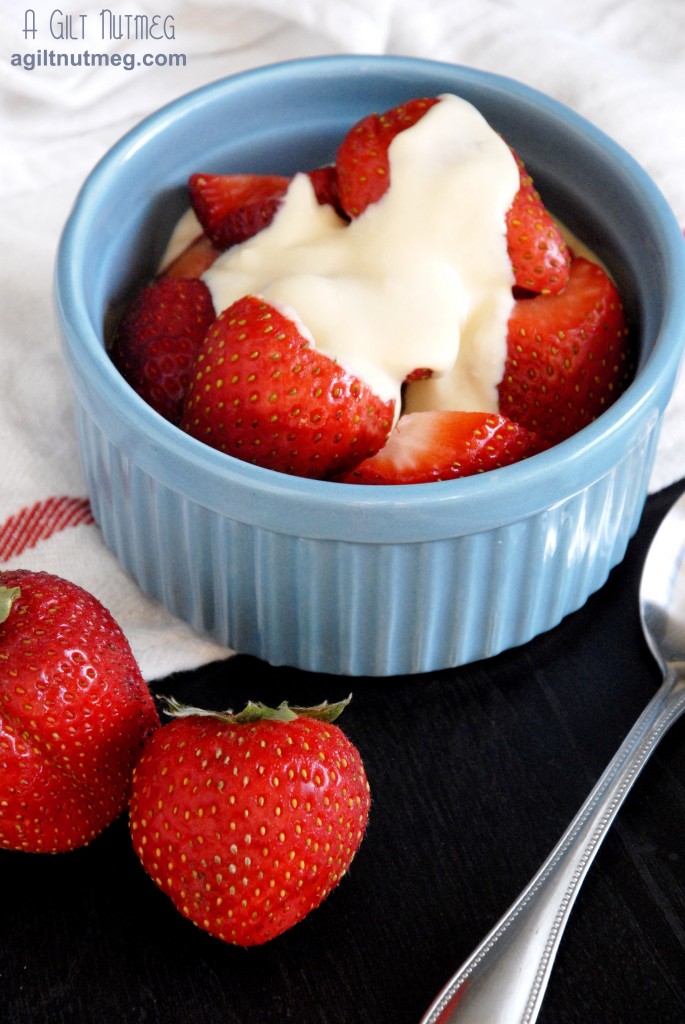
strawberries with honey vanilla creme anglais

Last summer I posted a recipe for Roasted Peaches with Oatmeal Streusel and Vanilla Bean Creme Anglaise.  While the picture definitely leaves something to be desired (it’s MUCH more tasty than it looks in that photo), that creme Anglaise pretty much changed my life.  I never knew such vanilla-packed creaminess could come out of my kitchen.  Now that summer fruits and berries are back with a vengeance, I knew the creme would be making an appearance again, but I wasn’t sure when until I saw Not Without Salt’s honey variation a few weeks ago.  She posted the recipe on July 3 and by the next morning I was serving it for 4th of July brunch.

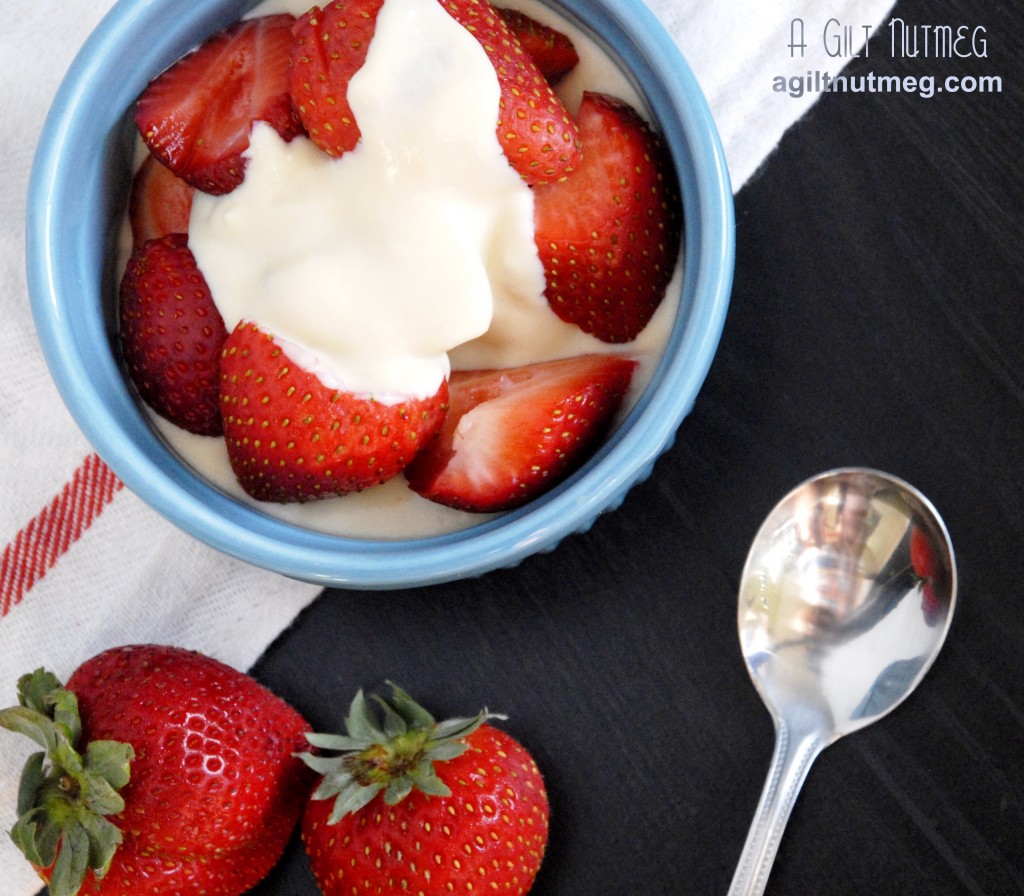
strawberries with honey vanilla creme anglais - overhead

While I loved the intense vanilla flavor of the first creme Anglaise I made, this version has overtones of honey that lend a very interesting depth to the creme.  It elevated what were already perfect summer strawberries to a whole new level.  Best of all, you can absolutely make this easy sauce ahead of time and all you have to do later to serve it is slice up some strawberries.

Honey-Vanilla Creme Anglaise
Adapted from Not Without Salt

  • 1 ½ cups heavy cream
  • ½ cup whole milk
  • 1 1/2 Tablespoons vanilla bean paste or extract
  • pinch of salt
  • ¼ cup honey
  • 4 egg yolks
  1. In a medium saucepan, stir together the cream, milk and vanilla.  Bring the mixture to a simmer and then let rest for 15 minutes.
  2. In a separate medium sized bowl, whisk together the salt, honey and egg yolks until thoroughly combined.
  3. Bring the cream-milk mixture back to a simmer.
  4. Slowly drizzle the warmed milk mixture into the honey-yolk mixture, whisking constantly as you go.
  5. Pour the contents of the bowl back into the saucepan and heat slowly to 175 degrees.  You’ll know it’s ready when the mixture coats the back of your wooden spoon.
  6. Using a fine mesh strainer over a clean medium mixing bowl, strain the mixture.
  7. Gently press a piece of plastic wrap over the surface of the creme Anglaise and refrigerate it for at least half an hour.  It will thicken and cool while in there.  (Not Without Salt suggests you can eat it warm, but my favorite is cold)
  8. When ready to serve over fruit, pour a little into the serving bowl first, then add the berries, then top with more creme.  Enjoy for brunch, dessert, whenever!