Entries from December 30th, 2011

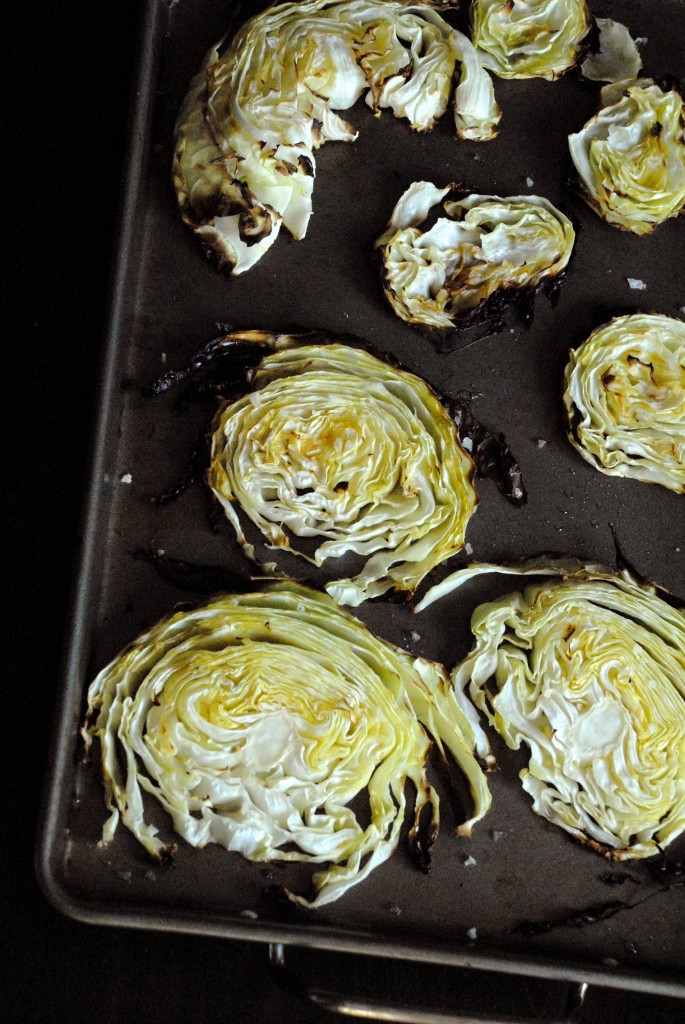
Roasted Cabbage

Friday, December 30, 2011

I know a lot of you are trying to eat healthy after the holidays and as part of your New Year’s Resolutions.  I can warn you that this is the last healthy recipe of 2011 and that you should probably just ignore the blog for a week because I’m starting off the year with something that will derail that diet of yours before January 2nd is even done.

Now that all said, I really do love cabbage.  I don’t know why or how I came to love cabbage, but I really do love it.  Mom would always steam it and add butter and salt to it (never pepper, which hides the natural sweetness of the cabbage for some reason).  Steamed cabbage isn’t very pretty, though, so I’m willing to bet it won’t convert any non-cabbage eaters, whereas this recipe just might.  Roasted in olive oil and sprinkled with salt, I could barely wait for the cabbage to cool before I was picking the rounds up off the cookie sheet with my fingers and eating them as if they were some odd looking savory cookie.  With hardly any work involved, this is a great way to start off the new year with a healthy kick as a side dish or even just a delicious snack!

Roasted Cabbage

Adapted from Martha Stewart

  • 1 head of green cabbage
  • olive oil
  • sea salt
  1. Preheat oven to 400 degrees and brush a cookie sheet with olive oil (I pour a little in the pan then swirl it all over with a paper towel).
  2. Slice cabbage into thin slices, about 1/2″ - 3/4″ thick and arrange on oiled cookie sheet.
  3. Lightly drizzle more olive oil over cabbage slices and sprinkle with sea salt.
  4. Roast in oven for 30-40 minutes until the outside edges are starting to get toasty and crunchy and the inside is tender.
  5. Serve immediately and enjoy!

Cream of Tomato Soup

Wednesday, December 28, 2011


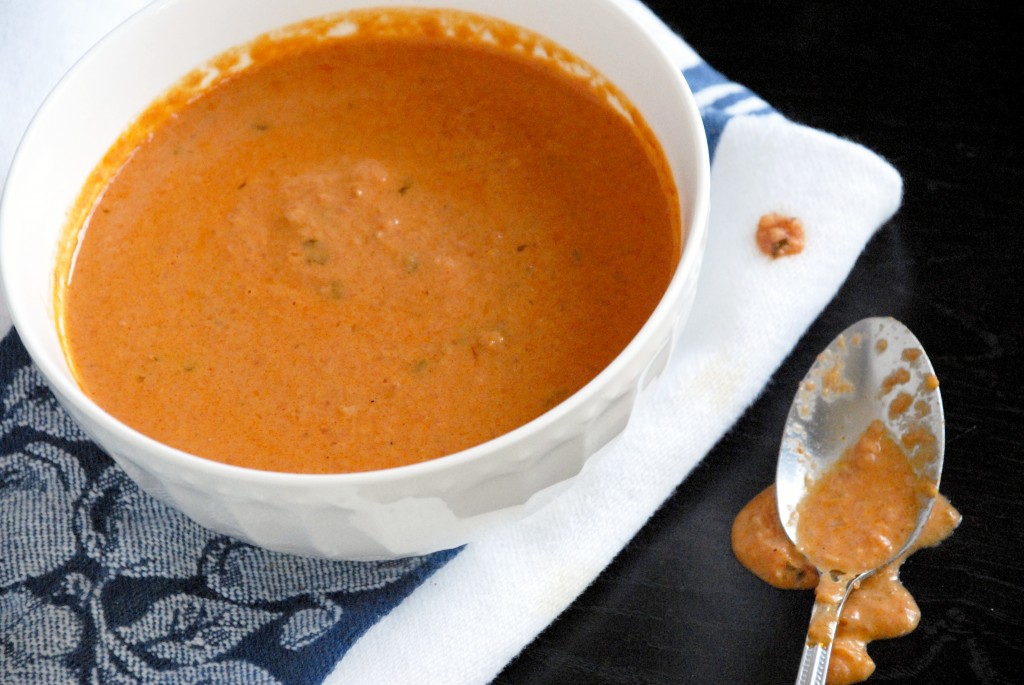
Well, the holidays are over and the leftovers are dwindling.  It’s cold outside and you don’t want something too heavy after finally eating the last of all the pie and cookies that were in your house.  Naturally, what do I turn to, but soup!  Now I admittedly love (LOVE) Campbell’s Tomato Soup with a grilled cheese sandwich, but I had the inspiration recently to make it from scratch and I have to wonder if I’m actually going to go back to Campbell’s now.

Making Cream of Tomato Soup from scratch means a whole new depth of flavors, instead of just the flat flavor you get from soup from a can, and the effort really isn’t that much more involved.  Plus, you lose all the salt and preservatives that you always find in prepackaged foods.

Cream of Tomato Soup

Adapted from Cooks Illustrated

Makes about 5 1/2 cups

  • 2 cans (28 oz) whole tomatoes (not packed in puree), drained, 3 cups juice reserved, tomatoes seeded
  • 1 1/2 tablespoons dark brown sugar
  • 4 tablespoons unsalted butter
  • 4 large shallots, minced
  • 1 tablespoon tomato paste
  • Pinch ground allspice
  • 2 tablespoons unbleached all-purpose flour
  • 1 3/4 cups chicken stock or canned low-sodium chicken broth
  • handful of fresh basil leaves
  • 1/2 cup heavy cream
  • 2 tablespoons brandy or dry sherry
  • Table salt
  • Cayenne pepper
  1. Heat oven to 450 degrees and line a rimmed baking sheet with foil.
  2. Spread the tomatoes out on the sheet and sprinkle the brown sugar over the tomatoes.  Bake for about 30 minutes until the tomatoes begin to brown a little, in the meantime…
  3. Melt butter in a nonreactive large saucepan.  Add shallots, tomato paste, and allspice.  Reduce the heat to low and let the shallots cook until soft (about 10 minutes).  Sprinkle flour over the shallots and stir until thoroughly combined, cooking for about 30 seconds.
  4. Whisking constantly, gradually add chicken stock; stir in reserved tomato juice, roasted tomatoes and basil leaves.
  5. Cover the pot with a lid and bring the contents to a boil.  Reduce the heat to low and simmer, stirring occasionally, for about 10 minutes.
  6. Using a stick blender, puree the contents until smooth.
  7. Add cream and heat over low heat until hot, about 3 minutes. Off heat, stir in brandy or sherry; season to taste with salt and cayenne.

(Cooks’ Illustrated adds that “this soup can be prepared through step 3, cooled, covered, and refrigerated for up to 3 days or frozen for up to 2 months. Reheat over low heat before proceeding with step 3″.)

Glazed Lemon Cranberry Loaf Cake

Saturday, December 24, 2011

I’m jumping the gun on this week’s Project Pastry Queen Challenge, but I just had to share this before Christmas!  I made it as a gift for my boyfriend’s family and his dad kept sneaking pieces before dinner, despite the fact we were supposed to be saving it for dessert.  They loved it!  The cake has a great lemon flavor and the sweet-tart cranberries mean that this dessert is perfect for family members to grab slices all through out the day, or you can save it for dessert with some whipped cream or ice cream.

The recipe calls for fresh cranberries; I expect these soften and burst just like blueberries do in blueberry muffins, but all I had were dried cranberries that I needed to use up and I think they’re a great substitute.  The texture is, of course, a little different, but I think either are great so use whichever you want!  The glaze isn’t the thick white glaze I expected, but instead a light sugar syrup brushed over the top, which adds just the perfect amount of sweetness.  You can barely see the dark outline of the glaze in the picture below.

Thanks, Shawnda, for a great recipe choice for the holiday season and be sure to check out PPQ for the other bloggers takes on the cake.  I’ll be taking a little break now (this will count as Monday’s post) but I’ll be back on Wednesday!  Happy Hannukah, Merry Christmas, and Happy Holidays to whatever you choose to celebrate!

Glazed Lemon Cranberry Loaf Cake

Recipe from The Pastry Queen by Rebecca Rather

  • 1 cup fresh or dried cranberries
  • 1 2/3 cups all purpose flour
  • 1/2 cup (1 stick) unsalted butter, at room temperature
  • 1 cup sugar
  • 2 large eggs
  • 1 1/2 tsp baking powder
  • 1/4 tsp salt
  • 1/2 cup milk
  • 1 tablespoon grated lemon zest

Lemon Glaze:

  • 1/4 cup sugar
  • 1/4 cup freshly squeezed lemon juice (1 lemon usually produces about 1/4 of a cup for me)
  1. Preheat the oven to 350. Grease a 9 x 5 inch loaf pan with butter, sprinkle lightly with flour and tap out excess (or spray with cooking spray.)
  2. Cream the butter and sugar in a large bowl on medium-high speed for 1 minutes, until fluffy.
  3. Add the eggs and beat on medium-high speed for 1 minute. Add the baking powder, salt, and half of flour; mix on low speed just until combined.
  4. Add half the milk and mix on low speed just until combined. Add the remaining flour, mix just until combined, then the remaining milk.
  5. Fold in the lemon zest and the cranberries.
  6. Pour the batter into the pan and bake about 1 hour (check after 45 minutes) or until a tester stuck into the middle of the loaf comes out clean. Cool the loaf for about 15 minutes (and make the glaze while it’s cooling), then remove it from the pan and set on a wire cooling rack.
  7. Once the cake is cooling, make the lemon glaze: Combine the sugar and lemon juice in a small saucepan and set over medium-high heat, bring the mixture to a boil and cook about 30 seconds. Remove the pan from the heat.
  8. Gently pierce the top of the loaf cake many times all over with a toothpick (I used my wire cake tester). Use a pastry brush to apply the warm glaze evenly over the top of the loaf.  It feels like a whole lot of glaze, but really, just keep sopping it on until you run out-the glaze will soak into the cake and give it just the right amount of sweetness.
  9. Serve immediately or let the glaze set before covering it with tin foil for the next day.  Enjoy with plain or ice cream!  (or like me, I put whipped cream on everything, actually preferring it to ice cream)

Nonpareils

Friday, December 23, 2011

Since we tackled one of the hardest candies yesterday, today we’re going the opposite route-something supremely easy and something that will be fun for the whole family to help with.  Best of all, you can tailor them to your own taste, be it milk chocolate, dark chocolate, or even adjust the sprinkle colors to match the holiday or season.  I made these specifically this year for my Uncle Steffen, who loves these, so I hope that the box has made its way through the post office system before he reads this!

An adult should take over the melting of the chocolate part, but after that, feel free to let kids pull up a stool, spoon the chocolate, and sprinkle the beads.

Also be sure to add your email address in the upper right hand corner of the website-you’ll get all of these recipes emailed directly to you!

Nonpareils

Adapted from Martha Stewart

  • 2 bars of your favorite chocolate (about 4 oz each)
  • 1/2 teaspoon of pure vegetable shortening
  • 1/4 cup of sugar beads (I bought two bottles and used almost all of both…but then again I wasn’t very careful about reserving the ones that didn’t stick to the chocolate right away)
  1.  Line a baking sheet with parchment paper.
  2. In a double boiler, melt the chocolate and shortening together.  (or use a makeshift double boiler like I do-simmer a pot of water and then just put a metal mixing bowl over the top of it to melt the chocolate in)
  3. Spoon the chocolate into little pools about the size of a quarter.
  4. Let the chocolate cool on the sheet for 20 minutes then come back and sprinkle the sugar beads very generously over the chocolate.  I actually sprinkled once, let them set for a few minutes, then sprinkled again over any areas short of sprinkles.  Also, make sure to wait the full 20 minutes or else the sprinkles will just settle down into the chocolate and your candy won’t be very pretty.
  5. Let chocolates cool over night and then gently remove them in the morning.  Enjoy!

Homemade Candy Canes

Friday, December 23, 2011

Whew, what a day-no sleep, no food, lots of running through the airport…it must mean Christmas travel!  This is my first shot at the internet today, which is why this is such a late post, but I think it’s one worth waiting for.  I mentioned I had a number of candy recipes for you and I’m going to go with the hardest first, candy canes, because these aren’t exactly something you want to try doing once the kids are in town (tomorrow’s recipe is definitely a more family-oriented one).

There are still sugar shards to be found around my kitchen and my hands ached the whole night after this project, but it was worth it just to be able to crunch into a pepperminty candy cane I made myself.  I’m sure you’ll feel the same way!

Homemade Candy Canes

Adapted from Whirly Bird

  • 3 cups sugar
  • 1 teaspoon Peppermint flavoring (add 1/2 teaspoon more for stronger flavoring)
  • 1/2 cup water
  • 3/4 cup light corn syrup
  • 1/2 teaspoon of food coloring for each color you want to twist in to the cane
  • 1/4 teaspoon cream of tartar
  • powdered sugar, for dusting
  • vegetable oil, for greasing pans and utensils
  • rimmed baking sheets, kitchen scissors, a candy thermometer, and at least one spatula (one spatula per color is better and I definitely found my wooden spatula to be the best to use by far)

Do set out all of your ingredients ahead of time so that everything will be ready to go.  I can tell you now that it will take you a little while to get the technique down -I spent a lot of time putting the sugar in the oven to soften it and taking it back out to cool before I finally got a hang for how the sugar should feel in consistency and could actually start rolling it out into canes.  The boyfriend would be very unhappy if I got sugar syrup all over his camera, so please do refer to Whirly Bird‘s post for pictures on what the process should look like at different stages.  Good luck!

  1. Preheat oven to 350 degrees in case you need to soften the sugar back up during the process.  Oil the baking sheets so they’re ready when your sugar reaches the right temperature and, if you have the extra counter space, sprinkle powdered sugar on a surface for later.
  2. Combine sugar, water, syrup, and cream of tartar in a saucepan-don’t stir-and bring to a boil.  Keep letting the pot boil until your candy thermometer reaches 280 degrees.
  3. Pour the sugar into pools on the greased pans-I poured a bigger amount into one pan for the white and then in opposite corners of a second pan, poured two smaller amounts (one for green and one for red) making sure they didn’t run together.
  4. Pour the peppermint oil evenly over the different sugar pools, then pour the food coloring on to their respective small sugar pools.  If you want white, leave that pool clear of dye.
  5. Let the sugar cool for a few minutes, then take a spatula and start to fold it over itself, as if you were kneading bread.  The sugar should be cool enough that it should have a consistency almost like clay.  If it’s just a sticky mess, let it cool for a little longer before kneading it.  Once you knead it with a spatula enough that you can pick it up and mold it, pick up the sugar intended to be white and stretch, pull, and knead it with your hands.  The longer you do this, you’ll see the white color come out.  Roll the white sugar into a long log.  Repeat with the colored sugars, but don’t knead these in your hand for too long or else white will get worked into your color and make pastels.  Roll these into separate sugar logs as well.
  6. Press the smaller logs into the sides of the larger log (I put the red and green logs exactly opposite of each other on either side of the white log).
  7. Working quickly while the candy is still warm, take hold of one end of the log and start twisting the ropes together (oiling your hands lightly may make this process easier).  The technique takes a second or two to get used to, but as you’re twisting the candy, pull it away from the rest of the candy log at the same time as you’re twisting so that it forms slender twisted rods.  When you’ve reached your desired length, use scissors to snip the thin candy strip off the log, gently (GENTLY!) bend it into a hook shape, and place it on that surface you covered with powdered sugar.
  8. Repeat until you’ve used up the whole sugar log and your hands are bright red and angry at you.  If the sugar cools too much during the process, I just kept the oven door open and held the log inside for a few seconds until it softened-you could see the skinner side start to droop.  (I felt very much like a glass blower through this part)
  9. Let the candy canes “cure” overnight or else they’ll stick to your teeth-I hate when candy canes do this!  Mine were still sticky to the touch the next day so I dusted them with powdered sugar all over and used a pastry brush to brush the excess off.
  10. Share with family and revel in your first step towards major hard candy making!


Lemon-Vanilla Bean Body Scrub

Wednesday, December 21, 2011

Ready or not, the holidays are officially here!  Hannukah started last night and Christmas is just 4 days away.  Do you have all your gifts ready?  Food planned?  Christmas caught me off guard this year, but I’m pleased to say that I do have a few tricks up my sleeves!  I know you come here to read about food, but since this wonderful scrub is made of all edible ingredients, I’m going to let it slide.

Before I go any further, I can say that I tested it last night before bottling it and it. is. divine.  As I was getting into bed last night I couldn’t stop rubbing my hands together over and over again.  It’s a great gift for co-workers or friends and just about the only step that takes any time is squeezing the lemon, which spends all of a minute to accomplish, so it’s perfect for any of you who waited until the last second to take care of gifts.

This is going to be a busy rest of the week on the blog-I have lots of candy recipes for you to make for the holidays, so keep checking back every day!  I’ll post Monday’s Project Pastry Queen recipe (Lemon Glazed Cranberry Loaf Cake) on Saturday, early, so that you will have a chance to make it for Christmas day if you wish, and I’ll take Monday off-a girl’s gotta rest, after all!

Lemon-Vanilla Bean Body Scrub
makes 2-3 cups of scrub
Adapted from Under the Table and Dreaming

  • 1 1/2 cups sugar (an exfoliant)
  • 1 cup safflower oil (inexpensive at the supermarket and is a good source of vitamin E!)
  • juice from 1 lemon
  • seeds scraped from 1 vanilla bean
  1. Stir ingredients until well combined.
  2. Spoon into jars and enjoy!

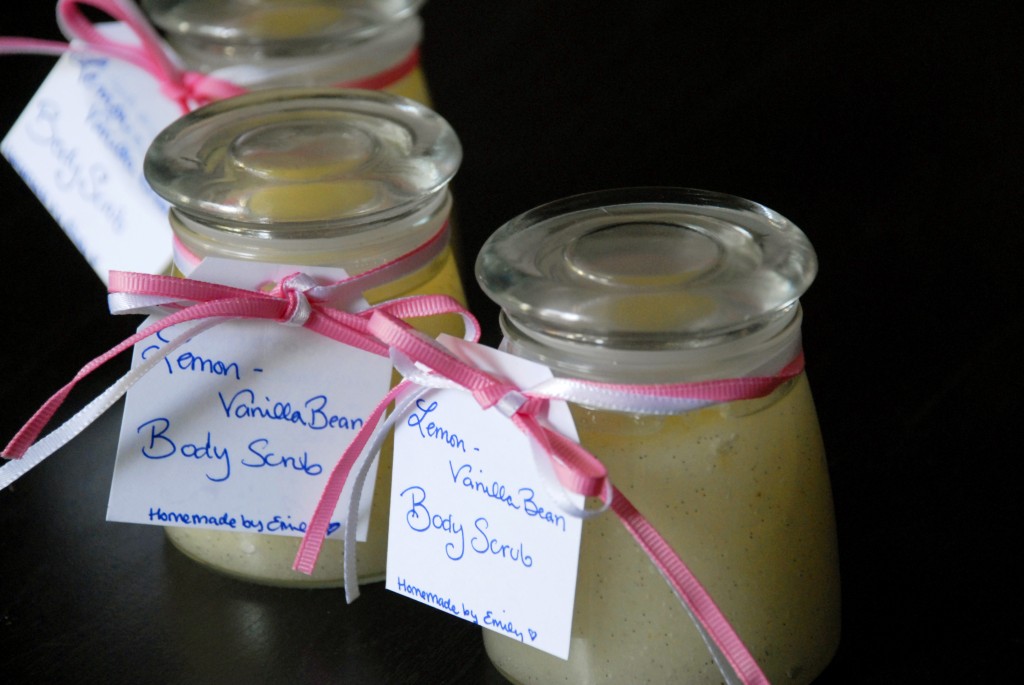
To ready them for giving as gifts, tie them up with a ribbon (I loved the spoon Stephanie attached to hers) and a tag.  You can see the tags I made above, on the back they say:

  1. Scrub over rough or dirty hands (or anywhere on body)
  2. Rinse
  3. Enjoy silky smooth skin!


Finally, you may have noticed that I finally got my mailing list back in order!  If you would like to receive an email each time I post something new, enter your email address above in the right hand corner; you’ll get an email asking to confirm, and voila-delicious recipes delivered three times a week to your inbox!

Beer Bread

Monday, December 19, 2011

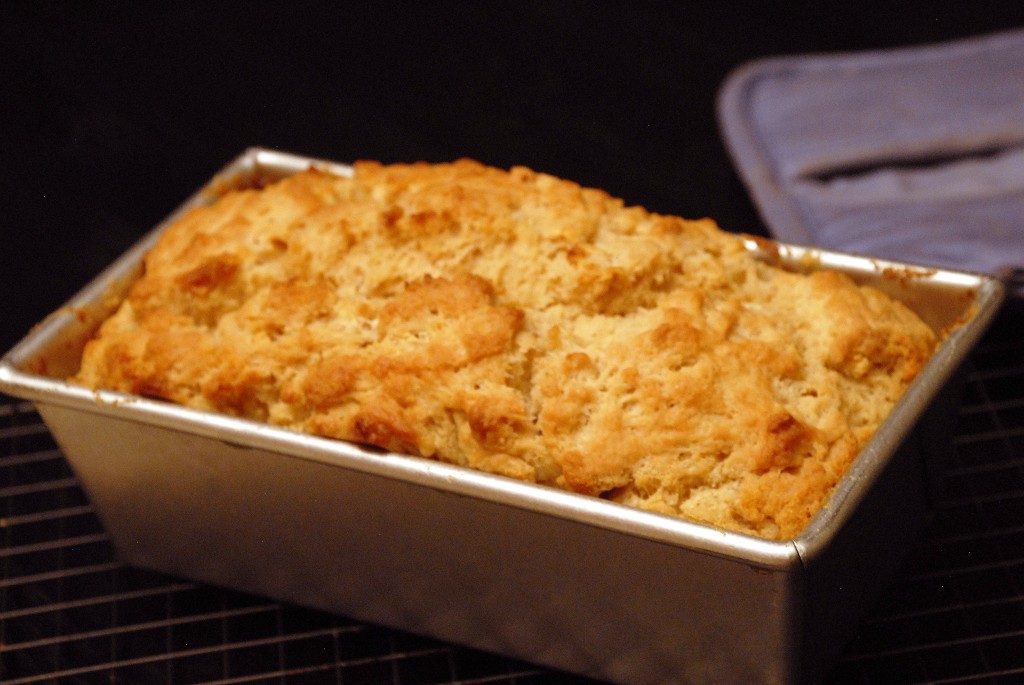
Man, I’m not sure how I lived without this bread.  I have never had a more butter-soaked, chewy crusted bread in my life and I swear that it took no more than 5 minutes to throw together and stick in the oven.  Even easier: last year my sister and I discovered Sam Adams’ Winter Variety Pack and loved it- you get 5 different winter spiced flavors (my favorite is the Old Fezziwig Ale) so I already had some beer on hand!

Thanks to Amanda of Homekeeping Adventures for this great Project Pastry Queen choice; it’ll be perfect to go with a big pot of chili for all the family gathered for the holidays.

Beer Bread
Recipe from Rebecca Rather’s The Pastry Queen

  • 3 cups all purpose flour
  • 1 tablespoon baking powder
  • 1 teaspoon salt
  • 3 tablespoons sugar
  • 1 bottle (12 0z) good quality beer or ale
  • 1 stick (1/2 cup) melted butter
  1. Preheat oven to 350 degrees; grease a 9×5″ loaf pan with butter.
  2. In a large bowl, whisk together flour, baking powder, salt, and sugar.
  3. Pour the beer into the flour mixture and stir until just combined (I used the same whisk at this point, but the dough is super heavy and sticky, so that proved to be a bit of a challenge.  A wooden spoon might have been a better idea.)
  4. Pour half of the melted butter into the bottom of the prepared loaf pan, spoon the batter into the pan and pour the rest of the butter over the top.
  5. Before putting the pan in the oven, put a piece of tin foil underneath it, because some of that delicious butter will spill over and you’ll be washing dishes and turn around to see a room full of smoke from the dripped butter all over the floor of your oven.
  6. Bake for about 50 minutes until golden brown on top.
  7. Let cool for 5-10 minutes, flip loaf out of the pan and serve warm, using a serrated knife to cut through the bread.

Rebecca suggests eating it all immediately (like I need a stick of butter for dinner!), but I can attest that it is absolutely delicious for breakfast toasted-it’s already buttered enough for you!

Peaches & Cream French Toast

Friday, December 16, 2011

I think I’ve found my new favorite breakfast-so easy to put together the night before, so the next morning practically all you have to do is throw it in the oven.  Not to even mention that it’s French toast.  And what’s more, it’s French toast that is so perfectly sweet and crunchy and custard-like in different places that to drench this in overly saccharine maple syrup would just be a crime!

I’m posting it now in case you don’t have anything planned for breakfast on Christmas morning, but really this recipe is great for any time of the year when you have guests (or not) and want a deliciously impressive breakfast that doesn’t take much effort at all in the morning.  I admit, the recipe uses canned peaches, which I feel is breaking some sort of “I’m-a-food-blogger-so-I-grind-my-own-wheat-for-flour” rule, but it just makes the recipe that much simpler and it means you’re not forced to wait until summer time to make it!

That said, I absolutely cannot wait until summer time to try this recipe with all the fresh fruits of the season-fresh blueberries and peaches, strawberries, raspberries…the possibilities are endless!  T-minus 5 months and counting…

Peaches & Cream French Toast
Serves 6
Adapted from All You via My Recipes

  • 1 8-oz. loaf French bread, sliced (I found a 16 oz loaf at Trader Joe’s, it’s just a half
  • 8 large eggs
  • 2 cups whole milk
  • 1/4 cup sugar
  • 2 teaspoons vanilla extract
  • 2 cans (15-oz.) sliced peaches packed in juice (not in syrup!), drained
  • 1/2 cup dark brown sugar (I think I used more like 3/4 cup, though)
  • plenty of cinnamon for sprinkling
  • 1/2 cup heavy cream
  1. There are two different approaches to arranging this recipe.  If you use a 9×13 glass baking dish, you’ll be overlapping your bread slices, which is what the original recipe calls for, which I imagine will give an over all more custardy-creamy texture.  I was at a friend’s house and didn’t have a dish like this available so I just found whatever oven-safe dishes I could scrounge up and laid the bread out flat in each dish (as in the photo).  I suspect this is how we got such a great crunch on the edges.  You can use whatever technique will give you your desired results (or just what will fit your dishes!).
  2. In a large bowl, whisk together eggs, milk, sugar and vanilla until well combined and pour the mixture evenly over the bread slices, then sprinkle the slices with cinnamon.
  3. Drain the cans of peaches and arrange peach slices on top of the bread, then sprinkle another round of cinnamon on top.
  4. Cover the dishes with saran wrap or tin foil and refrigerate overnight, for at least 8 hours (this allows the bread to soak up all the egg mixture).
  5. The next morning, preheat the oven to 350 degrees and pull the dishes out of the fridge and let them sit on the counter for 30 minutes (don’t worry, you have stuff to do while it warms up).
  6. Pour the 1/2 cup of heavy cream into a small saucepan and bring to a boil.  Let it boil for 10 minutes until it is reduced to half.  I was worried that it wasn’t going to be enough cream, but you really just want enough to drizzle over the peaches, so it was just the right amount.
  7. Sprinkle the brown sugar over the top of the peaches and drizzle the cream over the peaches.
  8. Let the dishes bake for about 50 minutes.  I kept checking mine and probably let it go an extra 10-15 minutes so that it was extra crunchy and golden brown along the edges.
  9. Let it sit for 10 minutes before serving and enjoy!  Like I mentioned before, it doesn’t even need syrup for it’s just the right amount of sweetness already.  My dear friend Anna made some eggs to go with it and served some extra fruit on the side and it was the perfect breakfast.

All-Sold-Out Chicken Pot Pies

Wednesday, December 14, 2011

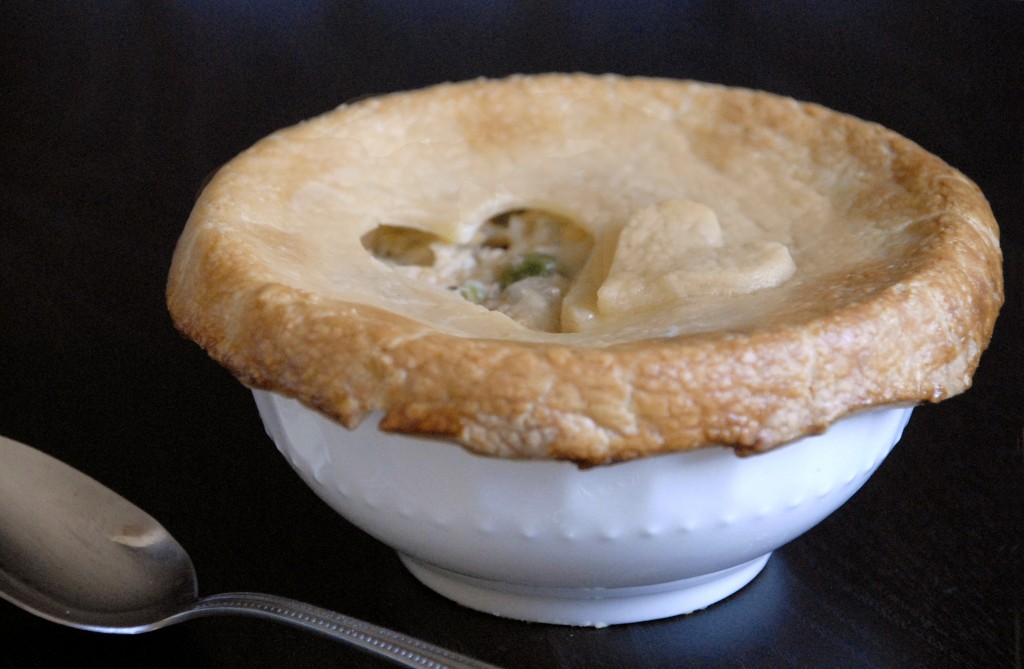
I love chicken pot pie.  It was (is) one of Mom’s signature dishes as I was growing up, and to this day I find I’m compelled to try it from every restaurant menu it appears on (which isn’t many, because it’s more a homey comfort food instead of high class fare).  So naturally, I’ve been looking forward to trying this recipe ever since I cracked open The Pastry Queen.

What can I say, but that it’s a great chicken pot pie!  I have certainly built up a criteria over the years, some of which this pie admittedly doesn’t qualify for, namely in two things:  I prefer puff pastry on top to crust (or the biscuits Mom tops hers with) and I prefer a higher sauce-to-filling ratio than this one provided, the opposite of which seems to be standard for chicken pot pie recipes I’ve tried at home.  But that all said, the filling is really a great combination of flavors-adding mushrooms and red bell pepper that I never would have used before, and I look forward to making this again and again!  I was surprised at Rebecca’s use of hot sauce and red pepper flakes but this was by no means a spicy dish: the hot sauce really gives an otherwise bland cream sauce dimension without overloading you on too many flavors.

I wish I loved the crust as much as the other girls did, but it felt a little heavy and dry to me (rolling it much thinner than Rebecca suggested helped a lot, though) so I think I’ll stick with puff pastry in the future-even just the frozen stuff does the trick.  As for the filling, it was so good that the only change I made was to add some dried thyme, since I’m of the opinion that most savory comfort food just isn’t comfort food without thyme in it.

Note: While I know many cooks prefer to prepare a mise en place (which means setting out all of your ingredients measured and chopped exactly how you need them before you start the recipe), this recipe lends itself well to those less-organized people (me) who prepare ingredients as they go.  While the potatoes and onions cooked, I chopped the bell pepper and mushrooms.  While the vegetables all cooked together, I shredded the chicken, and so on and so forth.

All-Sold-Out Chicken Pot Pies
Makes 6 Servings
Adapted from The Pastry Queen by Rebecca Rather

Filling

  • 3 tablespoons unsalted butter
  • 1 medium-size yellow onion, chopped
  • 3 cloves garlic, minced
  • 1 large russet potato, peeled and diced
  • 1 red bell pepper, diced
  • 8 oz. button mushrooms, sliced (I think 4 oz, half a package of mushrooms, is perfect but you can adjust to your tastes)
  • ½ teaspoon crushed red pepper flakes
  • 1 teaspoon dried thyme
  • salt and freshly ground black pepper
  • 1 purchased cooked rotisserie chicken, shredded
  • 1 (8 oz) package frozen peas

Cream Sauce

  • ½ cup (1 stick) unsalted butter
  • 1 cup all-purpose flour
  • 3 cups chicken stock
  • ½ cup heavy whipping cream
  • dash of hot pepper sauce, such as Tabasco
  • salt and white pepper

Crust

  • 1 cup (2 sticks) chilled unsalted butter, cut into 16 pieces
  • 3 cups all-purpose flour
  • 10 oz. chilled cream cheese
  • 1 tsp salt
  • ½ tsp white pepper
  • 1 large egg
  1. Melt the butter in a large pan over medium heat, add the potatoes and onions and saute for 5 minutes
  2. Add the bell pepper, garlic and mushrooms and saute for 15 minutes, until potatoes are soft; stir in the crushed red pepper and thyme; salt and pepper to taste.
  3. Add the shredded chicken and frozen peas, which will defrost in the heat of the filling, and set the pot aside while you make the cream sauce.
  4. Add butter for the cream sauce to a new sauce pan and let it melt.
  5. Gradually add the flour, whisking the whole time so that the butter and flour make a paste.
  6. Gradually add the chicken stock to the flour-butter paste, whisking thoroughly after each addition until you have a smooth sauce before adding more chicken stock; add the cream, hot pepper sauce; salt and white pepper to taste.  I will never forget my Mom’s advice to “cook the flour taste out.”  I stood over the stove and let it bubble for about ten minutes, tasting it every few minutes or so.  She’s absolutely right-it will taste just like flour until cooked long enough and then it starts to taste creamy and peppery instead.
  7. Pour the cream sauce over the chicken-vegetable mixture in the other pot and stir to combine.  Divide the filling up amongst the (oven proof) serving bowls you are using.  If you don’t want to do individual servings, you can do one big glass baking dish of it, which is how Mom always served it to the family.
  8. Heat the oven to 375 degrees.
  9. Pulse the flour and butter in a food processor until crumbly.
  10. Add the cream cheese, salt and pepper to the food processor and process until the dough forms a big ball.
  11. Dump the dough out onto a floured surface and roll it to 1/8″ thickness (Rebecca said 1/4″ but that was WAY too thick for me) with a floured rolling pin.
  12. Cut out rounds of dough that will drape over the sides of your bowls by about 1/2″, and drape over tops of bowls.
  13. Beat the egg with a splash of water and brush the crust with the egg mixture.
  14. Place pot pies on a baking sheet so you can put them all in and pull them out all at once.
  15. Bake for 20-25 minutes until golden brown on top and enjoy!


Cookies & Cream Cookies

Monday, December 12, 2011


Whew, what a trip The Great Food Blogger Holiday Cookie Swap 2011 has been!  Organized by Love and Olive Oil and The Little Kitchen, cookies were flying all over the country as they were shipped from one food blogger to another- 22,000 cookies were in transit worldwide last week!

I spent quite a while trying to decide what cookies I wanted to send-something that would be sturdy enough for travel, that would stay fresh, and was fun to make and receive.  I was in one of those situations where you have a lot of recipes that sound okay, but nothing really strikes you until that one special recipe comes seemingly out of no where and there’s no question that that’s your recipe.

I’ve always liked cookies & cream ice cream and when I saw this recipe my first thought was “that sounds AWESOME” and then my second thought was “that sounds awfully redundant, to put cookies in cookies” but my first thought quickly came back and my cookie swap cookie was decided: Cookies & Cream Cookies it is!  I hope that Brooke of Baking with Basil (North Carolina), Jessica of My Cooking Adventures (North Dakota), and Sofie of The German Foodie (Ohio) have enjoyed these fun cookies-it tastes just like eating cookies & cream ice cream!  They’ll be perfect for a Christmas party (for kids and adults alike) or to put out for Santa with a glass of milk!


Cookies and Cream Cookies
I used about a 2″ ice cream scoop for these cookies;
a double batch yielded about 40 cookies
  • 1/2 cup butter, at room temperature
  • 6 tbsp sugar
  • 6 tbsp brown sugar
  • 1 egg
  • 1 tsp vanilla
  • 1 1/4 cup flour
  • 1/2 tsp baking soda
  • 1/2 tsp salt
  • 12 Oreos, broken up into small pieces (I put mine in a large ziploc bag with the air squeezed out and beat them with a rolling pin on the floor-I’m sure my neighbors in the apartment below me weren’t too pleased with this)
  1. Preheat oven to 350 degrees.
  2. Cream together the butter and both sugar about 3 minutes, until fluffy.
  3. Add egg and vanilla to butter and sugar, beat until combined.
  4. In a separate bowl, whisk together the flour, baking soda and salt.
  5. With your mixer on low, add the dry ingredients to the wet ingredients in 4 parts, beating just until combined.
  6. With a spatula, gently fold in the Oreo pieces until fully incorporated in the batter.
  7. Using about a 2″ wide ice cream/cookie dough scoop, scoop the batter on to an ungreased cookie sheet, leaving 2″ between scoops on the sheet.
  8. Bake until just barely beginning to brown on the edges-if you bake them for too long, they lose that “cookies & cream ice cream” look because they won’t just be black and white, they’ll be black, white, and brown.
  9. Let the cookies cool on the baking sheet for 10 minutes.  If you don’t, they will stick the the sheet and bunch up in front of your spatula as you try to work it underneath the cookies.  Then transfer the cookies to a wire cooling rack to finish cooling all the way.

As I said before, these are great to bake ahead of time and leave out for Santa with some milk.  I actually baked mine last Sunday (over a week ago), shipped the cookies off on Monday and threw 4 of them into a tupperware container to take photos of for the blog.  I got busy and had to go out of town so I thought well, they’ll be stale when I get back but at least they’ll still look good for the photos.  Can you believe that over a week later these cookies still were perfectly crunchy-soft just like they were fresh off the cooling rack?  What a great recipe!

I have to send out a big thank you to the bloggers who sent ME delicious cookies!  I got delicious Pumpkin Chocolate Chip cookies from Nicki at Nick-Stirs and some fantastic Cranberry Orange Pecan cookies from Kimberly at Rhubarb and Honey, both of which disappeared quickly between me, The Boyfriend, and my roommate.  And somewhere, out there in California, Stephanie’s Gingersnaps with Chai Icing and Crystalized Ginger (from Life Tastes Like Food) are floating around lost in mail-limbo.  They haven’t hit my mailbox yet, but considering chai is one of my favorite flavors of all time, I’m pretty sure that these won’t even make it upstairs and that the next day, our post-lady is going to wonder why there are crumbs underneath the mailboxes.

A shout-out to Ace of The Toasted Sprinkle, who turned into one giant stress-ball over the Cookie Swap and bombarded me with panicked text messages for weeks, but turned out absolutely delicious sounding cookies in the end (See?  It all worked out!  You need some relaxing lavender bath salts for Christmas…)

And finally, a huge thank you to Lindsay of Love and Olive Oil and Julie of The Little Kitchen for all the hard work they put into organizing the whole swap-it was such a fun way to start off the holiday baking!  If you’re interested in participating in next year’s cookie swap, click this link here.