Entries Tagged as 'Party Food'

Salsa Verde

Wednesday, August 1, 2012

salsa verde

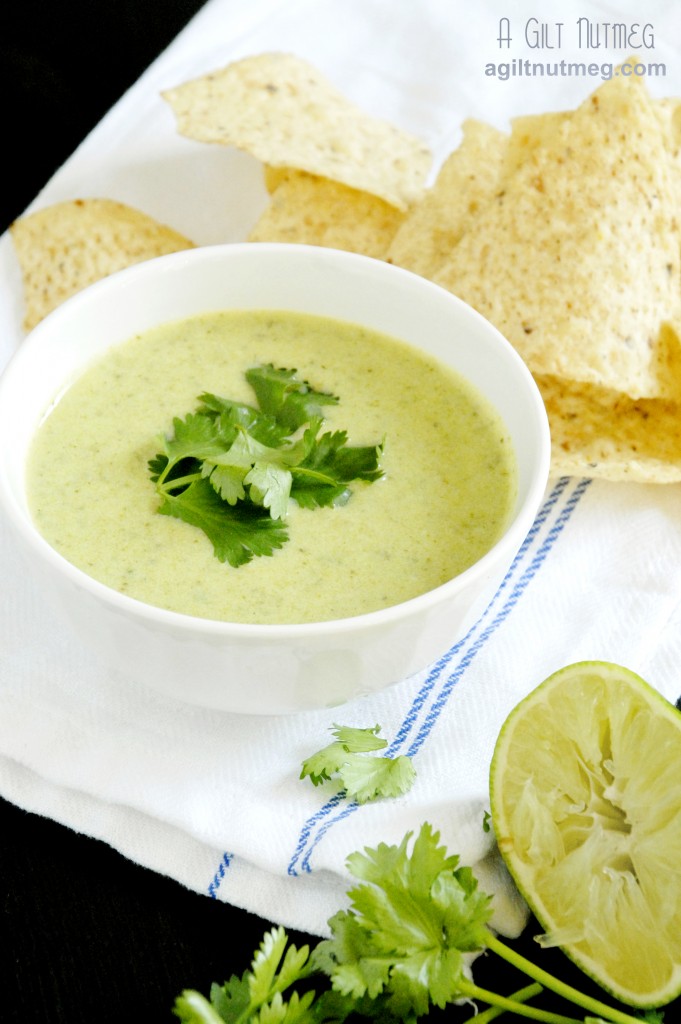
If you want something a little different from your average (and often flavorless) salsa from a jar in the grocery store, this quick salsa verde is a great break from the norm and super easy to make.  When we go to the Mexican restaurant near my apartment, I like to double dip my chips in both the red salsa and the salsa verde (which is Spanish for “green”) for a flavor combo better than each salsa on its own!

Salsa Verde
Makes about 1 cup
Adapted from Serious Eats

  • 1 large poblano chile, seeded and roughly chopped (very dark green, about the size of a bell pepper)
  • 2 serrano chiles, roughly chopped; discard seeds if you want a mild salsa (small skinny light green peppers, about 2” long)
  • 1 large tomatillo, quartered
  • 6 sprigs cilantro
  • 2 medium cloves garlic, chopped
  • 3/4 cup water
  • 1/2 cup sour cream
  • 1-2 tablespoons freshly squeezed lime juice
  • Kosher salt to taste
  1. Boil the chopped poblano chile, serrano chiles, tomatillo, cilantro, garlic, and water in a small sauce pan for 10 minutes.
  2. Pour the contents of the saucepan into a blender or a food processor (although be warned the food processor may leak a little bit as you blend, but not too badly).
  3. Stir in the sour cream, lime juice, and salt to taste
  4. Enjoy with tortilla chips and good company!

Virtual Baby Shower for Baby Ruf Love!

Monday, June 18, 2012

Emily Ruf, of Ruf Love, is having a baby!!  While we would all love to show our support for her in person, the truth of the matter is that us members of Project Pastry Queen are scattered all over the country.  Thus, the Virtual Baby Shower was a way to show we care by doing what we do best: blog!  Members of Project Pastry Queen submitted items they would like to “bring” to the shower and I’ve shared them below.  Click on the photos below to be taken to the website for each recipe.  Emily, feast your eyes…


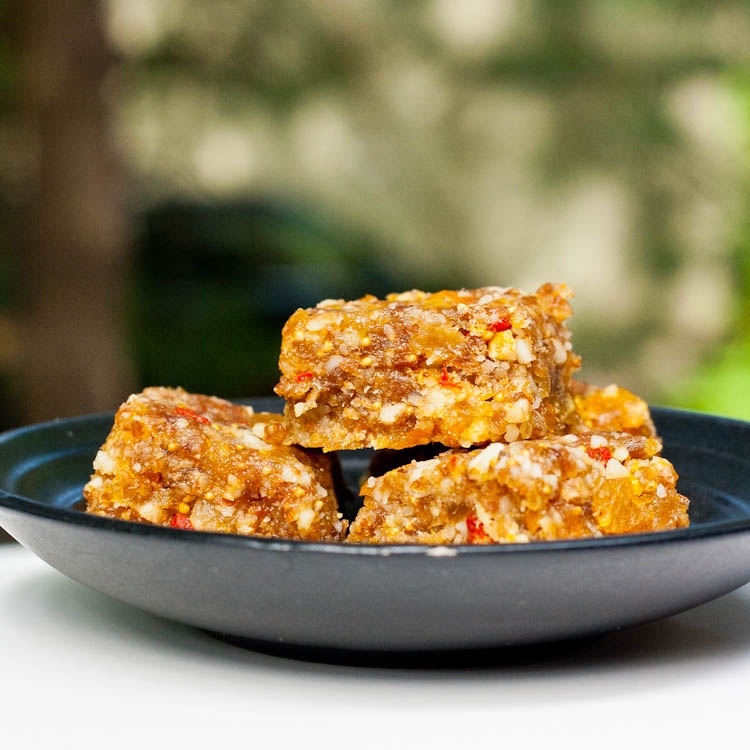
Vicky, of Avocado Pesto, made these Dried Fruit and Nut Bars.  Gotta keep Baby Ruf healthy!


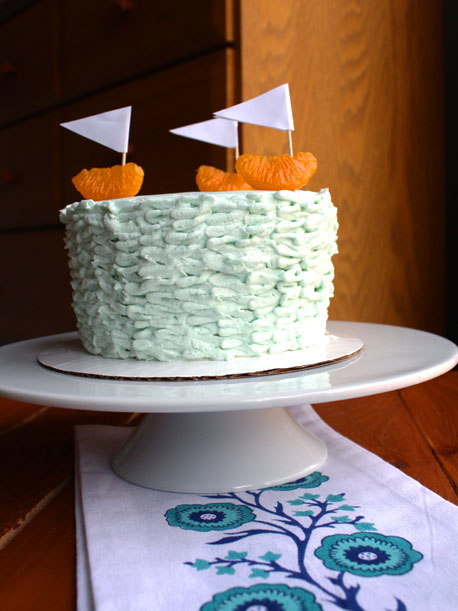
Emily (yes, there are three of us Emilys in PPQ!), of She Makes and Bakes, made this beautiful Lemon Blueberry Cake that matches Baby Ruf’s nautical themed nursery!


Shawnda, of Confections of a Foodie Bride, made this thirst-quenching Cherry Lemonade- looks delicious!


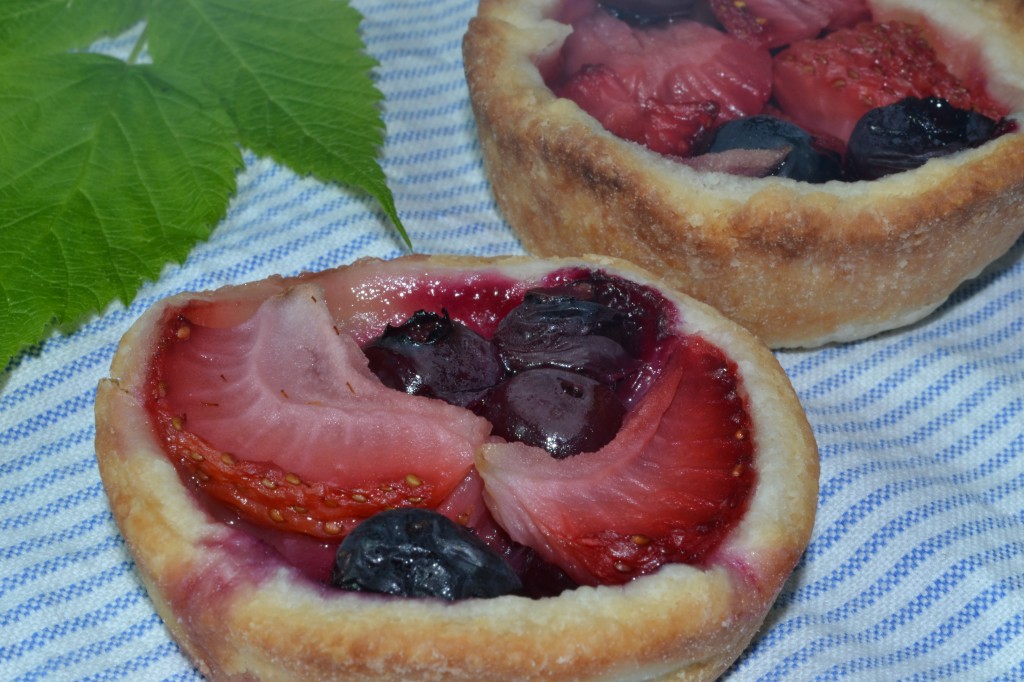
Jennifer, of Sweet Morris, made these Fruit Crostadas from the PPQ cookbook. Nothing beats fresh fruit in the summer!


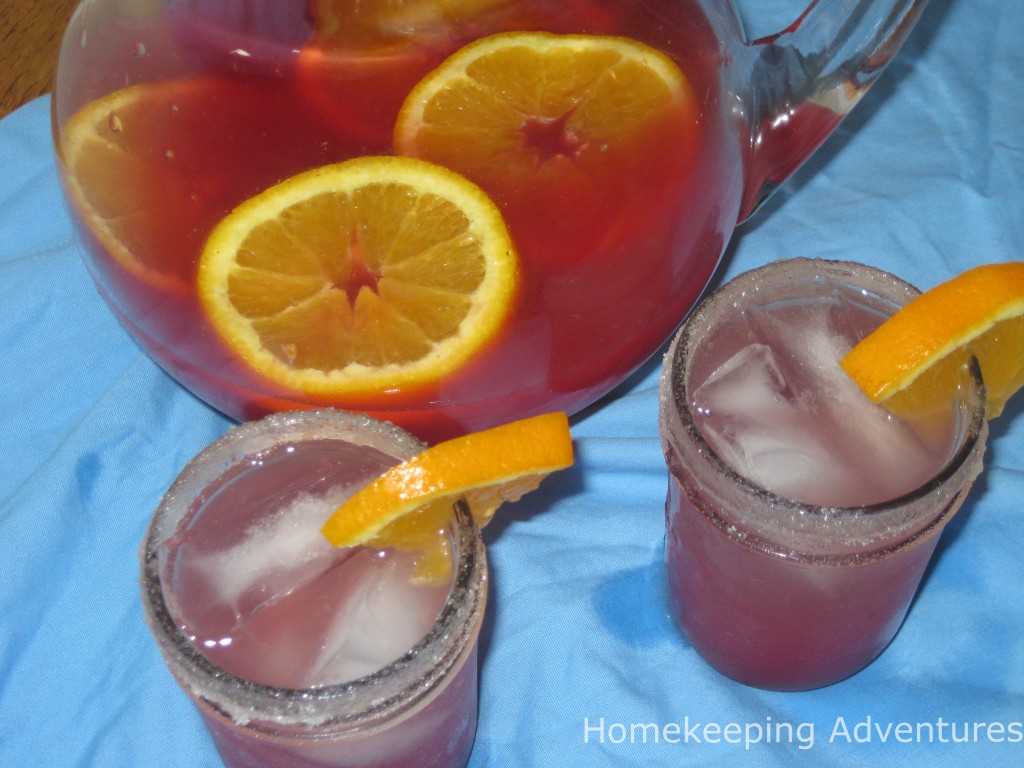
Amanda, of Homekeeping Adventures, made Orange-Cran Sparklers-I love drinks that tickle your nose!


blueberry crisp ice cream
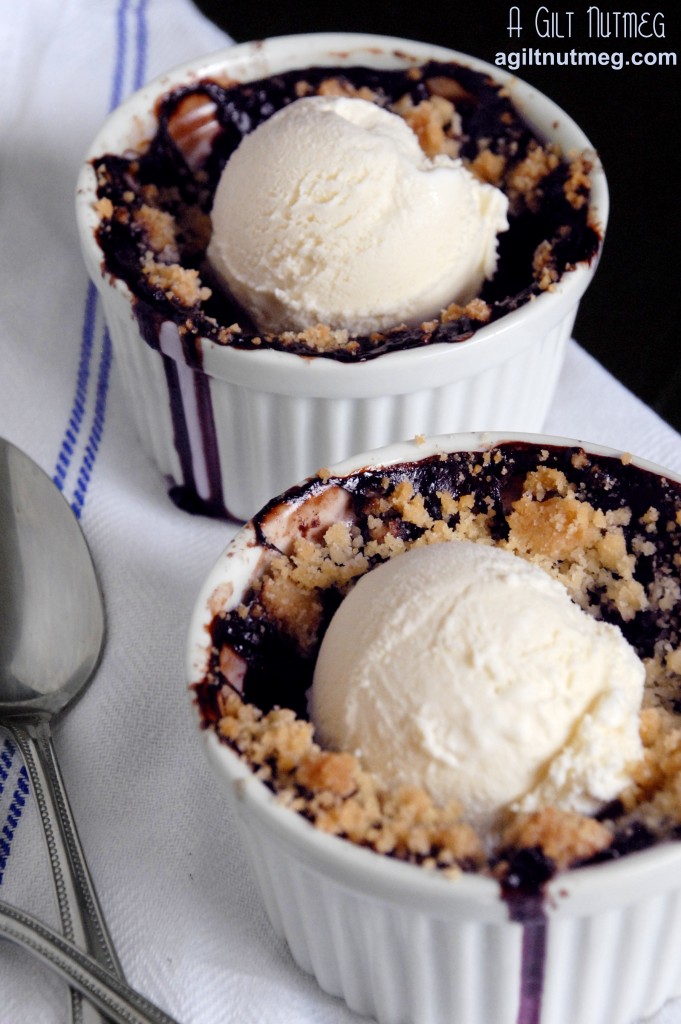
and finally, I made individual Blueberry Crisps for Emily and Baby Ruf

Aren’t you just dying to dig into all of that food??  Thank you to all of the PPQ members who contributed.  Emily, we all sincerely wish nothing but health and happiness coming your way in the next few months!


Bleu Cheese, Sausage & Crimini Mushroom Pizza

Wednesday, June 13, 2012

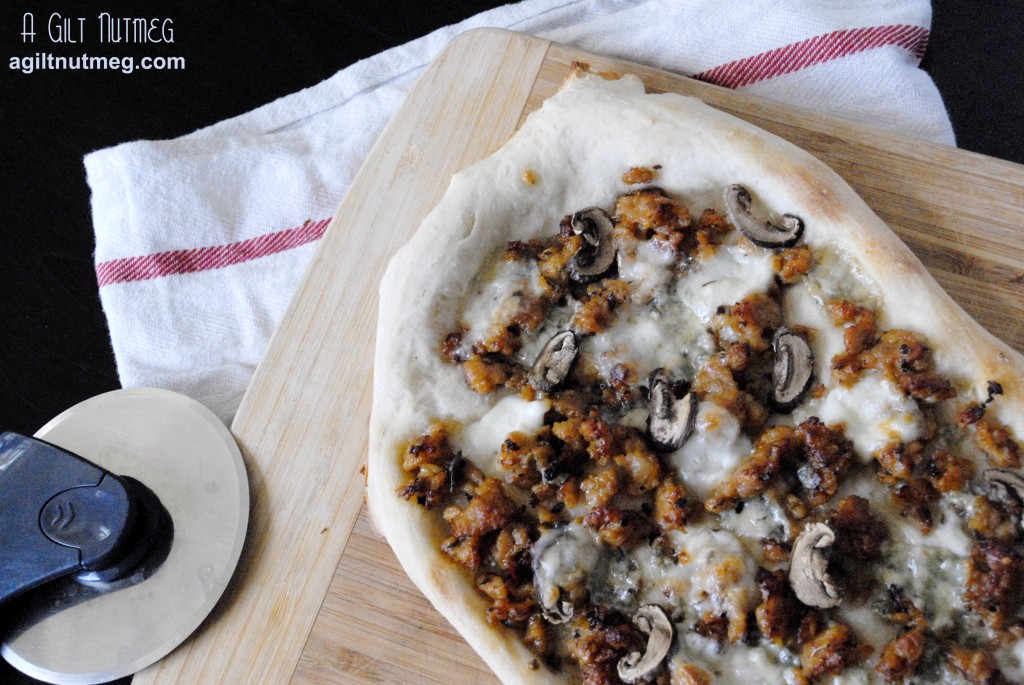
Last month I had the great pleasure and honor of making dinner for a number of friends from college who had come to visit from the East Coast.  I wanted something to serve that would be fun and that would cater to everyone’s different tastes, but that would also be fast and enable me to wander back and forth from the kitchen to chat.  I decided on pizza night, which definitely meant fast, wouldn’t break the bank, and allowed me to get creative.   We ended up with 4 different types of pizza:  Traditional Margarita, Rosemary & Red Potato, Roasted Veggie and Hummus (recipe to come!), and Bleu Cheese, Sausage & Crimini Mushroom.  All four were a hit!

This pizza was definitely the most hearty of the four.  The flavors are all strong, but work together instead of competing on your taste buds.  Pizza is one of those great recipes that you can whip up in no time and get on the table within minutes of starting, and this recipe is definitely going into normal rotation for pizza night.

Bleu Cheese, Sausage & Crimini Mushroom Pizza
Makes 2 small-medium pizzas

  • 1 package of Trader Joe’s refrigerated pizza dough
  • 2 chicken sausages, casings removed (I chose Trader Joe’s Sweet Italian Chicken Sausage)
  • 1 teaspoon dried oregano (optional)
  • Garlic infused olive oil (optional)
  • 1/2 cup Crimini mushrooms, sliced
  • 1/2 cup bleu cheese crumbles
  • 1 container Bocconcini (small mozzarella balls in water), sliced or 1 large ball of fresh Mozzarella, sliced (just don’t get the shredded bagged kind)
  1. Place an unrimmed cookie sheet in your oven or place a rimmed baking sheet upside down on the rack in your oven.  Heat the oven to 500 degrees with the sheet inside.
  2. While the oven is heating, remove the casings from the sausage and fry it up in a pan, breaking up the sausage into small pieces.  At this point, I added about 1 teaspoon of dried oregano to the sausage in the pan, because I felt it could do with a little more flavor, but this is entirely up to you and the sausage you chose.  When fully cooked through, move the sausage to a plate covered in a thick stack of paper towels so that the grease can drain.
  3. After the oven is good and hot (about 30 minutes), remove the cookie sheet and put it on a heat-safe counter, but leave the oven on.
  4. Break the pizza dough into two even pieces and stretch the first piece out gently with your hands, letting gravity do most of the work.  I always prefer this to rolling it out with a rolling pin, but you will absolutely end up with an oddly shaped pizza this way-I think it gives it character.
  5. Gently lay the stretched pizza dough onto the hot baking sheet (the goal here is to get the bottom of the crust baking first while you top the pizza, so that the dough cooks more evenly.  If you have some of that garlic infused olive oil, brush about a tablespoon or two over the crust.
  6. Sprinkle on about half of your sausage, half of your mushrooms, half of your bleu cheese and half of your mozzarella on top of all of that (adding the mozzarella last will help the toppings stick to your pizza better).  Of course, adjust to your tastes.  I like a little less of the bleu cheese, as it’s a super strong flavor.
  7. Return the baking sheet with the pizza now assembled on top to the oven and let it bake for 10-15 minutes, until the crust is starting to turn golden brown and the mozzarella is bubbly and also just starting to brown.
  8. Let cool for 5 minutes before cutting with a pizza cutter and enjoy!

Happy Birthday, Little Blog! + Fruity Pebbles Treats

Friday, May 25, 2012

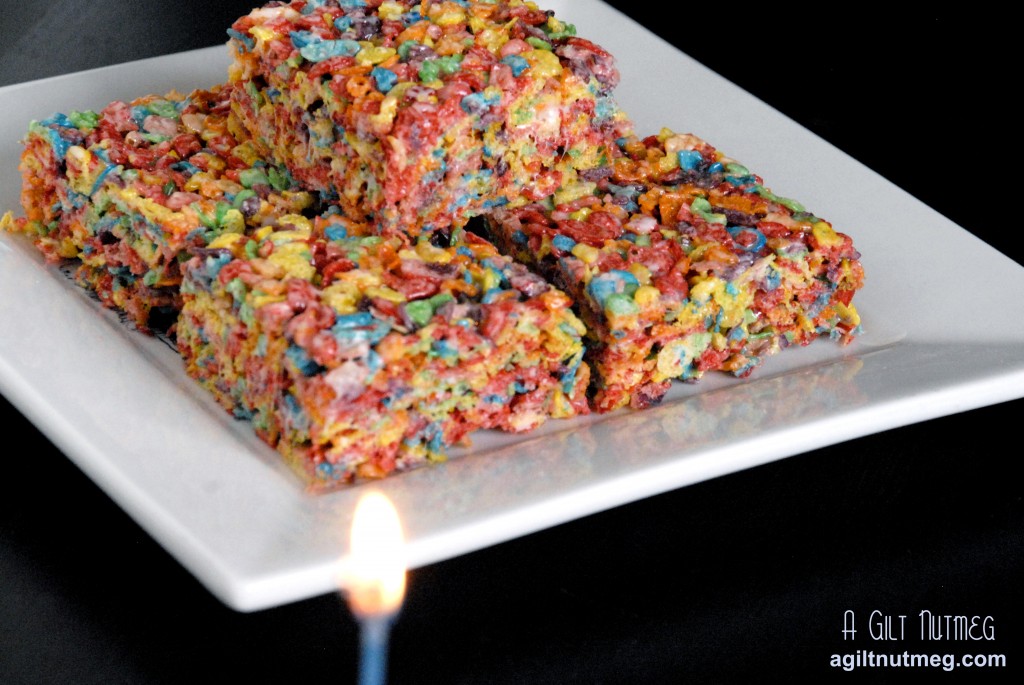
blogiversary fruity pebbles treats

One year ago today, I took my first little step into blogging.  A Gilt Nutmeg is one year old.  I wasn’t sure exactly why I wanted to start blogging, but I knew somehow that it was the right path to start walking down.  One year later and I can’t even begin to describe what this little project has done for me.  On the most basic of levels, it has taught me cooking skills I never would have guessed I would possess.  It has forced me to continue trying new recipes as often as I could instead of relying on tired old recipes I’ve used a million times and, perhaps most importantly, given me a focus in life for this odd in-between stage of being in my mid-twenties.  I admit, coming home from a job in a field I never planned to go into can be very draining and I think if it weren’t for the blog, I would just go home and plop in front of the tv each night with some fast food-and this is coming from someone who loves to cook!  Cooking was such an important part of my childhood that I think it was really just waiting patiently inside of me, waiting until I had a kitchen of my own (or at least roommate who didn’t commandeer it) and the drive to really get in there and let all this pent up cooking shine and spark out of me like a Katy Perry music video.

blogiversary fruity pebbles treats wide shot

So now I cook as often as I can.  I have a CSA box delivered once a month with organic fruits, veggies and herbs.   My baking cabinet is now so full of supplies that I have to store my cupcake tins on a chair at the dining room table because there’s just no room anymore.  I can proudly say that I know what an f-stop on a camera is, Jonathan Gold ate and liked my pie, and that I have been recognized by the New York Times as something “they’re reading“.  If you had told me a year ago that I could check even one of those things off my bucket list, I would have thought you were crazy….but here we are.  I can’t thank you enough for the support and encouragement you, my dear friends, family and readers have given me over the last 12 months.  Truly, nothing makes my heart sing more than to hear that someone has tried a recipe from my blog and loved it as much as I did.

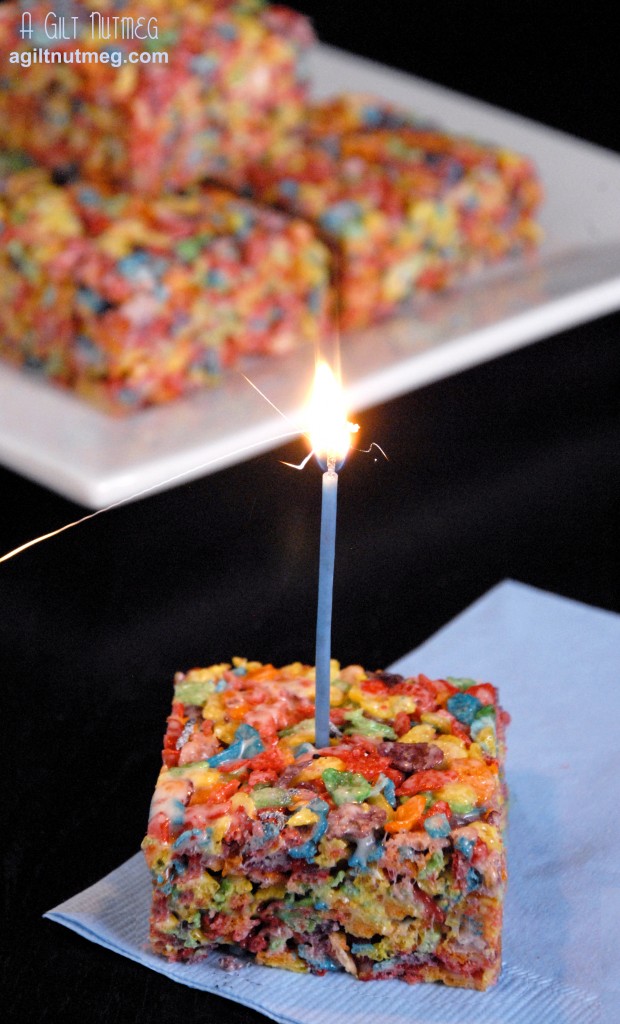
To celebrate, I did want to pull an oldie but a goodie out of the hat: Fruity Pebbles Treats.  Just like Rice Krispies Treats except you swap out the flavorless puffed rice with one of my all time favorite forbidden cereals, which just happens to be packed with flavors (albeit extremely artificial flavors).  You put one of these gorgeously colored treats in front of me and I guarantee that plate will be licked clean in no time at all!

Fruity Pebbles Treats
Makes 1-2 dozen, depending on dish size and cutting measurements

  • 1/4 cup unsalted butter
  • 1 bag (10 oz) mini marshmallows
  • 1 box (11 oz) Fruity Pebbles
  1. In a large stock pot, melt the butter over medium heat.  In the meantime, spray an 8×8 baking dish or a 9×13 baking dish with non-stick cooking spray.  An 8×8 pan will yield fewer treats, but they’ll be thicker (as in my photo).  A 9×13 dish will give you much thinner treats, but more of them.
  2. Add the mini marshmallows to the melted butter, stirring until they are melted entirely and incorporated with the butter.
  3. Add the Fruity Pebbles, turn off the heat, and gently stir and fold the cereal into the marshmallow-butter mixture.  Keep mixing until all the white patches of marshmallow are gone and the cereal is evenly coated in marshmallow.
  4. Dump the cereal-marshmallow mixture into the prepared dish and firmly press the mixture flat into the pan.  I use a lot of pressure, because if you squish the cereal down enough, it’ll break up a little and make for a chewier treat instead of an airy one that falls apart.
  5. Put in the fridge to cool.  Once cool, flip the treats out onto a cutting board and slice with a pizza cutter or large knife.  Enjoy!!

Herbed Cucumber Bites

Wednesday, May 23, 2012

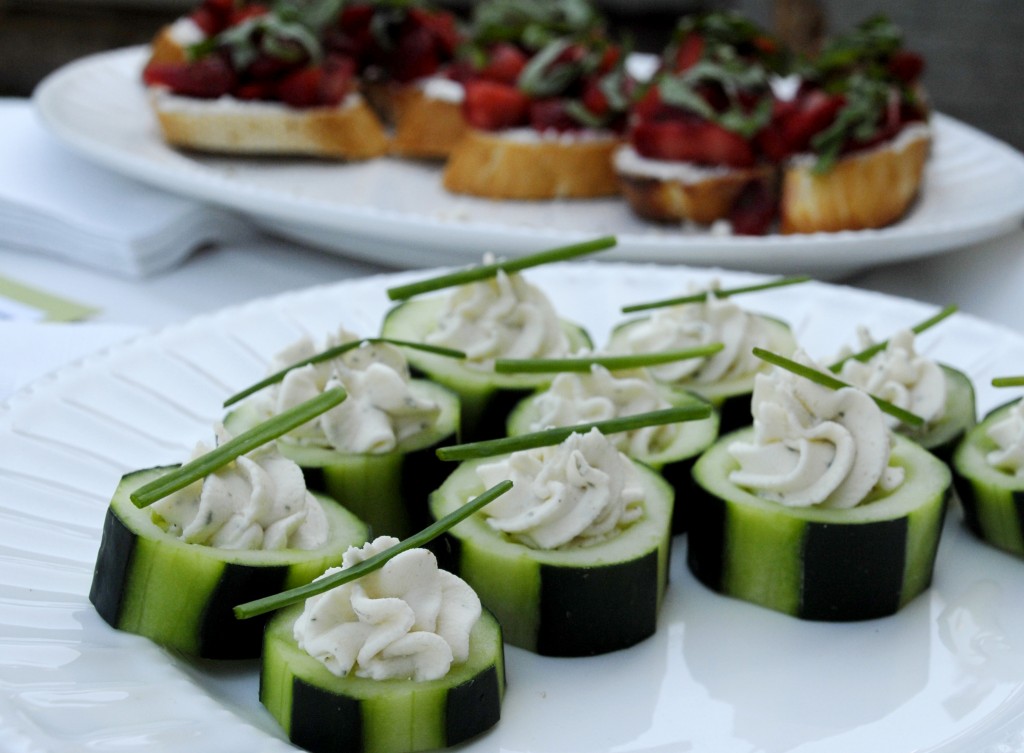
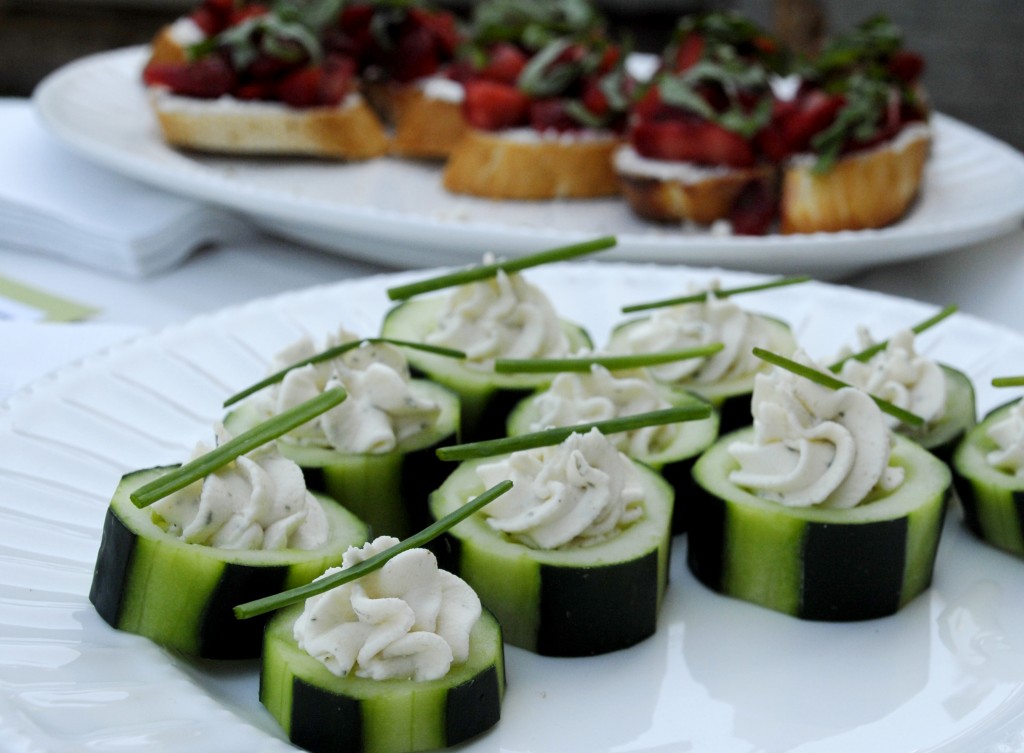
herbed cucumber bites

At the bridal shower a few weeks back, I was sure the Margarita Cupcakes would be the hit of the party.  If not them, then maybe the Strawberry Bruschetta.  Never did I expect these little cucumber bites might actually be the winner of the afternoon!  They’re the only appetizer I completely ran out of ingredients on and everyone kept remarking on how delicious they were.  Best of all, they’re ridiculously easy to make and shockingly addictive-you’ll find yourself going back and popping another in your mouth every chance you get!

Herbed Cucumber Bites
Ever so barely adapted from Annie’s Eats
Makes approximately 3 dozen

  • 5-6 large cucumbers
  • 3 boxes of Garlic Herb Boursin cheese
  • 6 tablespoons heavy cream
  • Chives
  1. In a small bowl, mash and mix the Boursin and cream until creamy and fully combined.
  2. Using a vegetable peeler, peel long lengthwise strips from the sides of the cucumbers, about 4-6 strips, depending on how large your cucumbers are.  By doing this, when you slice the cucumbers, they’ll have those great stripes.
  3. Slice the cucumbers into 1/2″ - 1″ slices.
  4. Using a spoon, scoop out the seeds from the center, leaving a little bit of cucumber in the bottom of the cup to hold the cheese in.  You can slice and scoop the cucumber pieces the night before if you want, just store in an airtight container in the fridge, along with the cheese mixture.
  5. Fill a pastry bag, fitted with a star tip, with the Boursin mixture and pipe the cheese mixture into each cucumber slice.  You’ll want to move in a small circular motion to make sure every bit is filled.
  6. Snip chives into pieces about 1 1/2″ long and adorn each cucumber bite with one piece of chive.
  7. Arrange on a platter and enjoy!

Strawberry Basil Bruschetta with Lemon Goat Cheese

Friday, May 18, 2012

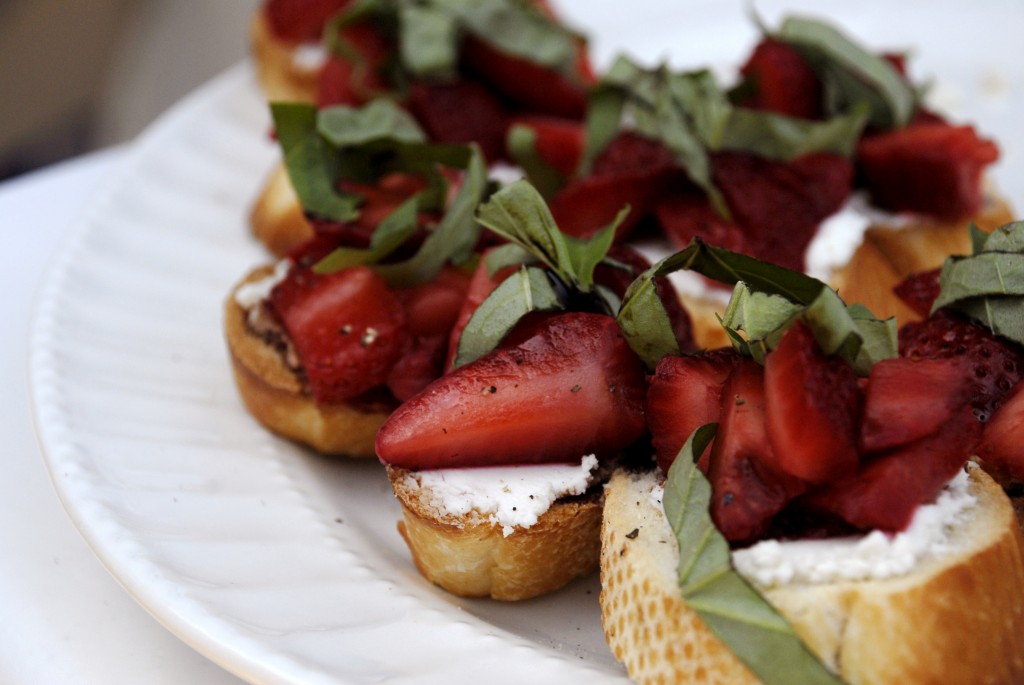
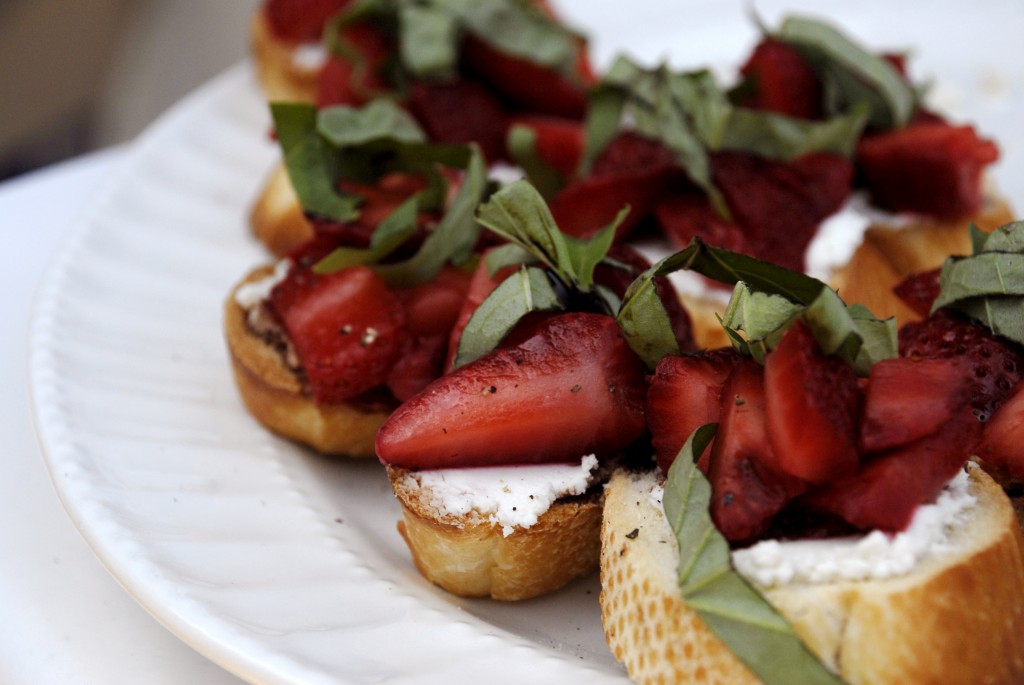
strawberry bruschetta

I have to admit that, when cooking, I’m not very adventurous when it comes to flavor combinations.  I think that’s why I was so proud of my alterations to this recipe: there are so many flavors that, despite being such a simple food to grab off a platter, the taste ends up being quite complex.  Balsamic vinegar and strawberries are actually quite an old combination, but one I still find awfully strange.  Basil and strawberries is an even less common combination and one that is shockingly perfect-you’ll have to taste it to believe it.  Add in some lemon goat cheese, a good baguette and a crack of fresh pepper over the top and you’re going to have such a crazy and delicious moment going on in your mouth that you’re just not going to know what to do with yourself!  You’d never think those flavors would go well together but you’ll find you and your guests reaching for these bruschetta over and over again.

Strawberry Basil Bruschetta with Lemon Goat Cheese
Adapted from Annie’s Eats
Makes 2-3 dozen pieces

  • 1 good quality baguette
  • 1 lb of strawberries, sliced
  • 3 tablespoons sugar
  • 1 package (4 oz) of lemon goat cheese (or 1 package plain goat cheese combined with zest from half a lemon)
  • balsamic vinegar
  • handful of whole fresh basil leaves
  • fresh ground black pepper
  1. Up to a few days before or at least a half hour before you need them, slice the strawberries, add them to a large bowl and mix the sugar in until thoroughly combined.  Set in the fridge until ready to use.
  2. The day you plan to eat the bruschetta, slice the baguette into slices, cutting at an angle.  Toast the baguette slices under your oven’s broiler until golden brown on each side.  Set aside and allow to cool.
  3. When cool, spread a thin layer of lemon goat cheese on each baguette slice, top with a spoonful of strawberries.
  4. Drizzle a small spoonful of balsamic vinegar over each slice with strawberries on it.
  5. To cut the basil, lay the leaves flat on top of each other, fold the pile in half and with a sharp knife or with kitchen scissors (I prefer the scissors), cut the basil in to thin strips.  Sprinkle the basil strips over the strawberries.
  6. Crack fresh pepper over the top of each bruschetta and enjoy!

Amanda’s Bridal Shower & Watermelon Gin Fizz

Monday, May 7, 2012

margarita cupcakes

On Saturday I had the honor of making the food for the bridal shower of my dear friend’s sister.  I learned a very important lesson this weekend: catering is EXHAUSTING.  I also learned that you should NOT leave something as finicky as Swiss Meringue Buttercream Frosting to the very last minute because you will be literally running on foot to the closest mini-mart for butter to start a backup American style Buttercream that will have you leaving 2 hours later for San Diego than planned.

herbed cucumber bites

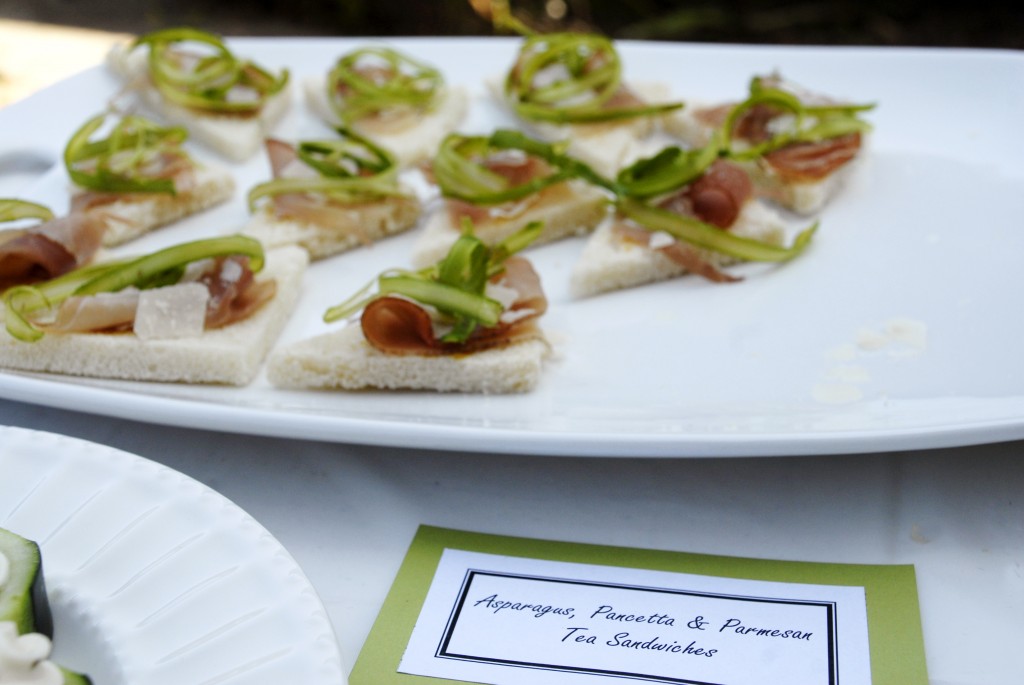
Since the party was for 2pm on a gorgeous spring day, I had planned out a menu that would be very light and all non-fork foods for the guests to snack on.  Would you believe that out of all of the different items, the hit of the party were the cucumbers?  Also, a green and red theme inadvertently emerged and yet the table somehow didn’t look like Christmas, which is a miracle-instead all the green just reminded you that Spring was getting underway.  I’ll be posting the recipes throughout the week; any one of them would be a great appetizer to a Spring dinner.

While tiring, the experience was very rewarding and I’m so proud and happy to have been able to do this for my friend’s family.  I wish nothing but the best for Amanda and Christian!

Menu

  • Herbed Cucumber Bites
  • Strawberry Basil Bruschetta with Lemon Goat Cheese
  • Shaved Asparagus, Prosciutto & Parmesan Tea Sandwiches
  • Margarita Cupcakes (it was Cinco de Mayo, after all)
  • Watermelon Gin Fizz

strawberry basil bruschetta

Since I don’t have a great photo of the drink, I’ll post the recipe here and save the other recipes for their own posts.  It is going to be perfect for a hot summer’s day with friends and I can’t wait to drink it all season long.

Watermelon Gin Fizz
Adapted from Eating Well

  • 1 medium sized watermelon (the melons a little bigger than a soccer ball)
  • 2 bottles (2 liter size) of ginger ale
  • about 1/2 a  bottle of gin (you can, of course, adjust this to taste)
  • Juice of 3 limes
  • extra limes to cut for garnish, if you wish
  1. Cut the watermelon into large chunks.  If you wish (and I highly suggest it) set aside about 1/3 of the melon and neatly cut those slices into 1″ cubes.  Put the cubes in a bag and put them in the freezer to act as edible ice cubes later.
  2. Puree the remaining watermelon in a blender or food processor (although the processor isn’t liquid proof so it may make a bit of a mess) and strain the watermelon puree in a sieve; discard the fibers and seeds left behind in the sieve.  You should end up with about 12 cups of juice.  This step can be done a few days ahead of time; refrigerate until needed.
  3. When ready to serve, combine the watermelon juice, ginger ale, gin, and lime juice.  Stir, add the watermelon “ice cubes”, and enjoy!

Another great hostess tip: In addition to the watermelon ice cubes, fill a cupcake pan with one round slice of lime (or lemon) in each of the 12 cupcake wells, then fill each well about half way with boiling water (boiling the water means the ice will freeze clear instead of looking white).  Put the tray in the freezer and voila!  Some of the cutest decorative ice cubes ever for your punch.  If you have trouble getting them out of the cupcake pan, run some warm water over the pan to loosen them.

Vanilla Honey Caramel Corn

Monday, March 26, 2012

honey vanilla bean caramel corn

Popcorn is, without a doubt, one of my favorite treats in all the world.  When we get within 100 feet of a movie theater, The Boyfriend has to take me by the arm and drag me in the opposite direction just so we can carry on with whatever it was we were doing before I smelled the popcorn.  If movie theater popcorn is my first love, then caramel popcorn is my secret mistress (clearly I just finished watching MadMen).  I usually go for the salty, buttery crunchy deliciousness of normal popcorn, but when I get that off craving for something sweet, caramel corn is one of the first things I turn to.

This recipe is special, though, because it’s not your typical coated-in-corn-syrup-just-so-you-get-a-sugar-fix caramel popcorn, but instead something much more sophisticated.  The flavors here are complex-honey, vanilla, and just enough burnt sugar to remind you there’s still caramel here.  In a word: phenomenal.  Making popcorn at home is much simpler than most people realize, so I encourage you to give it a shot; turning it into this deliciously coated popcorn is just a few extra steps.  I promise, you’ll think it’s worth it when you’re munching away and are surprised to find it all gone in minutes.

Vanilla Honey Caramel Popcorn
Adapted from Eat the Love’s amazing Wordless Recipe

  • 1 Tablespoon oil
  • 1/3 cup popcorn kernels
  • 1 teaspoon salt
  • 1/2 cup honey
  • 1 teaspoon vanilla bean paste (extract will do, as well, but it’s fun to see the beans on the popcorn!)
  • 1/4 cup heavy cream
  • 2 Tablespoons butter
  1. Heat the oven to 300 degrees.
  2. In a large pot, add the oil and 3-4 popcorn kernels.  Once those kernels pop, you know the oil is hot enough; dump the 1/3 cup of kernels into the pot and put the lid on the pot.
  3. Immediately pull the pot off the heat, count to 30 seconds, shaking the kernels around in the pot every once in a while, then return the pot to the heat.  The popcorn will begin to pop very shortly-make sure the lid is tilted ever so slightly so that steam can escape but not so much that popcorn flies out!
  4. Once most of the kernels are done popping, turn off the heat and dump the popped popcorn into a large mixing bowl.  Sprinkle with the salt, and set aside.
  5. In a medium saucepan, add the honey, vanilla, cream, and butter.  Using a candy thermometer, heat the mixture to 245-250 degrees (the Firm Ball stage if you’re a candy maker).  While it’s heating, line a baking sheet with parchment paper.
  6. Once it’s reached the right temperature, pour the mixture over the popcorn and toss until the popcorn is evenly coated.
  7. Spread the popcorn over the parchment covered baking sheet in an even layer and put it in the oven for 15 minutes.
  8. Take the popcorn out and let the baking sheet cool on a wire cooling rack.  You won’t be able to resist taking a nibble as soon as its out of the oven, and I can warn you now that it will be soft and not appealing at all.  As it cools it will harden into the crunchy deliciousness you expect.
  9. Once it cools, break the popcorn up, if it cooled into clumps, and serve.  Enjoy!

Note: I made this recipe two days ahead of time for a weekend get-away treat and, just my luck, we had a rainstorm and the humidity went through the roof.  I watched sadly as my popcorn got progressively soggier and soggier.  Luckily, all it took was a pop back in the oven for 15 minutes at 300 degrees and it crisped right back up again!

Creamy Chicken Taquitos

Wednesday, February 15, 2012

 baked creamy chicken taquitos

I don’t like to lie to you, my dear readers, so I will neither confirm, nor deny, that the only real experience I had with taquitos before making this recipe was from the 7-11 gas station in Georgia.

I will also put out there that I prefer baking to cooking (I’m sure that’s clear to most of you, by now, though) because too often you put the time, money and effort into making a nice dinner and then it’s…you know…good but would have been better if you’d just ordered it at a restaurant where they use 4 times as much butter and you wouldn’t have to clean up the grease splattered kitchen afterwards.

I can safely say that this dinner does not play out like the scene I just described.  No, these taquitos hit the spot in every way possible:  easy to make, easy to clean, filling, delicious, and absolutely satisfying in all manners of the word.  It’s even baked instead of fried like restaurant taquitos so you’ve kicked up the health factor a notch and it’s a great new fun alternative to the typical taco night (not that I would EVER turn down a taco).

Now the only question we were trying to figure out was…do you eat these with a knife and fork or pick them up with your fingers?

Creamy Chicken Taquitos
Makes 12-14, depending on how generous you are with the filling
Adapted from Annie’s Eats, originally from Our Best Bites

  • 3 oz. cream cheese, softened
  • ¼ cup salsa
  • 4 oz can of diced green chiles
  • freshly squeezed lime juice from 1/2 lime
  • 1 tsp. chili powder
  • ½ tsp. cumin
  • ½ tsp. onion powder
  • 3 cloves garlic, minced or garlic pressed
  • 3 tbsp. chopped cilantro
  • 2-3 green onions, chopped
  • 2 cups shredded cooked chicken (I just grabbed an already roasted chicken from the grocery deli and shredded it at home)
  • 1 cup shredded Mexican cheese
  • 10-14 flour tortillas - size 6″ (packages at my market came in either 10 or 16)
  • Cooking spray
  • Kosher salt
  1. Heat oven to 425 degrees and line a baking sheet with parchment paper
  2. Be sure to soften the cream cheese prior to starting the rest of the recipe-30 seconds or so in the microwave did the trick for me.
  3. In a large bowl, mix all of the ingredients, except for the tortillas, spray and salt, and stir until they’re all thoroughly combined.
  4. Heat the stack of tortillas you’re going to use for 30 seconds in the microwave so that they’re soft and pliable (if you find you’re one short and need to heat an extra tortilla, don’t do it by itself for a full 30 seconds!  I killed a tortilla that way, just do it for maybe 10 seconds).
  5. Lay the tortilla flat and spoon 2-3 tablespoons of filling in a straight line on the tortilla-most people say to do it down the center, but I did it a bit closer to the edge I was rolling up so that I could roll the tortilla very tightly.
  6. Once it’s rolled up, place the filled tortilla on the prepared baking sheet with the edge of the tortilla hidden on the bottom so that it doesn’t unroll.  Press gently to flatten it just enough so that it doesn’t roll around on the baking sheet.  You can arrange these pretty close together-I did mine about an inch apart so I could fit all of them on my oversized cookie sheet but still have enough room for air to circulate around them.
  7. Once all of the tortillas are rolled up and placed on the baking sheet, lightly spray them with cooking spray and sprinkle kosher salt over the tops of them.
  8. Bake for 15-20 minutes until golden brown on the edges.
  9. These are great for freezing for future meals!  Annie notes: “To freeze before baking, transfer the baking sheet to the freezer and chill the assembled taquitos 30-60 minutes.  Transfer to a freezer-safe container or plastic bag.  To bake from the freezer, simply add a few additional minutes to the original baking time, until the filling is warmed through.
  10. Serve hot from the oven with extra salsa, hot sauce, and sour cream.  Enjoy!

Baked Crispy Asparagus with Blue Cheese Dipping Sauce

Friday, February 10, 2012

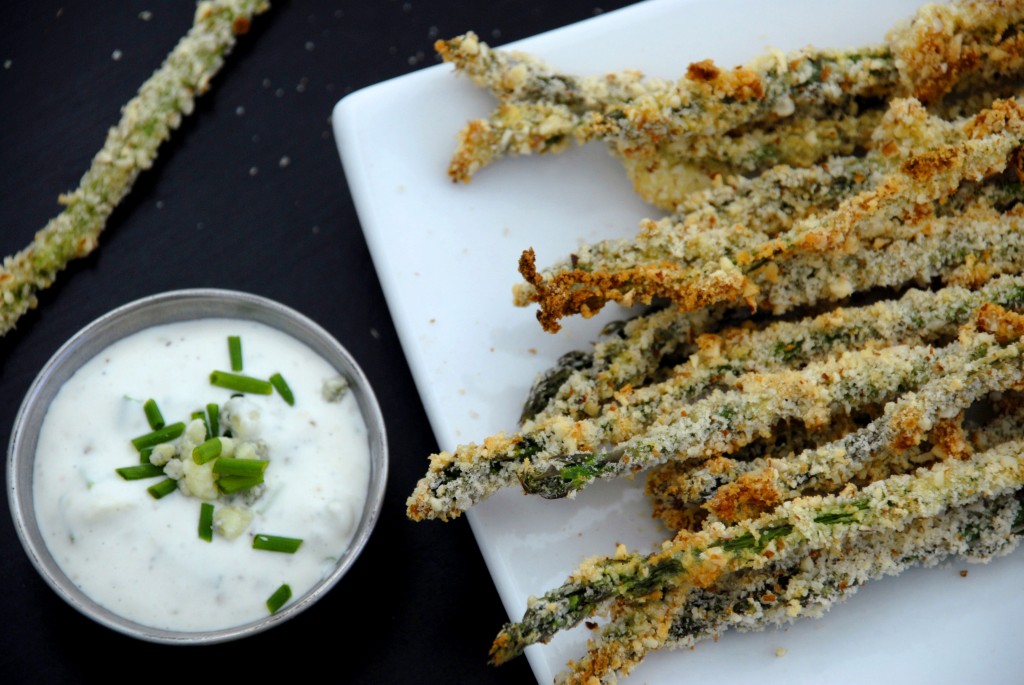
baked crispy asparagus fries

I’m a pretty picky eater.  And because of that, when I buy certain ingredients for recipes, I buy them in the smallest amount, knowing sadly that some of it will go to waste.  I try to encourage The Roommate and The Boyfriend to eat up, but to no avail.  So here I was with a partial container of sour cream, a partial carton of buttermilk, a partial package of chives, and a partial container of blue cheese crumbles in the fridge.  I also bought beautiful asparagus yesterday, spur of the moment, because whereas a pound is normally around $5, it was on sale for 99 cents!  (I had to explain to my East Coaster friends that it wasn’t discounted because it was gross, but that So Cal is having a lovely warm mild winter so asparagus is growing early like crazy and they’re trying to sell it as fast as they can.)

So here I am browsing Pinterest and I see a pin for crispy asparagus with dipping sauces.  Curious, I scan the recipe and I start thinking, “…buttermilk, I have that!…sour cream, I have that!…blue cheese, I have that!” and so all of that, paired with the fact that this beautiful asparagus needed to be eaten, I knew exactly what I was making when I got home.

and now I can say, this is a phenomenal recipe!  I have never had so much fun eating asparagus.  Roommate, Boyfriend, and I couldn’t stop eating them and I honestly can’t believe that ingredients I normally don’t like (mayo, sour cream, etc…notice a white gloppy pattern?) all come together to make such a delicious sauce.  Bonus: the asparagus is baked so it’s super healthy-and let’s just leave it at that and not think about whether the dipping sauce is healthy or not, shall we?


Baked Crispy Asparagus with Blue Cheese Dipping Sauce
Adapted from SpoonForkBacon
Makes 1 lb of asparagus and almost 1 cup of dipping sauce

Asparagus

  • 1 lb of thin asparagus spears, tough ends removed
  • 1 cup almonds
  • 2 cups panko bread crumbs
  • 2/3 cup flour
  • 4 eggs
  • cooking spray

Dipping Sauce

  • 1/4 cup light mayonnaise
  • 1/4 cup light sour cream
  • 1/4 cup crumbled blue cheese
  • 2 tablespoons milk
  • 1 1/2 tablespoons chives, chopped
  • 1 teaspoon fresh lemon juice
  • salt and pepper to taste
  1. Heat oven to 375 degrees and cover a baking sheet with parchment paper.
  2. In a food processor, process the almonds and panko bread crumbs until finely ground and combined (I used whole almonds because they were on sale, so I processed them up first for a few seconds before adding the panko crumbs.  If you buy pre-sliced almonds, just throw the panko and almonds all in at once).
  3. In three separate dishes, put the flour in one dish, put half the almond-panko mixture into another and 2 of the eggs, beat with a fork, into the third.  I started with just half the almond-panko mixture and half of the eggs in the pans because the panko gets a little clumpy when the egg drips in it and then the egg gets a little clumpy when the panko falls in it.  Basically, you need a half-time to rinse the pans out and start fresh.
  4. Roll the asparagus in the flour, dip it into the egg, then dip it into the almond-panko mixture and lay it in rows on the cookie sheet.
  5. Once all the asparagus is rolled, dipped and dipped again, lightly spray the asparagus on the cookie sheet with cooking spray and then put it in the oven to bake for about 15 minutes until golden brown.
  6. While the asparagus is baking, put all the ingredients for the dipping sauce into a small bowl and mix until thoroughly combined.
  7. Serve the asparagus hot and dipping sauce cold and enjoy!