Entries Tagged as 'Holiday Food'

Steak and Guinness Pie

Tuesday, March 12, 2013

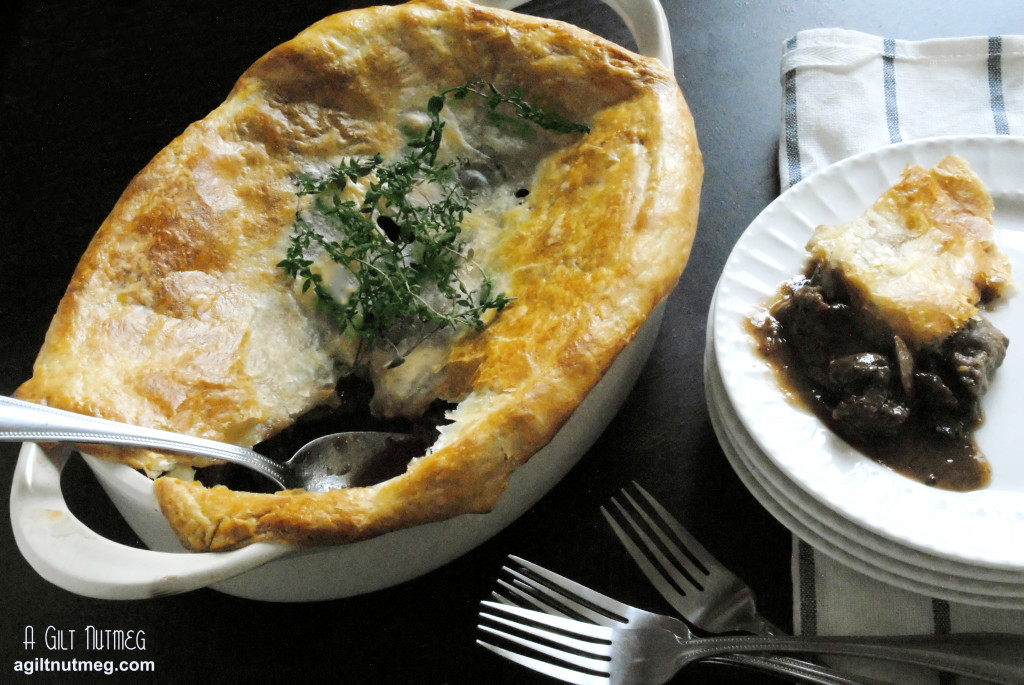
Steak and Guinness Pie - from agiltnutmeg.com

One of my favorite parts about living abroad in the UK was the food.  Don’t worry, I understand that you may have done a double take at the statement I just made.  It’s true, though, I loved the simple, hearty, food-every meal you ate, you could so easily see it being made a century ago to feed a family in front of a large cottage fireplace.

Given that LA weather has been rather up and down in temperature lately, and in honor of the upcoming St. Patrick’s holiday, Steak and Guinness Pie seemed like a no-brainer.  I don’t think I’ve come across a more satisfyingly hearty dish in my kitchen.  Each bite is so full of flavor that you don’t need to eat half the pie to feel like you got a full meal out of it.  While I do love the entirely savory pie (the steak, mushrooms and onions), I think the next time I make this I’ll add in some small potatoes and sweet roasted carrots to increase the veggie count and to stretch the pie even further than the 4-5 servings we already got out of it.  I still carry a card I purchased in Ireland with a saying on it very fitting for a food blog: “May you live as long as you want and never want as long as you live.”  Slainte!
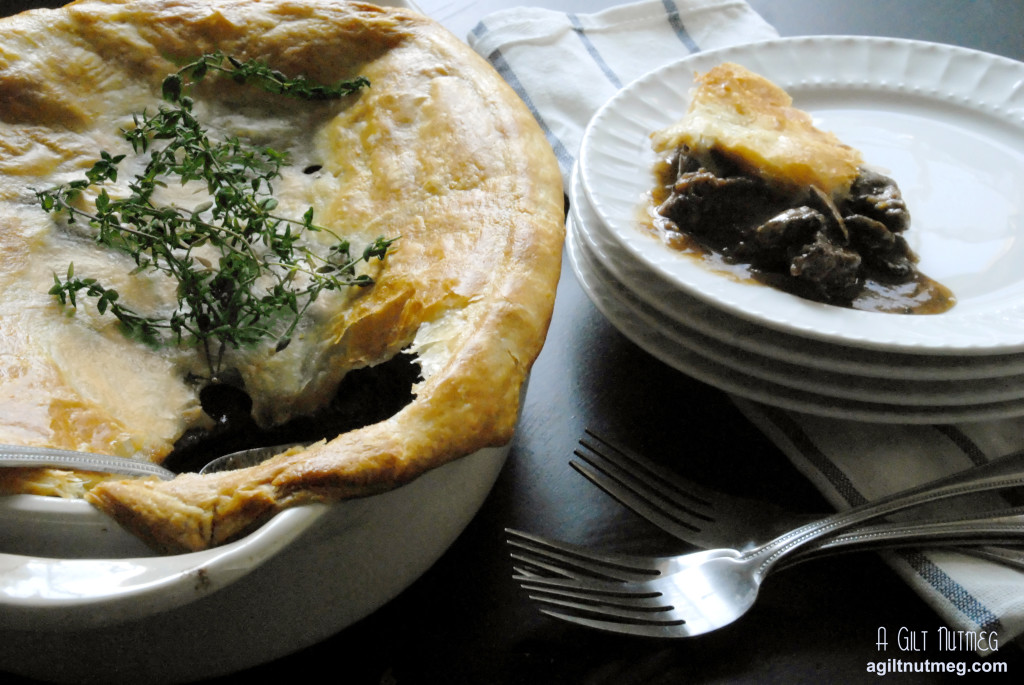
 Steak and Guinness Pie - from agiltnutmeg.com

Steak and Guinness Pie
Adapted from The Complete Irish Pub Cookbook via Never Enough Thyme
Serves 4-5

  • 2 pounds lean chuck steak
  • 3 Tbs all-purpose flour
  • 1 tsp salt
  • 1/2 tsp black pepper
  • 5 Tbs oil, divided into 3 Tbs and 2 Tbs
  • 1 1/4 cups beef broth, divided into 1/4 cup and 1 cup
  • 1 medium onion, chopped
  • 8 oz Cremini mushrooms, sliced
  • 1 Tbs tomato paste (Trader Joe’s has this great tomato paste that comes in a tube like toothpaste.  No more wasting whole cans of it for just 1 or 2 tablespoons!)
  • 5 sprigs fresh thyme
  • 1 cup Guinness beer
  • 1 sheet frozen puff pastry, thawed
  • 1 egg yolk, lightly beaten with 1 Tbs of water
  1. Removing as much fat as possible (or as much as you can before you get frustrated and give up), and slice steak into 1″ chunks.
  2. Whisk together the flour, salt and pepper in a large bowl, add the steak chunks, and toss until steak pieces are fully coated by the flour mixture.
  3. In a cast iron or heavy bottomed skillet, heat the first 3 tablespoons of oil until shimmering.  Make sure the beef sizzles when it touches the oil before adding it to the pan and work in 2 or 3 batches so that you don’t overcrowd the pan; try not to push the beef around until fully browned on the bottom so that you get that deep color on the meat and the fond in the bottom of the skillet.  Once the beef is cooked mostly through and browned all over, transfer the beef to a dutch oven, pour the oil out of the skillet and return it to the heat.  Pour in 1/4 of beef broth to the hot pan, scraping up the browned bits from the pan; pour the stock and browned bits into the dutch oven with the beef.
  4. Add the last of the oil to the skillet and saute the onion and mushrooms over medium heat about 15 minutes until browned; transfer to the dutch oven.
  5. In the measuring cup the beef broth is waiting in, whisk in the tomato paste and add mixture to the dutch oven along with the thyme and stout.  Bring the contents of the dutch oven to a boil, reduce the heat to low and let it simmer, partially covered with the lid, for 90 minutes, then let mixture cool.
  6. Heat your oven to 425 degrees and make sure your puff pastry is completely thawed (it will break apart when you unfold it, otherwise).
  7. Transfer the cooled contents of the dutch oven to the dish you plan on baking your pie in, then drape the puff pastry over the top of the dish.  Trim the edges of the dough around the edge of the dish, leaving at least 1/4″ of hangover.  Wet your fingers and run them around the edge of the dish, under the dough, and press the dough against the wet edge of the dish.
  8. Use a knife to slice one or two slots into the crust for steam, then brush the top with the egg mixture.
  9. Bake for 25 minutes, until the crust is golden brown.
  10. Serve hot and enjoy!

Mexican Wedding Cookies

Wednesday, May 9, 2012

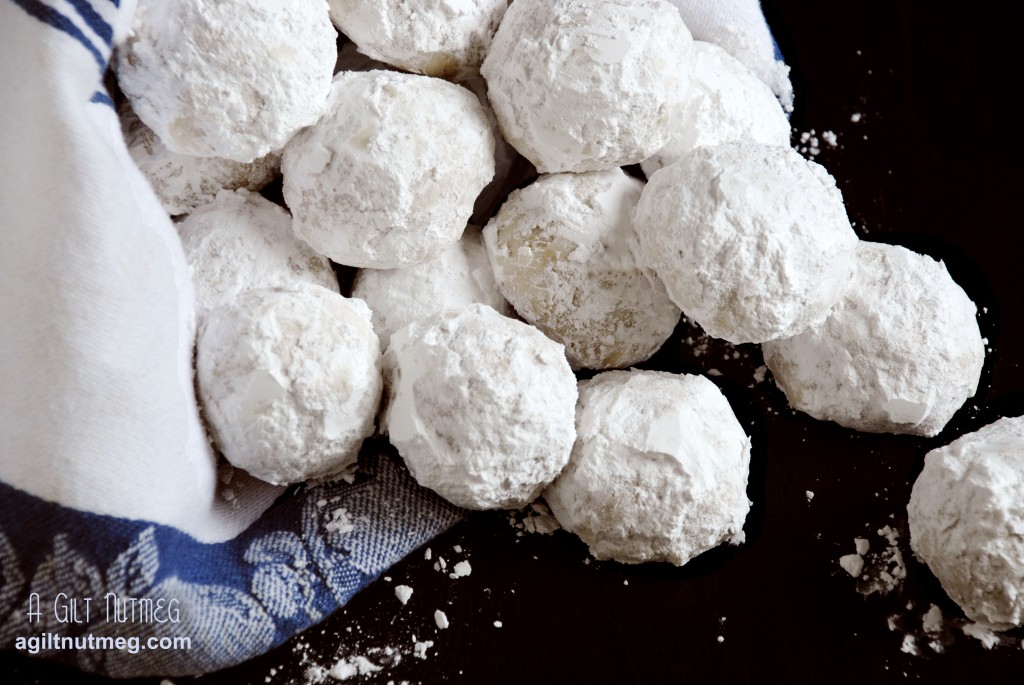
 mexican wedding cookies

At the office, since Cinco de Mayo fell on a Saturday, we had a little Ocho de Mayo celebration yesterday instead.  In trying to decide what to bring, the idea of Mexican Wedding Cookies floated into my head and then that idea stuck and wouldn’t let go and then there was just no turning back because I love these cookies and couldn’t bear not to make them at this point!  And then last night, after our celebration, I had to tell The Boyfriend that there was good news and there was bad news:  The good news is that I saved a cookie for him.  The bad news was that I ate ALL THE REST of the leftover cookies.    Oops.

These cookies are satisfyingly crunchy and surprisingly flavorful, but you do have to eat them over the sink unless you’re okay with powdered sugar going EVERYWHERE.  It’s worth it, in my opinion.  They’re some of my favorites!

Mexican Wedding Cookies
Adapted from Williams-Sonoma
Makes between 2-3 dozen

  • 16 Tbs (2 sticks) unsalted butter, at room temperature
  • 1/4 cup confectioners’ sugar + 1 cup confectioner’s sugar for dusting later
  • 1 1/2 tsps vanilla extract
  • 1/4 tsp salt
  • 1 3/4 cups all-purpose flour
  • 1 tsp ground cinnamon
  • 1 1/2 cups blanched almonds, ground in a food processor until it looks like coarse cornmeal
  1. On high speed, beat the butter in a mixer until it is very light yellow and very fluffy, about 3-4 minutes.
  2. Reduce speed to medium and add the confectioners sugar to the butter, mixing until thoroughly incorporated, then switch the speed to low and add the vanilla and salt, again mixing until incorporated.
  3. With a fine sieve, sift the flour and cinnamon into the butter mixture, then mix in to batter on low speed (or else it’ll pouf all over your kitchen!).
  4. Add the almonds to the mixture and beat on low speed until those are mixed in.
  5. Cover the bowl with plastic wrap and put it in the refrigerator for 15-20 minutes.  The goal is to chill the dough so that it is firm and no longer sticky, but not yet hard.
  6. Heat the oven to 350 degrees while the dough is chilling.
  7. Line a cookie sheet with parchment paper and scoop up chilled dough in balls approximately 1″ or 1 1/2″ wide and roll them in your palms to make the balls smooth.  The bigger the cookie, the fewer you’ll have and vice versa.  My cookies were about 1 1/2″ wide and I ended up with about 30 cookies.
  8. Place the cookies in rows, about 1-2″ apart and bake for 12-15 minutes.  The cookies will not look done on top (they’ll stay white), but you can roll one or two over to look at the bottoms-they should be starting to turn golden brown.  The cookies will also be almost firm if you poke one, but I find that the brown color underneath is the best indicator of doneness.
  9. Let the cookies cool on a wire rack for 15 minutes and in the meantime add that extra 1 cup of confectioner’s sugar to a bowl.
  10. When the cookies have cooled for a little while, roll them in the powdered sugar and put them back on the racks.  The powdered sugar on the cookies will get a little sticky, but let the cookies cool some more and roll them again.  Set them back on the racks and wait a few hours before giving the cookies their final roll in the sugar.  You want them good and coated!
  11. Store in an airtight container and enjoy!  (over a plate or the sink or a napkin, that is)

Coconut Chocolate Pie

Monday, April 9, 2012

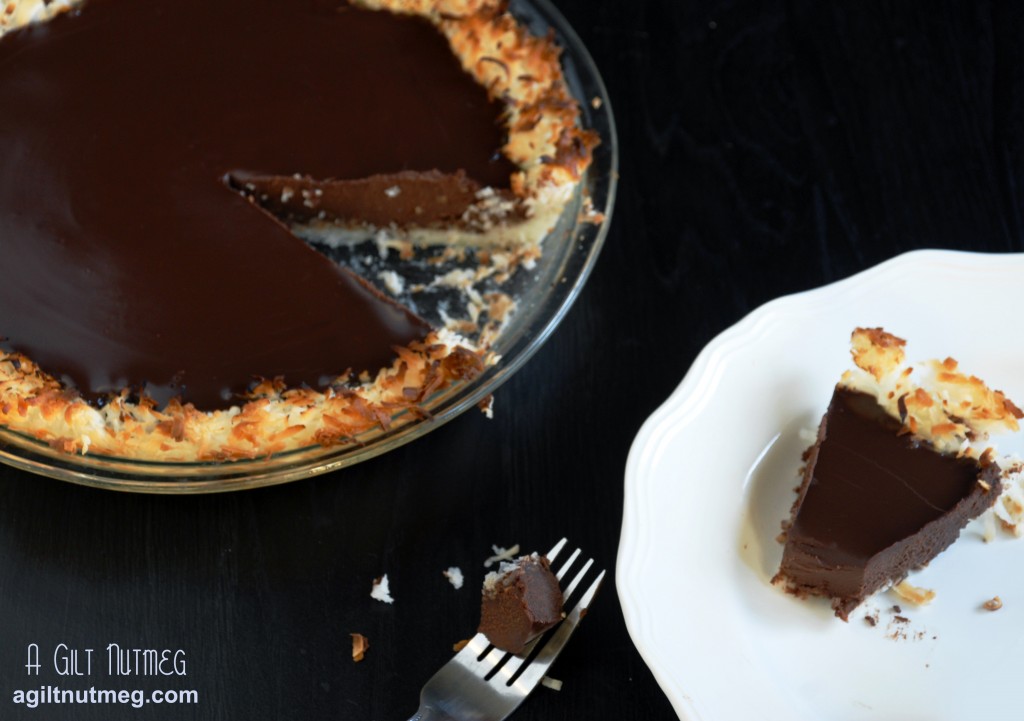
 coconut chocolate pie

It’s still Passover so I’m not too too late with this holiday approved dessert, I think.  Between all of the coconut macaroons and flourless chocolate cakes that come out this time of the year, this combo seemed like an obvious (and delicious) choice-and contrary to many holiday desserts, this one is so incredibly easy I could hardly believe it!  It only has 4 ingredients and takes practically no time to complete the steps, which was a major relief because those Hot Cross Buns put a temporary curse on my kitchen.  Nothing was working and after I ruined the lime creme I was making to fill coconut macaroon tart shells, I was sure I was going to have to go back to the grocery store at 10pm (typical me scenario) to get ingredients so that I could produce something (anything) for today’s post.  Then the kitchen fairies came out and, knowing I needed 8 oz of bittersweet chocolate for this recipe (which I already had the coconut for), I found a 4 oz bar of bittersweet chocolate and exactly 4 oz of bittersweet chocolate chips leftover from a previous recipe.

This recipe produces a crisp coconut macaroon “crust” and a creamy dense chocolate filling that will be perfect with a little bit of whipped cream to lighten it up.  While it is appropriate for Passover, since it is has no flour in it and is unleavened, I think this pie will be welcome at anyone’s spring table.  Chag Sameach!

Coconut Chocolate Pie
Adapted from Martha Stewart’s New Pies and Tarts

For the crust

  • 4 tablespoons unsalted butter, softened
  • 1 bag (about 14 oz) of shredded coconut

For the filling

  • 1 cup heavy cream
  • 8 ounces bittersweet chocolate, finely chopped
  1. Heat oven to 350 degrees.
  2. In a food processor, pulse about 1/3 of the coconut and butter together until well combined, 1-2 minutes.
  3. In a medium bowl, combine the coconut-butter mixture with the rest of the coconut and stir well until mixture is cohesive.
  4. Press the coconut into a 9″ pie plate so that it forms a crust and bake for 10-15 minutes.  If the edges start to brown too much, cover them with some tin foil.
  5. Once golden brown, move the crust to a wire cooling rack and let it cool completely before filling with the chocolate (this will allow the crust to crisp up first).
  6. While the crust is cooling, bring the heavy cream to boil in a small saucepan.
  7. Put the chopped chocolate into a medium bowl and pour the boiling cream over it.  Let it sit for a few minutes then whisk until it is smooth and no streaks of cream remain.
  8. Pour the chocolate into the tart shell and let it cool before moving it to the refrigerator to set completely for another hour or so.  Enjoy!


Hot Cross Buns

Wednesday, April 4, 2012

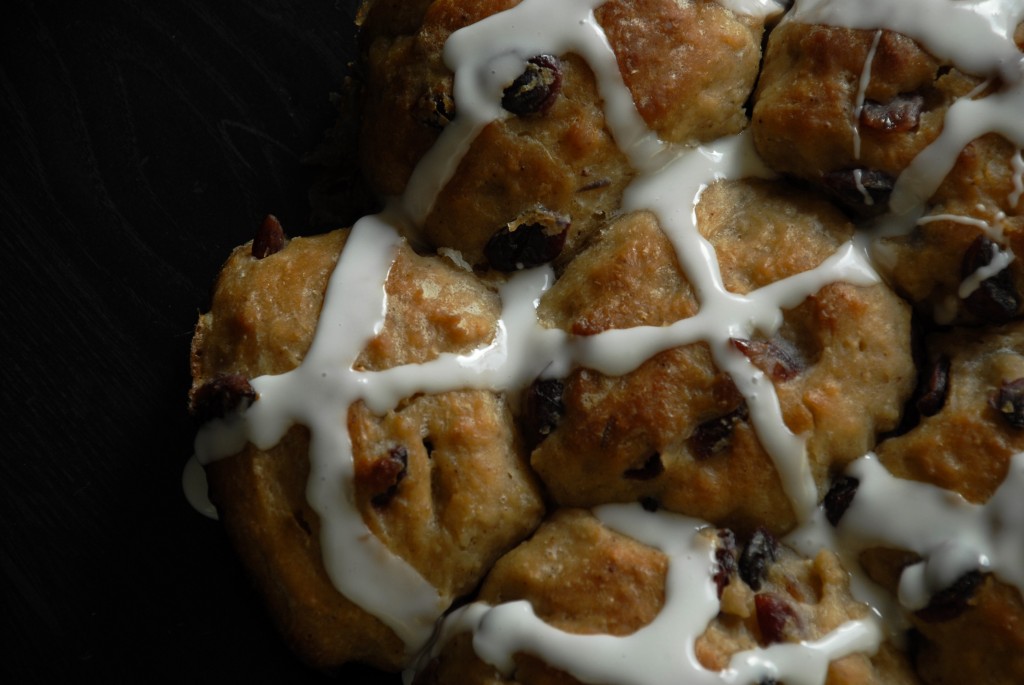
So I have to admit something to you: these hot cross buns for Good Friday this week didn’t turn out the way I had hoped.  And since this blog is supposed to be inspirational, I want you to know that it’s okay to mess up in the kitchen as long as it’s in the spirit of trying something new.  For some reason, my cooking nemesis is yeasted bread and rolls (and meringue, but we’re slowly, cautiously becoming friends) and I will not give up until I get it right.  I don’t know what the problem is, be it too much flour or not enough flour or rising temperature or sub-par kneading skills, but my bread almost always turns out heavy and dense.  The only yeasty bread item I’ve ever made to satisfactory standards (and delicious standards) was my Fat Tuesday King Cake.  Once I save up a few pennies, I think I’m going to take a class on yeast breads just to make sure I understand the proper technique .

At least with these buns, I know what a big part of the problem was-I was softening butter in the microwave and completely forgot to take it out and add it to the dough.  Oops.  Oh well.  I also don’t have a stand mixer or bread machine so I may not have kneaded long enough.

I’ve posted the original recipe from King Arthur Flour below for you to try yourself.  I will say that, though the texture wasn’t right (again, my fault), the flavor is delicious.  Instead of raisins, currants, and all the extra dried fruit, I stuck to just a 1/2 cup (I made a half-recipe) of rum-soaked dried cranberries; it went beautifully with the spices in the buns and the whole house smelled like my favorite tiki bar- the scent of spiced rum was hanging in the air in an exotic way.  The boyfriend admitted these buns weren’t my best effort, but then he ate three of them, so I clearly got SOMEthing right and I think it was those flavors.

Hot Cross Buns

Adapted from King Arthur Flour

Makes 12-14 buns

  • 1/4 cup dark rum (or apple juice)
  • 1/2 - 3/4 cup dried cranberries
  • 1 1/4 cups milk, room temperature
  • 3 large eggs, 1 separated
  • 6 tablespoons butter, room temperature
  • 2 teaspoons instant yeast
  • 1/4 cup light brown sugar, firmly packed
  • 1 teaspoon ground cinnamon
  • 1/4 teaspoon ground cloves
  • 1/4 teaspoon ground nutmeg
  • 1 3/4 teaspoons salt
  • 1 Tablespoon baking powder
  • 4 1/2 cups flour

Glaze

  • 1 tablespoon of milk + the egg white from the egg separated above

Icing

  • 1 cup + 2 Tablespoons confectioners’ sugar
  • pinch of salt
  • 4 teaspoons milk, or “enough to make a thick, pipeable icing”
  1. Lightly grease a  9 x 13″ pan.
  2. Put the rum and cranberries in a bowl and let them soak for about a half hour.  If you don’t have the time to wait, put them in the microwave for about a minute and then let them cool before adding them to the dough.
  3. Mix together the rest of the bread ingredients except for the fruit and knead in a stand mixer or bread machine until soft and elastic.
  4. Add the cranberries and any rum that wasn’t soaked up to the dough and mix until incorporated.
  5. Let the dough rise for an hour.  KAF warns, “It should become puffy, though may not double in bulk.”
  6. Divide the dough into 12-14 billiard ball sized pieces and arrange in the prepared pan.
  7. Let them rise for another hour, until the balls are touching.  Preheat the oven to 375 degrees in the meantime.
  8. Whisk together the tablespoon of milk and the egg white and brush over the buns before baking.  Bake for 20 minutes until golden brown; let cool on a wire rack.
  9. Whisk together the icing ingredients and pipe them into crosses over each bun.  Enjoy!
Pin It

Carrot Vichyssoise

Monday, April 2, 2012

Carrot Vichyssoise

Here I was, on a Friday afternoon, pondering where my next week of blogging might go, when it occurred to me to  check the calendar.  And boy howdy am I sure glad I did, because I had no idea that Easter and Passover were only a week away!  Of course, the blog week took shape very quickly thereafter and the first holiday cooking I’m tackling is Easter.  I wanted to do something “appropriate” (spring…bunnies…you get the idea), but I did Carrot Cake  a few weeks ago for Project Pastry Queen and I wasn’t yet ready to blog about the traditional ham or lamb, so I had to get creative.

Wanting something a little out of the standard Easter fare, I was delighted to stumble across this recipe for Carrot Vichyssoise.  Vichyssoise is a potato leek cream soup served cold and this variation brings carrots to the mix, which adds a lively flavor and color to the soup.  I thought it might be hard to enjoy eating cold soup, just because hot soup, no matter the weather, is one of my favorite things in the world, but this soup is filling yet light and refreshing at the same time and the cold didn’t bother me at all.  It will be a fantastic part of your Easter supper and, if you just can’t deal with the cold, it’s great hot, too.  The Easter Bunny will be pleased!

Carrot Vichyssoise
Adapted from Whole Living
Serves 6

  • 3 large leeks (about 1 1/2 lbs), white and light green part sliced into 1/4″ pieces
  • 2 cloves of garlic, minced or pressed
  • 4 Yukon Gold potatoes (about 1 1/2 lbs), peeled; 3 diced, 1 set aside
  • 5 large carrots (about 9 oz), peeled; 3 sliced, 2 set aside
  • 2 1/2 cups low-sodium chicken broth
  • 2 cups water
  • 1 1/2 teaspoons salt
  • 1/8 teaspoon fresh ground pepper
  • 2 cups whole milk
  • chives for garnish
  1. Add about a tablespoon or two of olive oil to a large pot and turn the heat on to medium-low.  Add the leeks and garlic and cover with the pot lid, cooking for about 15 minutes.
  2. Add the diced potatoes, sliced carrots, chicken broth, water, salt and pepper.  Bring the pot to a boil and then turn the heat down so it’s simmering for 20 minutes.
  3. Once the vegetables are tender, turn off the heat, stir in the milk, and either transfer the mixture to a blender, or use a stick blender right in the pot to blend until smooth.
  4. Let the soup cool (I transferred it to a large glass bowl to speed the cooling along), then move it to the refrigerator to chill.
  5. While the soup is chilling, set a small pot of water to boil and make a small bowl of ice water.  Grab that last potato and the 2 extra carrots and slice them into small matchstick shaped pieces about 2 inches long
  6. Boil the matchstick potatoes and carrots for 3-4 minutes, until just tender (you don’t want them too soft) and then drain the pot.  Add the carrots and potatoes into the ice water to stop them from cooking any further.
  7. When ready to serve, ladle the soup into bowls and garnish with the potato and carrot matchsticks and the chives.  Be sure to share some with the Easter Bunny and enjoy!

Chocolate Baileys Irish Cream Cheesecake

Friday, March 16, 2012

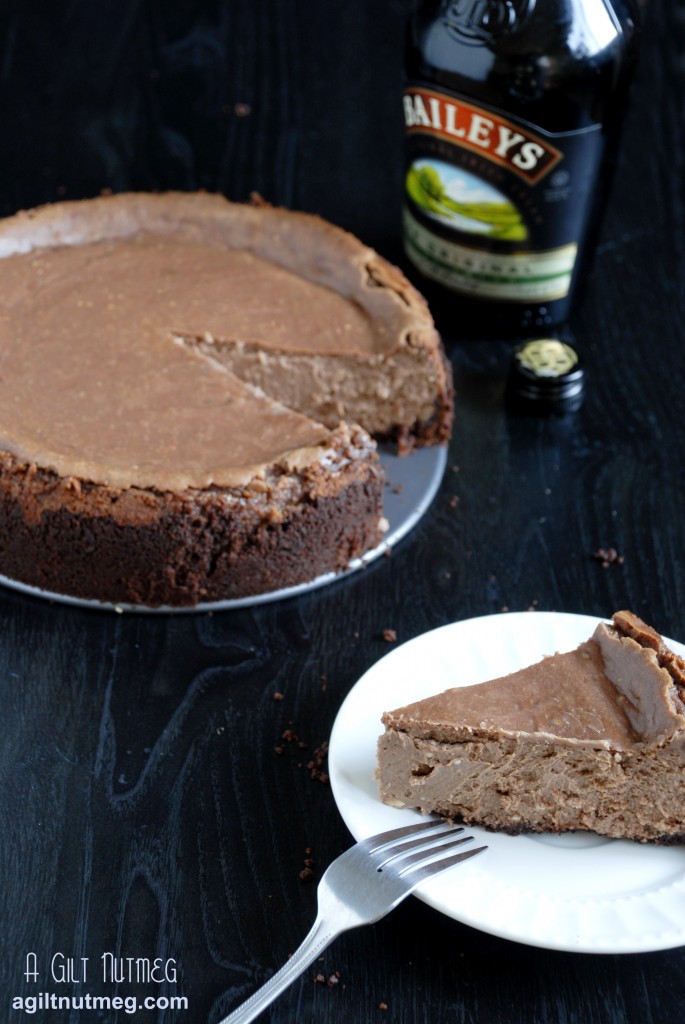
chocolate baileys irish cream cheesecake

Happy Day Before St. Patrick’s Day!  Continuing with our love for the various gifts of food and drink Ireland has shared with us over time, I give you Chocolate-Baileys Cheesecake.  Having made it, I’m pretty sure that this will not just be a St. Patrick’s Day tradition, but a year-round tradition because it’s just that good.  The chocolate and Irish Cream meld together perfectly for a dessert that will keep you sneaking forkfuls from the fridge when you think no one is looking (but since my roommate is out of town this weekend, the only one around to judge me sneaking to the fridge are the kitchen cabinets and, frankly, I don’t care what they think).

And just when you think the combination of Baileys and chocolate couldn’t get any better, there’s a touch of cinnamon thrown into the crust which just sends this dessert over the top.  The original recipe calls for chocolate wafer cookies and everyone in the comments on BHG insists that they’re easy to find, but I didn’t find a single plain chocolate cookie in my store but one: Teddy Grahams.  And I love Teddy Grahams, so I was happy to use them.  I used the 1 1/2 cups of crumbs the recipe called for, but I didn’t get the tall perfect crust like BHG does, so I suggest using the whole box of Teddy Grahams.

Happy St. Patrick’s Day, everyone!

Chocolate-Baileys Cheesecake
Adapted from Better Homes & Gardens

  • 1 box of chocolate Teddy Grahams, ground to fine crumbs
  • 7 tablespoons butter, melted
  • 1/2 teaspoon ground cinnamon
  • 3 packages (8 oz) cream cheese, softened
  • 1 container (8 oz) sour cream
  • 1 cup sugar
  • 8 oz semisweet chocolate, melted and cooled
  • 3 eggs
  • 1/2 cup Baileys Irish cream liqueur
  • 2 tablespoons heavy cream
  • 2 teaspoons vanilla
  1. Heat the oven to 325 degrees.
  2. Combine the cookie crumbs, melted butter and cinnamon in a small bowl until thoroughly combined, then press the crumbs into the bottom and up the sides of a 9″ springform pan.
  3. In a large bowl, beat the cream cheese, sour cream, sugar and chocolate together on medium speed until smooth.
  4. Add the eggs and beat on low-medium until just combined.
  5. Add the Baileys, cream and vanilla and stir in with a wooden spoon (I suspect this is because using an electric mixer here would splatter EVERYWHERE)
  6. Pour the filling into the springform pan and bake for 50-60 minutes until the center is just set.  It’s hard to describe exactly what that looks like, but I guess the only way to say it is that even though the top was baked, it jiggled around when I shook it as if the top were sitting on something slidey.
  7. Cool on a wire rack for 30 minutes, then slide a thin sharp knife around the edge to separate the crust.  Let it cool for another hour and then stick it in the fridge for at least 6 hours.  I made mine the night before so it was ready for the next day.  Enjoy!

Irish Coffee Cupcakes

Wednesday, March 14, 2012

irish coffee cupcakes

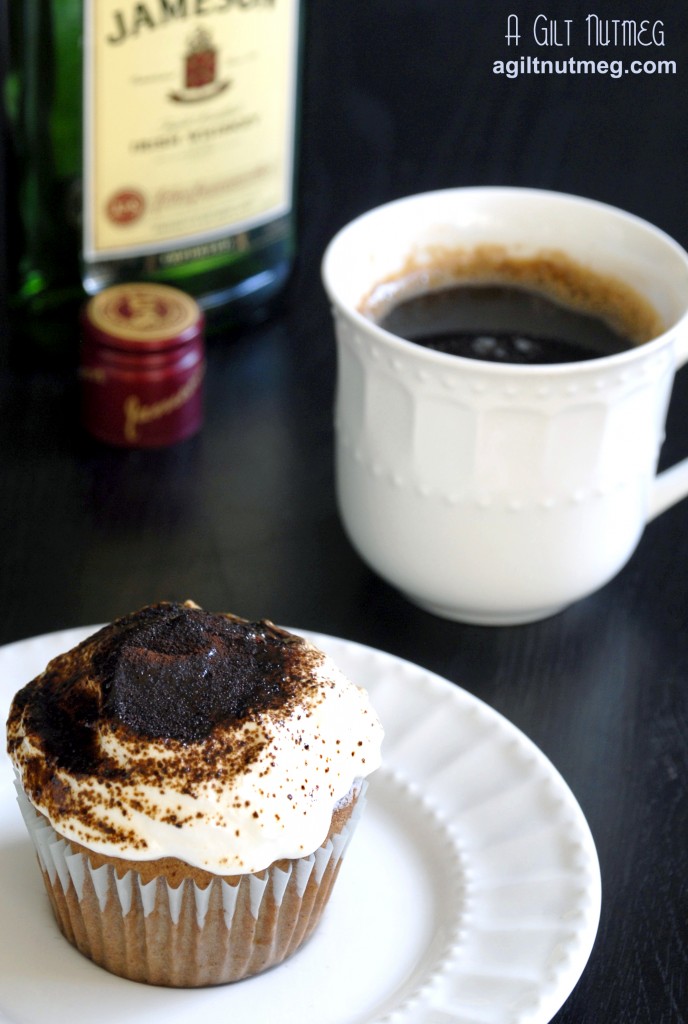
St. Patrick’s Day is almost upon us!  and since the holiday is celebrated (at least here in America it is) by drinking as much alcohol as possible, let’s go with one of the classier options, Irish Coffee, and turn it into a cupcake.   Irish Coffee was first introduced in the U.S. by the Buena Vista, a bar in San Fransisco that I have had the pleasure of having breakfast at before.  It’s got a beautiful view from the windows, but the best view, in my opinion, is of the bar where tuxedoed bartenders expertly make Irish Coffee after Irish Coffee.  Strong brewed coffee, sugar, Irish whiskey and to top it off, whipped cream is ever so carefully floated on top.  You definitely have to be trained for years in order to make the perfect cup of Irish Coffee.

Martha Stewart created a fantastic cupcake version of this drink: a brown sugar coffee cupcake and an Irish whiskey spiked whipped cream topping.  The whipped cream on top creates an especially light yet flavorful finish to the cupcake and the espresso powder dusting adds just a touch of bitterness (I would go lighter than I did with the espresso powder-I had a slip of the hand).  The perfect way to celebrate the holiday!

 Irish Coffee Cupcakes
From Martha Stewart
Makes 15 cupcake

  • 2 cups all-purpose flour
  • 1 teaspoon baking powder
  • 1/4 teaspoon baking soda
  • 1/4 teaspoon salt
  • 1/2 cup boiling water
  • 2 tablespoons instant-espresso powder
  • 1/4 cup whole milk
  • 1 stick unsalted butter, room temperature
  • 1/2 cup granulated sugar
  • 1/2 cup packed light-brown sugar
  • 2 large eggs
  • 1 cup heavy cream
  • 1 tablespoon confectioners’ sugar
  • 1 tablespoon whiskey
  • Instant-espresso powder, for dusting
  1. Heat oven to 350 degrees.  Prepare muffin tins by putting 8 cupcake papers in one tin and 7 papers in another tin.
  2. Whisk together flour, baking powder, baking soda, and salt.
  3. Pour water over the espresso powder and let cool. Mix espresso in with milk.
  4. Beat butter and granulated and brown sugars with a mixer on medium speed until pale and fluffy, about 3 minutes.
  5. Add eggs, 1 at a time, beating well after each addition.
  6. Beat in flour mixture in 3 additions, alternating with espresso-milk mixture, beginning and ending with flour, until thoroughly combined.
  7. Evenly divide the batter among the 15 papers.  Bake until a toothpick inserted into the centers comes out clean, 20 to 22 minutes. Let cool for a few minutes, then take the cupcakes out of the tins and let them cool on a wire rack.  They must be totally cool before adding the whipped topping or else the topping will melt.
  8. To make the frosting, beat together the cream and confectioners’ sugar until medium peaks form. Add whiskey then beat until slightly stiff peaks form.
  9. Top each cupcake with 2 tablespoons frosting; dust with espresso powder.  Enjoy!

Fat Tuesday King Cake

Tuesday, February 21, 2012

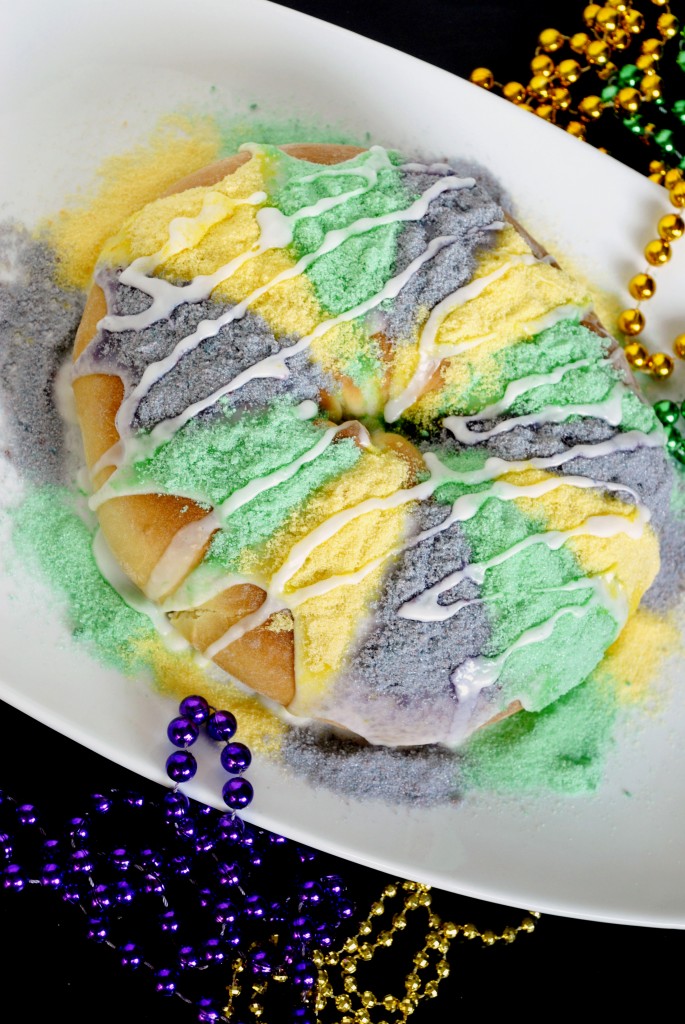
Happy Fat Tuesday, everyone!  Though I am not currently in New Orleans sipping on a hurricane, that doesn’t mean I’m not partaking in the traditional gluttony of the day, namely in the baked form known as King Cake.

I’ve always been hesitant to try making King Cake because it’s a brioche dough and goodness knows I have issues with yeast doughs.  It’s not the yeast that’s the problem, it’s “the dough is really sticky, do I add more flour?  Did I add too much flour and now it’s too dense and heavy?  Will the dough ever come out from under my fingernails?”  I was shocked at how easy this came together.  It’s a great beginners recipe for yeasty recipes!

While researching for this post, I read a lot of recipes over the last few days and found some great ones.  This is a pretty simple straightforward one, a sweet delicious brioche dough and a cinnamon cream cheese filling.  It’s so satisfying (especially with coffee) that I really wouldn’t mind if I used only this recipe for the rest of my life, but I can’t wait to make it again soon with additions to the dough like nutmeg and lemon zest.

Tradition states you hide a tiny plastic baby in the cake; the person who finds it gets good luck for the entire year but also has to bring the King Cake to next year’s party.  I didn’t have a tiny plastic baby on hand on such short notice.  If I had my wits about me, I would have hidden a pecan half in there somewhere since it’s an edible object, but I wasn’t thinking so I brought the cake to the office sans good luck charm.  The ruckus everyone made made it very clear that I made a huge mistake and so, without anything better, I resorted to pushing a nickel up from the bottom of the bread and just had to cross my fingers that no one broke a tooth or choked (we’re all safe, thankfully).

Eat up-the one I brought into the office went quickly-and enjoy this day of excess by having another slice!

King Cake
Adapted from Foodie Bride’s friend Erica

Dough

  • 1 cup warm water, about 105 degrees
  • 1/4 cup sugar (1 tablespoon measured out of that 1/4 cup and set aside)
  • 1 pkg yeast
  • 1 egg
  • 1 egg yolk
  • 4 tablespoons butter, melted
  • 3 cups flour, plus more for dusting work surface
  • 1 tsp salt
  • Oil or cooking spray, for coating bowl

Filling

  • 8 oz cream cheese, room temperature
  • 1/4 cup + 2 tablespoons sugar
  • 1 egg yolk
  • 1 teaspoon vanilla
  • 1/2 rounded tsp cinnamon
  • 2 tablespoons melted butter

Glaze

  • 1 cup powdered sugar
  • 1/2 teaspoon vanilla
  • 4 teaspoon water
  • green, purple & yellow decorating sugar OR 3/4 cups plain sugar, divided into three bowls, 1/4 cup sugar per bowl and green, red, blue, and yellow food coloring


  1. In a large mixing bowl, add the warm water, that one tablespoon of sugar you measured out, and the yeast.  Let it sit for 10 minutes.
  2. Add the melted butter, egg, egg yolk, what’s left of the 1/4 cup of sugar, 3 cups flour, and salt.  Stir with a large wooden spoon until the dough comes together (I added the flour in 3 portions, mixing thoroughly after each).  Have an extra 1/2 cup of flour on hand in case the dough is way too sticky, but I have to say that this is the first yeast dough I’ve ever done where I didn’t have to add any extra flour at all and it was just right.  It should be just a little sticky, and look a little lumpy.
  3. Lightly oil a large metal bowl and transfer the dough into the bowl.  Cover with a dish towel and let the dough rise in a warm spot until double in size, about an hour.
  4. In the meantime while the dough is rising, clean the kitchen (at least that’s what I did, because I didn’t want to torture my roommate any more), set the oven to heat to 375 degrees and then make the filling.
  5. Add cream cheese, sugar, egg yolk, vanilla and cinnamon (that’s everything BUT the melted butter) to a medium mixing bowl and, using an electric mixer, beat on medium until the filling is smooth and spreadable, which won’t take too long.
  6. When the dough is done rising, sprinkle a surface (I covered my dining room table with saran wrap) with flour and roll the dough out with a rolling pin until it is a rectangle approximately 12″ tall and 18″ wide.
  7. Using a pastry brush, brush the melted butter over the dough, leaving an inch or so of dough along the farthest wide edge dry.
  8. Spread the cinnamon cream cheese filling evenly over the dough (leaving that inch of dough dry again).
  9. Taking the wide edge of the dough closest to you, gently roll it up and away from you, forming a big giant cinnamon roll log.  Pinch the long seam closed as best you can, then arrange the rolled up dough in a ring shape on a baking sheet, pinching the two open ends together to close the ring.  I tried to stretch it out as best I could so that it would hold a little of its ring shape instead of just baking up into one big ball.  Emeril Lagasse suggests putting a well greased coffee can in the middle there so that the hole doesn’t close up.
  10. Bake for 25 minutes until nicely golden brown on top (I prefer my baked goods lighter rather than darker, but in this case I went for the whole 25 minutes to ensure the inside was baked properly and the top was only slightly darker golden than I normally go for).
  11. Let the bread cool on a wire rack before glazing.
  12. If you are coloring your own sugar, do that now-I highly recommend it because, though it took an extra 10 minutes or so of work, it was worth it because it was free (I already had sugar and food coloring in my cabinets) versus paying $6 for pre-colored sugars.  In the first bowl, I used 3 drops of yellow, in the second I used 3 drops of green, and in the third bowl I used 3 drops of blue and 3 drops of red.  The food coloring will basically just stick to a little clump of sugar, but if you take a spoon and keep jabbing at that little droplet, it will break up and color the rest of the sugar.  The Boyfriend and I (isn’t he sweet to help?) took about 5 minutes per bowl of stirring, tapping and jabbing, but I think the colors turned out nicely!
  13. To make the glaze, add all the ingredients in except for the colored sugars into a small mixing bowl and whisk until thoroughly combined and smooth.  The thickness of the glaze is up to you; I wanted one that was pourable but that wouldn’t just drip right over the sides and look messy.  You can add a little water (a little goes a looooong way here) or some powdered sugar to adjust the glaze to your desired thickness.  Save a little glaze to drizzle over the top of the sugar afterwards or just use this now and then later throw together a little sugar and water until it’s drizzling consistency.
  14. Let the glaze set for 5 minutes or so before decorating.  King Cakes are usually decorated in alternating stripes of the green-yellow-purple colors, but you can get creative if you want!  Just be sure to lay the sugar on thick, because I tried to go thin on my sugar layer and the white glaze underneath would start to show through (in some cases the sugar dissolved and in other cases the glaze would get heavy with the sugar and start to drip farther down the side of the cake, so there would be white stripes where the sugar had slid down.  Being heavy handed on the sugar solved both of these problems!).  Drizzle with some extra glaze.
  15. Serve with coffee and enjoy your Fat Tuesday!


Valentine’s Peanut Butter Kisses

Wednesday, February 8, 2012

I came across this cute little twist on these classic peanut butter cookies on Pinterest and just could. not. resist.  I’ve never made these cookies, nor was it a recipe my mom really made at home as I was growing up; I only remember them from way back in elementary school as something that would show up on birthdays or bake sales, but when I saw these little hearts, I knew exactly what I had to make for Valentine’s Day this year.

They’re a super simple cookie to throw together and I can even confirm that I made a very minimal mess in the kitchen, a rarity for me.  If it’s not Valentine’s Day and you can’t find chocolate hearts, you can of course fall back on the traditional Hershey’s Kisses instead.

I know leaving cookies out for Santa is tradition…but maybe we should try leaving these out for Cupid for a little extra love this year?

Valentine’s Peanut Butter Kisses
Makes 4-5 dozen cookies
Adapted from chinchymork

  • 2 2/3 cups flour
  • 2 teaspoons baking soda
  • 1 teaspoon salt
  • 2/3 cup creamy peanut butter
  • 1 cup butter, room temperature
  • 1 cup sugar
  • 1 cup brown sugar, firmly packed
  • 2 eggs
  • 2 teaspoons vanilla extract
  • 5 dozen chocolate heart candies, unwrapped
  • additional sugar for rolling
  1. Preheat the oven to 375 degrees and make sure that butter is pulled out of the fridge to soften.
  2. In a large bowl, mix the flour, baking soda and salt.
  3. Add the butter and peanut butter to the flour mixture and, with an electric mixer, beat the mixture until it is a smooth, cohesive dough-start off slow so that the flour doesn’t fly everywhere, then gradually kick up the speed to medium.  If you’ve made icing with butter and powdered sugar, you know that it turns crumbly first and then very smooth very quickly; this dough doesn’t go as quickly and you definitely need to beat it for a good few minutes for it to turn smooth-I was actually getting worried it wouldn’t turn smooth, but I promise it does.
  4. Add the white and brown sugars and beat until thoroughly combined, about 1 minute.
  5. Add the eggs and vanilla extract, beating for a few minutes, again, until thoroughly combined.
  6. Put the extra sugar (about 1/2 cup) into a pie plate or other container.  Taking about a tablespoon of dough, roll the dough into approximately ping pong ball sized balls.  Roll the dough in the sugar so that it’s fully coated before placing it on an ungreased cookie sheet, about 2″ apart from each other.
  7. Bake the cookies for 8 minutes, then pull them out of oven and place a chocolate candy in the middle of each, pressing down so that the cookies flatten out a little bit, then return them to the oven for an additional 2 minutes.
  8. Take the cookies out and let them cool on the cookie sheet for a few minutes before carefully moving them to a cooling rack.  The chocolates will be softened on the outside, so be careful not to touch them.
  9. Let cool entirely and enjoy!

Glazed Lemon Cranberry Loaf Cake

Saturday, December 24, 2011

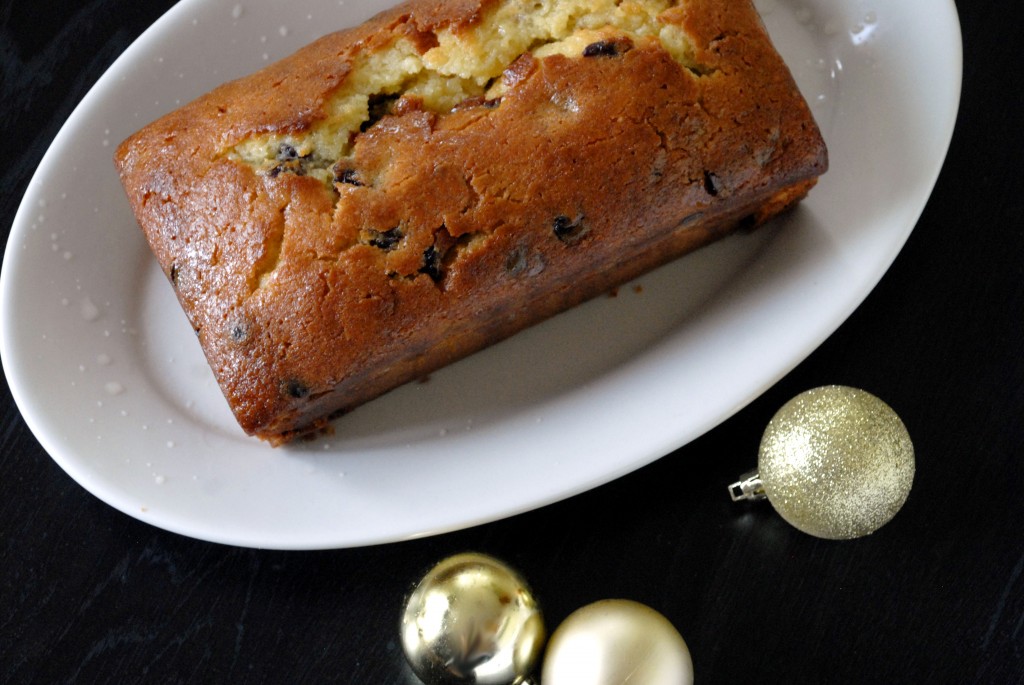
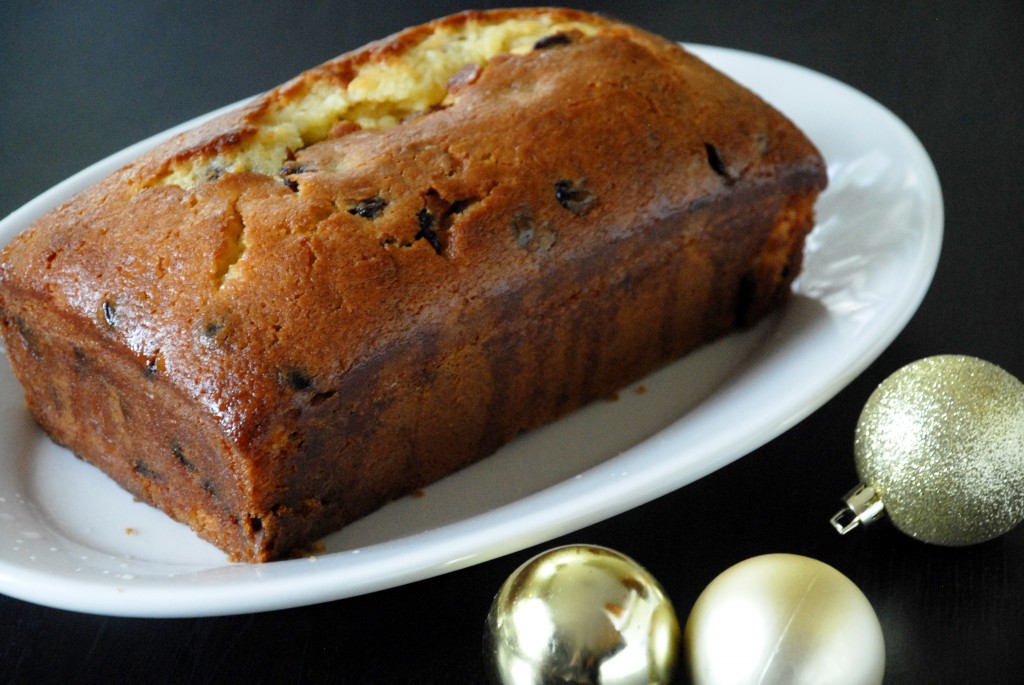
I’m jumping the gun on this week’s Project Pastry Queen Challenge, but I just had to share this before Christmas!  I made it as a gift for my boyfriend’s family and his dad kept sneaking pieces before dinner, despite the fact we were supposed to be saving it for dessert.  They loved it!  The cake has a great lemon flavor and the sweet-tart cranberries mean that this dessert is perfect for family members to grab slices all through out the day, or you can save it for dessert with some whipped cream or ice cream.

The recipe calls for fresh cranberries; I expect these soften and burst just like blueberries do in blueberry muffins, but all I had were dried cranberries that I needed to use up and I think they’re a great substitute.  The texture is, of course, a little different, but I think either are great so use whichever you want!  The glaze isn’t the thick white glaze I expected, but instead a light sugar syrup brushed over the top, which adds just the perfect amount of sweetness.  You can barely see the dark outline of the glaze in the picture below.

Thanks, Shawnda, for a great recipe choice for the holiday season and be sure to check out PPQ for the other bloggers takes on the cake.  I’ll be taking a little break now (this will count as Monday’s post) but I’ll be back on Wednesday!  Happy Hannukah, Merry Christmas, and Happy Holidays to whatever you choose to celebrate!

Glazed Lemon Cranberry Loaf Cake

Recipe from The Pastry Queen by Rebecca Rather

  • 1 cup fresh or dried cranberries
  • 1 2/3 cups all purpose flour
  • 1/2 cup (1 stick) unsalted butter, at room temperature
  • 1 cup sugar
  • 2 large eggs
  • 1 1/2 tsp baking powder
  • 1/4 tsp salt
  • 1/2 cup milk
  • 1 tablespoon grated lemon zest

Lemon Glaze:

  • 1/4 cup sugar
  • 1/4 cup freshly squeezed lemon juice (1 lemon usually produces about 1/4 of a cup for me)
  1. Preheat the oven to 350. Grease a 9 x 5 inch loaf pan with butter, sprinkle lightly with flour and tap out excess (or spray with cooking spray.)
  2. Cream the butter and sugar in a large bowl on medium-high speed for 1 minutes, until fluffy.
  3. Add the eggs and beat on medium-high speed for 1 minute. Add the baking powder, salt, and half of flour; mix on low speed just until combined.
  4. Add half the milk and mix on low speed just until combined. Add the remaining flour, mix just until combined, then the remaining milk.
  5. Fold in the lemon zest and the cranberries.
  6. Pour the batter into the pan and bake about 1 hour (check after 45 minutes) or until a tester stuck into the middle of the loaf comes out clean. Cool the loaf for about 15 minutes (and make the glaze while it’s cooling), then remove it from the pan and set on a wire cooling rack.
  7. Once the cake is cooling, make the lemon glaze: Combine the sugar and lemon juice in a small saucepan and set over medium-high heat, bring the mixture to a boil and cook about 30 seconds. Remove the pan from the heat.
  8. Gently pierce the top of the loaf cake many times all over with a toothpick (I used my wire cake tester). Use a pastry brush to apply the warm glaze evenly over the top of the loaf.  It feels like a whole lot of glaze, but really, just keep sopping it on until you run out-the glaze will soak into the cake and give it just the right amount of sweetness.
  9. Serve immediately or let the glaze set before covering it with tin foil for the next day.  Enjoy with plain or ice cream!  (or like me, I put whipped cream on everything, actually preferring it to ice cream)