Homemade Chicken Stock

Monday, April 8, 2013

Homemade Chicken Stock - from agiltnutmeg.com

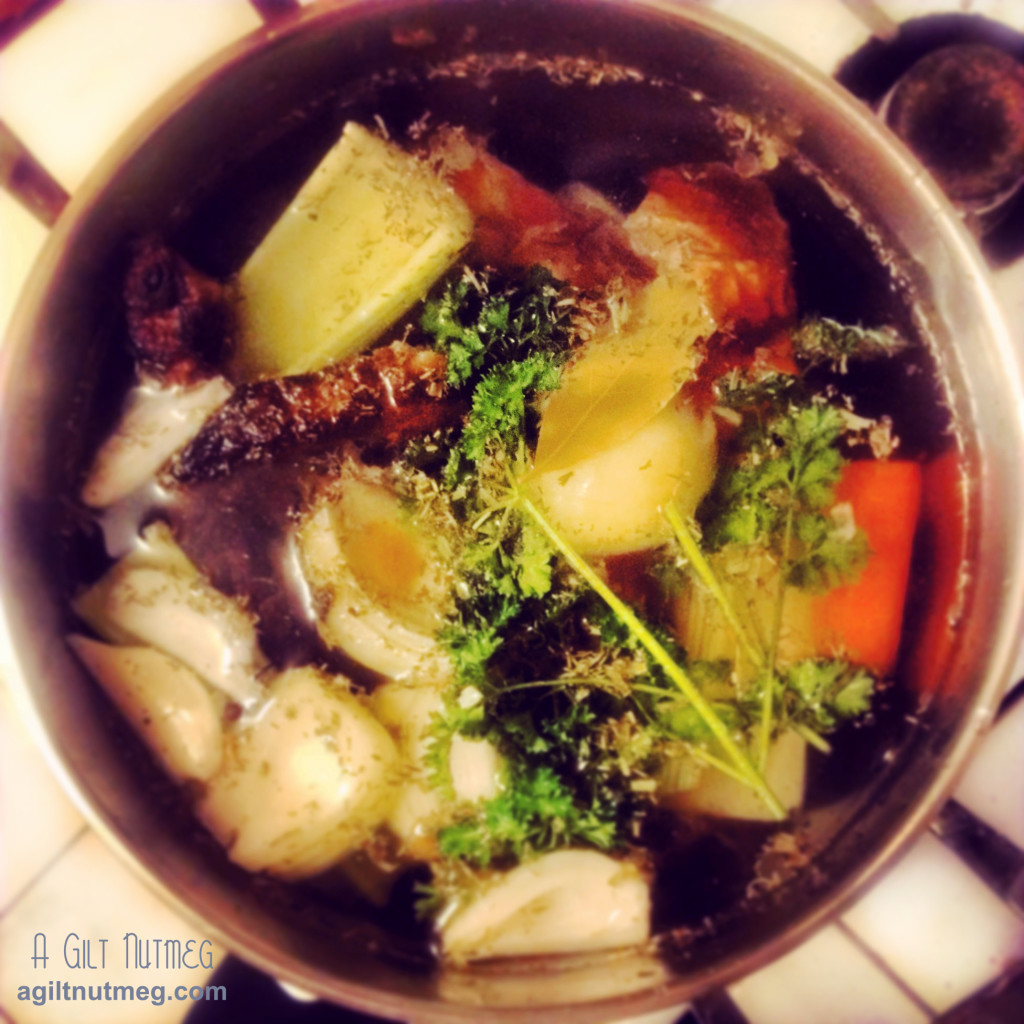
Nothing makes me feel more “Suzy Homemaker” than making homemade chicken stock.  You get more stock than you can use in a given time (freezer!), it tastes so much better than what comes out of a box and, incredibly, there’s almost nothing to clean up afterwards.  Throw the ingredients in a pot, turn on a movie for a few hours while it simmers, and voila: one step closer to being healthier and more homemade.

Homemade Chicken Stock
Loosely adapted from Martha Stewart

  • 1 roasted chicken carcass, most of the meat removed (*Note: this chicken was leftover from Easter; I brined it overnight in buttermilk and Williams-Sonoma Apples & Spice Turkey Brine)
  • 2 medium carrots, peeled and cut into 6 pieces
  • 1 large celery stalk, cut into 3 pieces
  • 1 medium white onion, peeled cut into 4 pieces
  • 3 large sprigs of parsley
  • 1 teaspoon salt
  • 1/2 teaspoon whole peppercorns
  • 2 dried bay leaves
  • 1 teaspoon (at least) of other dried herbs: I used about 1/2 tsp of dried dill, 1/2 tsp dried tarragon and 1/2 tsp dried herbs de Provence (I used the herbs de Provence because I was out of dried thyme, which you can use instead)
  1. Combine all ingredients in a 6 qt stock pot, cover with water about an inch from the edge of the pot and bring to a fast simmer, but not a boil.
  2. Reduce heat to low, so that the simmer is very slow and leave uncovered for 2 hours.
  3. If foam appears, skim it off the surface.
  4. Once two hours is up, remove largest pieces of chicken and strain stock through a fine mesh sieve.
  5. Store in refrigerator until needed, or freeze if you won’t be using it in the next few days.
  6. Enjoy some tasty soups or risottos!  Best of all, you don’t always have to follow a soup recipe; throwing things together into a pot at random often delivers just as tasty a meal.  With the first half of this soup stock, I heated 5 cups of stock in a large pot, threw in 2 packs of ramen noodles (discarded the flavor packets), a few handfuls of sliced scallions, a few handfuls of frozen edamame, a Tablespoon or so of soy sauce and, after turning the heat off before serving, added some pre-cooked shrimp with the tails removed so they would heat up in the broth but not overcook.  Voila!  Asian-inspired almost-sort-of-but-not-really ramen soup that was super tasty.  Just decide on the flavor profile you’re craving and go wild!

Southern Caramel Cake

Thursday, April 4, 2013

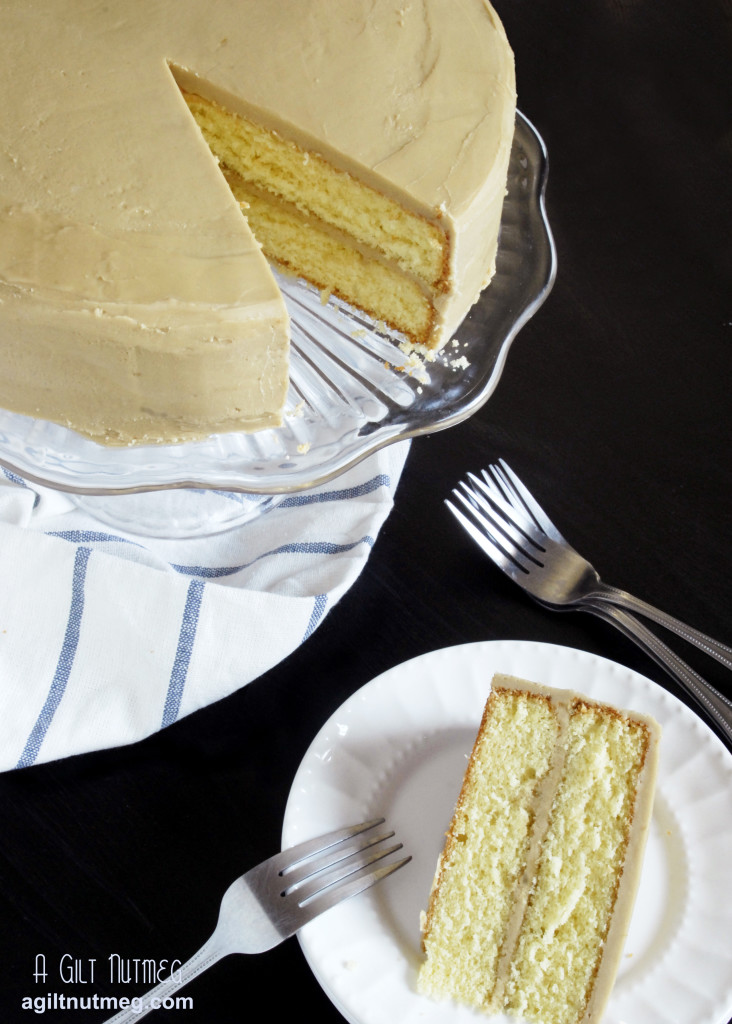
Southern Caramel Cake from agiltnutmeg.com

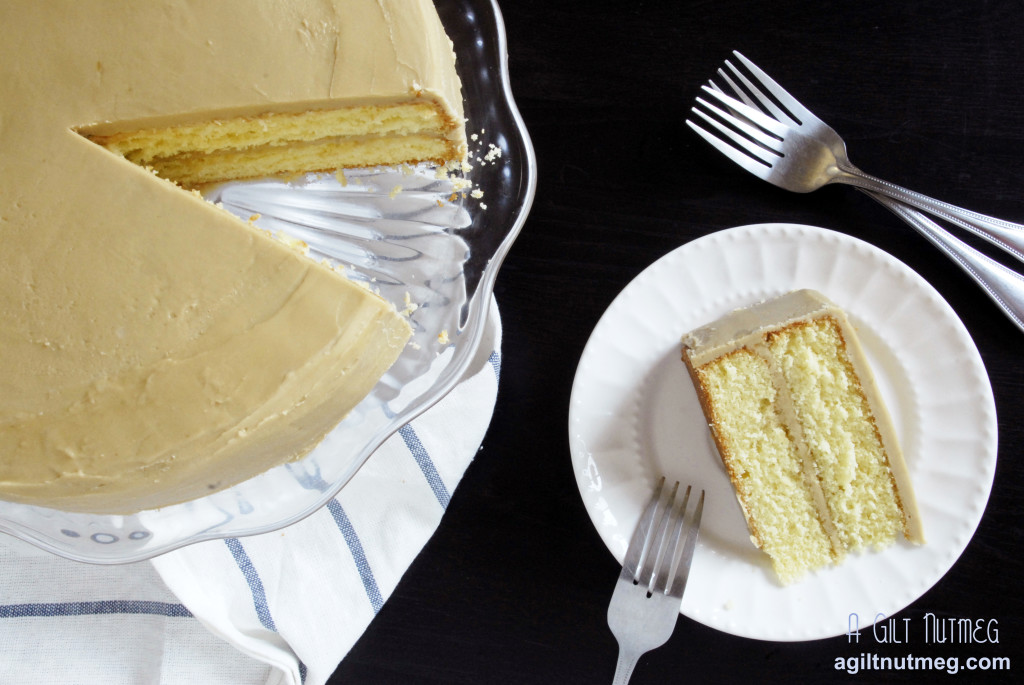
My Aunt Fannie Mae is famous in my family for her Red Velvet cake.  As such, Red Velvet was the traditional Southern layer cake that I remember growing up with (well, that and the Coconut Cake we always had at Christmas, but that wasn’t homemade).  It wasn’t until recently that I started learning about other Southern layer cakes long steeped in tradition- Hummingbird Cake, German Chocolate Cake, and now Caramel Cake.  Out of those three I just listed, Caramel Cake “takes the cake” by far in my opinion (pun intended).  I mean, really:  it’s got fantastically fluffy yellow cake layered with frosting that tastes exactly like a Werther’s Original candy.  It was irresistible!  Granted, I don’t have an overly sweet-tooth, so only one slice was plenty for me, but that one slice was outstanding.  The one tricky aspect was the frosting-as it cools, a crystallized sugar crust forms on the frosting (delish!) instead of whipped soft creaminess of buttercream frosting, so you have to frost quickly and not aim for too smooth a finish.

Southern Caramel Cake from agiltnutmeg.com

Southern Caramel Cake
from America’s Test Kitchen Season 12

  • 1/2 cup buttermilk, room temperature
  • 4 large eggs, room temperature
  • 2 tsp vanilla extract
  • 2 1/4 cups all-purpose flour
  • 1 1/2 cups granulated sugar
  • 1 1/2 tsp baking powder
  • 1/2 tsp baking soda
  • 3/4 tsp salt
  • 2 sticks (16 Tbs) unsalted butter, cut into pieces and softened
  • 1 1/2 sticks (12 Tbs) unsalted butter, cut into pieces and softened, divided into 8 Tbs and 4 Tbs
  • 2 cups packed brown sugar
  • 1/2 tsp salt
  • 1/2 cup heavy cream
  • 1 tsp vanilla extract
  • 2 1/2 cups confectioners’ sugar, sifted
  1. Heat the oven to 350 degrees and spray two 9″ round cake pans with baking spray.
  2. In a large measuring cup, whisk together the buttermilk, eggs and vanilla.
  3. In a large bowl, combine flour, granulated sugar, baking powder, baking soda and salt at low speed with an electric mixer.
  4. Add the butter, one piece at a time, until the chunks are no bigger than pea-sized.
  5. Add half of the buttermilk mixture to the butter-dry ingredients mixture and beat for one minute on medium speed until fluffy.  Slowly pour in the rest of the buttermilk and continue to beat on medium speed until just incorporated.
  6. Divide the batter evenly between the two pans and bake 20-25 minutes until golden brown.  While the cakes are baking, if you have just one bowl for your stand mixer and it is now dirty, take the time to wash it because you’ll need it for the frosting.
  7. Cool cakes in pans for 10 minutes before removing them from pans and letting them finish cooling on wire racks before frosting.  If your cakes rose a bit too much in the middle, let them cool and then level off the tops with a serrated knife before frosting.  I’ve also seen caramel cake with 4 very thin layers of cake instead of 2 thick layers.  To do this, equally cut the 2 individual cakes horizontally so that you end up with 4 thinner cake layers and frost a thin layer between each layer of cake.
  8. In a large saucepan, melt together the first 8 tablespoons of butter, brown sugar and salt.  When small bubbles appear around the edge of the pot after 5 or so minutes, whisk in the heavy cream and heat until the bubbles appear again a minute later. Remove from heat and whisk in vanilla extract.
  9. Pour the sugar mixture into a large mixing bowl and turn the electric mixer on to low.  Slowly add in the confectioners’ sugar until fully incorporated.
  10. Bump the speed up to medium and beat the frosting mixture for 5 minutes, until it is pale brown and no longer hot (but still warm).
  11. Drop the 4 Tbs of butter in, one piece at a time, and beat for another 2 minutes until butter is fully incorporated.
  12. To frost, place one cake on your cake plate, dollop about 1 cup of frosting on top of the cake and spread it evenly over the cake.  Add the second layer on top and frost the top and side of the cakes with the remaining frosting.  As I mentioned above, frost quickly!  Test Kitchen says you can microwave the frosting for 10 seconds or so to soften it back up, if necessary.
  13. Since it tastes like a rich Werther’s Original candy, be sure to have a glass of milk on hand when you cut a slice.  Enjoy!

The Best Oatmeal Raisin Cookies You’ll Ever Bake

Friday, March 15, 2013

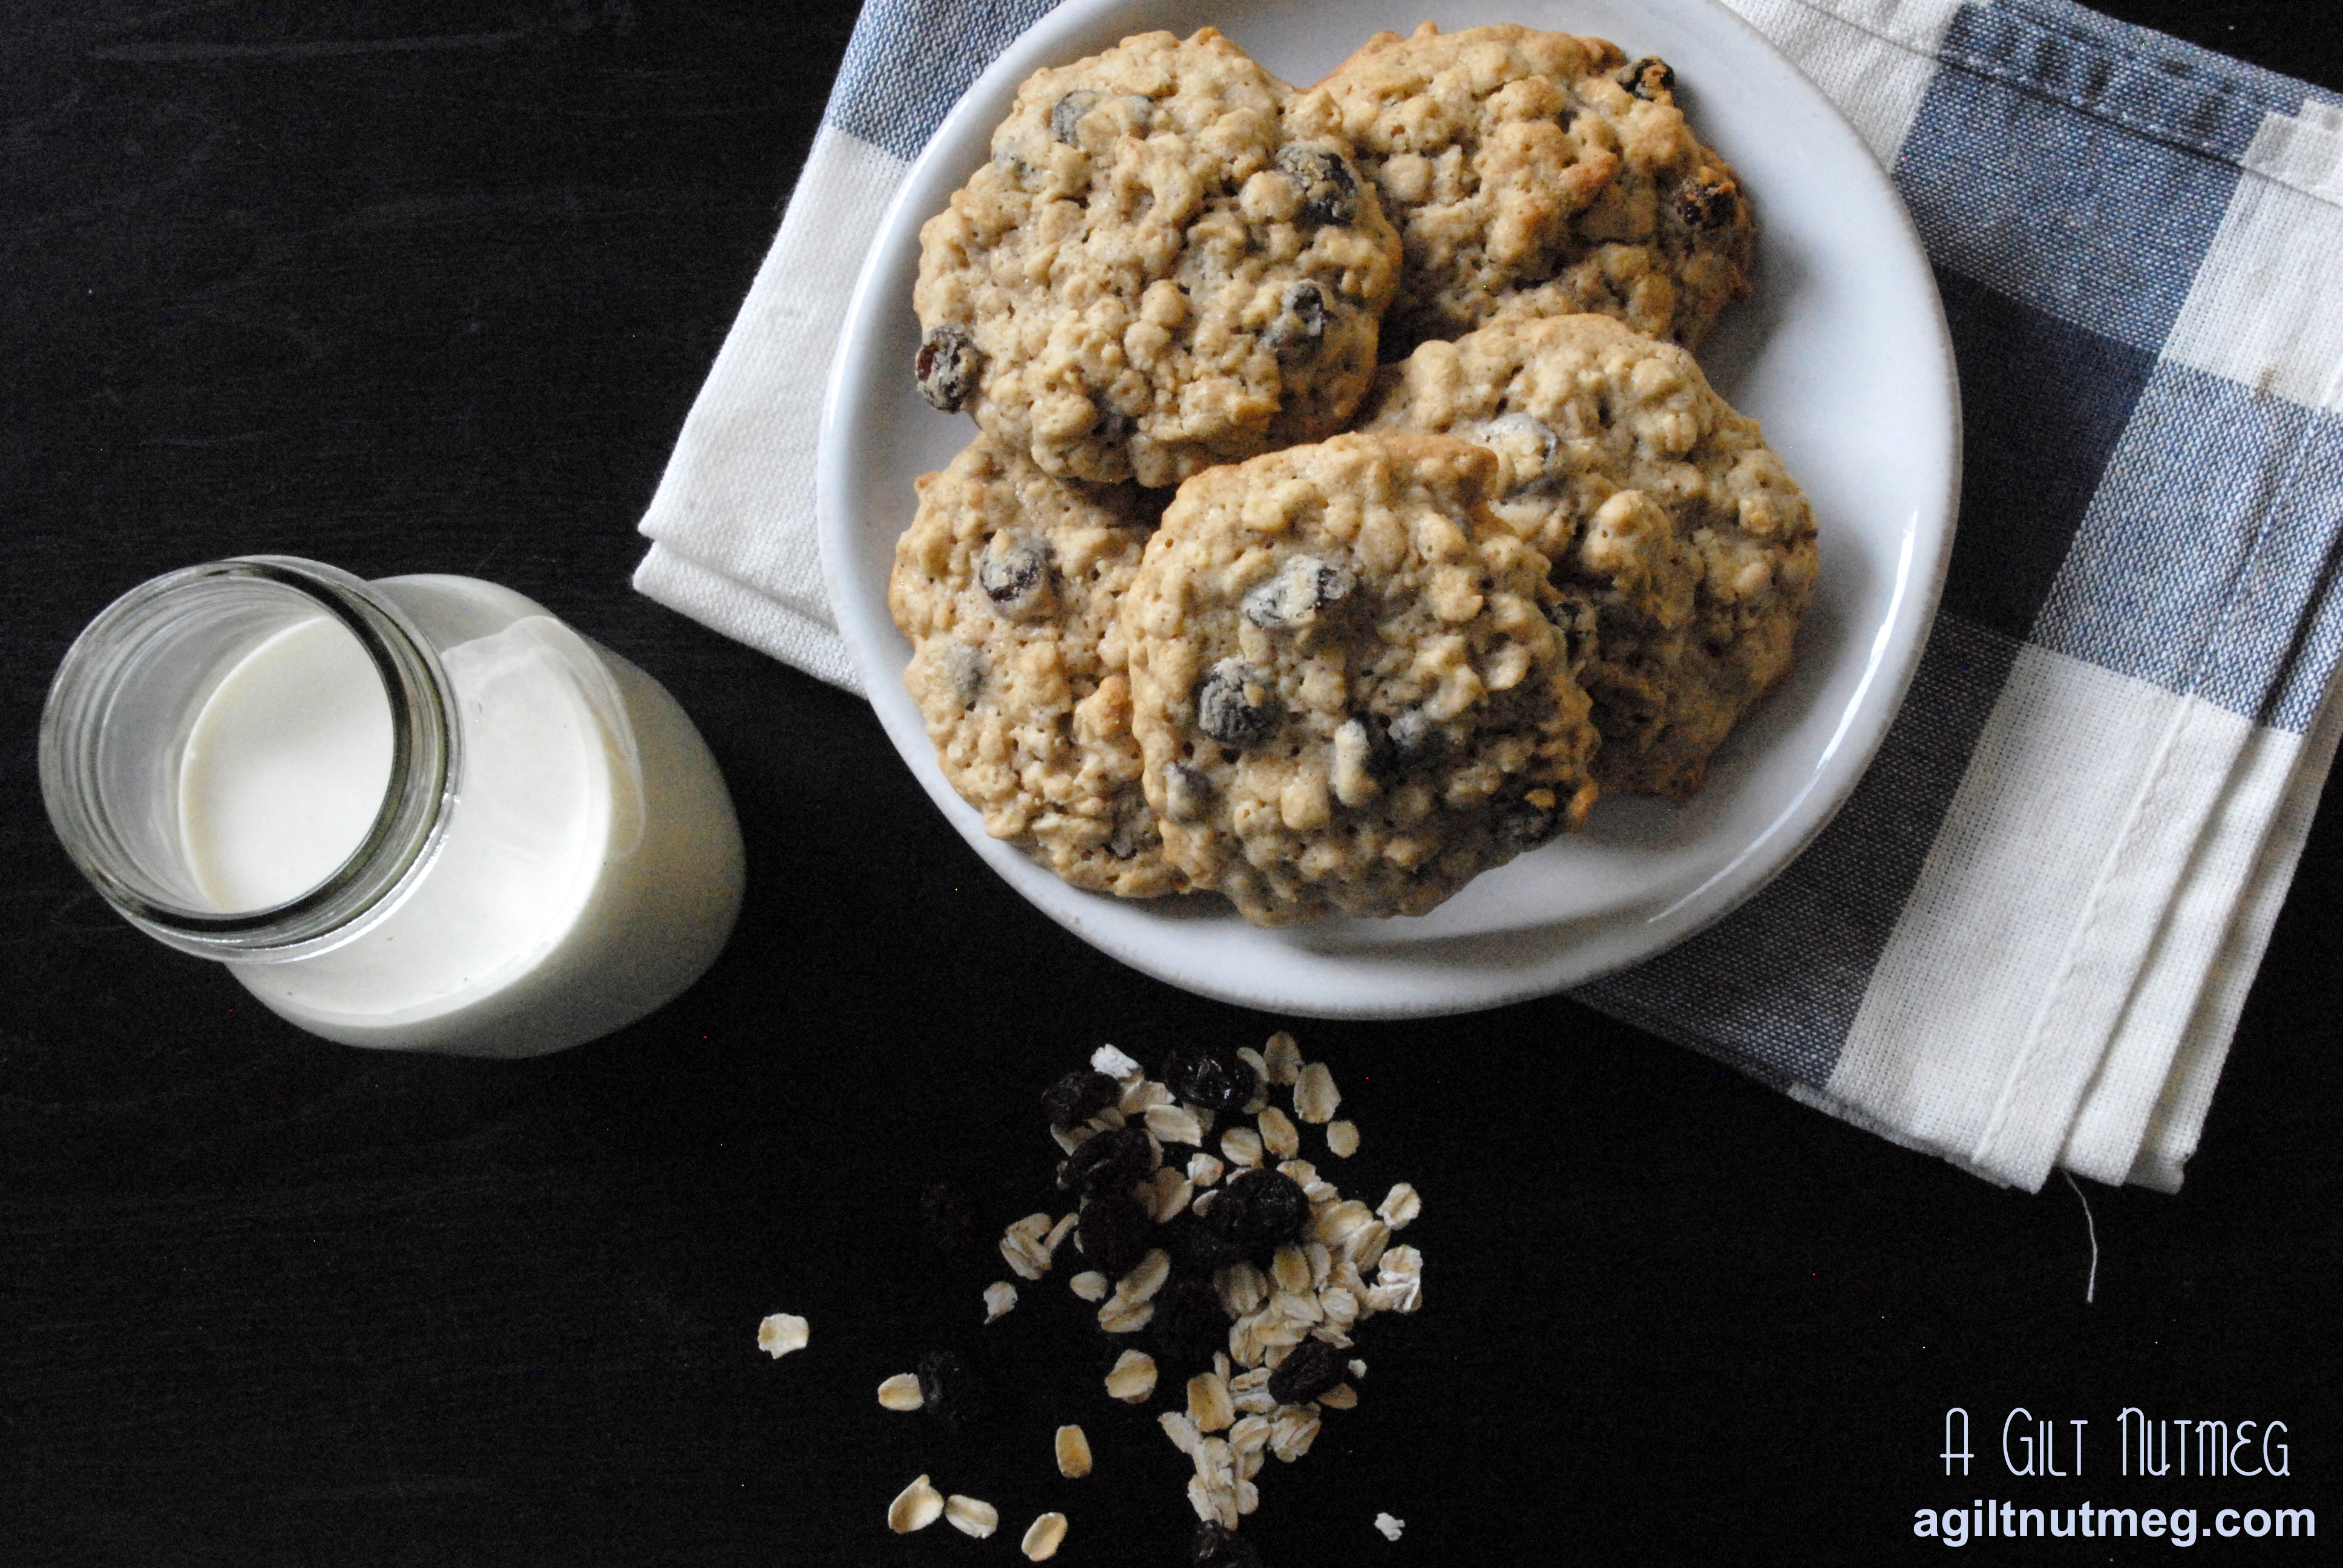
Best Oatmeal Raisin Cookies Ever - www.agiltnutmeg.com

I love Oatmeal Raisin cookies.  “Love” may even be an understatement.  While other more flashy cookies may temporarily steal my attention, I will always come back home to Oatmeal Raisin.  Soft yet chewy, full of oats, raisins and spices…you really just can’t beat a good one of these.  When it came time to start baking my own Oatmeal Raisin cookies, I consulted the two sources I trust most: Cooks Illustrated and the back of the Quaker Oats Oatmeal canister.  Surprisingly enough, Cooks tells you immediately that the recipe Quaker Oats provides is pretty near spot on, with only minor tweaks-high praise from CI!  My only hesitation was that CI proceeded to take out most of the spices that I love, so I went back to Quaker’s recipe for help and remedied that.  The resulting cookie is incredible:  big, fluffy, chewy and I love being able to pick out the little specks of spice on the top of the cookie- dark brown nutmeg, light brown cinnamon and black vanilla beans.  Interestingly, I found these taste best after they “rest” for a day or even two days after baking; I don’t know the theory behind this, but just trust me.  These are outrageously simple to make and my sister and I both agree that they qualify as breakfast food (oats…raisins…yes).  So with that, I share with you my favorite cookie recipe of all time…

Best Oatmeal Raisin Cookies Ever - www.agiltnutmeg.com

Oatmeal Raisin Cookies
Adapted from Cooks Illustrated and Quaker Oats
Makes approximately 20 large cookies

  • 2 sticks unsalted butter (1/2 pound), softened but still firm
  • 1 cup light brown sugar
  • 1 cup granulated sugar
  • 2 eggs
  • 1 teaspoon vanilla bean paste (or substitute extract)
  • 1 1/2 cups unbleached all-purpose flour
  • 1 cup raisins (or if you really love raisins, go up to 1 1/2 cups)
  • 1/2 teaspoon table salt
  • 1/2 teaspoon baking powder
  • 1/2 teaspoon fresh ground nutmeg
  • 1 teaspoon cinnamon
  • 3 cups rolled oats
  1. Heat oven to 350 degrees.
  2. Using an electric mixer, beat the butter until completely softened, 2-3 minutes.
  3. Add brown and white sugar and beat an additional 3 minutes, until fluffy.
  4. Add in vanilla and the eggs, one at a time, making sure they are fully incorporated after each one.
  5. In a separate medium bowl, whisk together the flour, salt, baking powder, nutmeg and cinnamon.
  6. Using a wooden spoon, stir the dry mixture into the butter-sugar mixture until fully combined.
  7. Add in the oats and raisins to the batter and stir with the wooden spoon until both are incorporated evenly into the dough.
  8. Line baking sheets with parchment paper and form about twenty 2″ balls on the baking sheets.
  9. Bake until the very edges of the cookies turn golden brown but no longer, about 20-22 minutes.  The cookies will look too light on top, but trust me.
  10. Let the cookies cool for 5 minutes on the baking sheet before transferring cookies to a cooling rack.

Pi Day Redux

Thursday, March 14, 2013

3.14 = pi = PIE = THE MOST DELICIOUS DAY OF THE YEAR!  In celebration of 2013′s Pi/Pie Day, here’s a look back at my favorite pies over the course of A Gilt Nutmeg…


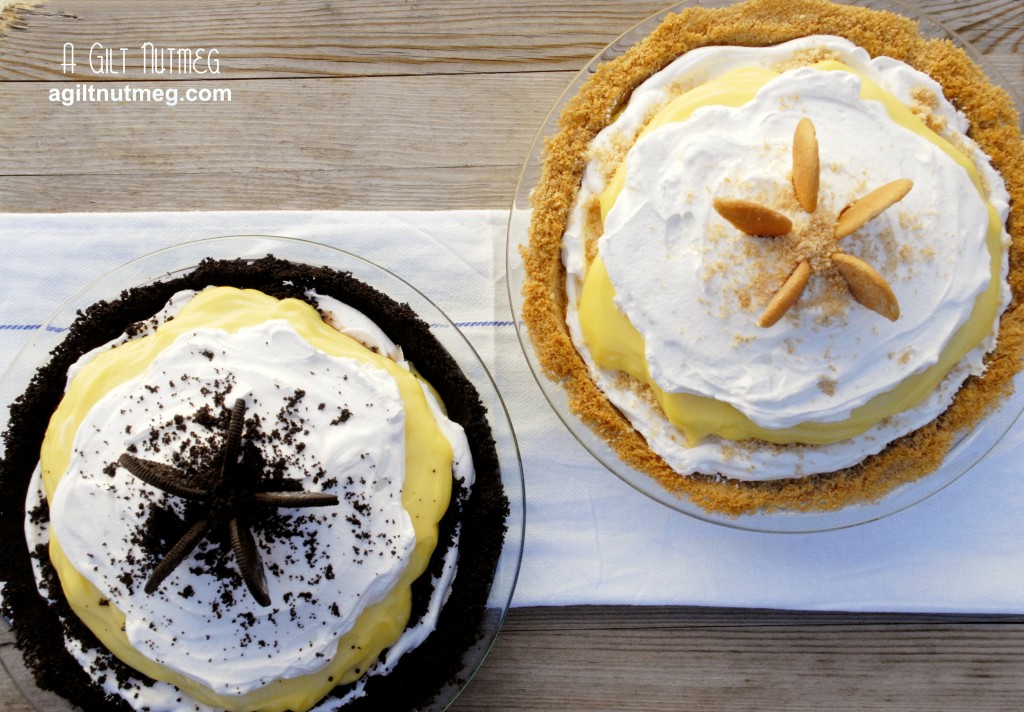
Black and White Banana Cream Pies

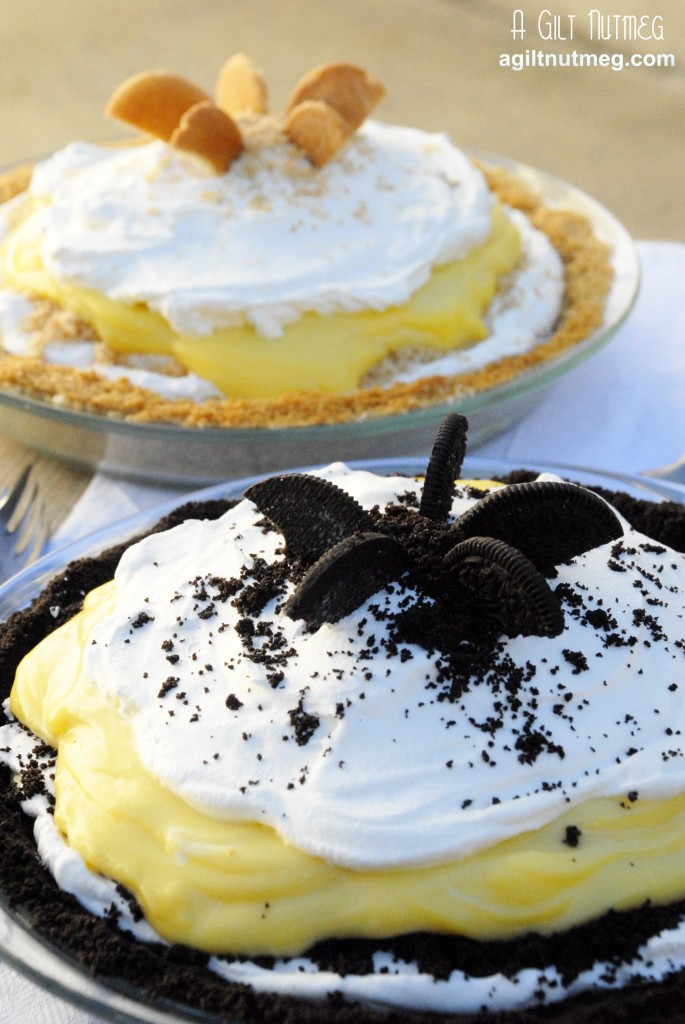
Black and White Banana Cream Pies - agiltnutmeg.com

Black and White Banana Cream Pies - agiltnutmeg.com

One of my favorites of all time, I themed these Banana Cream Pies for a friend’s party.  You really can’t go wrong with traditional “Nana Pudding” Nilla Wafers OR Oreos for a chocolate-covered banana twist.  In fact, why on earth would you choose?  Just make both!


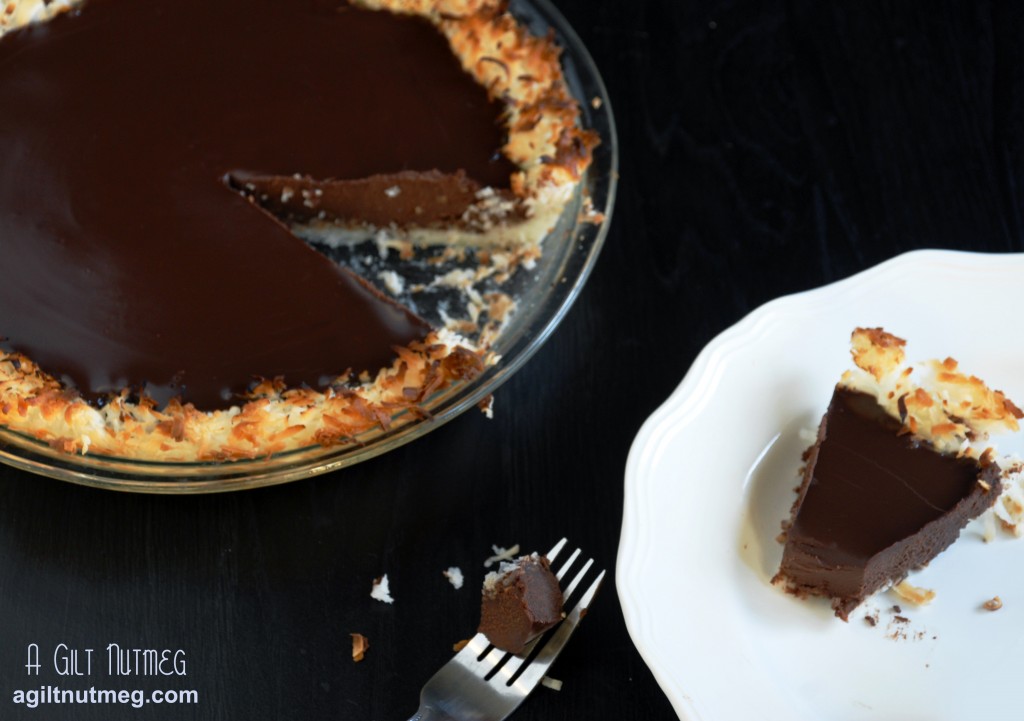
Chocolate Coconut Pie for Passover

Coconut Chocolate Pie from agiltnutmeg.com

This Chocolate Coconut Pie was created with just 4 ingredients and is perfect for those people celebrating Passover but who can’t stand one more coconut macaroon.  With Passover in just a few weeks, this is definitely a recipe to tuck away for later.


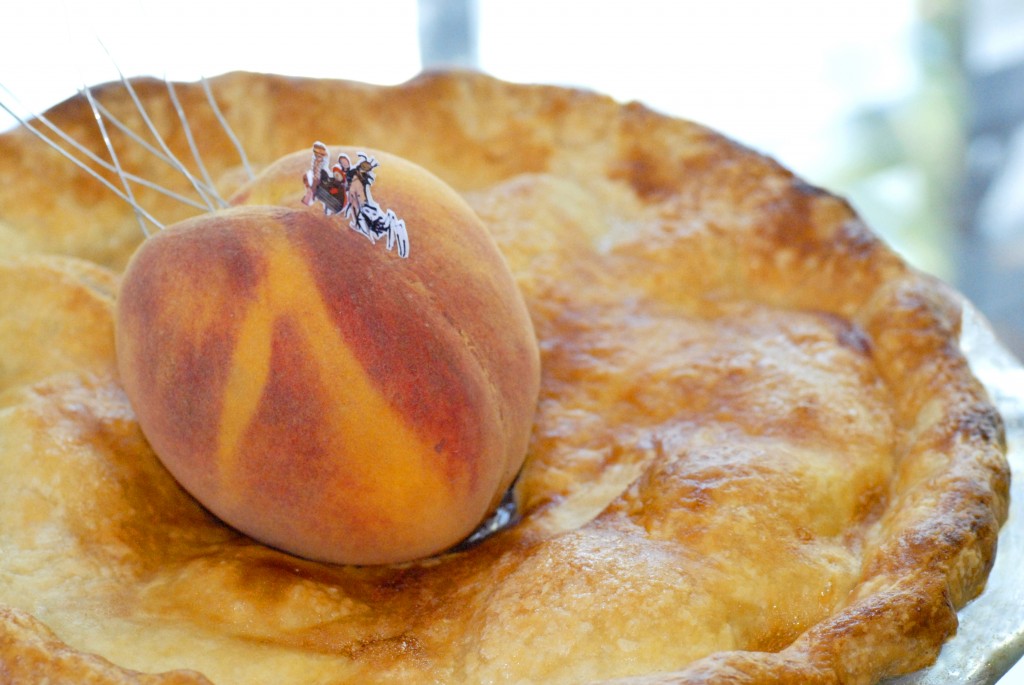
Bourbon Honey Peach Pie

Bourbon Honey Peach Pie - agiltnutmeg.com

For those who haven’t been reading the blog as long, you may have missed my very proudest moment, when I won a blue ribbon at the Annual KCRW Good Eats Pie Contest for my Bourbon Honey Peach Pie.  It was entered in the Tim Burton-Inspired Category, hence the “James and the Giant Peach” decorations on top.  You don’t have to decorate yours with bugs, but this pie is truly one of the most outstanding recipes I’ve ever worked on.


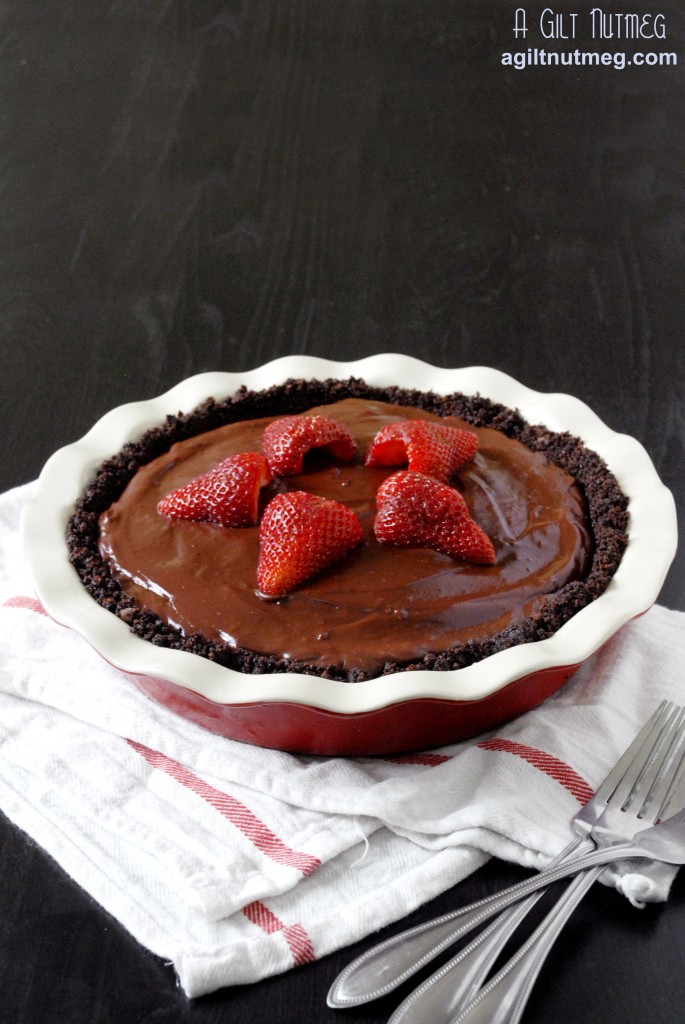
Chocolate & Strawberry Pie

Coconut Strawberry Pie from agiltnutmeg.com

You can’t go wrong with a chocolate-strawberry combination, and this Chocolate & Strawberry Pie is ridiculously easy to throw together.  There’s a touch of alcohol and spice in the chocolate pudding-like filling, which elevates it to an entirely new level of decadence.


Boston Cream Pie

Boston Cream Pie

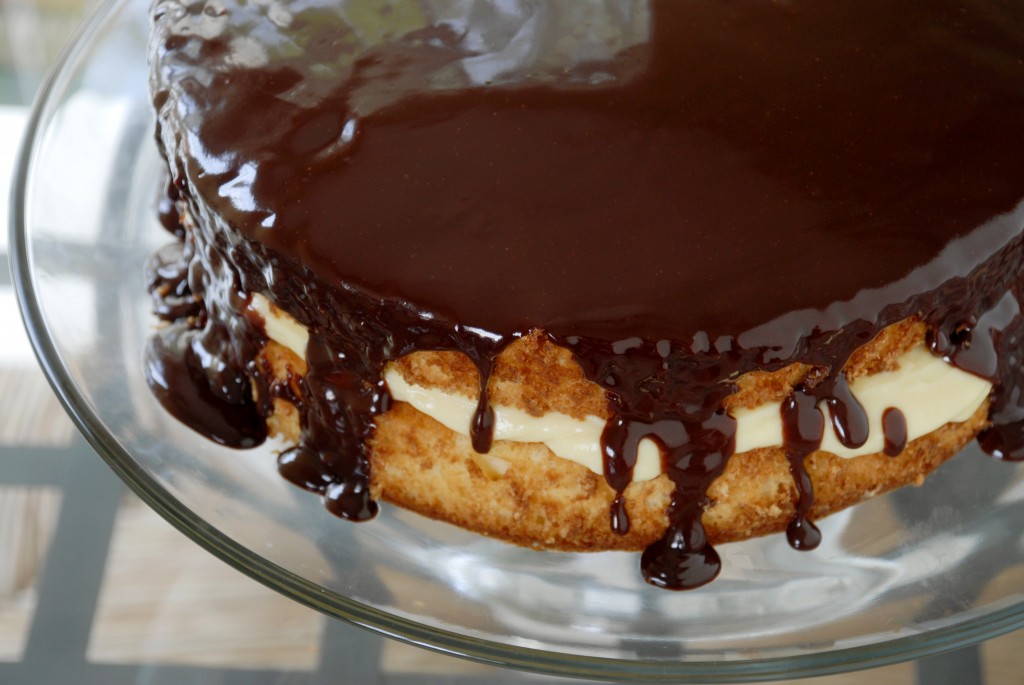
Okay, okay, you got me.  Boston Cream Pie is not a true pie, but darn if it doesn’t say “pie” in the name.  Besides, this is the recipe that taught me all about pastry cream and I happily jumped on that train and have never looked back.  I could eat pastry cream forever.  Seriously.

Steak and Guinness Pie

Tuesday, March 12, 2013

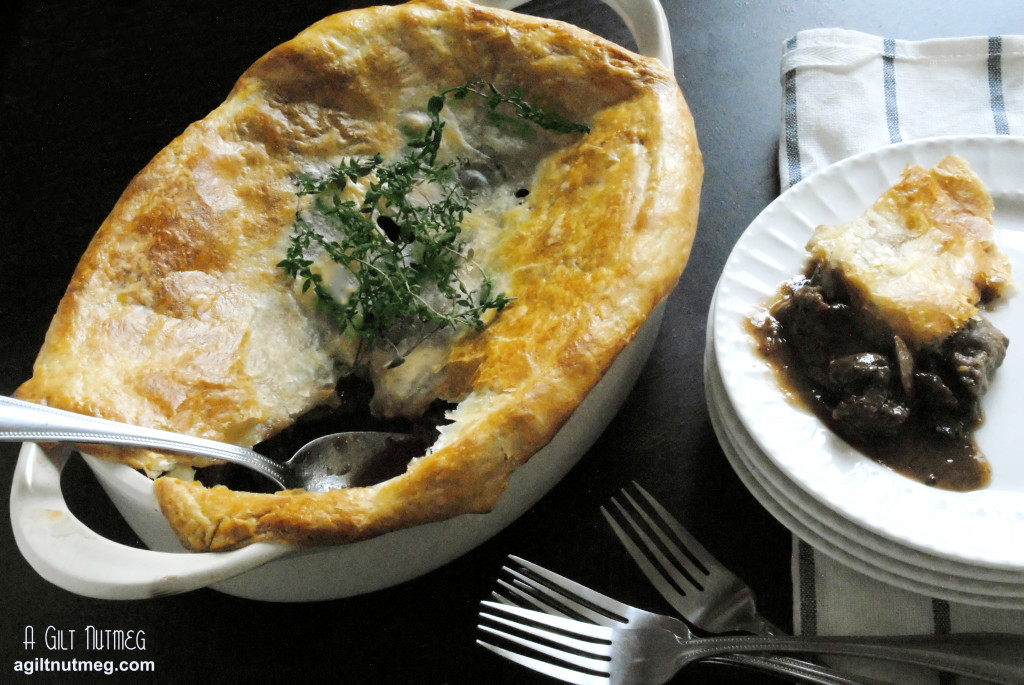
Steak and Guinness Pie - from agiltnutmeg.com

One of my favorite parts about living abroad in the UK was the food.  Don’t worry, I understand that you may have done a double take at the statement I just made.  It’s true, though, I loved the simple, hearty, food-every meal you ate, you could so easily see it being made a century ago to feed a family in front of a large cottage fireplace.

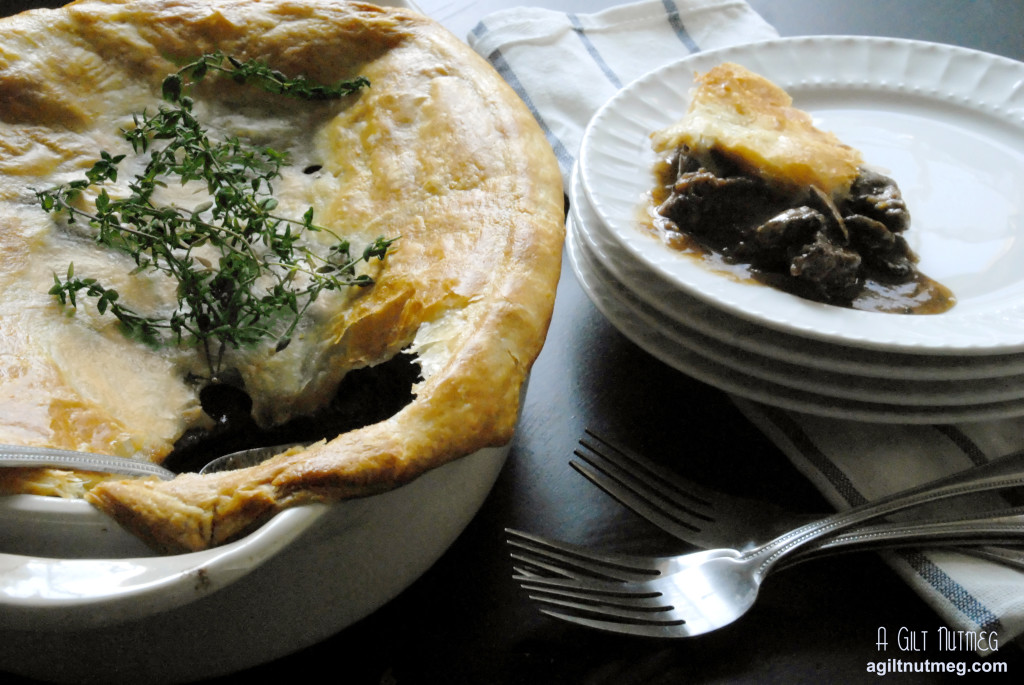
Given that LA weather has been rather up and down in temperature lately, and in honor of the upcoming St. Patrick’s holiday, Steak and Guinness Pie seemed like a no-brainer.  I don’t think I’ve come across a more satisfyingly hearty dish in my kitchen.  Each bite is so full of flavor that you don’t need to eat half the pie to feel like you got a full meal out of it.  While I do love the entirely savory pie (the steak, mushrooms and onions), I think the next time I make this I’ll add in some small potatoes and sweet roasted carrots to increase the veggie count and to stretch the pie even further than the 4-5 servings we already got out of it.  I still carry a card I purchased in Ireland with a saying on it very fitting for a food blog: “May you live as long as you want and never want as long as you live.”  Slainte!

 Steak and Guinness Pie - from agiltnutmeg.com

Steak and Guinness Pie
Adapted from The Complete Irish Pub Cookbook via Never Enough Thyme
Serves 4-5

  • 2 pounds lean chuck steak
  • 3 Tbs all-purpose flour
  • 1 tsp salt
  • 1/2 tsp black pepper
  • 5 Tbs oil, divided into 3 Tbs and 2 Tbs
  • 1 1/4 cups beef broth, divided into 1/4 cup and 1 cup
  • 1 medium onion, chopped
  • 8 oz Cremini mushrooms, sliced
  • 1 Tbs tomato paste (Trader Joe’s has this great tomato paste that comes in a tube like toothpaste.  No more wasting whole cans of it for just 1 or 2 tablespoons!)
  • 5 sprigs fresh thyme
  • 1 cup Guinness beer
  • 1 sheet frozen puff pastry, thawed
  • 1 egg yolk, lightly beaten with 1 Tbs of water
  1. Removing as much fat as possible (or as much as you can before you get frustrated and give up), and slice steak into 1″ chunks.
  2. Whisk together the flour, salt and pepper in a large bowl, add the steak chunks, and toss until steak pieces are fully coated by the flour mixture.
  3. In a cast iron or heavy bottomed skillet, heat the first 3 tablespoons of oil until shimmering.  Make sure the beef sizzles when it touches the oil before adding it to the pan and work in 2 or 3 batches so that you don’t overcrowd the pan; try not to push the beef around until fully browned on the bottom so that you get that deep color on the meat and the fond in the bottom of the skillet.  Once the beef is cooked mostly through and browned all over, transfer the beef to a dutch oven, pour the oil out of the skillet and return it to the heat.  Pour in 1/4 of beef broth to the hot pan, scraping up the browned bits from the pan; pour the stock and browned bits into the dutch oven with the beef.
  4. Add the last of the oil to the skillet and saute the onion and mushrooms over medium heat about 15 minutes until browned; transfer to the dutch oven.
  5. In the measuring cup the beef broth is waiting in, whisk in the tomato paste and add mixture to the dutch oven along with the thyme and stout.  Bring the contents of the dutch oven to a boil, reduce the heat to low and let it simmer, partially covered with the lid, for 90 minutes, then let mixture cool.
  6. Heat your oven to 425 degrees and make sure your puff pastry is completely thawed (it will break apart when you unfold it, otherwise).
  7. Transfer the cooled contents of the dutch oven to the dish you plan on baking your pie in, then drape the puff pastry over the top of the dish.  Trim the edges of the dough around the edge of the dish, leaving at least 1/4″ of hangover.  Wet your fingers and run them around the edge of the dish, under the dough, and press the dough against the wet edge of the dish.
  8. Use a knife to slice one or two slots into the crust for steam, then brush the top with the egg mixture.
  9. Bake for 25 minutes, until the crust is golden brown.
  10. Serve hot and enjoy!

Wild Rice & Mushroom Soup

Thursday, February 7, 2013

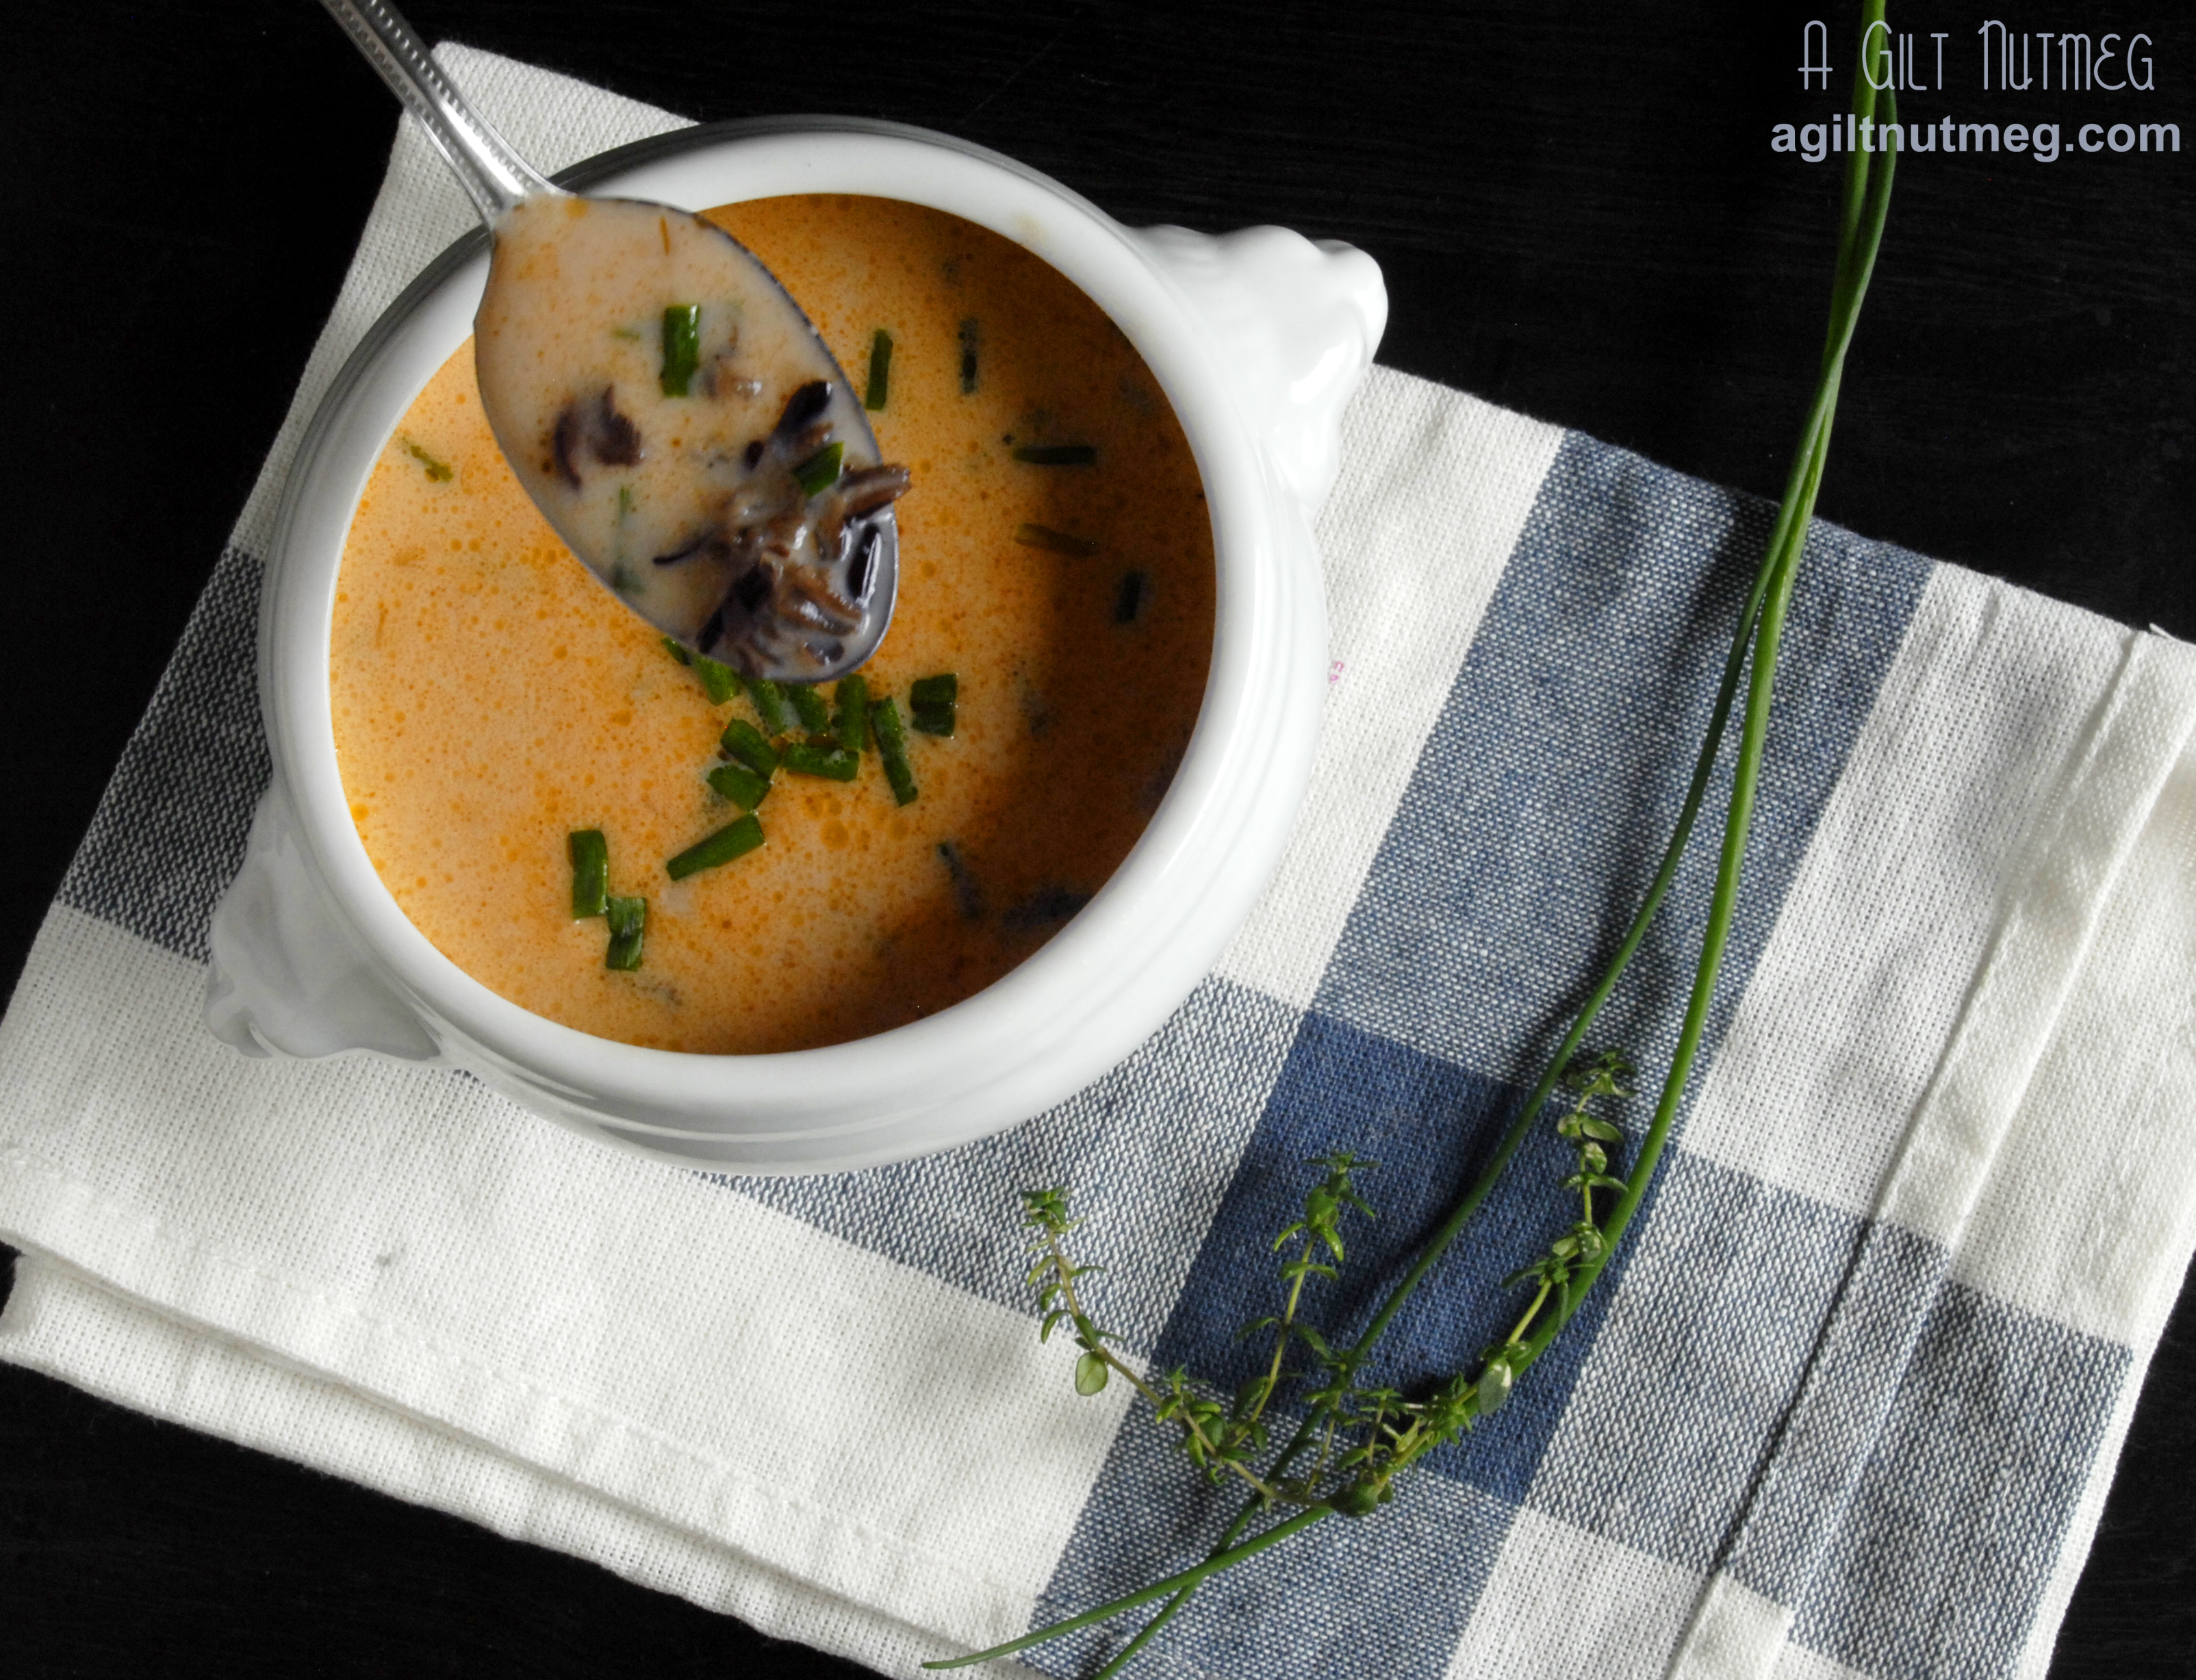
Wild Rice & Mushroom Soup - A Gilt Nutmeg


This holiday, spent at home in Georgia, my little sister insisted that she wanted to make a recipe for mushroom soup she saw in the latest Cooks Illustrated.  I will be the first to admit that I wasn’t particularly excited about it, as mushrooms are not my favorite at all.  I’m really working hard on liking mushrooms, but the thought of  thick meaty slices of mushroom scared me: in soup there was nothing to hide them under!  Cut to Christmas dinner and I remember specifically saying “give me only a little, so I’ll have room for dinner” and then cut to me finishing that first bowl and scrambling to the pot to fill up my bowl beyond that tiny little first taste I had.  Somewhere during that taste, I had somehow forgotten that I don’t like mushrooms.

Folks, this is not your average mushroom soup; in fact, it’s not what you would expect from mushroom soup at all.  Instead of a heavy, thick, cream based soup that most of us are used to, this is a brothy soup that some how still tastes and feels creamy, despite having so little actual cream in it.  The mushrooms and wild rice are a wonderful texture contrast to each other (chewy vs soft) and also to the broth; the lemon zest and chives add an unexpected twist of bright flavor.  It’s salty and savory yet light and refreshing all at the same time.  Even if you’re a little hesitant to give mushrooms such a spotlight, you should give this soup a try for a delicious surprise -and if you do love mushrooms, all the better!

Note: I couldn’t find dried shiitake mushrooms, except for in large packages that cost $12 or more.  Instead I just bought 2 fresh shiitake mushrooms for a total of 60 cents and set them out on a saucer on my countertop to dry over the course of a week or so.  Low tech, but it worked, so I can’t complain.  To turn the mushrooms to dust, CI suggests a spice grinder or a blender.  I have neither of those, so I used a flat nutmeg grater to great effect.  My boyfriend used the top of my pepper grinder to grind up the little bits that were too little to grate without scraping my fingers.

Wild Rice & Mushroom Soup
Barely Adapted from Cooks Illustrated, Jan 2013
Serves 6-8

  • 1/4 ounce dried shiitake mushrooms, rinsed and grated to powder (see note above)
  • 4 1/4 cups water
  • 1 sprig fresh thyme
  • 1 bay leaf
  • 1 garlic clove, peeled, plus 4 cloves, minced
  • Salt and pepper
  • 1/4 teaspoons baking soda
  • 1 cup wild rice
  • 4 tablespoons unsalted butter
  • 1 pound white mushrooms, sliced 1/4″ thick (you can buy two bags of Trader Joe’s presliced mushrooms)
  • 1 onion, chopped fine
  • 1 teaspoon tomato paste
  • 2/3 cup dry sherry or dry vermouth
  • 4 cups low-sodium chicken broth
  • 1 tablespoon soy sauce
  • 1/4 cup cornstarch
  • 1/4 cup cold water
  • 1/2 cup heavy cream
  • 1/4 cup minced fresh chives
  • 1/2 teaspoon finely grated lemon zest
  1. Set oven to 375 degrees and while it’s heating, bring the water, thyme, bay leaf, garlic clove, 3/4 tsp salt, pepper, and wild rice to a boil in an ovenproof dutch oven.
  2. Add the wild rice, bring back to a boil, then cover and move the pot to the oven to bake for 40 minutes (or until rice is tender and chewy).
  3. Over a large mixing bowl, pour the dutch oven’s contents into a fine mesh sieve.  Pull out the bay leaf, thyme stem and garlic clove and discard.  Pour the rice liquid into a 4 cup measuring cup and add water until you have 3 cups of liquid total.
  4. Put the now-empty dutch oven on the stove and melt the butter over medium high heat.  Add the mushrooms, onion, 4 minced garlic cloves, 3/4 tsp salt, 1 tsp pepper and tomato paste and let brown, stirring every once in a while.  I thought it was taking too long and realized my heat was too low- as soon as I turned the heat up, I got the deep brown bits (called fond) on the bottom of the pan I was looking for.
  5. Add the sherry (or vermouth, which is what I substituted) and scrape up the brown fond on the bottom of the pan and continue cooking until almost all of the liquid gone from the pan.
  6. Add ground shiitake mushrooms, rice liquid, chicken broth, and soy sauce and bring the pot to a boil.  Lower the heat so the pot comes back down to a simmer and let it simmer for 20 minutes.
  7. In a small bowl, whisk together the corn starch and 1/4 cup of water until dissolved, then stir into the soup pot and let cook for 2 or 3 more minutes.
  8. Turn off the heat and stir in the rice, cream, chives, and lemon zest.  Serve hot and enjoy!


Almond Bread Pudding & Salted Caramel Sauce

Monday, January 28, 2013

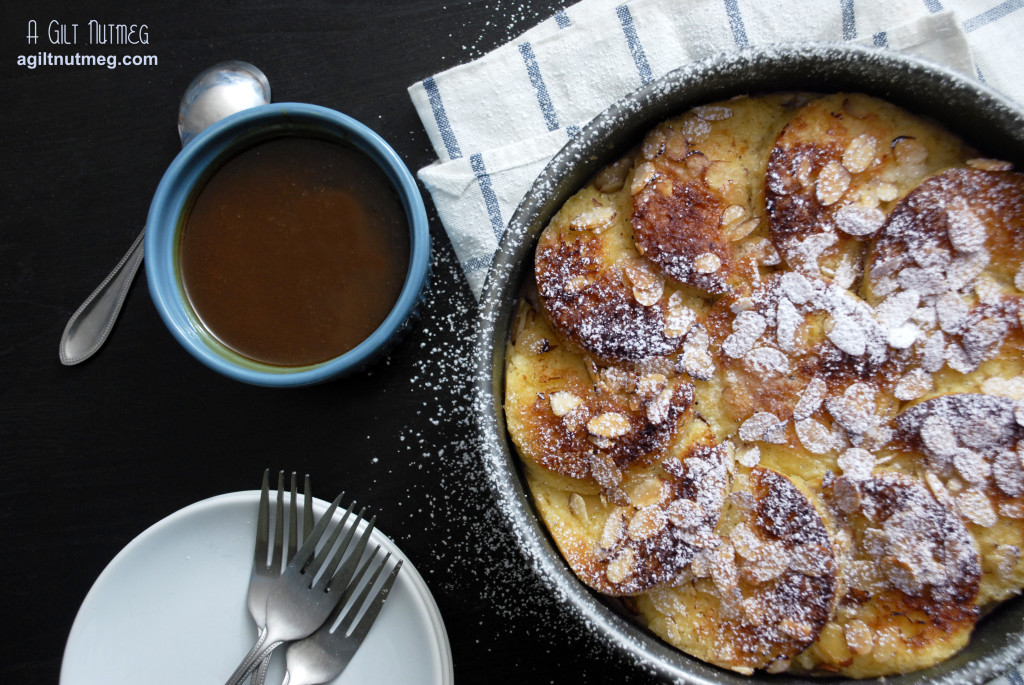
Almond Bread Pudding with Salted Caramel Sauce

My boyfriend loves bread pudding.  With this knowledge in hand, I was pretty sure fate was on my side when Bon Appetit’s January issue came out featuring an Almond Bread Pudding with Salted Caramel Sauce just days before it was time to celebrate said boyfriend’s birthday.  To be sure, this was not the standard cinnamon-y raisin flecked bread pudding.  This bread pudding had a focus on almonds and custard, and, even though I was worried it wouldn’t be as well received, the fact that it was practically inhaled by the four of us having birthday dinner and Apples-to-Apples battles was a pretty good indicator that this recipe was a winner.

I thought that the slightly tedious circular bread cut outs were just to look fancy, but, given that each round has a slather of almond butter on the underneath side, it worked surprisingly well at having that almond flavor perfectly marbled throughout the entire dish.  It worked so well, in fact, that I want to make another one soon, maybe with some cream cheese and cinnamon, knowing that there will be just the right amount of spice in every bite.

Note: you can make the caramel sauce well in advance, to save some time.  Always important when planning special desserts!


Almond Bread Pudding with Salted Caramel Sauce
Recipe slightly adapted from Bon Appetit, Jan ’13
Serves 8-10

Pudding

  • 1 1/4 cups half-and-half
  • 1 1/4 cups heavy cream
  • 1 vanilla bean
  • 4 egg yolks
  • 3 eggs
  • 3/4 cup sugar
  • 1/4 tsp kosher salt
  • 1 loaf (1 lb) brioche or challah
  • 1/2 cup almond butter (with no added sugar)
  • 3 tablespoons sliced almonds
  • 2 tablespoons raw or white sugar
  • powdered sugar
  • butter

Caramel Sauce

  • 1 cup sugar
  • 1/8 tsp cream of tartar
  • 1/4 cup unsalted butter
  • 1/2 cup heavy cream
  • 1 tsp kosher salt
  1. In a medium saucepan, whisk together the half-and-half, cream, and seeds scraped from vanilla bean.  Add the bean to the pot as well and bring to a simmer, then turn off the heat.
  2. In a medium bowl, whisk together egg yolks, eggs, sugar and salt.
  3. Pouring in just small amounts at a time, add the hot cream mixture into the egg mixture, whisking thoroughly each time before pouring in a little more.  Continue until fully combined.
  4. Cover the bowl with plastic wrap and let it rest for 30 minutes.  After 30 minutes, strain in a fine mesh sieve to remove any bits of cooked egg and the vanilla bean.
  5. While the custard is resting, heat the oven to 350 degrees.  Butter a round cake pan, 8″ wide with 2″ high sides.  Using something close enough will be fine, just don’t use a springform pan, like I did.  I was only worried about getting a pan as close in size as possible and in the process forgot that the custard would leak out!
  6. Still in that 30 minute time frame, slice the bread into 3/4″ slices (you’ll need 10-12 slices).  Cut the crusts off each slice, then, using a 3″ wide round biscuit cutter, cut a circle out of the middle of each bread slice.  Save the scraps- you’ll need them!
  7. Arrange the bread scraps into the bottom of the buttered pan, fitting them in tightly like a puzzle.  Press gently with your fist to squish them down slightly.
  8. Spread one side of each round piece of bread with almond butter, then place slices, almond side down, into the pan, arranged in an overlapping circle, as seen in the picture above.  Save one slice to place in the center of the circle.
  9. Pour the custard over the arranged bread, making sure to do so evenly.
  10. Sprinkle the almonds and 2 tablespoons of sugar over the top of the bread.
  11. Place the cake pan in the center of a large roasting pan and fill the roasting pan with water that reaches about half way up the sides of the cake pan.  Cover the roasting pan with tin foil.
  12. Bake for 25-30 minutes before removing the foil and raising the temperature of the oven to 375 degrees for another 25 minutes.
  13. Move the cake pan to a cooling rack for a few minutes before dusting with powdered sugar and serving with the salted caramel sauce.
  14. To make caramel sauce: In a medium sauce pan, whisk together sugar, cream of tarter and 3 tablespoons of water.
  15. Bring mixture to a boil, stirring to make sure the sugar dissolves.  Once the sugar is boiling, do not stir until the mixture begins to darken in color, then stir to ensure the sugar cooks evenly.
  16. Watch the mixture carefully as it will darken extremely quickly.  Once it reaches the color of honey, turn the heat down to low and continue until almost an amber color before turning the heat off.  The mixture will continue to darken for another minute or so after you turn the heat off.
  17. Carefully stir in the butter (caramel will bubble!).  Once that is melted, stir in the cream and salt.
  18. Let cool slightly before serving and enjoy!


Toast Two Ways

Friday, January 18, 2013

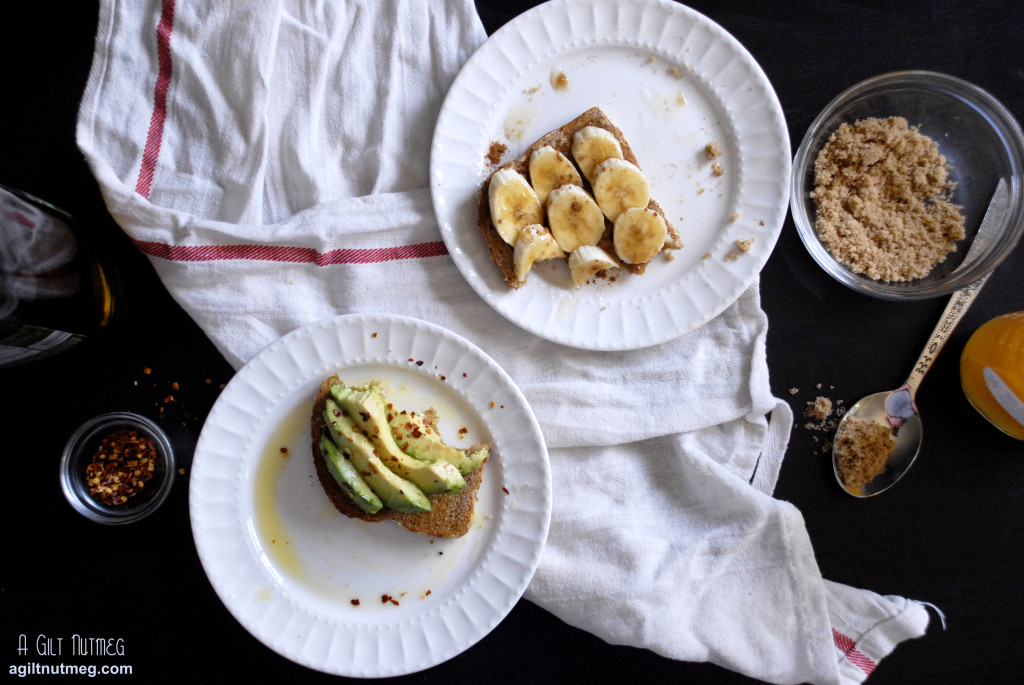
Toast Two Ways from A Gilt Nutmeg

On my way home from my favorite yoga studio, I walk by this phenomenal diner called Swingers.  Specializing in classic American diner food but with twists to make it organic/vegetarian/vegan, they have this amazing avocado toast, and after a hard work out class, absolutely nothing sounds better to my rumbling stomach: rich avocado on hearty toast, fruity olive oil and just the right amount of spicy heat from the red pepper flakes.  Now as much as I love Swingers and the juke box that plays ‘Freebird’ and the purple cows on the wall, I eventually realized that I could just make the avocado toast at home.  It’s such a simple combination that it’s hard to believe that I didn’t come up with this on my own, but now that I’ve started making it at home, I can’t get enough of it.  Whenever my boyfriend calls to ask if I need anything from the store, my response now is usually “can you grab me an avocado?”  For those of you who want something a little more sweet in the mornings, I also love banana toast with brown sugar, a little honey, and cinnamon.  Either way, you can’t go wrong!

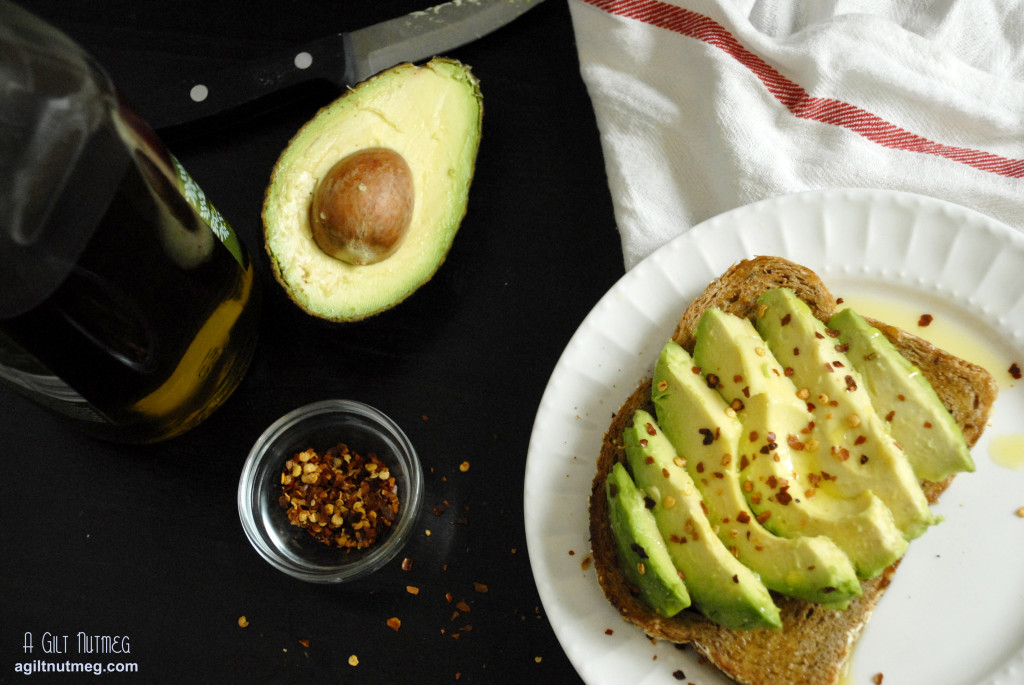
avocado toast watermark

Avocado Toast
Adapted from Swingers Diner

  • 1 slice hearty, whole grain bread (trust me, I love white bread, but this just tastes better on whole grain toast)
  • 1/2 of an avocado, peeled and sliced
  • about 2 Tablespoons good quality extra virgin olive oil
  • red pepper flakes
  1. Toast bread
  2. Arrange avocado slices on toast
  3. Drizzle with olive oil
  4. Sprinkle with red pepper flakes to your own desired amount and enjoy


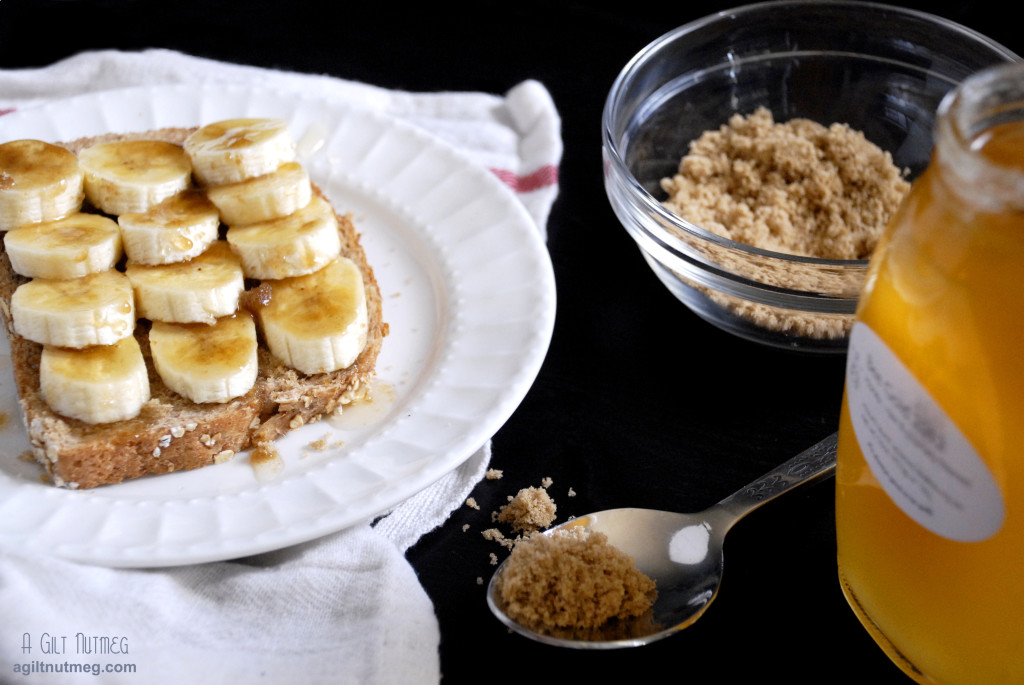
banana toast watermark

Banana Toast
Adapted from Seasaltwithfood*

  • 1 slice whole grain bread
  • 1 banana, peeled and sliced
  • 1 tablespoon brown sugar
  • 1 tablespoon honey
  • cinnamon
  1. Toast bread
  2. Arrange banana slices on toast
  3. Sprinkle with brown sugar and drizzle on honey to taste
  4. Lightly dust with a pinch of cinnamon and enjoy

*Seasaltwithfood’s version is baked and broiled for a great creme brulee like sugar crust on the bananas.  While simple enough, I wanted something even easier for a Sunday morning, which means no oven-but I can’t deny, I’m excited to try the broiled version, too someday!

Quiche Lorraine

Tuesday, January 8, 2013

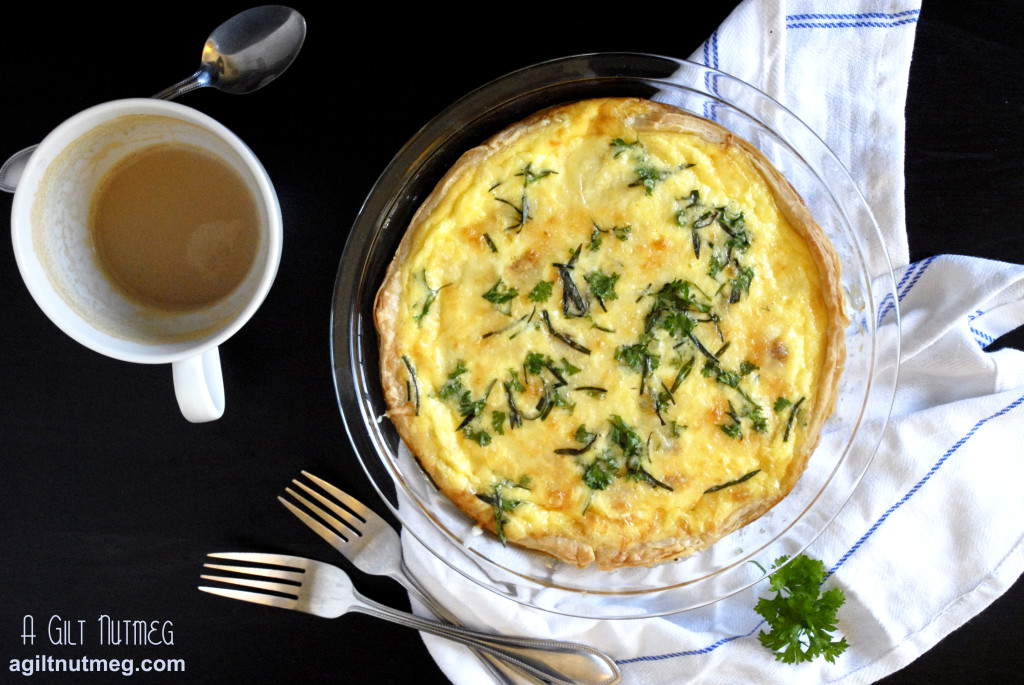
quiche lorraine


The name “Vegas” means different things to different people.  To some it means losing a lot of money, to others it means consuming lots of alcohol and dancing in a dark nightclub.  To me, though, it means eating.  Even when I’m on a budget, I never want for interesting new places to experience a meal.  With all the fancy restaurants you can drop your dollars at along the strip, my favorite came as quite a surprise…

In the shadow of the Eiffel Tower at the Paris Hotel, you’ll see a cafe, Mon Ami Gabi.  If you’re like me, you’ll assume that it’s a tourist trap, because it’s under a fake Eiffel Tower and it has a great view of the Bellagio water fountains across the street.  You’ll assume that it’s sickeningly overpriced and sub-par quality.  Hopefully you’ll be dragged in there one time, though, and you’ll realize that all of your assumptions were 100% incorrect.  There, under that Eiffel Tower, I was served the best quiche I have ever had in my entire life and it didn’t cost an arm and a leg.  Well, my aunt got the quiche, I got the eggs Benedict, but I wished desperately I had gotten the quiche.  It’s creamy and custard-like, instead of stiff and eggy, and it’s chock full of cheese, bacon and sweet caramelized almost jam-like onions.  I thought I was going to have to beg the waiter to beg the chef for me for the unbelievable quiche’s recipe, but imagine my second surprise of the morning when the waiter brought me a special little card to fill out, to request that the chef send me the recipe.  Clearly, they get asked a lot.  Also, once I received the recipe, I realized why it was so tasty:  there was more heavy cream in it than eggs.  Did I care?  No.  Still easily the best quiche of my life and I have no regrets.

Because this isn’t one of those giant deep-dish quiches, don’t expect to make this recipe to feed a large crowd.  It should serve about 4 if you pair it with a light side salad like they do at Mon Ami Gabi or another side dish.  Or one home cook-blogger and her boyfriend, because it’s not like they didn’t eat enough rich food over the holidays as it was.  Also, make sure to use a shallow, wide bottomed pie dish- the wider the bottom, the more room for that bacon and cheese and onion!

Quiche Lorraine
Adapted from Mon Ami Gabi, Las Vegas
Serves 4

  • 1 sheet of puff pastry dough, thawed
  • 1 small yellow onion, diced
  • 2 pieces bacon, cooked & crumbled
  • about 1/4 cup Jarlsberg cheese, shredded (can substitute Swiss or Gruyere)
  • 3 eggs
  • 1 1/3 cups heavy cream
  • small handful of chopped fresh herbs — chives, parsley and tarragon are a great combination
  • salt & pepper
  1. If you want to save time the morning you make the quiche, cook the bacon and caramelize the onions ahead of time and refrigerate until ready to use.  I’m sure you know how to fry up a couple of slices of bacon, but if you’ve never caramelized onion before, it’s quite easy.  I leave a little bit of the bacon drippings in the pan, add the diced onion, sprinkle with a tablespoon of sugar and cook on low heat, stirring frequently, very slowly and very gently browning the onion.  The process can take quite a while, but the more you go through the steps and know what to look for, the faster you can go in the future.  The onions will be a very deep brown and, if you put them in the fridge overnight, they’ll turn into a jam like texture.
  2. Heat the oven to 350 degrees.
  3. In the meantime, lightly roll out the puff pastry if it needs it, to better fit the pie plate.  Mine was a square sheet, so I arranged it in the plate, then trimmed the corners off with a knife so that the dough was an even circle all around.  It’s okay if it doesn’t reach the top of the plate like a normal pie crust.
  4. Blind bake the puff pastry — spray a piece of tin foil with non-stick baking spray and place it on top of the puff pastry, with the spray side facing down.  Fill the covered pastry with some sort of weight: rice, dried beans, or specifically designated pie weights.  Bake for 12-15 minutes until fully baked but not particularly browned all the way.
  5. Once the puff pastry is baked, pull it out of the oven (leave the oven on).  Sprinkle the pastry crust with an even layer of the caramelized onion, then the crumbled bacon, then the shredded cheese.
  6. Whisk together the eggs, cream, herbs and salt & pepper (to taste) in a small bowl.  Pour the mixture over the crust and fillings until the fillings are just barely covered.  You may not use all of the egg-cream mixture, just set the extra aside.
  7. Carefully move the quiche to the oven and bake for 35-40 minutes, until the filling is dry on top and starting to lightly brown in spots.
  8. Serve warm with a light side salad and enjoy a taste of France!…or Vegas, rather.

Farewell 2012, Hello 2013

Friday, January 4, 2013

Honestly, I can’t believe the year is gone.  In 2012 I tried my hand at catering.  I made cheese at home for the first time and it was delicious.  The blog turned 1 and then I putzed out on it, but only after the LA Times and NY Times recognized me on various internet platforms…because that makes a lot of sense, doesn’t it?  In honor of a great year for food, may I present to you, a retrospective:

The most popular recipes on the blog, as dictated by my precious readers, were all sweets.  I guess I know where my strengths lie?


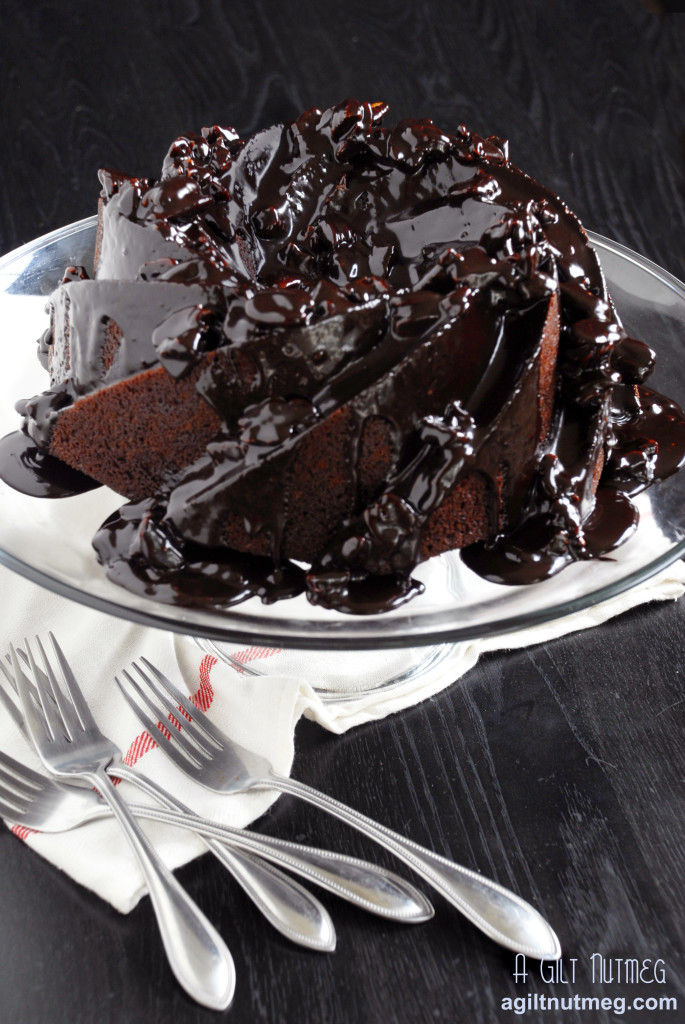
 Mexican Chocolate Cakemexican_chocolate_cake

The Pastry Queen‘s Mexican Chocolate Cake was the year’s big winner by a long shot, and rightfully so.  The intense chocolate flavor with that hint of cinnamon and pecan taught me that not all chocolate cakes are created equal.


Blueberry Supremes

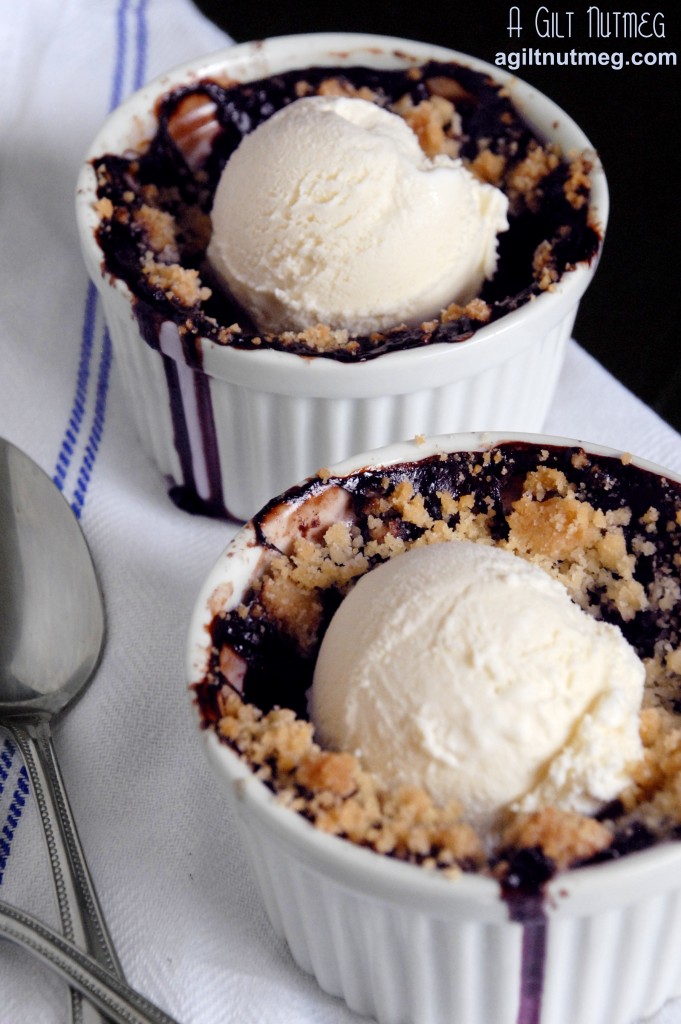
blueberry crisp ice cream

These little Blueberry Supremes count as one of my favorites of the year as well, because they were from a recipe handed down from my Great Aunt, who had the recipe from an old Junior League of Tulsa cookbook.  Not much more than blueberries, a little butter sugar and flour for the topping, and voila!  Those ladies sure knew how to cook!  Pulling these hot and bubbling from the oven is one of my favorite food memories of the year.


Caramel-Filled Brownies

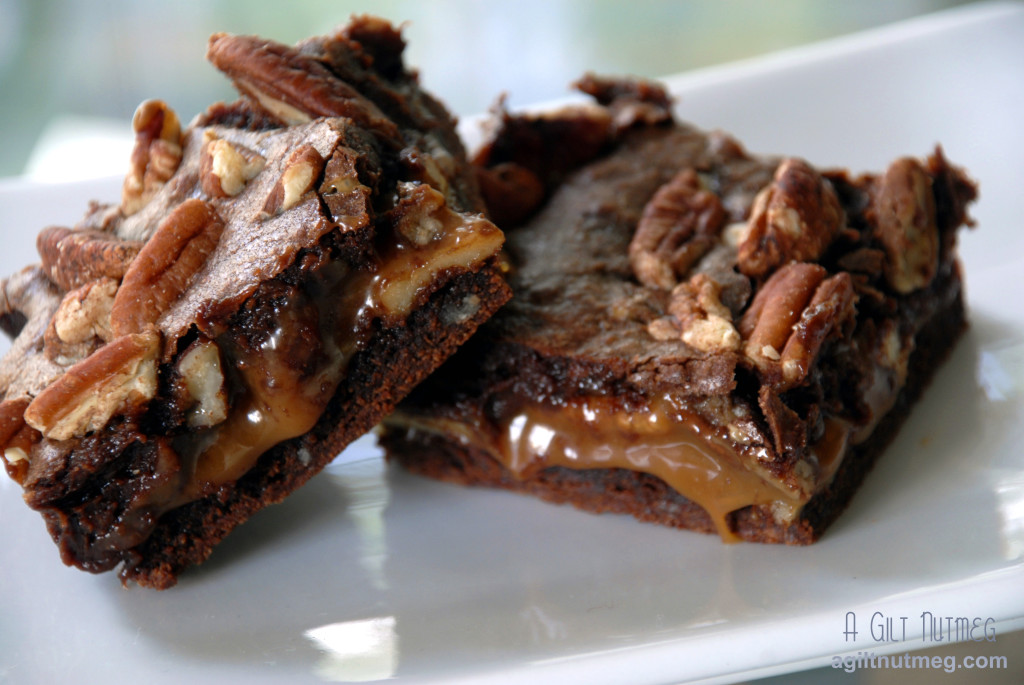
caramel-filled_brownies watermark

Another winner from The Pastry Queen, these Caramel-Filled Brownies were definitely some of the richest treats to ever come out of my kitchen.  Wash down with a tall glass of milk.


Chewy Coconut Lime Sugar Cookies

chewy coconut lime sugar cookies

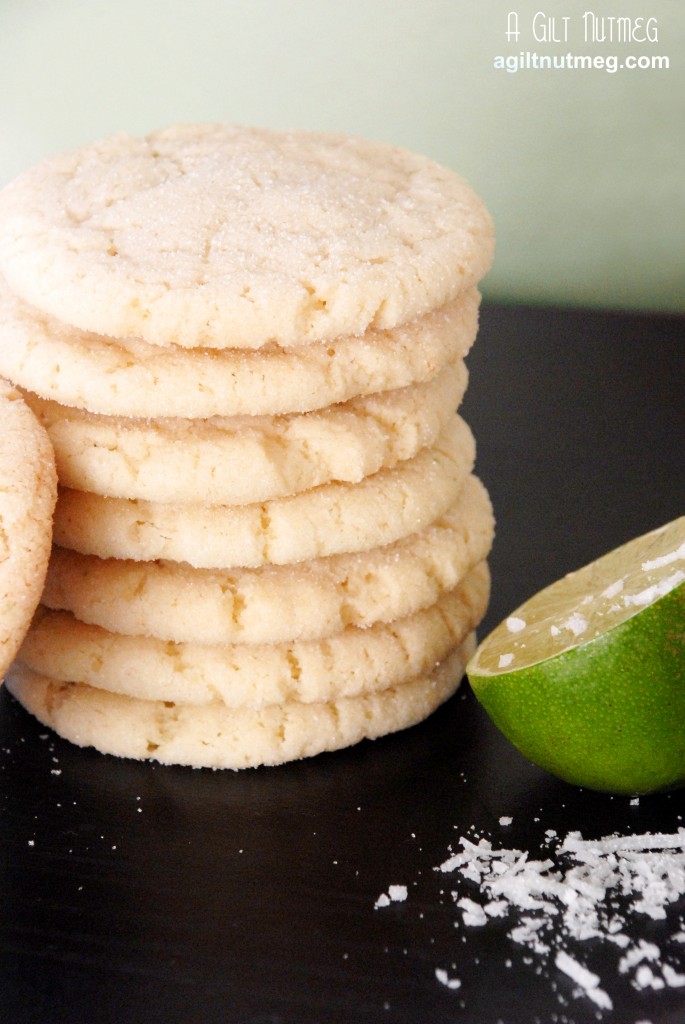
I don’t blame people for loving these Coconut Lime Sugar Cookies- they are without a doubt the best basic sugar cookie recipe I’ve ever come across (Thank you, Cooks Illustrated!).  The best part is how easy it is to add in great twists of flavor, like the coconut and lime in this particular variation.


AND AS FOR MY FAVORITES OF THE YEAR….


Lemon Sugar Dutch Baby

lemon sugar dutchbaby

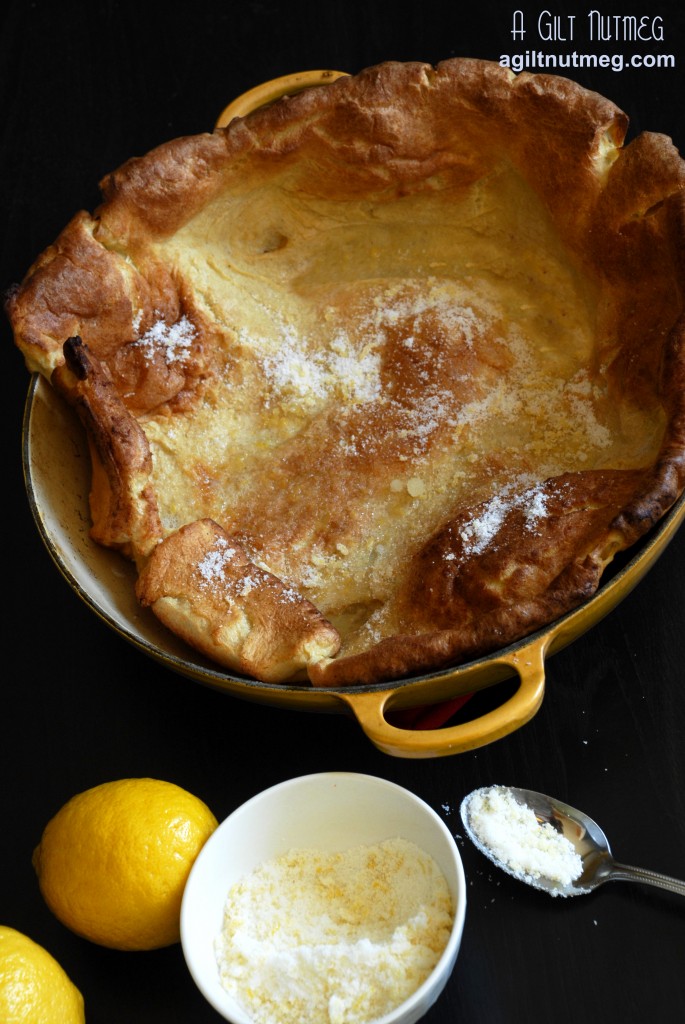
If you want a way to make breakfast more interesting without adding a lot of extra work to the process, look no farther than this fun treat.  The Lemon Sugar Dutch Baby is a fabulously easy and equally impressive for guests.


Fat Tuesday King Cake

king_cake

This soft, cinnamon and cream cheese twisted brioche King Cake makes the list of my favorites because (trumpet fanfare) it was the first yeasted recipe I was able to pull off properly.  For all the failures I’ve endured this year, I was finally rewarded with a soft, tender bread dough filled with spicy cinnamon and rich cream cheese.  Leave off the colored sugar and you’ve got yourself a breakfast item that you’re going to want to eat all in one sitting.


Creamy Chicken Taquitos

chicken_taquitos

I know, I know, Creamy Chicken Taquitos certainly made the rounds in the food blog world this year, but it did rightfully so.  They’re the perfect minimal effort fun dinner.  They’d also be great for leftovers, if only some lasted beyond dinner whenever I make them…


French Yogurt Cake

french yogurt cake

Rounding out my favorites of the year is a delightful French Yogurt Cake.  Easy to make but tasting far more complicated, it’s a light, airy version of a pound cake.  It was gone within 24 hours- you can’t argue with results like that!


Even though 2012 is looking hard to beat, I’m sure 2013 will be even more tasty.  I can’t wait to see what comes out of my kitchen to share with you.  Given that Santy Clause left a Himalayan Salt Plate and a sparkly new Ice Cream Maker under the tree for me this year, I predict we’re going to see lots of new recipes rolling out very soon.  Happy New Year, everyone!


Theme by Blogmilk   Coded by Brandi Bernoskie